Sidebar widgets are an excellent way to convert users on your site without interrupting their browsing experience. In fact, many web visitors will look to the sidebar automatically when they’re interested in subscribing to your newsletter.
In this article, you’ll learn how to take advantage of the sidebar area, giving you the chance to convert visitors from anywhere on your site and turning each page into a lead generation opportunity.
Before we get into the tutorial, let’s take a look at some sidebar widgets that OptinMonster customers have created.
Sidebar Widget Examples
Here are just a few examples of sidebar widgets from OptinMonster customers. If you want to see more, check out our sidebar optin gallery.
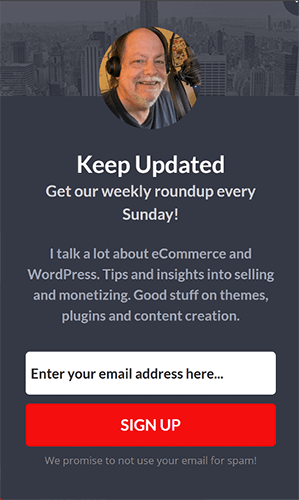
BobWP’s Sidebar Widget Campaign
This sidebar optin is great because you can see the person behind the page. Plus, they tell you right in the optin copy what you can expect from them when you sign up.
Remote Jobs Sidebar Widget Campaign
We love the copy on this simple sidebar widget optin. Plus, the addition of the radio button at the bottom is a great way to let subscribers self-segment.
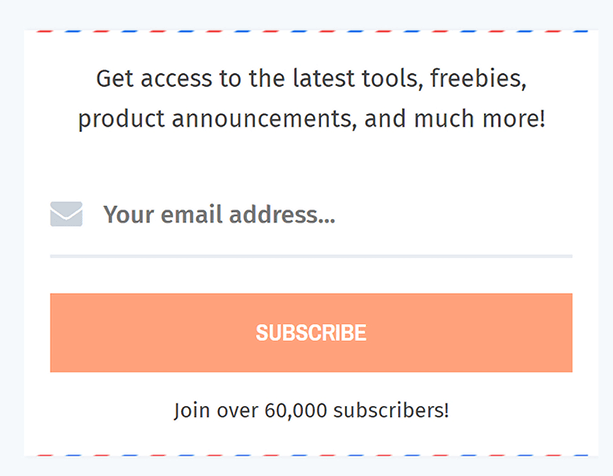
OneXtraPixel’s Sidebar Widget Campaign
This simple sidebar widget optin uses social proof to let subscribers know that more than 60,000 subscribers already get the newsletter they’re thinking about signing up for.
SHH’s Sidebar Widget Campaign
We love the link to the privacy policy at the bottom of this sidebar widget optin.
How to Create a Sidebar Widget Optin for Your WordPress Blog
By now, you’re probably excited to create your own sidebar widget optin to bring in new subscribers and generate more leads. With OptinMonster, it’s super easy.
Before you can get started, you’ll need to sign up for OptinMonster.
Also, we know that not everyone learns the same way. That’s why we created this helpful video tutorial for our visual learners:
Prefer the written tutorial? No worries. Just keep reading to learn how to create a sidebar widget in WordPress.
1. Create a New Campaign
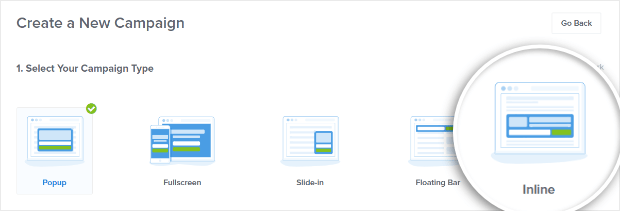
Log in to your Optinmonster account and click the Create New Campaign button in the top right corner of the screen.
Choose your campaign type. For a sidebar widget optin, you’ll want the Inline campaign.
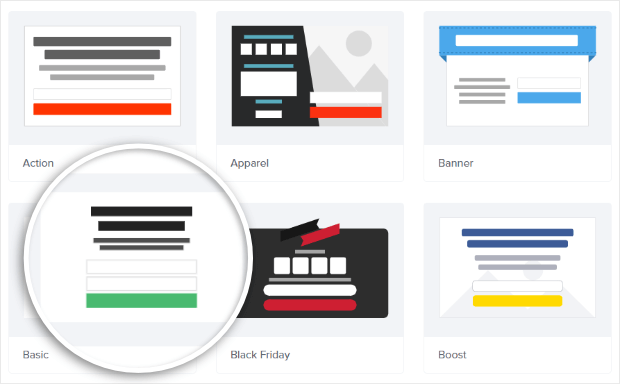
Next, select a campaign template. You have 30+ templates to choose from for your inline campaign, all fully customizable. For our tutorial, we’ll use Basic.
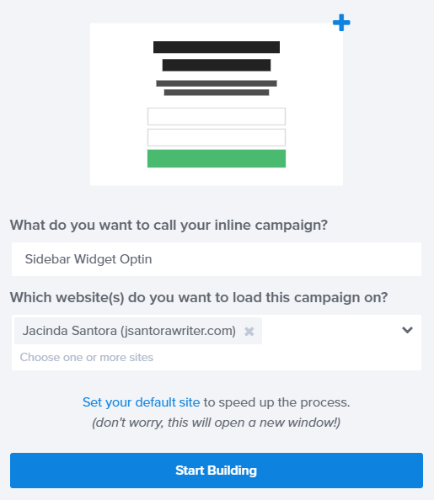
Once you click Use Template, you’ll be able to give your campaign a name (internal use) and choose the website you want the campaign to show up on.
Click Start Building and you’ll be taken into the campaign builder.
2. Design Your Sidebar Widget Optin
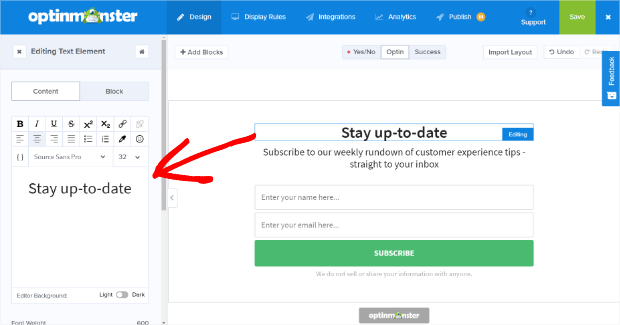
You can customize every aspect of your optin by clicking on the element you want to edit in the live preview. The editing tools will then load on the left side of the screen.
You can change text, font, colors, images, sizes, and more.
Once you’re happy with your design, click on Save in the upper-righthand corner. Next, it’s time to set display rules.
3. Set Display Rules
Display rules control who sees your campaign. By default, the campaign is set to show all visitors on every page of your site.
OptinMonster’s display rules engine is very powerful and you have tons of options to choose from.
We’re going to leave our display rules as the default for this tutorial. If you make changes to your display rules, save your campaign before moving on.
4. Add an Email Integration to Store Emails
If you want to use OptinMonster to grow your email list, you’ll need to integrate with an email marketing service. If you have an email marketing service, OptinMonster probably integrates with it.
If you don’t have an email marketing service, we recommend Constant Contact because it’s easy enough for beginners and robust enough for advanced users. We’ll be using Constant Contact for this tutorial.
Pro TipWe recommend that you add Monster Leads to your integrations whether or not you have an email marketing service. Monster Leads lets you keep a backup of your leads that you can export whenever you want.
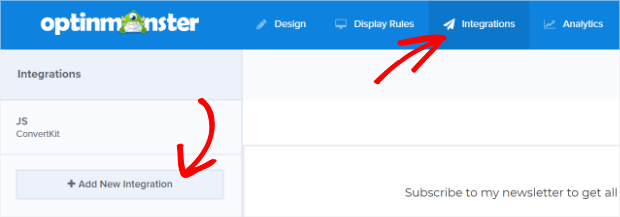
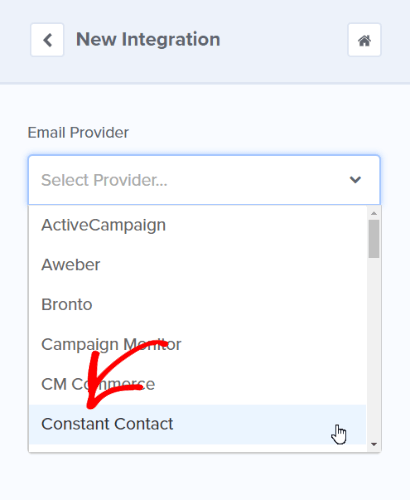
At the top of your campaign builder, click Integrations. Then, on the lefthand side of the builder, you’ll click + Add New Integration.
Choose your email service provider from the dropdown.
If this is your first time connecting Constant Contact and OptinMonster, you’ll need to register and log in to your Constant Contact account.
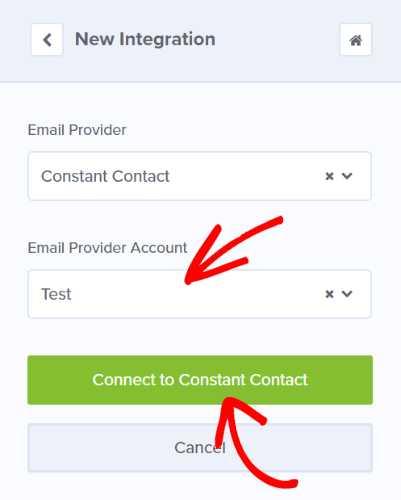
Once you’ve logged in, you’ll be able to choose your email provider account and click the Connect to Constant Contact button.
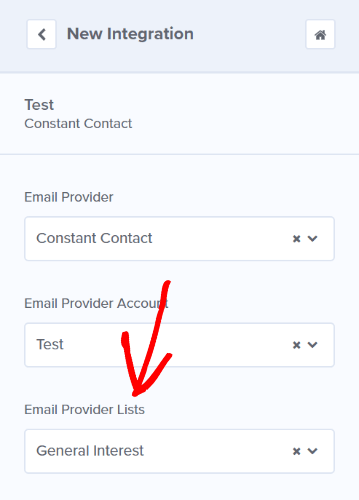
If you have any lists set up in your Constant Contact account, you’ll be able to select the list you want to use to collect leads.
Go ahead and save your campaign before moving on.
5. Add Analytics to Track Progress
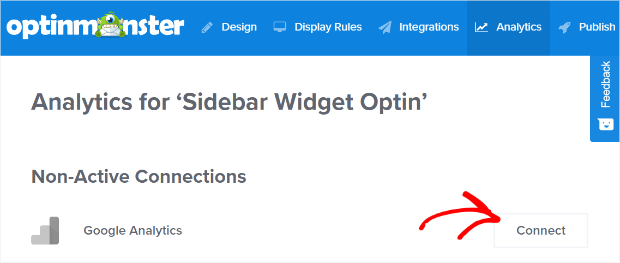
After adding an integration your campaign, it’s time to add analytics. By default, you’ll have access to OptinMonster’s native analytics. If you want to add Google Analytics, go to the Analytics tab. Then, click Connect.
You’ll need to enter your Google Analytics account and website profile to connect.
Save your campaign.
5. Publish Your New Sidebar Campaign
Now it’s time to publish your sidebar widget optin!
Go to the Publish tab and toggle the Status to Live.
Save your campaign.
6. Add Your Sidebar Widget to WordPress
After you’ve published your campaign, log in to WordPress.
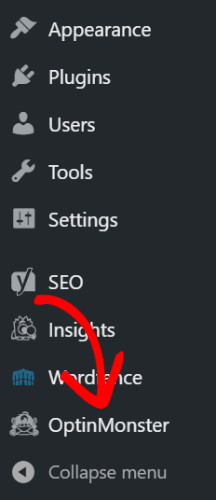
From your WordPress dashboard, click on OptinMonster from the lefthand menu.
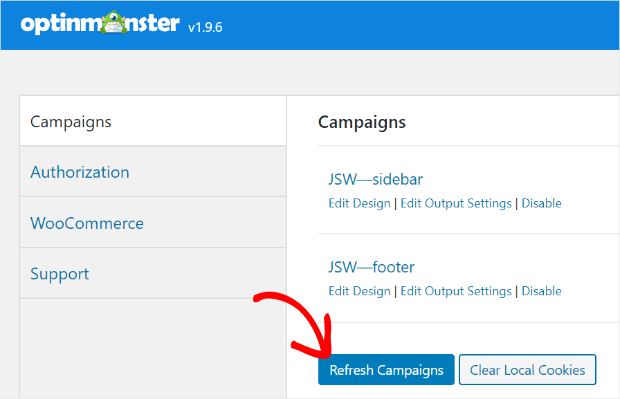
Click on Refresh Campaigns to bring up your new campaign.
Next, from your WordPress dashboard, click on Appearance » Widgets.
Drag the OptinMonster widget to your WordPress sidebar and choose the campaign you want to appear in your WordPress sidebar.
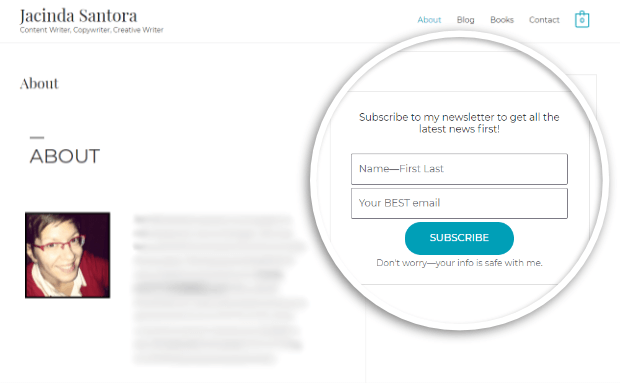
Click Save. Now you can head over to your website and check out your new sidebar widget optin!
That’s all there is to it. You’ve successfully created a sidebar widget optin and added it to your WordPress site. Want even more subscribers? Check out these high-converting places to add your email signup forms.
And, be sure to follow us on YouTube, Facebook, and Twitter for more tips and tutorials to boost your conversions.












Add a Comment