Want to increase your leads from Pinterest? In this post, we’re going to cover Pinterest referral traffic, aka, how to use Pinterest to drive traffic to your blog or website.
We’re going to start off by sharing some information about Pinterest users because you can never know too much about your audience. From there, we’ll move into a step-by-step guide to use Pinterest to drive traffic to your site. We’ll wrap up by showing you the best way to capture leads from Pinterest using OptinMonster’s referral detection.
Ready to get started? Let’s do this.
Pinterest User Stats for Marketing
When Pinterest first came onto the scene in 2010, it was immediately labeled a social media platform for women and pretty much not given another thought for quite a while.
But, Pinners kept on pinning. Soon, the platform became host to billions of pins (50+) about every topic under the sun. Yes, there’s a lot of recipes and dream weddings. There’s also a lot of business tips and entrepreneurship.
As the platform has grown, we’ve learned it’s really a visual search engine that you can be social on. Sort of a Google meets Tumblr.
And it works.
Pinterest has more than 200 million active monthly users. Here’s what we know about them:
Gender
Pinterest is definitely woman-dominant with 70% of its users identifying as female.
However, 50% of new signups identify as male even though they account for only 7% of the total pins on the platform.
They’re Young
Half of US adults under the age of 35 use Pinterest every month, more than any other age group. The next largest age group ranges from 30-49.
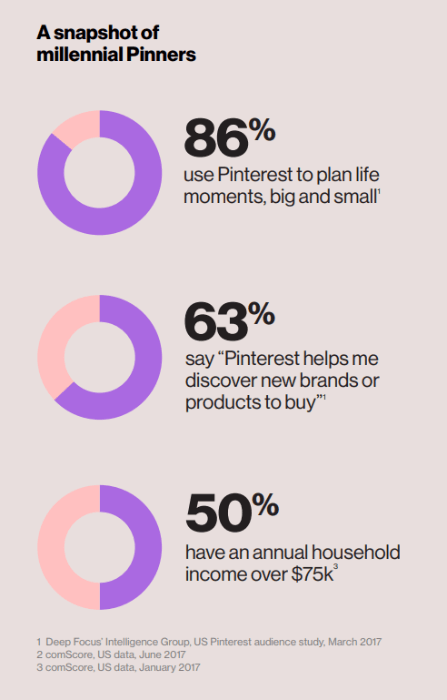
We hear a lot about how Millennials are ruining everything from the diamond industry to avocados, but Pinterest seems to think they’re an okay bunch. In a survey of its users, Pinterest found that Millennials who use the platform do so because the platform helps them make and achieve their plans and goals.
They’re Worldwide
The Pinterest audience is truly global with more than 50% of all Pinterest users, and 75% of all new signups, coming from outside of the US.
They Have Spending Money
40% of Pinterest users have a household income of $100k or more. If you’re looking just at Millennials, 50% have a household income of more than $75k or more. Pinterest users tend to have spending money.
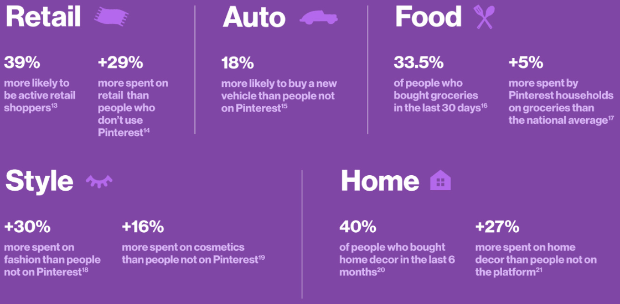
Because of this, it should come as no surprise that they are:
- 39% more likely to be active retail shoppers
- Spend 29% more on retail than people who don’t use Pinterest
- 18% more likely to buy a new vehicle than people not on Pinterest
- Spend 30% more on fashion than people not on Pinterest
They Use It to Shop
More than 60% of all pins come from businesses and represent brands and products. And Pinners are happy about that. Almost 75% of them say that brand content makes the platform more useful.
Just take a look at these stats:
- Pinterest is the number one shopping platform among Millennials
- 47% of Millennials have purchased something they’ve pinned (beating out items they shared on Facebook or Twitter)
- 55% of users shop on the site, more than 4X the rate of other digital platforms
- 18.5% of active Pinners make a Pinterest-inspired purchase at least once a month
- 73% of active Pinners have bought something because they saw it on Pinterest
- Pinterest referral traffic has a higher Average Order Value ($58.95) than Facebook ($55.00)
- 5% of all website referral traffic comes from Pinterest
- Pinterest drives 33% more referral traffic than Facebook for shopping websites specifically
Pinteresting, isn’t it? (Sorry, we had to.)
Let’s talk about traffic.
How to Generate Traffic From Pinterest Step-by-Step
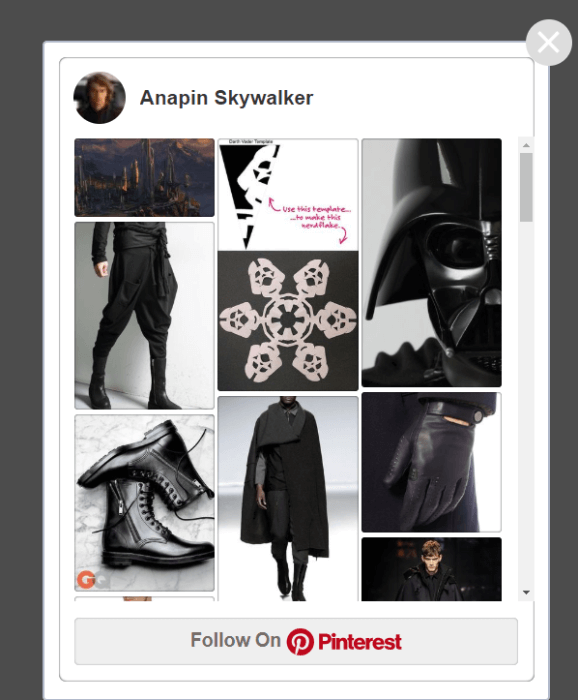
In the first post of this 2-part Pinterest series, we showed you how to add a Pinterest follow button popup to your WordPress site. It looked something like this:
This was designed to push visitors who found your site from a Google search to your Pinterest profile. It was more of a how to increase Pinterest traffic.
Today, we’re doing the opposite. We’re going to looking at how to use Pinterest to drive traffic to your website.
Step 1. Sign Up for a Business Account
Signing up for a business account with Pinterest is just as easy as signing up for a personal one. Or, if you already have a following on a personal account, but want to switch to a business account, it’s easy to do that too.
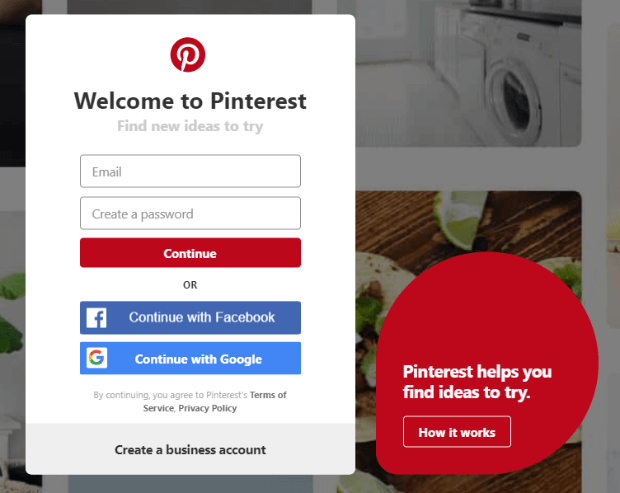
To sign up for a new account, just go to Pinterest’s website, enter your email address and create a password and click Continue. Or, you can use your Facebook or Google account.
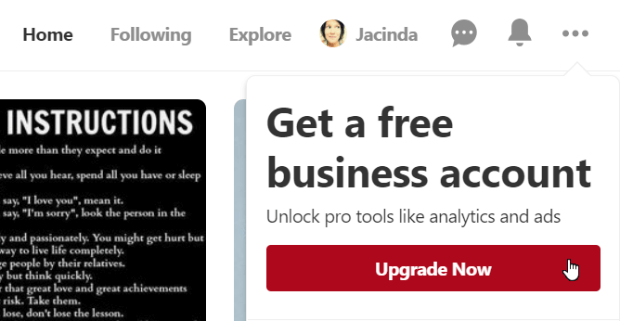
To change an existing account to a business account, log in to your account and access your settings.
If you don’t already have a business account, you’ll be offered an upgrade.
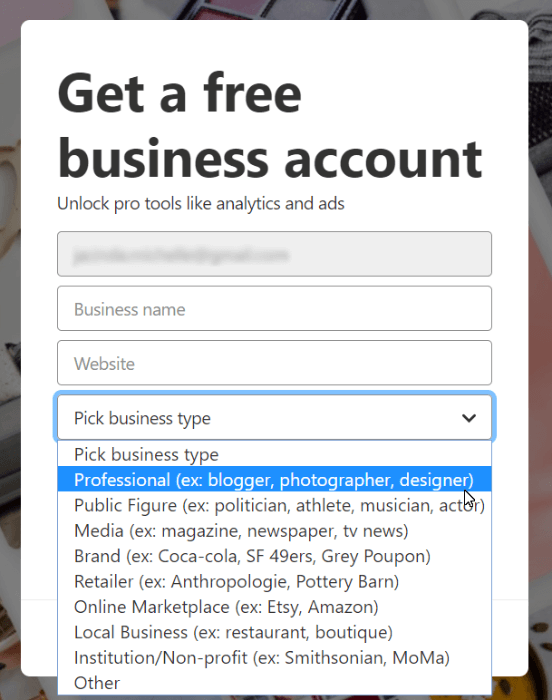
And then you fill out some basic business info to get started.
Pinterest offers a lot of help to guide you through the process.
Step 2. Optimize Your Pinterest SEO
There are 3 areas on Pinterest that benefit from search engine optimization:
- Your profile
- Your boards
- Individual pins
Profile SEO
Pinterest allows you to include up to 30 characters in your name, so there’s not a whole lot of space for SEO there; just stick with your name or your business name.
Pro tip: If you need help naming your business then check out Nameboy’s business name generator tool. Its awesome.
Some people do have longer names. Those are folks who’ve been around for a while but haven’t changed their names since before the 30 character limit went into effect.
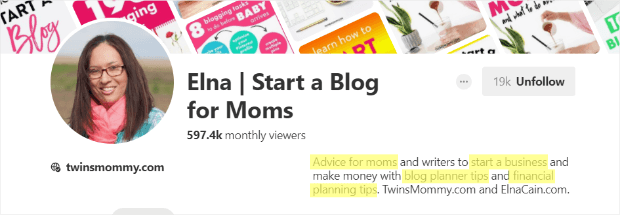
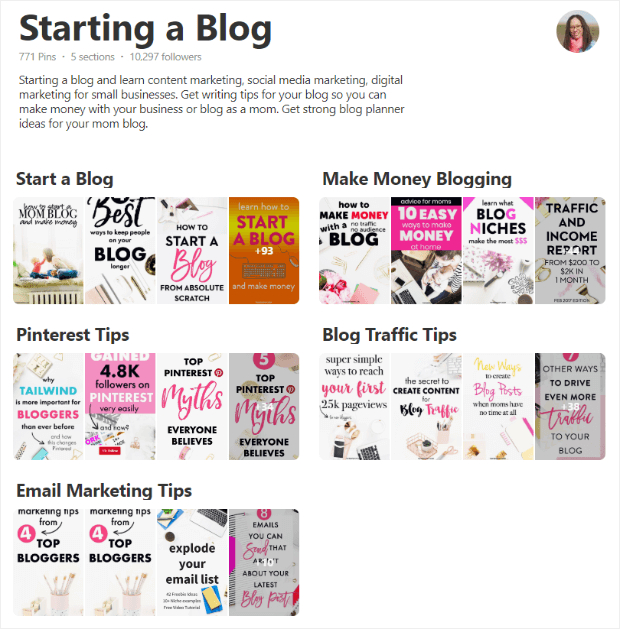
Let’s take a look at the Pinterest profile of a popular mom blogger, Elna Cain.
Elna uses the limited space given for the business description to include key phrases that will make it easier for her target audience to find her pins. And, with nearly 600k monthly viewers, her strategy seems to be paying off.
Pinterest Board SEO
It can be really tempting to name your Pinterest boards artsy and creative things like Organizing My Castle or Roomer Has It.
Don’t. Not if you’re using Pinterest for business.
Your boards should have clear and concise names and tell users exactly what they’re going to find on them.
People search for things like blogger tips, time management, financial planning, and start a business. They don’t search for flipping flaps.
In addition to board names, you should also include longtail keywords in your board descriptions. Remember, though, that these descriptions are content, and content is always for the user first. Don’t just add keywords for the sake of SEO; make sure your copy is helpful and readable.
Interested in brushing up on your content marketing skills? Our beginner’s guide to content marketing is the absolute best place to start.
Board Sections
You can also include sections within your boards, making them even more useful to your followers and providing even more opportunities to get in some longtail keywords.
The same rules apply to these sections as to the boards themselves.
Individual Pin SEO
When we told you that you could SEO Pinterest, we meant all of it. Down to each individual pin that you pin.
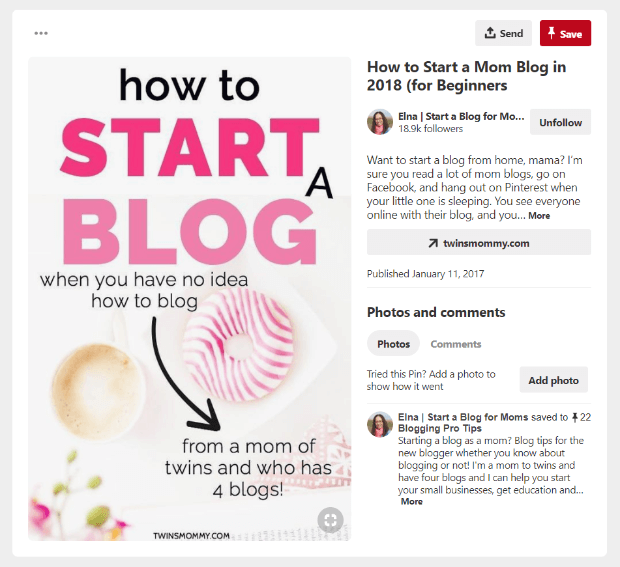
Pins have several parts. For starters, they typically have a beautiful, eye-catching, and rather tall image. There’s a pin name and description, and you can make comments on the pin.
Every single bit of that is open to SEO. Yes, even the wording on the image.
Are you excited to get started optimizing Pinterest to get your pins and boards discovered but need a little help with the SEO? We’ve got you covered. Check out our ultimate SEO guide and watch your Pinterest traffic take off.
Step 3. Make Your Pins Stand Out
There are two things that make a really strong pin:
- It’s taller than it is wide
- It has a call to action
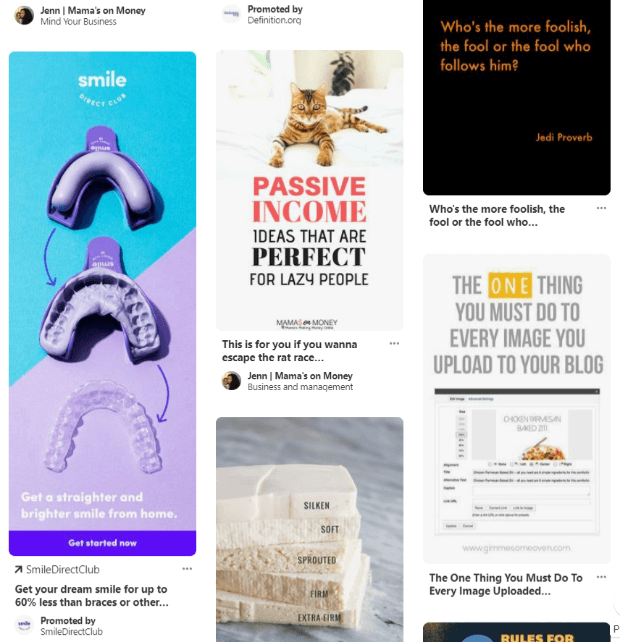
According to Pinterest, the best images are 600 x 900 px (or any 2:3 ratio). Pins like tall infographics (600 x 1260 px, any 1:2.1 ratio or above) are likely to be cropped in the main feed, but will still be viewed in their full height if they’re clicked on.
Pinterest is also starting to recommend square, Instagram-like images that are 600 x 600 px (1:1 ratio), but we don’t see the Pinterest-sized, tall and narrow image losing much ground. At least not quickly.
Play around with your images to see what works with your target audience, but stick with 1:1 or 2:3 ratios, and if you do include a 1:2.1 ratio size image you’d better make sure it carries a ton of value with it.
It will be interesting to see if different image sizes are available depending on whether a pin is just a standard pin or a Promoted Pin.
Step 4. Use Rich Pins
Rich pins increase engagement by providing a, well, richer experience for the user. These pins include additional information that comes from metadata, so it’s always updated; the information in a rich pin is independent of the pin description and is always tied to the pin.
There are currently 4 types of rich pins supported:
- App
- Article
- Product
- Recipe
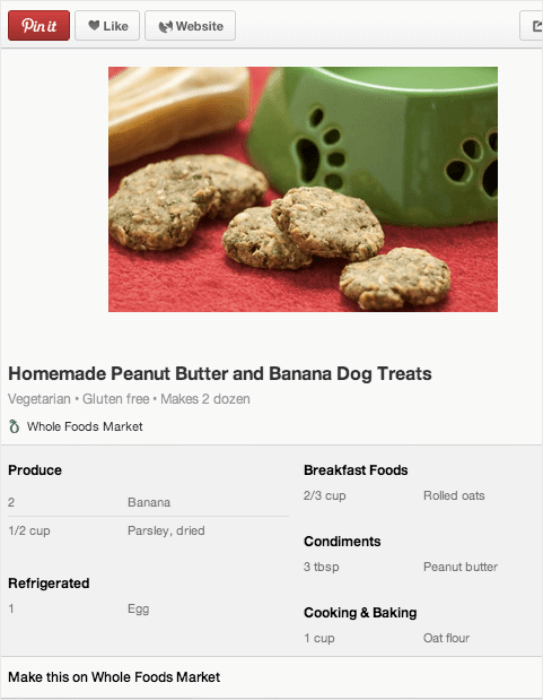
Here’s a great example of a Recipe rich pin from Whole Foods.
As you can see, the pin contains a ton of information and makes it really easy for other Pinners to engage. Also, if Whole Foods makes changes to this recipe, the pin will automatically update everywhere.
How to Install Rich Pins on Your WordPress Site in Under 5 Minutes
It’s incredibly easy to install rich pins to your WordPress site. If you don’t use WordPress, you can follow Pinterest’s instructions for setting up rich pins.
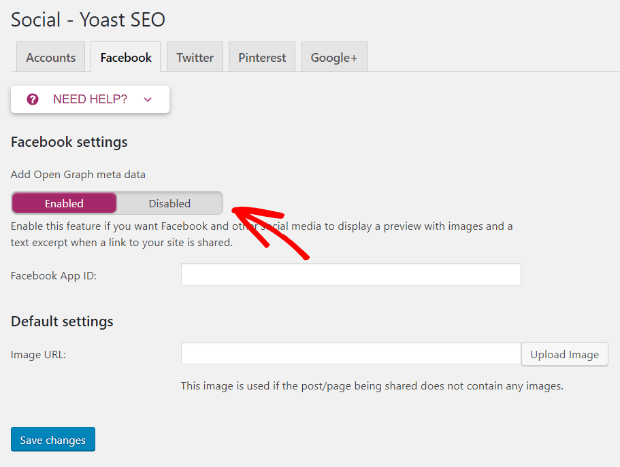
Start by logging into WordPress and installing the Yoast SEO plugin if you don’t already have it.
- Activate the plugin
- Click on the Social tab in the plugin settings
- Click on the Facebook tab
- Make sure Add Open Graph Meta Data is enabled
- Save Changes if needed
Go to Pinterest’s Rich Pins Validator and enter the URL from one of your posts.
Once it tells you that your URL has been validated, you just click Apply Now and wait for the email confirmation telling you that you’re all set for rich pins. It took less than a minute when we tried it out.
Capture Leads From Pinterest Using Referral Detection
Now that you’re driving all this traffic from your Pinterest boards to your blog or website, you need to be able to capture those leads.
Sure, you could create a generic popup campaign that shows up to all visitors, regardless of where they came from. But, using referrer detection you can easily create a personalized experience for the traffic coming directly from Pinterest.
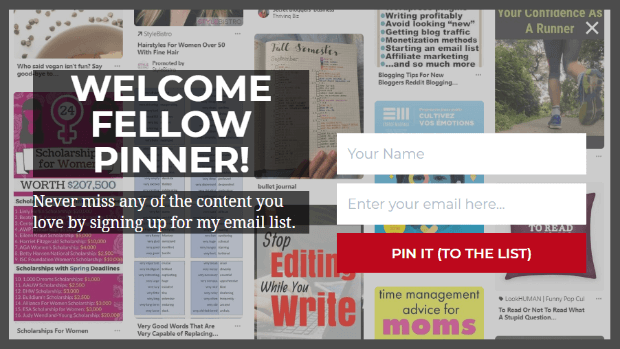
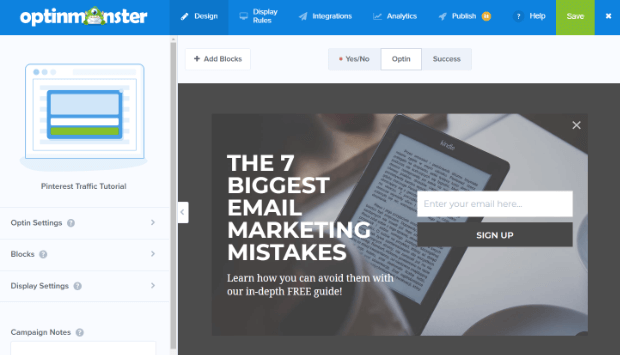
Let’s do that now. Our final campaign is going to look something like this:
Create a New Campaign
Start out by logging into OptinMonster and clicking the green Create Campaign button.
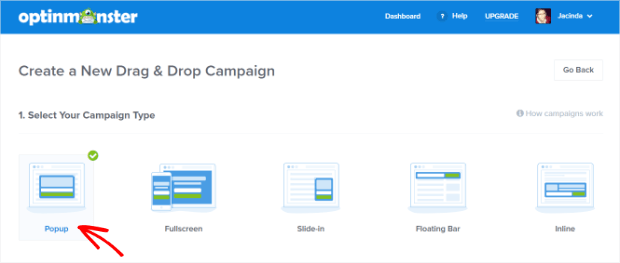
Next, select your campaign type. We’ll go with popup.
Scroll down to select your campaign template. We’re using Overlayed for this campaign. You select it by hovering over it and clicking on the blue Use Template button that appears.
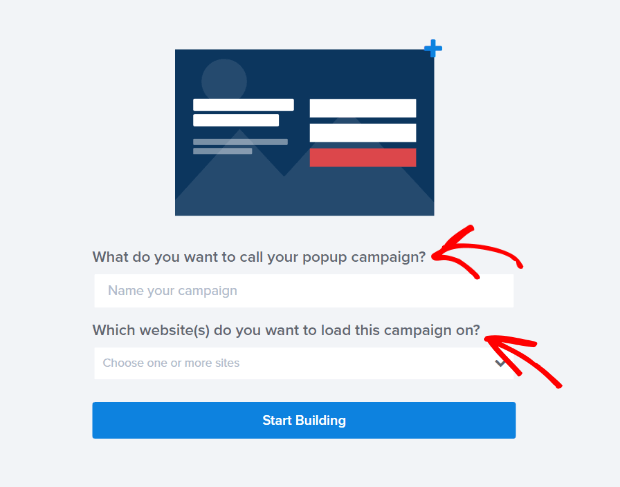
Now you just name it, choose the site you want it on, and click the blue Start Building button.
Design Your Campaign
After you click the Start Building button, you’ll be taken to the default Overlayed campaign in the campaign builder.
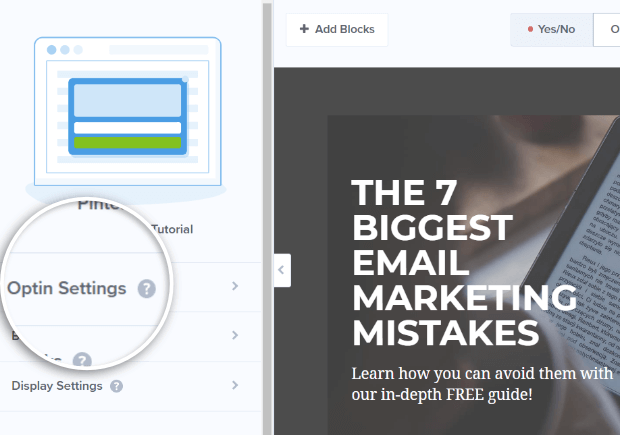
To change the background image on this campaign template, click on Optin Settings.
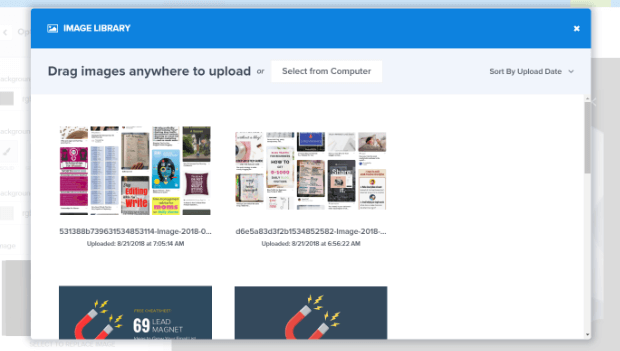
From there, Optin View Styles and then Select to Replace Image. You can replace the image with one from your gallery or upload one from your computer.
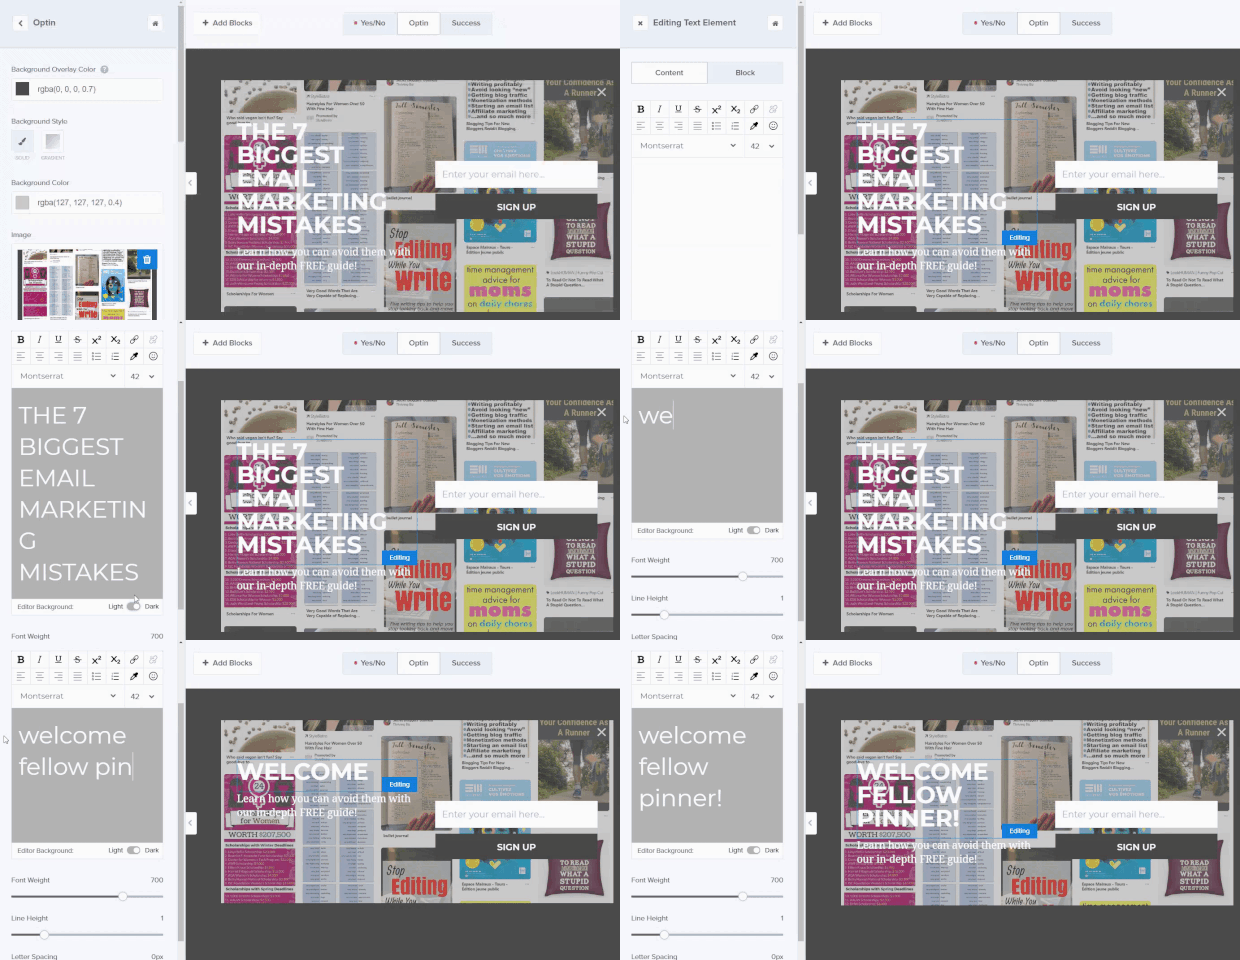
You can make changes to the text, fields, and buttons in this campaign by simply clicking on that element in the campaign view. The editing tools will then come up to the left.
For more design tips to create the perfect optin, check out our best practices post. Or, if you’re looking for something a bit more in depth, there’s always our 63-point checklist for creating the perfect optin form.
Quick TipTry adding a Pinterest Conversion Tag to track actions people take on your website after viewing your pin!
Set the Display Rules
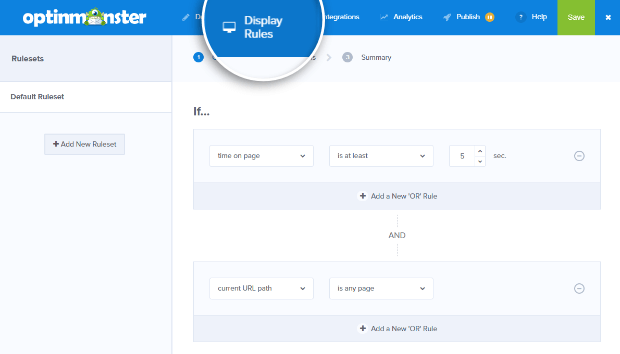
We don’t want to show our Pinterest optin to everyone, just the people who are coming from Pinterest. With referrer detection that’s super easy to do.
Click on the Display Rules tab.
Now, all we need to do is change our first condition to If the referrer URL contains pinterest.com and we’re done.
That’s seriously all there is to it.
You can add other display rules, too. If you want to display only on certain pages or only after a certain amount of time, those rules are very easy to add. Have a look at our Display Rules documentation to see just how powerful your OptinMonster campaigns can be.
Add Your Email Marketing Service
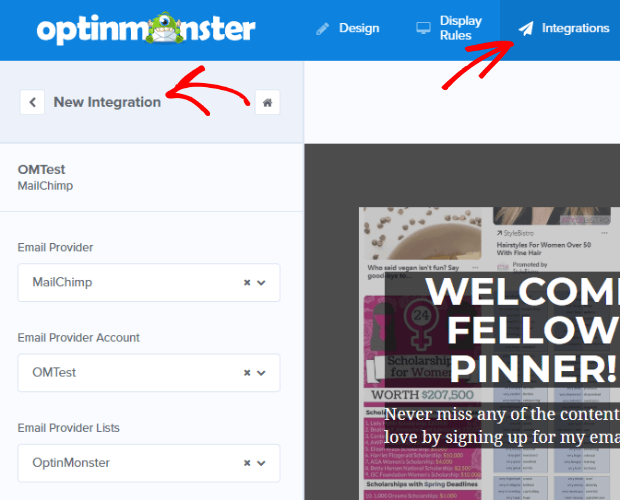
Since we’re capturing email addresses with our optin, we’ll need to add our email marketing service integration. OptinMonster integrations with every major service, so adding your provider will be a piece of cake.
Click on the Integrations tab and then +Add New Integration.
From there, you simply make choices from the dropdowns as they appear.
Save and Publish Your Campaign
At any time in your editing process, you can save your campaign by clicking on the green Save button.
To publish your campaign, click on the Publish tab and toggle the status to Live. Then click Save.
Your campaign is now ready to go live on your WordPress (or any other site) with various publishing platforms.
Since WordPress is most popular with our users, we’re going to take you through publishing your campaign on a WordPress site.
Start by logging in to WordPress and selecting OptinMonster on the menu.
Your published campaigns will appear in a list. If your newly published campaign isn’t there, click Refresh Campaigns.
To activate your campaign, click Go Live.
Congratulations! You’ve just published your Pinterest campaign and are ready to capture the leads generated by your increased traffic from Pinterest. Now why not add a Pinterest popup on your website to get more followers?
Looking for more ways to increase traffic to your blog or website? Check out these 25 proven strategies to increase traffic by 1064%.
Or, have a look at this step by step guide to email marketing so you can make the most of those emails now that you have them.
Still aren’t using OptinMonster? What’s stopping you? Get started today!









Add a Comment