People love videos. They really do. If you’re not using a video popup on your site, you’re missing a golden opportunity to boost engagement, leads, and sales.
Recent reporting from Wyzowl states that 79% of people confess to buying software or an app because of the brand’s persuasive video.
And a completely mind-blowing 96% of people have watched an explainer video to learn more about a product or service. In fact, based on Wyzowl’s research, 68% of people said they’d rather learn about a new product or service from watching a short video than any other way. Even infographics only earned a meager 4% of the love!
On top of all that, 48% of people said they were more likely to share a video they enjoyed than other types of content.
Question: What can we learn from this?
Answer: If you’re not using video in your marketing, you’re ignoring a large and very eager part of your audience.
So, how can you get the benefits of using video to engage your customers, while keeping your site speedy?
Create a popup video!
We’ll walk you through the process, step by step.
How to Create a Video Popup
Creating a Video Popup Using OptinMonster
One major advantage of using OptinMonster is that you can load the video inside of the campaign. This means that it won’t be hosted on your site, so your site speed won’t suffer.
OptinMonster helps you create a responsive lightbox video popup that’s suitable for viewing even on mobile devices. With an estimated 14 billion mobile devices in use by 2020, having mobile-friendly video popups is crucial.
OptinMonster also has advanced targeting features (like page-level targeting and campaign scheduling) that let you decide who’ll see your video popup campaign and at what time, for maximum impact and engagement.
Once your visitors are engaged, they’ll be more likely to opt-in to your email marketing campaigns.
In this guide, we’re going to show you how to create a popup video that grabs your visitors’ attention and add that YouTube lightbox video popup to WordPress.
Step 1. Create Your Campaign
Log in to the OptinMonster dashboard, and click Create Campaign.
Choose a campaign type. For this tutorial, we’ll use our high converting Lightbox Popup.
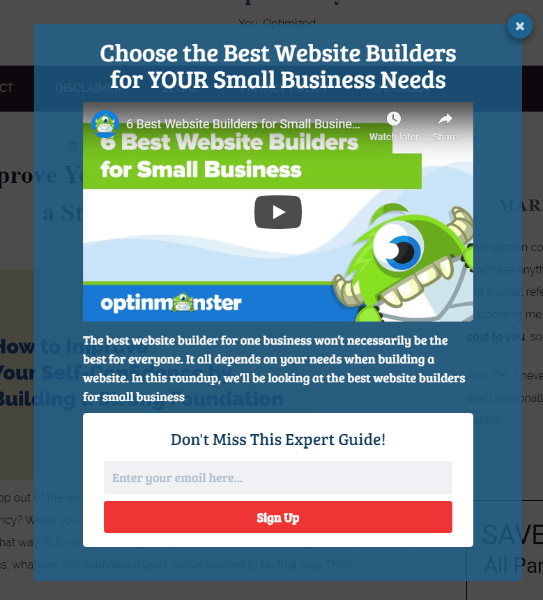
Select a template. Our Theater template is ideal for video, so we’ll use that one. But you can also embed a YouTube video in any OptinMonster template. We’ll show you how later in this tutorial.
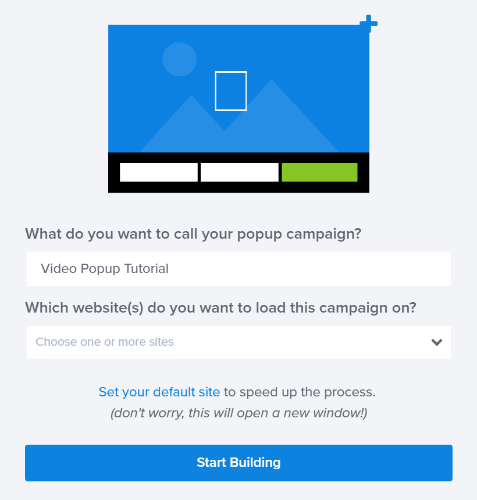
Name your campaign, choose which website you want to use the campaign on, then press the Start Building button.
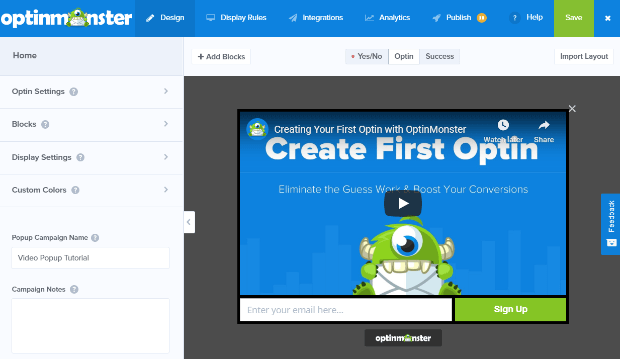
This will take you to the OptinMonster campaign builder where you’ll see the default theater template.
Step 2. Get Your Video Embed URL
Next, you’ll want to get the URL for the video you want to embed. We’re going to use YouTube in this tutorial, but OptinMonster also works with Vimeo, Wistia, and other video sites.
Leave the OptinMonster campaign builder open, and use another browser tab to go to the URL of the video you want to embed. We’re using an OptinMonster video about the best website builders for small business.
Copy the embed URL. This is NOT the URL in your browser’s address bar.
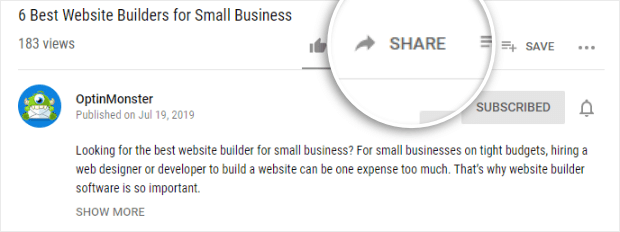
To find the embed URL, click on Share:
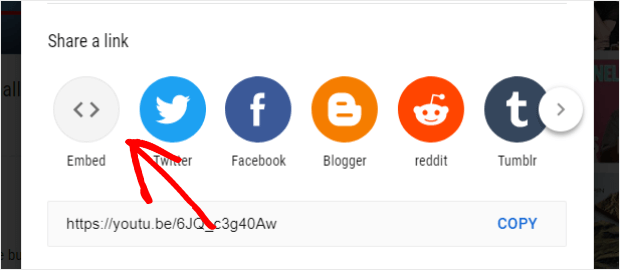
Now, click EMBED from the popup box.
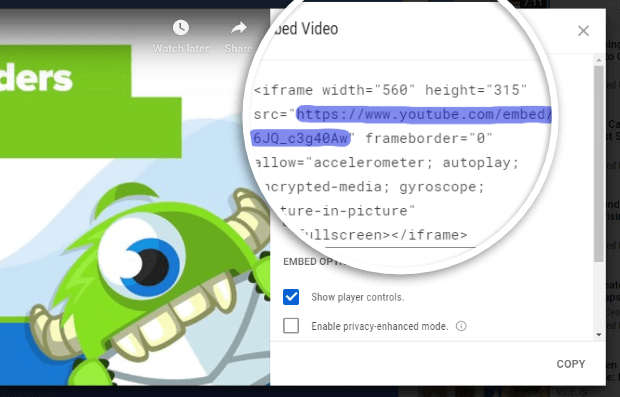
Another box will pop up showing a video preview and the video embed code.
You can also set additional options for the video, like starting at a particular time or enabling privacy-enhanced mode. Here are some common options to try.
When you’re done, copy the embed code.
You only need the URL part of the embed code, which appears between quotation marks. If you have trouble grabbing it on its own, copy all of the code to a text file, then select and copy the URL.
Step 3. Embed the Video in Your Campaign
Return to the OptinMonster campaign builder.
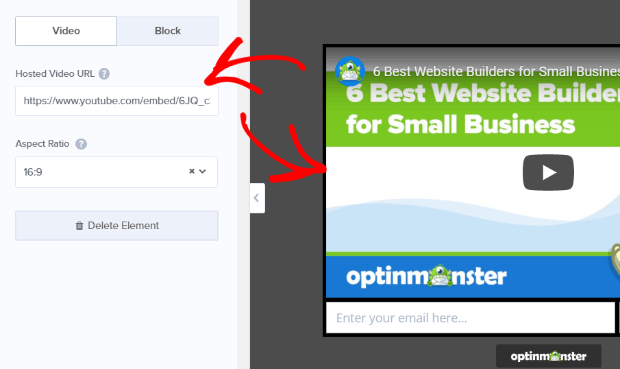
Click directly on the video in the live preview to bring up the editing tools. Enter the embed URL for the video in the Hosted Video URL box.
The campaign preview will update to show the updated YouTube lightbox video popup campaign.
Be sure to save your campaign by clicking on the Save button in the upper right-hand corner of the screen.
Step 4. Set Display Rules for Your Video Popup
Next, you’ll want to specify when visitors should see your video popup campaign.
To do that, go to the Display Rules tab.
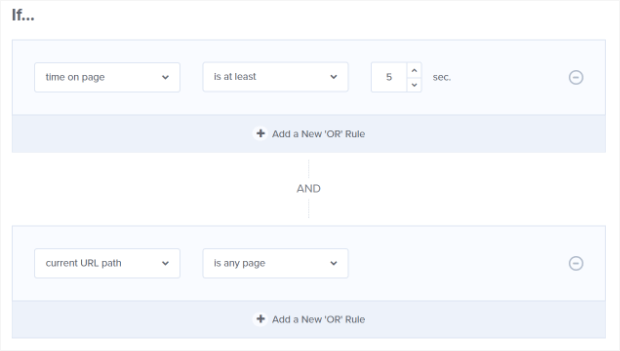
By default, If time on page is at least 5 seconds, which means that even if you forget to set a display rule, visitors will see your video popup after they’ve been on your site for at least 5 seconds.
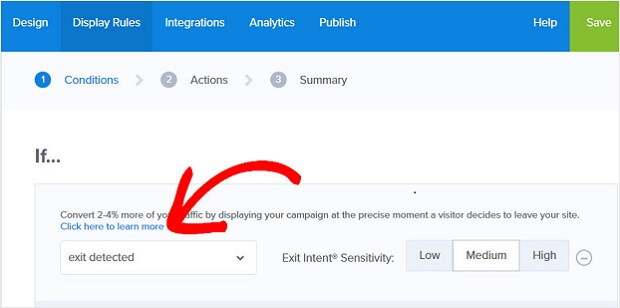
Another great option is to use OptinMonster’s signature Exit-Intent® technology, which detects when people are about to leave your site, so you can grab their attention with your popup video and keep them engaged.
To enable this, add a condition of If exit detected, then choose the level of sensitivity you want.
Step 5. Add Your Email Service Integration
When you click Add New Integration from the Integrations tab, you can select from our list of native integrations to connect with. Just choose your email service provider from the Email Provider dropdown.
Related Content12 Steps to Get Your First 100 YouTube Subscribers
We recommend Constant Contact because the platform offers a lightweight, user-friendly interface, but you’re welcome to check out our list of the best SMTP services or Mailchimp alternatives for more options.
Step 6. Publish Your Campaign
When you create a new campaign, it’s Paused by default. Go to the Publish tab from the top menu to see the Publish Options.
Use the toggle to change the status to Live, then save your campaign by clicking the Save button in the top right of the builder.
Scroll down the Publish page to find OptinMonster’s broad range of publishing options. If you need more information, take a look at the documentation for embedding OptinMonster on your site.
How to Add a YouTube Lightbox Video Popup to WordPress
WordPress is a popular website platform, powering around a third of the web. OptinMonster is the best WordPress popup plugin on the market, making it easy to create WordPress video popups.
To add your video popup to WordPress, make sure you have installed the OptinMonster plugin.
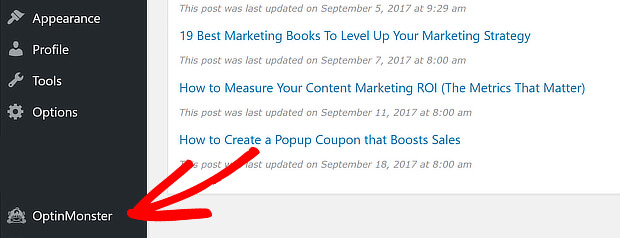
After you publish your video popup, go to your WordPress dashboard, and click on the OptinMonster icon.
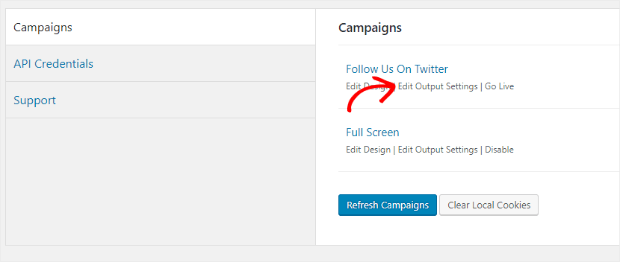
See if your new campaign is listed. If it isn’t, click Refresh Campaigns. Your campaign should appear in the list.
If you want to change where your campaign appears on WordPress, you can do it here, by clicking on Edit Output Settings. For example, you can set your campaign to appear only on certain post categories or post types.
Once you have made changes, press Save Settings. Your WordPress video popup is ready to go.
How to Create a Video Popup with Custom HTML
If you prefer not to use the Theater theme, there’s another way to create a video popup.
You can use our Custom HTML integration with any theme. To do this, follow the instructions for creating your first campaign.
Go back to YouTube and follow the steps to get the embed code. This time, you’ll need the complete embed code.
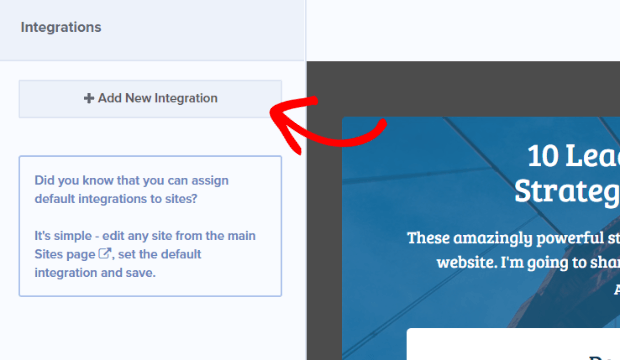
Go to the Integrations tab. Click on Add New Integration.
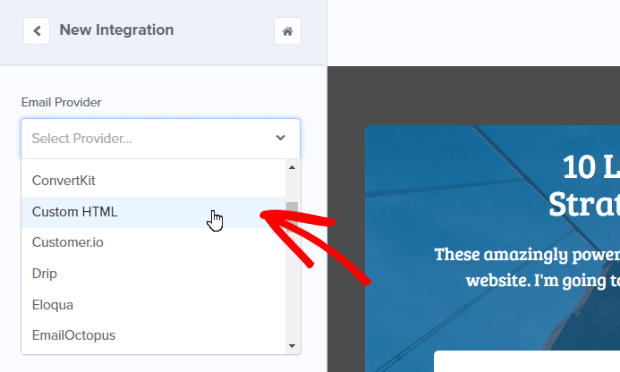
Under Email Provider, select Custom HTML.
Paste the embed code. Your campaign will automatically update to show the video. If you’re using one of our professionally, pre-designed templates you’ll want to play around with the design to get it just right.
Change the display rules if you want, as described above, then Save and Publish your campaign.
You can use this method to create a WordPress video popup on page load, by embedding the video into a fullscreen welcome gate.
That’s it! If you enjoyed this tutorial, also check out:
- Email Popup Best Practices
- How To Create Campaigns Targeting AdBlock Users
- How To Schedule Your OptinMonster Campaigns
- Video Marketing Statistics: What You Must Know for 2023
If you want to get the most out of your YouTube channel, check out our guide to YouTube SEO. And, you’ll definitely want to take a look at our guide on how to start and optimize your YouTube channel for business.
Not using OptinMonster yet? Get started today and start converting more visitors into subscribers and customers!










Add a Comment