Are you wanting to learn how to create a customer journey map while converting along the way?
A customer journey is a path your website visitors take from discovering your site to becoming a paying customer. Unfortunately, the journey isn’t always linear, so it’s important to personalize your customer journey to best suit your business and your target audience.
But before we get into how to create a customer journey map, let’s look at 3 different stages of the customer journey.
3 Stages of the Customer Journey Map
To understand how to tailor your lead generation campaigns to every prospect, you first need to know the 3 main stages of the customer journey.
These stages are often referred to as Awareness, Evaluation, and Conversion (or Top of Funnel, Middle of Funnel and Bottom of Funnel).
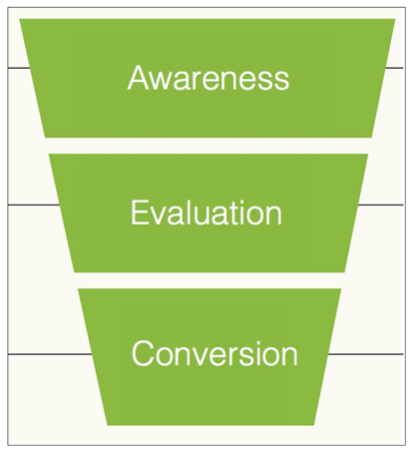
The Awareness stage is when the prospect knows they have a problem, but doesn’t yet know that you exist or that you can help them solve that problem.
The Evaluation stage is when the prospect is aware that you exist and that you have a solution to their problem, but they are still evaluating other possible solutions.
The Conversion stage is when the prospect is almost ready to buy your solution, but they may still have a few questions or objections to overcome first.
OK, now that you know what the 3 stages of the customer journey are, let’s take a look at how to actually capture email leads during each stage…
1. The Awareness Stage
During this first stage, the prospect is just becoming aware of your brand and what you have to offer. They may know that they have a problem or a need, but they aren’t yet aware of what the specific solution is, or that you have that solution.
Your Goal: Aside from capturing their email address, your goal at the Awareness stage is to move the prospect from Awareness to Evaluation by introducing them to your brand, making them aware of the solution to their problem, and introducing them to your solution (your product).
2. The Evaluation Stage
At the Evaluation stage, your prospect understands the solution to their problem and is aware of your brand/offer. However, they are still evaluating their options (and likely looking at your competitors).
Your Goal: Aside from capturing their email, your goal is to move the prospect from Evaluation to Conversion by giving them a quick win which proves that you are the authority they need to pay attention to. You may also have the goal of acquiring initial customers during this stage.
3. The Conversion Stage
At the Conversion Stage, your prospect is aware that your product provides the solution they seek, but they haven’t quite made the decision to buy yet.
Your Goal: Aside from capturing any leads who haven’t yet opted in to your email list, your goal at this stage is to maximize immediate customer value. You’ll do this by helping them overcome any objections to the sale, and giving them the extra “nudge” they need to buy right now. You may also have the goal of retaining existing customers and increasing buyer frequency/boosting conversions on your cross-sells and upsells.
[Case Study] Creating a Customer Journey that Converts
Admit it! Each user is different. And you don’t know what each of your website visitor wanted and which stage of customer journey they’re in.
If only there’s a tool that identifies which customer stage each of your website visitors are in… and delivers a personalized experience to each one of them based on their customer stage.
Oh, wait there is such a tool! It’s called OptinMonster!
And by creating a personalized customer journey for each stage with OptinMonster, Human Food Bar, a niche website focused on energy and nutrition bars, has increased conversions at each step!
Here’s what they achieved by creating a customer journey.
- In the awareness stage, they increased email subscribers by 80%
- Average time on site up 18% and bounce rate down 7%
- In the conversion stage, they made $17,000 average profit per seasonal sale
- Website retention rate up 35%
Want to know EXACTLY how they achieved it? Let’s take a look…
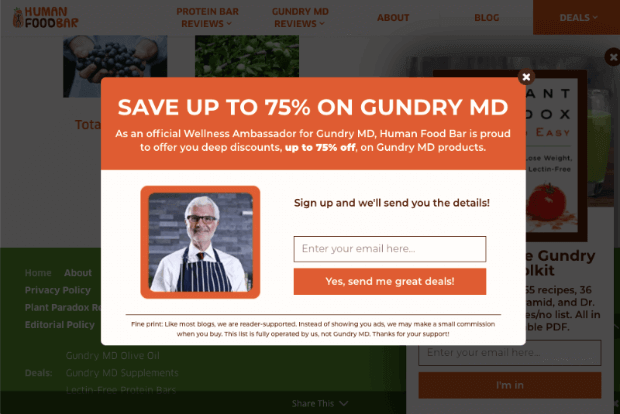
When you visit the Human Food Bar site for the first time, you’re met with this welcome popup:
It only displays to new visitors and instantly offers a 75% discount on Gundry MD products.
But not everybody is interested in buying products right away. That means people may be in the awareness stage and they’ll need a little bit more convincing before they evaluate your product and convert into customers.
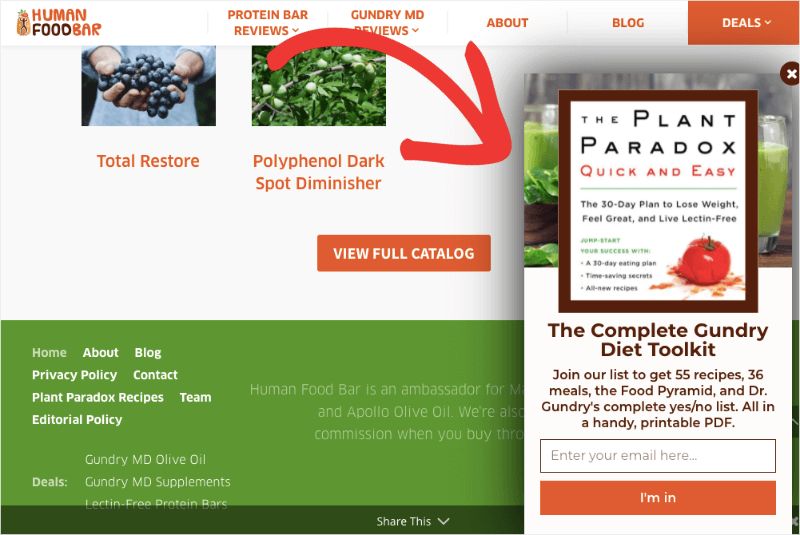
If the visitor isn’t interested in buying products just yet, the “Human Food Bar” website draws visitors attention to getting a free toolkit that’s packed with recipes, meals, and more.
This strategy helps cater to 2 separate audiences and intentions who are in the different stages (awareness and evaluation) in their customer journey.
And between the 2 campaigns, Human Food Bar gets 1,800+ new email signups every month.
Now, let’s take a look at how to create a customer journey map and convert users into subscribers and customers.
Step 1: Create a Lead Magnet for YOUR Target Audience
We’ve already explained that your goal at the Awareness stage is to move the prospect from Awareness to Evaluation by introducing them to your brand, making them aware of the solution to their problem, and introducing them to your solution (your product). And capturing their email address is the first step to do so.
Most people are generally not willing to part with their email address unless there is something in it for them.
So, how do you entice a potential lead? By offering up a lead magnet.
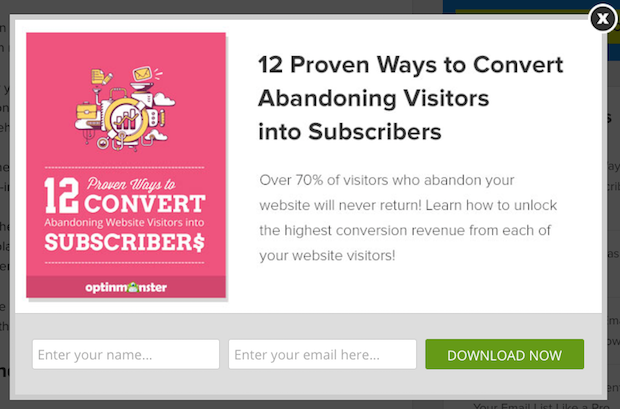
Lead magnets are free resources that attract your target audience to complete your call to action. This is usually in exchange for their email address or other contact information.
Remember: Awareness-stage prospects don’t know you very well yet. In fact, they didn’t even know you existed just a few moments ago. So you’ll want to use the most polite optin forms possible when asking them to join your email list.
For the messaging on your Awareness optin form, focus on the pain points that your prospects are currently experiencing.
- Solve a problem your customers have
- Be specific to that problem
- Quick to digest
- Be instantly accessible (capitalize on people’s need for instant gratification)
- Demonstrates your expertise (this will help convert them from a lead to a customer down the road)
Step 2: Offer Lead Magnets Targeting Awareness Stage
So you may be wondering, how do you actually target these different optin forms and lead magnets specifically to prospects in the Awareness stage?
To identify who your Awareness-stage prospects are, you need to understand where they are coming from.
Awareness-stage prospects usually find you through…
- Search engines – by typing in a question related to their problem
- Social media – they saw a post that someone shared about your content
- Referrals – other websites linking to you
- Paid ads – any ad campaign that you are targeting to cold traffic
Most of these people arriving at your website for the first time are landing on one of your blog posts. That means you need to have Awareness-stage offers on your blog.
Not having your offers in the right places can turn off visitors and can tank your conversion rates.
You may be wondering how you can make sure your lead magnets are getting in the right places on your website and in front of the right people. Well, that’s where a tool like OptinMonster comes in:
OptinMonster is the world’s #1 lead generation tool. It allows you to easily create optin campaigns to distribute your lead magnets in a highly targeted way in just a few minutes.
You’ve likely seen optin campaigns before. They are popups, floating bars, gamified wheels, and other parts of a website where visitors can enter their information, usually in exchange for a freebie.
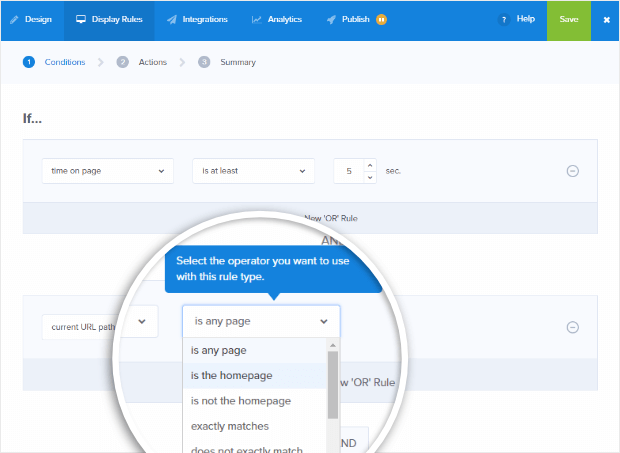
OptinMonster takes this all a step further, letting you customize your campaigns to appear precisely when you want your visitors to see them. These rules help you create an even more personalized customer journey.
We recommend that you always include a scroll box, a sidebar form and an exit-intent popup on all of your blog posts (at the minimum). On your most popular blog posts, you can boost optins even more with a content upgrade.
In addition to targeting prospects on your blog posts, you can also target them based on where they came from using referrer detection or specific URL parameters (e.g. ?utm_campaign=my-campaign).
So for example, if you have an ad campaign that is being targeted to cold traffic, you could detect those visitors with your specific campaign parameter, and then display your Awareness-stage optin form to those visitors.
Step 3: Identify and Convert Users in Evaluation Stage
While some prospects in the Evaluation phase have already opted in to your email list, you will also have some who are following you but have not yet opted in.
Evaluation-stage prospects also visit particular pages on your site besides just your blog, such as your…
- Opt-in Landing Pages
- About Page
- Start Here Page (here’s an example from our other site, WPBeginner)
- Resource Pages (here’s another example from WPBeginner)
Visits to these pages indicate that the prospect is no longer a complete stranger to your brand. Rather, they want to get to know you better and learn more things from you.
What all of this means is that you can target Evaluation-stage prospects either by the traffic source (e.g. via a specific URL parameter) or by the specific pages that they are viewing.
And don’t forget– you can also target your most engaged Evaluation-stage prospects based on the number of pageviews and convert them into customers right away! For example, you could target visitors who have viewed at least 4 or more pages on your site…
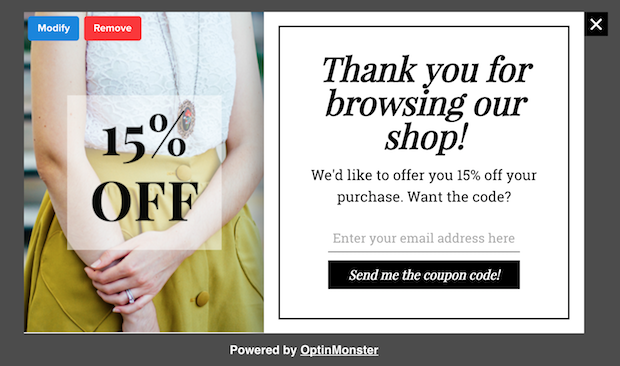
..and then present them with a low-dollar offer or a coupon inside a timed lightbox popup.
(For more details, check out our tutorial on converting engaged visitors into buyers.)
Step 4. Identify and Convert Users in Conversion Stage
Don’t assume that someone has already opted in to your email list just because they are in the Conversion stage!
Especially if your brand has already established a lot of awareness in your market, you will have prospects who are already thinking about buying but haven’t given you their email address yet. Maybe they were referred to you by someone, or they’ve read reviews about you on another site.
You definitely do not want to lose these hot leads.
Good lead magnets at the Conversion stage include…
- Coupon
- Free trial
- Case studies
- Free quote
- Free catalog
- …more bottom of funnel lead magnet ideas here
Conversion Optin Types:
To capture leads at the Conversion stage of the customer journey, use…
- Highly noticeable floating bars
- Countdown timers
- Timed popups + eye-catching animations
- Exit-intent popups
You should be getting more aggressive here because you can, and should.
These prospects are actively looking to buy your product. If you don’t keep their attention and push for the sale, you may lose them forever, simply because they decided to just come back another day (and never actually got around to it). Or, they ended up going with your competitor because their messaging was stronger than yours.
For your opt-in messaging at the Conversion stage, focus on proof and urgency. For example, “300,000+ websites already use OptinMonster to get more email subscribers. Don’t get left behind!” or, “Get 10% Off OptinMonster (only 3 hours left!)“.
Conversion Targeting:
Prospects in the Conversion stage come to your website through…
- Search engines – by typing in conversion-intent queries such as “[your product] reviews”, “[your product] coupon”, or “buy [your product]”
- Social media – by clicking on a post regarding a sale, or other promotion
- Referrals – clicking through from another blog reviewing your product
- Paid ads – retargeting ads
- Direct traffic – people who clicked on a link inside a promotional email, or typed your URL into the browser directly
To target these prospects, you can either display optin forms to visitors based on where they came from (a specific email link, a specific ad campaign, referrer domain, etc.), or based on the page they are currently viewing.
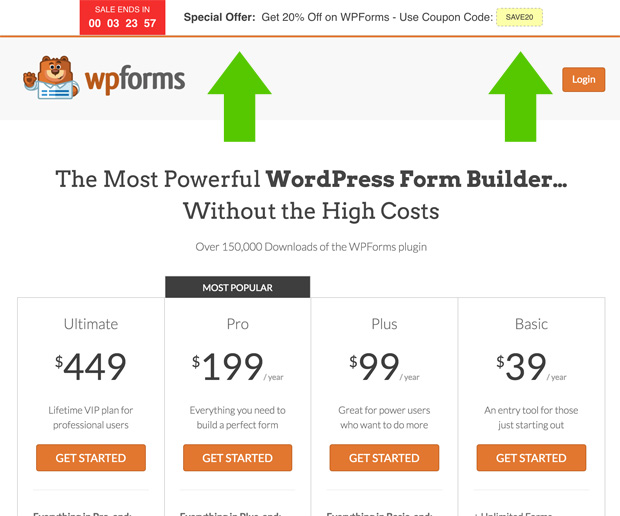
In addition to targeting visitors from specific email marketing or retargeting ad campaigns, we highly recommend that you add urgency to all pages with conversion-intent using a floating bar + countdown timer. You can use this to optimize your pricing page, feature pages, and any other pages or blog posts where you have high sales conversions.
We have implemented this on several of our own web properties with astonishing results, which is why we rolled out the Countdown theme for our customers.
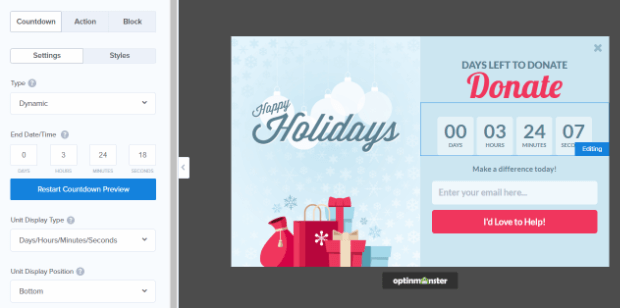
With OptinMonster’s Countdown theme, you can customize the timer to each visitor, so every visitor will see a different countdown that is tailored specifically to them.
All you have to do is set the Countdown Type to “Dynamic”, and set the length of your timer.
Converting at Each Stage With a Customer Journey Map
In this map, we showed you the 3 main stages of the customer journey (Awareness, Evaluation, and Conversion) and how to acquire leads at each stage.
We also showed you how to maximize the value of your prospects by moving them from one stage of your sales funnel to the next.
Once you’ve converted your website visitors into email subscribers, the next step is to nurture these leads with email marketing…
Here are few resources that would be helpful to you in the next step:
- What Is Email Automation? (+31 Tools to Transform Your Business)
- How to Create an Effective Email Autoresponder Series
- How To Create An Email Newsletter in 3 EASY Steps
Now it’s your turn. Follow the roadmap above and install OptinMonster to capture high-quality leads throughout the customer journey.




Add a Comment