Ever wish you could create and manage OptinMonster campaigns right from your WordPress dashboard? Managing campaigns within the WordPress dashboard streamlines your lead generation process.
Today, we’re pushing out a HUGE update to the OptinMonster for WordPress plugin that gives WordPress users new flexibility to manage and deploy campaigns entirely from your WordPress dashboard… instead of switching between the plugin and OptinMonster.com.
Our WordPress plugin has received over 240 ⭐️⭐️⭐️⭐️⭐️ reviews, and we know you’re going to love this update, too!
Let’s take a look…
Introducing the OptinMonster for WordPress Plugin 2.0
With the newest update to our popular plugin for WordPress websites, you can easily review, manage and even publish your conversion optimization campaigns right from your WordPress website. This comes in handy especially when you want to
- create a new campaign to go with that new post or page you’re writing…
- take a quick glance at the performance of your campaigns…
- easily change a campaign’s status…
- share your campaign quickly and easily with shareable links…
- and so much more!
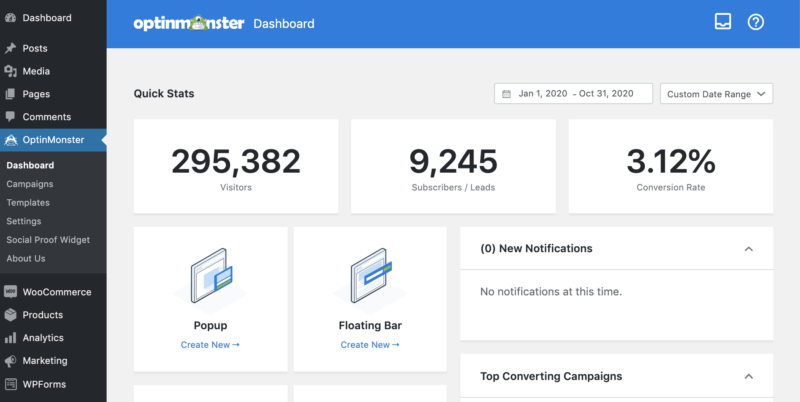
After updating your OptinMonster for WordPress plugin to v2.0, the first thing you’ll notice is its beautiful Dashboard that shows the overall performance of your campaigns at a glance.
You’ll see which campaigns are your top performers, any recent notifications from the OptinMonster team, and can even choose a campaign type to begin creating your next campaign.
Navigate to Campaigns to get detailed insights into individual campaign’s performance from the last 30 days, campaign status (published, draft, or scheduled), and if the campaign has any split tests.
Hover over a campaign to access the following options:
- Edit Design
- Output Settings
- Change Status
Here are a few more things that you can do from within the Campaigns screen.
- A/B tests: Easily set up A/B tests for your campaigns
- Status: Switch the campaign status between Draft, Published, and Scheduled
- Actions: Easily preview, duplicate, or delete a campaign. You’ll also get additional options to archive the campaigns, visit your Output settings, and get a link to share your campaign.
NEW! Creating a Campaign Within WordPress
We’ve simplified the process of publishing a campaign from your OptinMonster for WordPress plugin, too.
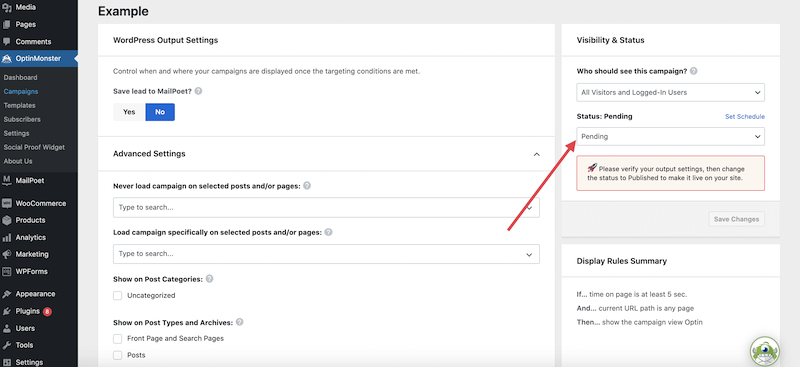
With this newest update to our WordPress plugin, you can create and publish new campaigns entirely from within your website. For our WordPress plugin users, there is now one status to rule them all: Draft, Pending or Published.
If you’re creating a campaign but still have lots of edits to make to the design or settings, leave the campaign as Draft. When you’re ready for visitors to see your campaign, set the Status to Publish. And if you need someone else to review the campaign before you Publish it, set it to Pending as a reminder to yourself that it’s almost ready to go.
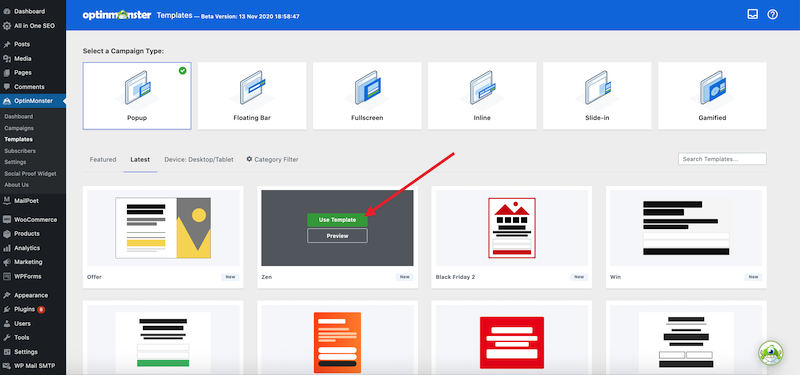
To create a new campaign, start by choosing the campaign type and a template that matches your goals. Click Use Template and immediately start creating your campaign using our drag and drop editor.
After you’ve finished designing your campaign, setting up your Display Rules, and connecting to your marketing integration, save your changes and click the close button. You’ll be redirected to your Campaign’s Output Settings. Adjust the Output Settings to laser focus where and when your campaigns can appear.
Then, when you’re ready for the campaign to appear live on your site, simply change the Status to Published and click Save Change, and we’ll take care of the rest.
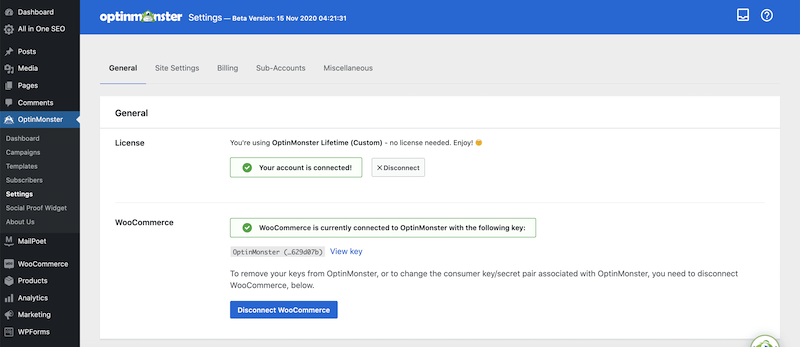
OptinMonster Plugin Settings
OptinMonster 2.0 also brings key areas of your Account into your WordPress dashboard.
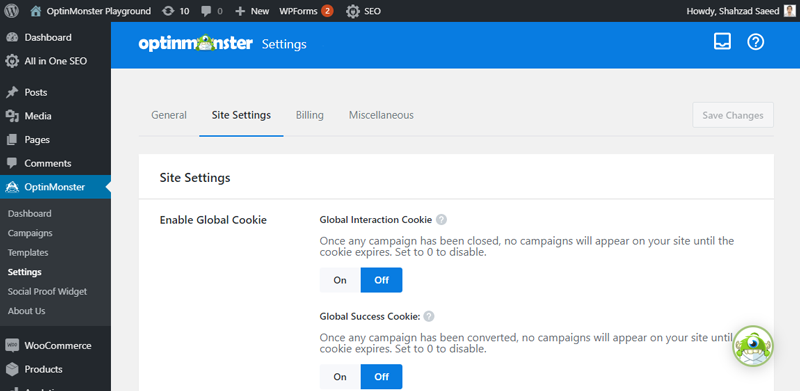
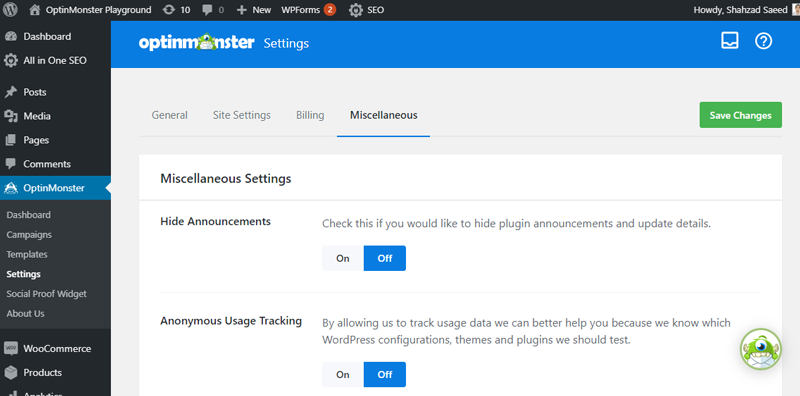
In Settings, you’ll find five important sections:
- General
- Site Settings
- Billing
- Sub-Accounts
- Miscellaneous
In the General section, you can find your OptinMonster license information and integrate OptinMonster with WooCommerce.
In Site Settings, view and edit details that are unique to your site, such as Global Cookie settings, Analytics preferences, and Google reCAPTCHA configuration.
To update your billing, click on Billing and you’ll be directed to your account at OptinMonster.com where you can manage your subscription.
Click Sub-Accounts to add new users to your OptinMonster.com and to assign those users specific permissions using our Sub-Accounts solution.
And in Miscellaneous, you can show or hide plugin announcements and update details, and also choose whether you want to allow OptinMonster to track usage data.
We’re continually striving to bring you the best conversion optimization software, so you can convert more website visitors into subscribers and customers.
Not using OptinMonster yet? Click here to get started today!
As always, thank you for continued support in helping us make OptinMonster the world’s best conversion optimization toolkit!

