Do you want to find out where your leads are coming from or which marketing campaigns and forms are performing well on your site?
Knowing which source brings in leads will help you know which channels to focus on as you grow your business.
Today, we’ll show you the best way to track a lead source in WordPress, so you’ll know exactly where your new leads are coming from.
But first, let’s get clear on why you need to track lead sources at all.
Why Should You Track Lead Sources?
Right now, you probably spend your time designing optimized marketing campaigns and investing in channels to boost lead generation.
But are they actually working?
By tracking lead sources, you can determine what campaigns are working and where you need to make improvements. You can track website forms, popups, affiliate promoters, and more.
Once you know your lead sources, you can use this data to find out:
- Referral sites that drive the most traffic so you can partner with them to boost affiliate conversions
- The best channels to promote your lead generation, sales, and marketing campaigns
- Which social media platforms to focus on
- Whether you need to focus on SEO (if Google is driving the most leads)
- If your lead capture tools are worth the investment
That way, you can use your time, effort, and money to promote the right channels that will help you maximize leads.
Now that we know why you should track lead sources, let’s look at how you can do so.
Lead Source Tracking in WordPress
There’s a traditional tracking method where you need to add a tracking code to your site and configure a goal in Google Analytics.
You’ll need to do this for every form or campaign on your site. This isn’t just an extra task to add to your never-ending to-do list, but it’s also quite technical and time-consuming.
We’ve covered how to do it in this guide: Google Analytics 101: How to Track Your Conversions (Step-by-Step).
But, today, we’re going to show you 3 EASY WAYS to track lead sources that are simple to set up and make tracking easier in the long run.
Here’s a table of contents to skip ahead to the section that interests you the most:
- Lead Source Tracking in MonsterInsights
- Lead Source Tracking in Google Analytics Events
- Lead Source Tracking in WPForms
Let’s get started.
1. Lead Source Tracking in MonsterInsights
The best way to check lead sources is by using MonsterInsights.
MonsterInsights is the #1 Google Analytics plugin for WordPress.
It makes it easy to connect your site to Google Analytics. MonsterInsights then takes complex Google Analytics data and creates simple reports that are easy to understand.
This makes the tool great for beginners and those who aren’t comfortable navigating through Google Analytics.
MonsterInsights comes with a Forms addon that automatically tracks form conversions as events. That means you don’t need to set it up manually for every form on your site.
To get started, you’ll want to install and activate MonsterInsights on your WordPress site. Once that’s done, you can follow the launch wizard to connect your site to Google Analytics.
Use this guide for more detailed steps on setting it up: How to Add Google Analytics to WordPress—Quick & Easy!
Next, head over to the Insights » Addons page. Find the Forms addon and install it.
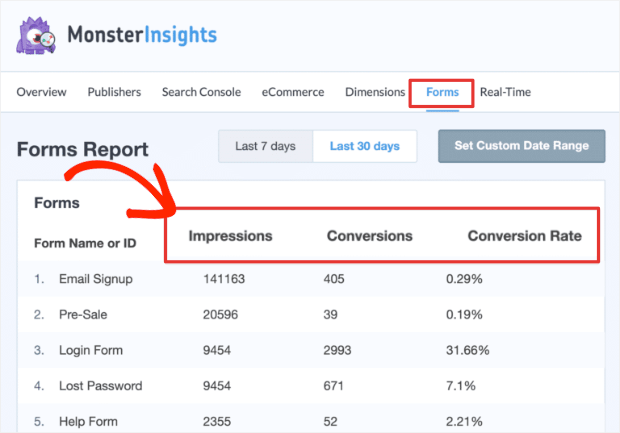
When you activate the addon, MonsterInsights will start recording your website form data. It then creates a report for you which can be accessed under the Insights » Reports » Forms page.
You’ll find a list of forms here, along with the impressions, conversions, and conversion rate for each one.
This tells you how many people saw your form and how many actually submitted it. In the report above, you can see that the Email Signup form performs well and brings in leads.
MonsterInsights is the easiest way to track lead sources of your website forms.
Get started with MonsterInsights today!
Next, we’ll show you how to see your other lead sources inside Google Analytics.
2. Lead Source Tracking in Google Analytics Events
You’ll want to use Google Analytics to track lead sources if you have other lead generation campaigns set up with a tool like OptinMonster:
OptinMonster is hands down the best lead generation software on the market.
It allows anyone to quickly and easily capture new leads with campaigns like popups, floating bars, slide-ins, fullscreen mats, gamified wheels, and more:
Plus, there are 50+ high-converting templates to get started, along with a beginner-friendly campaign builder.
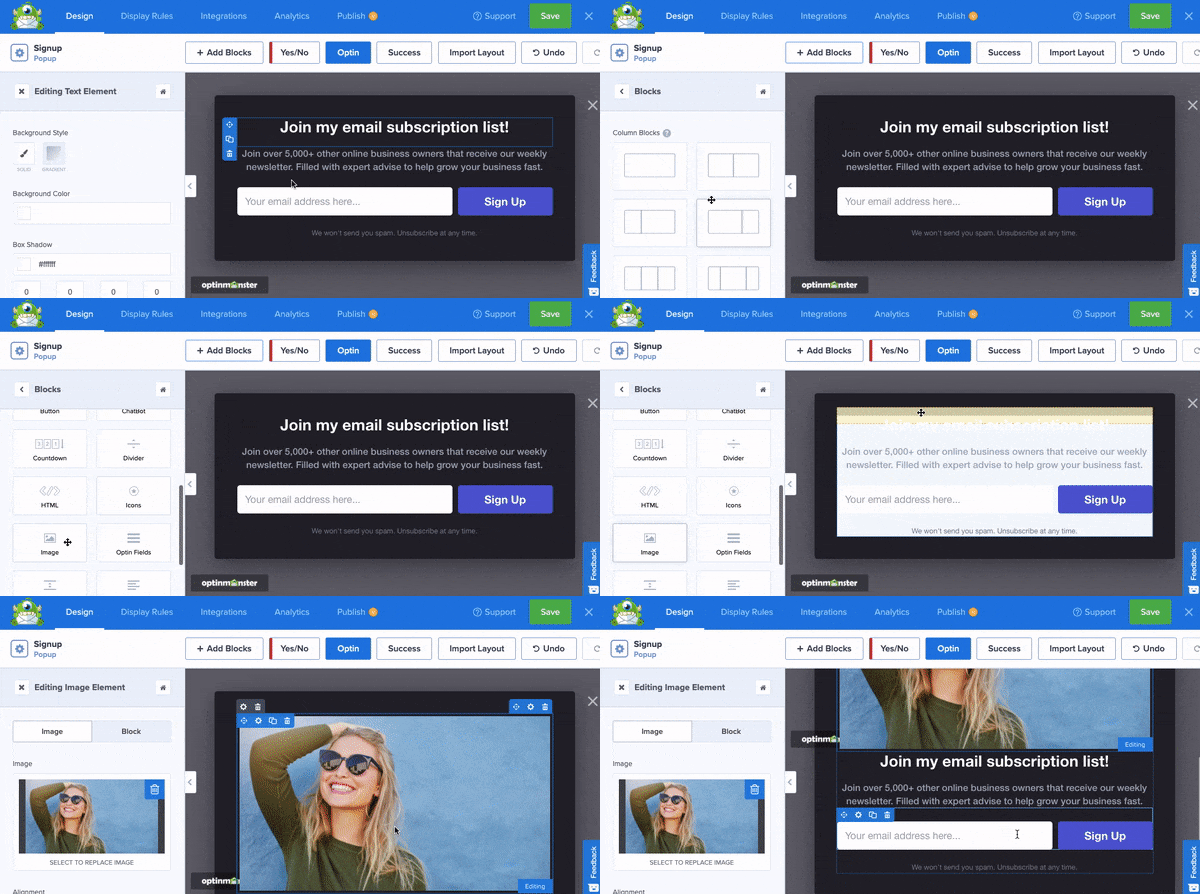
And once you’ve select the right template, you can make modifications with a drag and a drop:
This lets you set up and customize a campaign in under 10 minutes.
And OptinMonster’s powerful targeting rules let you display campaigns to the right people at the right time to maximize conversions.
Some of the most popular targeting rules include:
- Exit-Intent® Technology: Display popups to users who are actively leaving your site.
- OnSite Retargeting®: Show fresh campaigns to returning users to prevent ‘popup fatigue.’
- Geolocation: Target users based on their physical location to personalize the user journey.
And much more.
These targeting rules and others are how companies like Crossrope increase their list by 900% month over month.
Or how small businesses like Shotkit add 40+ NEW leads every single day.
You can achieve similar success by clicking below and signing up for your 100% risk-free OptinMonster account:
If you’ve never used OptinMonster before, this guide will help you start your first campaign.
Before we get started, make sure your website is connected to Google Analytics. If you haven’t done that yet, you can learn how to do it here: Google Analytics 101 (A Step-by-Step Guide).
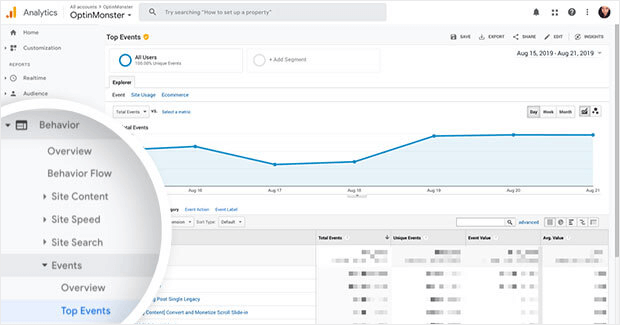
To see where your leads are coming from, log into your Google Analytics account.
Then navigate to Behaviour » Events » Top Events from the menu on the left.
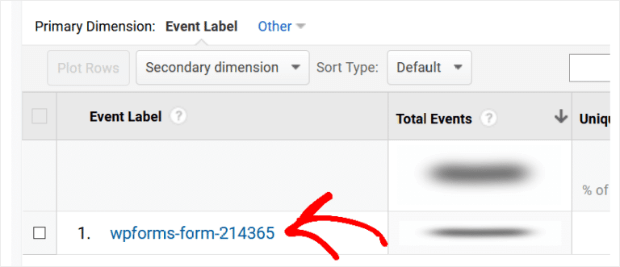
On this page, you can filter your events using the Event Action tab.
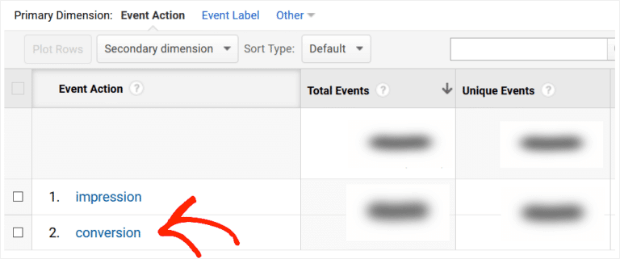
If you’re using lead generation tools like WPForms and OptinMonster, you’ll see 2 items called Impression and Conversion.
Click on the Conversion tab, and you’ll see your forms and campaigns.
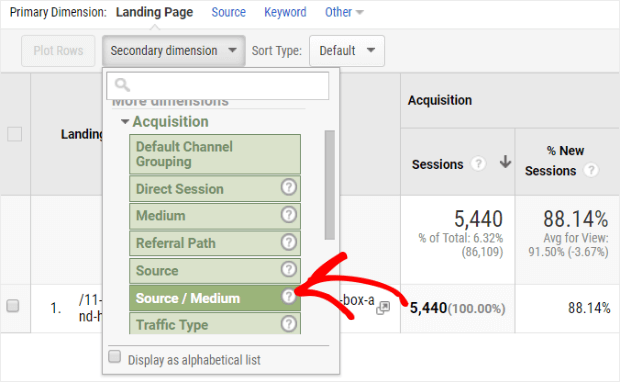
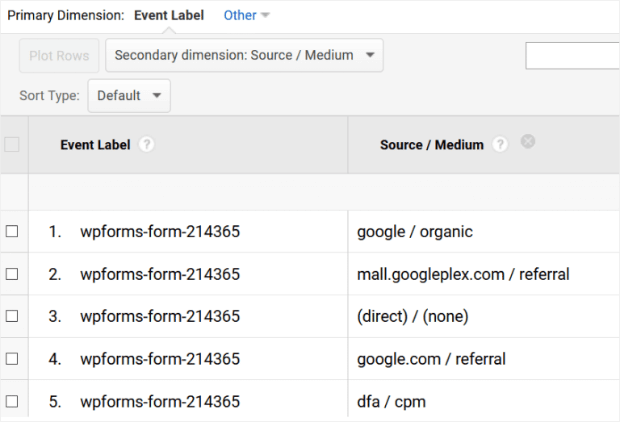
Next, select any campaign here and click on Secondary dimension to open the drop-down menu. Then choose the Source/Medium option.
This will show you all the sources that brought in leads to your site. For instance, you can see how many people came through Google, social media, or referral websites.
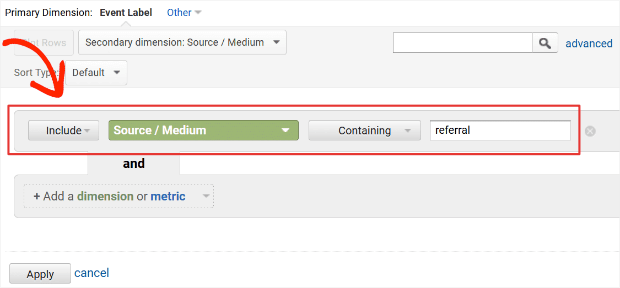
Google Analytics has an advanced filter to narrow down your data here.
For example, if you want to see which forms bring in leads from referral sources, select Include » Source/Medium » Containing and enter ‘referral’ in the last field.
Once you’ve entered these details, click the Apply button:
The filter will now only display leads from referral sources. You can do the same for other sources using this advanced filter.
And that’s how you track lead sources in Google Analytics. We have one more easy method to show you how to track leads.
This will teach you where your leads came from and what actions they took on your site before they converted.
Lead Source Tracking in WPForms
For the last method in this tutorial, we’ll be using WPForms.
WPForms is the best form builder for WordPress to create and track high-converting forms on your site. The forms include contact, sign-up, registration, login, survey forms, and more.
WPForms comes with a User Journey Addon that records the visitor’s path before submitting a form on your website.
That way, you can see where your users came from, what they did on your site, and which form they engaged with the most.
To get started, you’ll need to install and activate WPForms on your site and create a form.
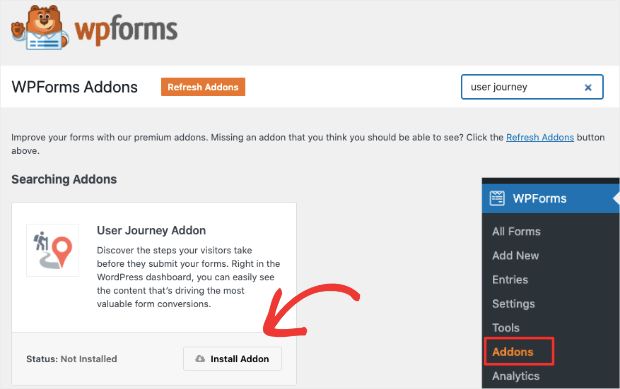
Then from your WordPress dashboard, head over to WPForms » Addons tab. Here, search for the User Journey Addon and install it.
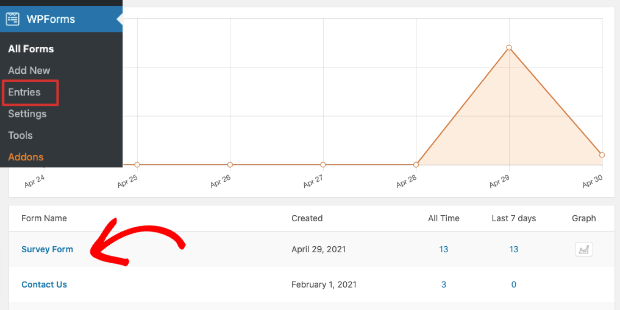
Once you activate the addon, go to the WPForms » Entries page. You’ll see a list of all the forms you’ve created with WPForms.
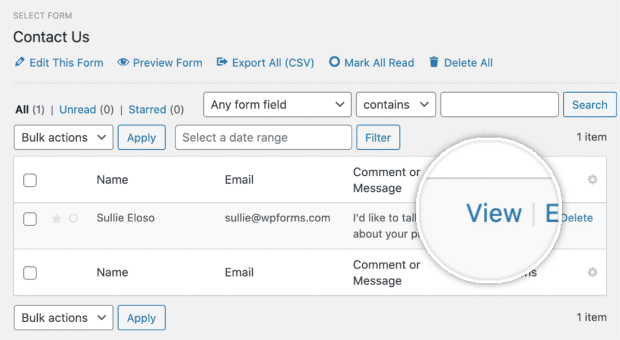
Select a form, and on the next page, and you’ll see all the users that submitted the form. To see a user’s journey, you can click on the View button.
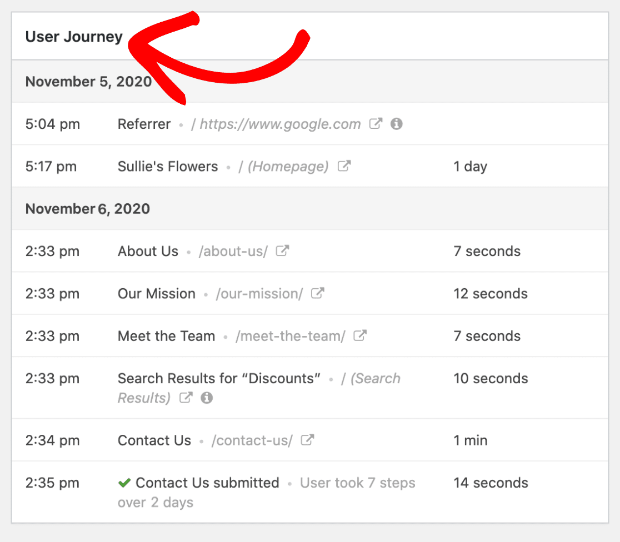
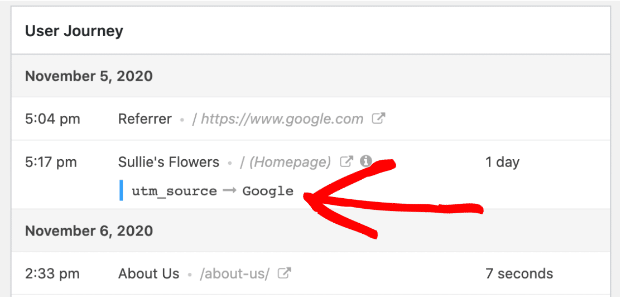
On the user’s page, scroll down to the User Journey section, and you can see the steps the visitor took before they submitted the form.
It shows you the referral source, which pages the user viewed, its date, time, and duration.
Click on the Info icon, and you’ll see the URL the visitor used. You can even open that page by clicking the Open Window in a New Tab icon.
If you’ve used custom UTMs in your marketing campaigns, you can check the URL parameters here too.
With this data, you can determine which sources are performing well and what users are interested in on your website.
This will help you target your audience better to show them personalized marketing campaigns that they’ll respond to.
And that’s all for today! These have been 3 methods for tracking lead sources from Google Analytics.
We hope you found this tutorial helpful. And if so, you may be interested in these resources:
- How to Make a Lead Capture Form That Actually Converts
- How to Use Progressive Profiling to Generate Better Leads
- How to Easily Verify an Email Address and Qualify Your Leads
These posts are packed with info to help you grow your email list and capture warm leads that boost your revenue.







Add a Comment