Are you looking for a quick and easy way to create a Squarespace announcement bar?
Announcement bars let you easily share important information and updates with your site visitors. But adding a customized announcement bar in Squarespace might require coding skills.
Fortunately, there’s an easier way.
Today, we’ll explain how to create a Squarespace announcement bar without coding.
Why add a Squarespace Announcement Bar
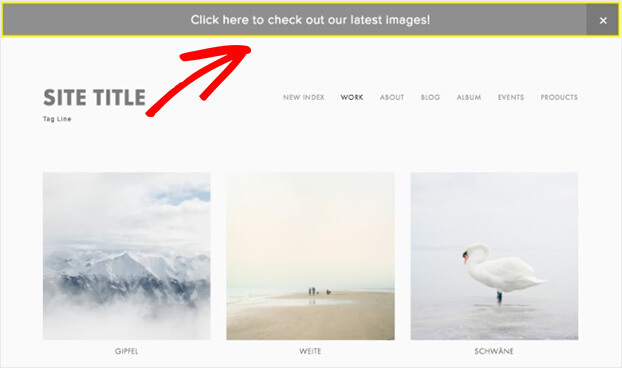
An announcement bar, or floating bar, is a banner that sits at the top or bottom of your website. The great thing is it allows you to communicate with your site visitors without interrupting them.
You can set your announcement bar to stick to the page as your visitor scrolls. Or, if you like, you can make it appear after someone has scrolled down the page.
You can use announcement bars to:
- Welcome visitors to your site
- Announce new store hours
- Share special offers
So, you might be wondering, “How do I add an announcement bar in Squarespace?”
Now, Squarespace comes with built-in announcement bar features. So, you can add it to your site easily from within your Squarespace editor.
But your options for customization here are limited. For example, your announcement bar will show on every page except Cover Pages. So, you can’t set it to appear on certain pages. And when it comes to design, you can only do basic style edits, like customizing the background color, font color, and style.
To make other changes to the announcement bar, you’ll need to use CSS. Now, Squarespace’s business is website building and hosting. So, you’re not going to find the best features for creating announcement bars and other popups.
Of course, this might be enough for some website owners.
But, if you want an easy way to create an announcement bar that will grab your reader’s attention, you should use OptinMonster.
OptinMonster is the best tool to create a Squarespace announcement bar. With its drag and drop builder, you can easily create eye-catching announcement bars. And adding it to your Squarespace site is incredibly easy because all you need to do is paste an embed code on your site.
OptinMonster’s 50+ announcement bar templates let you generate more leads from your Squarespace site with campaigns like these:
- Grow your email list with an announcement bar
- Increase sales with an announcement bar and countdown timer
- Boost your social following by adding links to your profiles
One of the best things about OptinMonster is its targeting features. So, unlike Squarespace, you can show your floating bar on any page of your site.
Cosmetic Capital used these features to increase leads by 300% using this floating bar.
Let’s see how to create an announcement bar that delivers similar results.
How to Add an Announcement Bar in Squarespace
You’ll need an OptinMonster account to follow along in this tutorial.
Using OptinMonster, you can create an announcement bar like this in 30 minutes or less.
Sign up using the link below. It’s 100% risk-free with our 14-day free trial.
We also understand that not everyone learns the same way. That’s why we also made this helpful video tutorial for our visual learners:
But for a totally in-depth guide, we recommend going through these written instructions. Let’s get started.
Step 1: Create a Squarespace Announcement Bar Campaign
First, you need to click Create New Campaign from your OptinMonster dashboard.
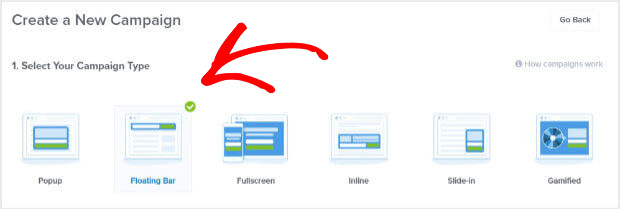
Now, you’ll need to select Floating Bar.
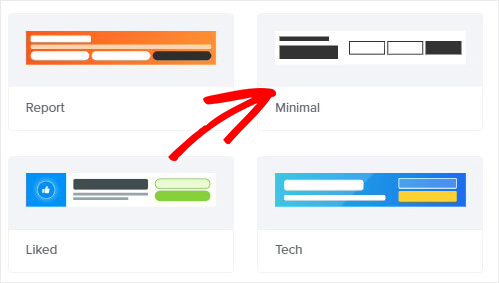
The next step is to choose your template.
OptinMonster has more than 50 floating bar templates.
If you need help finding the right template, you can filter by your goal:
- Grow email list
- Show time sensitive offer
- Redirect traffic
Today, we will go with Minimal because it’s perfect for the special offer announcement bar we’re creating today.
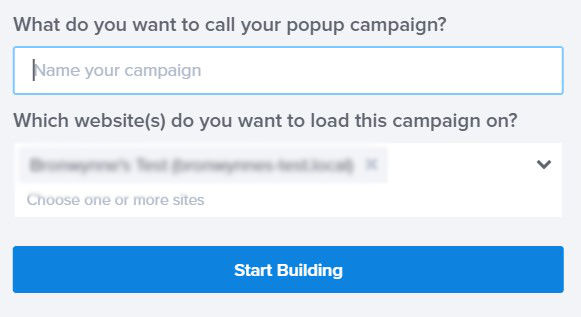
Then, you’ll need to name your campaign, and click Start Building to enter the editor.
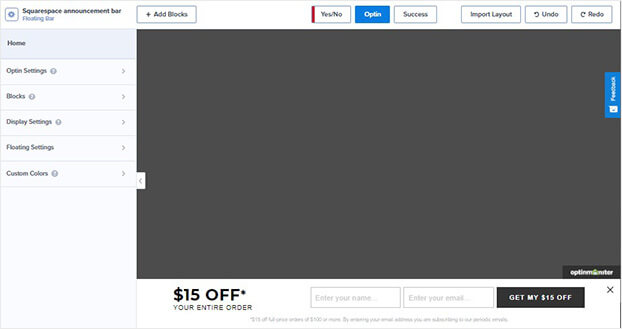
Now, we’re ready to design our Squarespace announcement bar.
Step 2: Customize Your Squarespace Announcement Bar
Customizing your Squarespace announcement bar in the OptinMonster editor is incredibly simple.
You can easily change your background color, font style, and image.
In the end, it takes just minutes to create an announcement bar that matches your site and reflects your brand.
Let’s take a closer look.
The first thing you want to do is set the position of your announcement bar. By default, the announcement bar appears at the bottom of the screen. You can leave those settings in place or change its position.
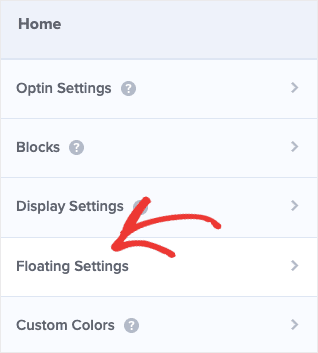
Click Floating Settings.
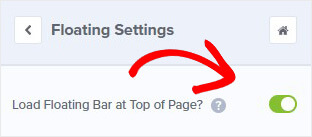
Select Load Floating Bar at Top of Page.
Now, we’ll look at how you customize the content.
To change the text, simply click on the announcement bar. You’ll be able to change the text directly on the popup.
From here, you can change your font, text size, and color.
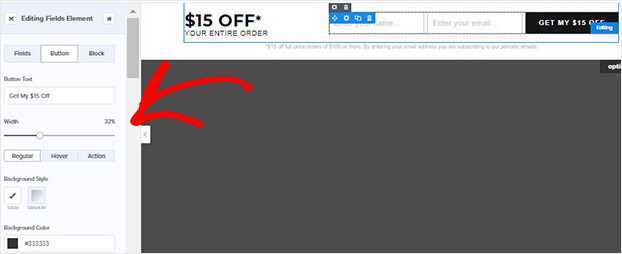
You can also change the submit button by clicking on it.
Using the editing tools on the left, you can edit the button color and text.
Want to add anything to your announcement bar?
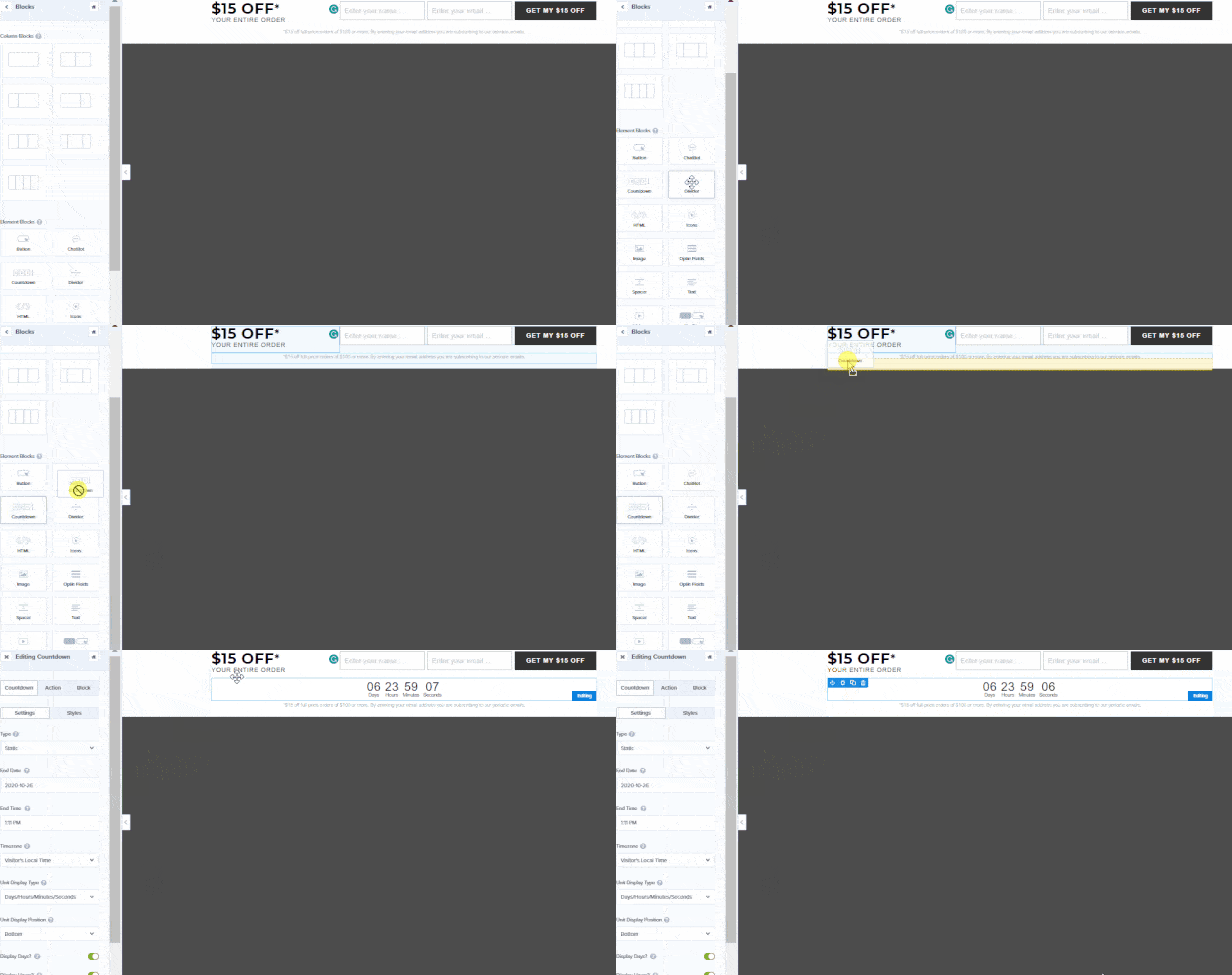
Simply click on Add Blocks at top of your editor.
From the side panel, you can select:
- Countdown timer
- Image
- HTML
- Divider
- Optin fields
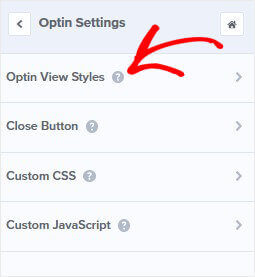
Now, if you want to change the background color, just click on Optin Settings.
Then, select Optin View Styles.
Now, choose your background color.
You can also use the OptinMonster Success view to deliver your discount code immediately.
Once you’re happy with the design of your announcement bar, you’re ready to determine how your announcement bar is displayed on your Squarespace site.
Step 3: Display Squarespace Announcement Bar
In this next step, you’ll decide where and when to show your announcement bar.
Today, we want to make our announcement appear on a specific blog post.
We’ll do that using OptinMonster’s Display Rules.
With OptinMonster’s Display Rules, you can
- Show your announcement bar on specific pages
- Display your announcement bar after your site visitor scrolls
- Make your announcement bar load as soon as your site visitor lands on your page
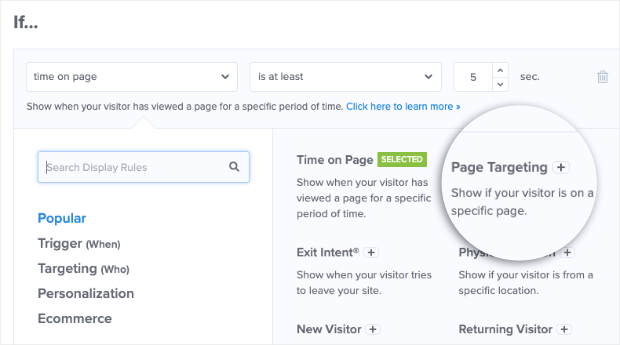
Today, we’ll use the Page Targeting and Scroll Distance.
Select Display Rules at the top of your editor.
Find and select Page Targeting.
Next, add the page URL.
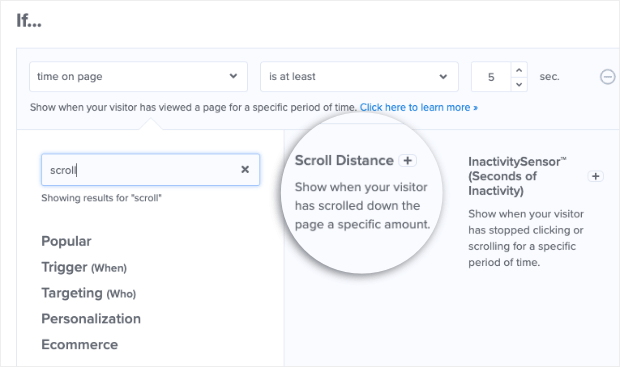
Now, find and select Scroll Distance.
Showing your announcement bar after scrolling down a certain amount is a simple technique to increase conversions.
Then, select the distance the person has to scroll to trigger the announcement bar.
Now, you’ll connect your email service provider.
Step 4: Integrate Your Email Provider
OptinMonster makes it easy to collect email addresses. You’ll be able to send your emails straight to your email service provider.
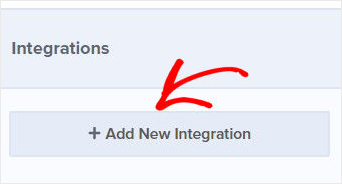
Simply head over to Integrations at the top of your editor.
Now, click Add New Integration.
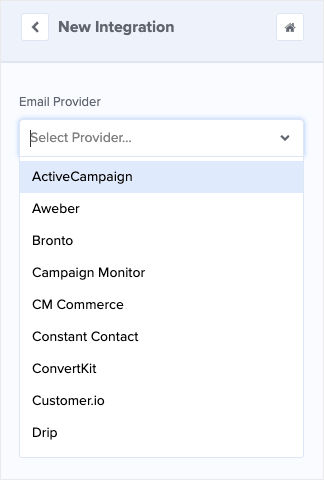
Select your email platform from the dropdown menu.
The final step is to publish your announcement bar.
Step 5: Publish Squarespace Announcement Bar
Adding your OptinMonster announcement bar to your Squarespace site is quick and easy.
All you need to do is add a single embed code to your website.
To start, head over to Publish at the top of your editor.
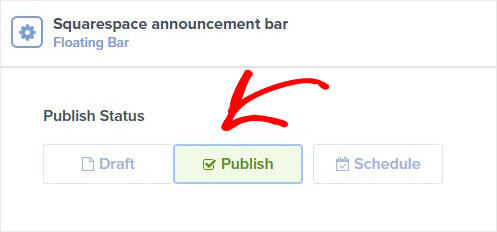
Change the campaign status to Publish.
Copy the embed code at the bottom of the page.
Now, you’ll need to add it to your Squarespace site.
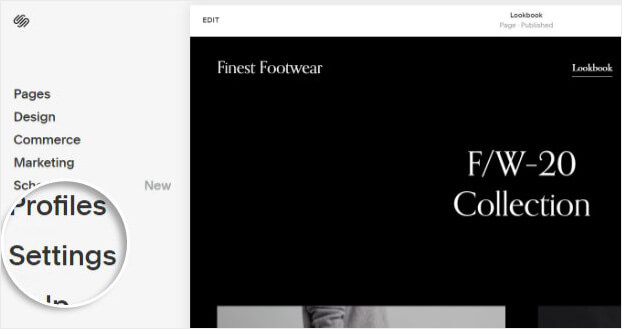
Head over to your Squarespace site.
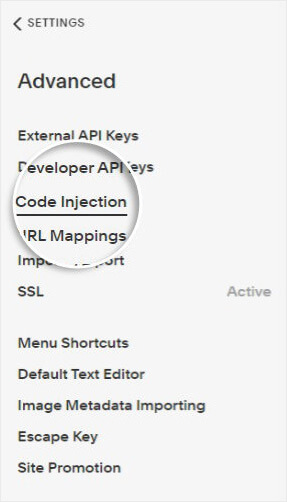
Select Settings.
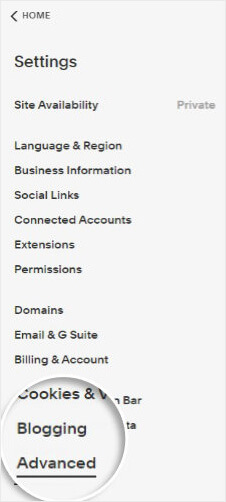
On the next screen, select Advanced.
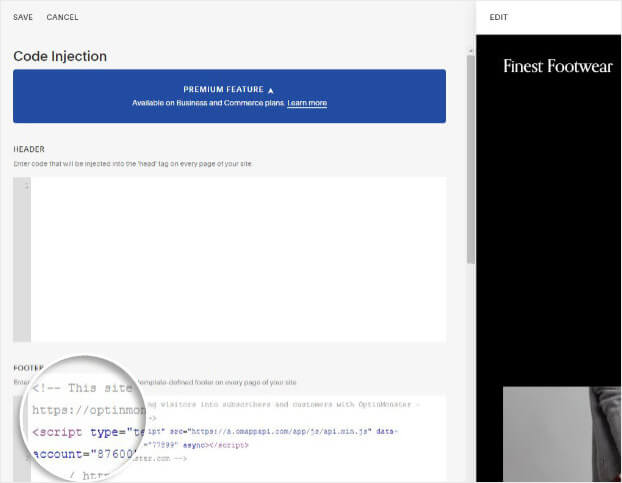
Choose Code Injection on the next page.
Paste the OptinMonster embed code in the footer section.
That’s it. Now, your announcement bar will be shown on your Squarespace website.
- Lead Generation Strategies Proven to Boost Your Reach + FREE ebook
- How to Grow Your Email List: 80+ Proven and Simple Ways
Ready to create a Squarespace announcement bar that converts? Get OptinMonster today.












Add a Comment