Are you running a limited time offer (while supplies last), but you’re not sure the best way to promote it across your site?
Limited time offers build scarcity around your promotion and motivates your audience to take action.
The problem is that your audience has to actually learn about your offer before they can take you up on it.
And that’s where this tutorial comes in. Because, in today’s post, we’ll teach you how to create a limited time offer (while supplies last) campaign.
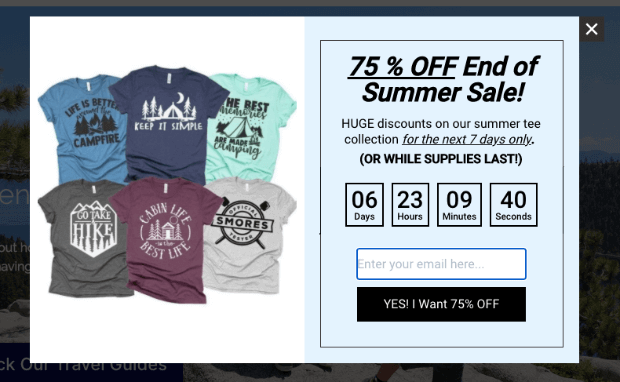
Here’s the example we made for today’s demo:
The best part is that this can be used for both physical and digital products. For digital items, you just won’t need to add “while supplies last” to your popup.
But you’ll have an easy way to create limited time offers for your target audience.
Plus, this popup only took us 10 minutes to create, set up, and publish with ZERO coding required.
Ready to get started? Let’s dive straight into the tutorial.
Making a Limited Time Offer Campaign
For this article, we’ll create our limited time offer with OptinMonster:
OptinMonster is the world’s #1 lead generation toolkit. It comes with everything you need to build high-converting campaigns in a matter of minutes.
That’s because it comes pre-loaded with 50+ templates that look and function great out of the box.
And with a drag and drop builder, making custom changes to your template can be done in just a few clicks.
Plus, as you’ll see, OptinMonster gives you more ways to target users than any other lead generation software on the market.
Some of these targeting rules include things like:
- Exit Intent® Technology: Recover abandoning users as they’re actively leaving your website.
- Geolocation: Boost conversions by targeting visitors based on their physical location.
- OnSite Retargeting®: Keep your audience engaged by showing fresh campaigns to returning users.
- MonsterLinks™: Transform your campaigns into clickable buttons or anchor texts to be used in blog posts, web copy, emails, or any other text-based content.
These are just a few examples of OptinMonster’s powerful targeting rules, though there are many others.
From there, we’ll connect your email service provider (ESP) with OptinMonster.
That way, your new leads go exactly where you need them to, and you can generate more profits from your email marketing strategy.
Ready to follow along? Click below to start your 100% risk-free OptinMonster account today:
We won’t go over all the details on how to connect OptinMonster to your site in this tutorial.
Fortunately, it’s an easy process regardless of what website builder you’re using.
If you need some direction, we highly recommend checking out this helpful resource: How to Add OptinMonster to ANY Website.
And for WordPress users, things are even more simple. You can install and activate OptinMonster just like you would with any other plugin on the WordPress market.
For more guidance, here’s a step-by-step tutorial to get started: How to Install the OptinMonster WordPress Plugin.
Once you’ve gotten OptinMonster hooked up to your site, you’re ready to build your first campaign.
Step 1) Choose Your Campaign Type & Template
First and foremost, you’ll need to determine which type of campaign you want to use for your limited time offer deal.
By “campaign type,” we’re talking about things you’re probably familiar with already, such as:
- Lightbox popups
- Floating bars
- Fullscreen welcome mats
- Slide-in scroll boxes
- And much more…
This variety is important because it allows you to avoid boring your audience with the same type of generic campaign over and over again.
Instead, you can present your limited time offers in new ways to keep users engaged.
Or you can use different campaign types depending on the page or post your audience is looking at. Either way, MORE options mean MORE opportunities for boosting conversions.
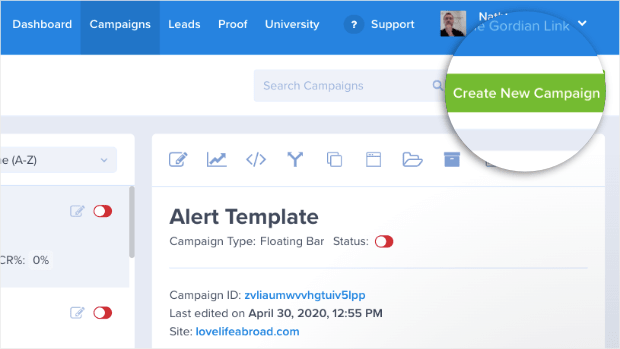
From your OptinMonster dashboard, click Create New Campaign:
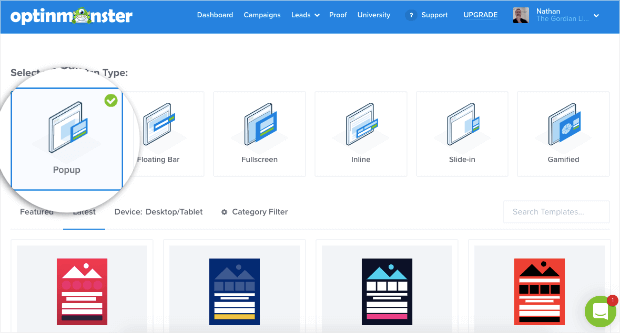
Now you’ll be able to select your campaign type and template.
In today’s tutorial, we’re going to use a Popup campaign:
This is one of the most commonly used campaign types, and it’s a proven method to get people to interact with your limited time offer.
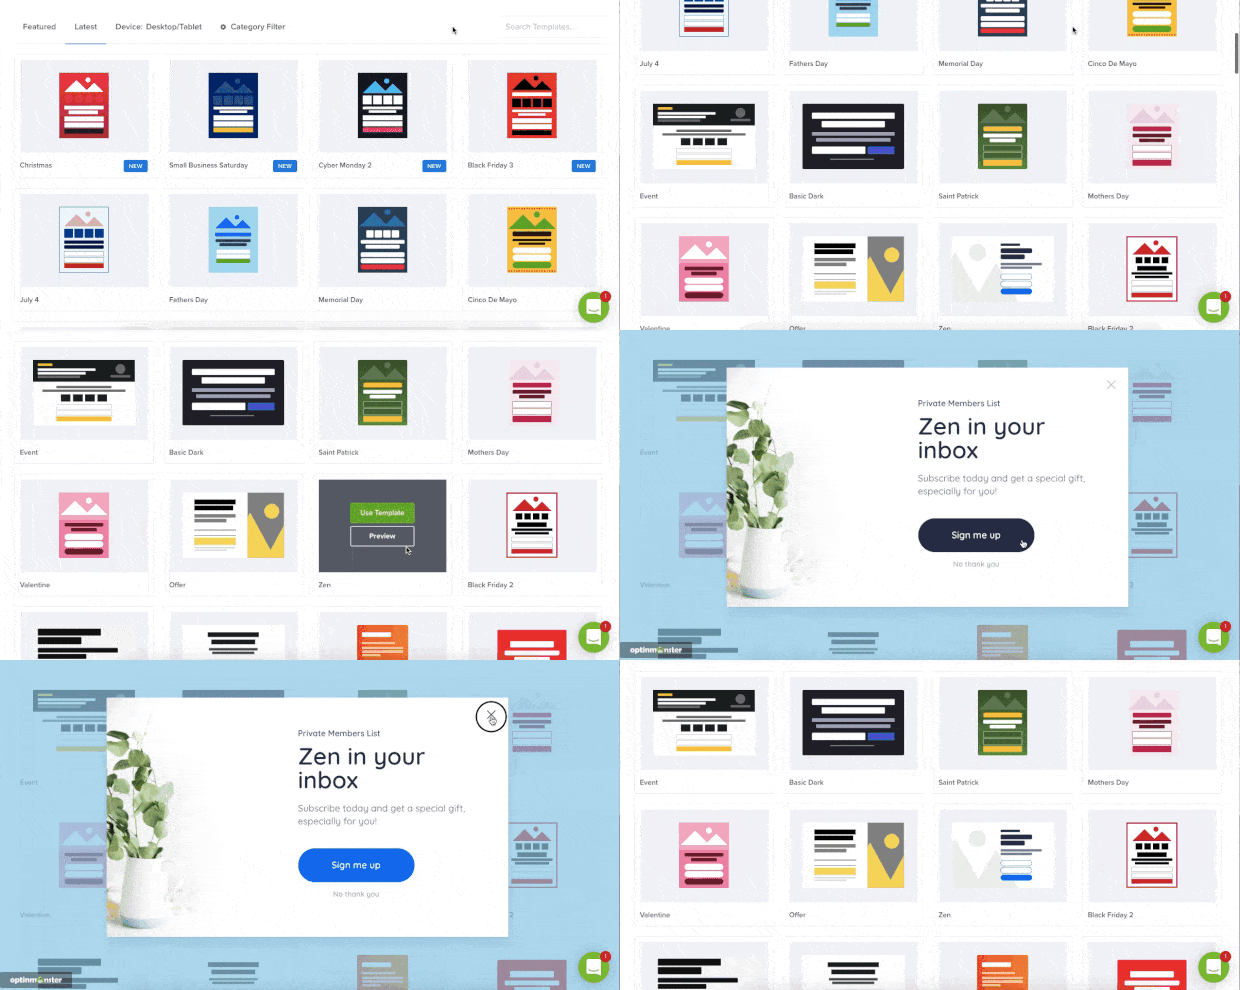
Next, we’ll need to select the template for our limited time offer popup:
OptinMonster has 50+ templates that you can use to get started FAST. All of these templates are mobile-friendly, fully responsive, and function great out of the box.
For today’s tutorial, we’ll use the Shopping template:
This is a great place to get started with eCommerce limited time (while supplies last) offers.
But keep in mind that you can select any template that most closely reflects your brand’s voice, style, and messaging.
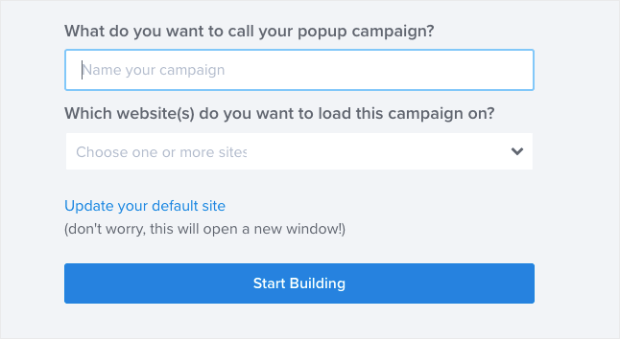
Once you’ve made your selection, you’ll need to name your campaign and click Start Building:
Then you’ll be ready to modify your campaign’s template.
Step 2) Design Your Limited Time Offer Popup
At this point, the template you’ve selected will be in your OptinMonster editor.
This is a codeless drag and drop visual builder, so making your modifications will be EASY.
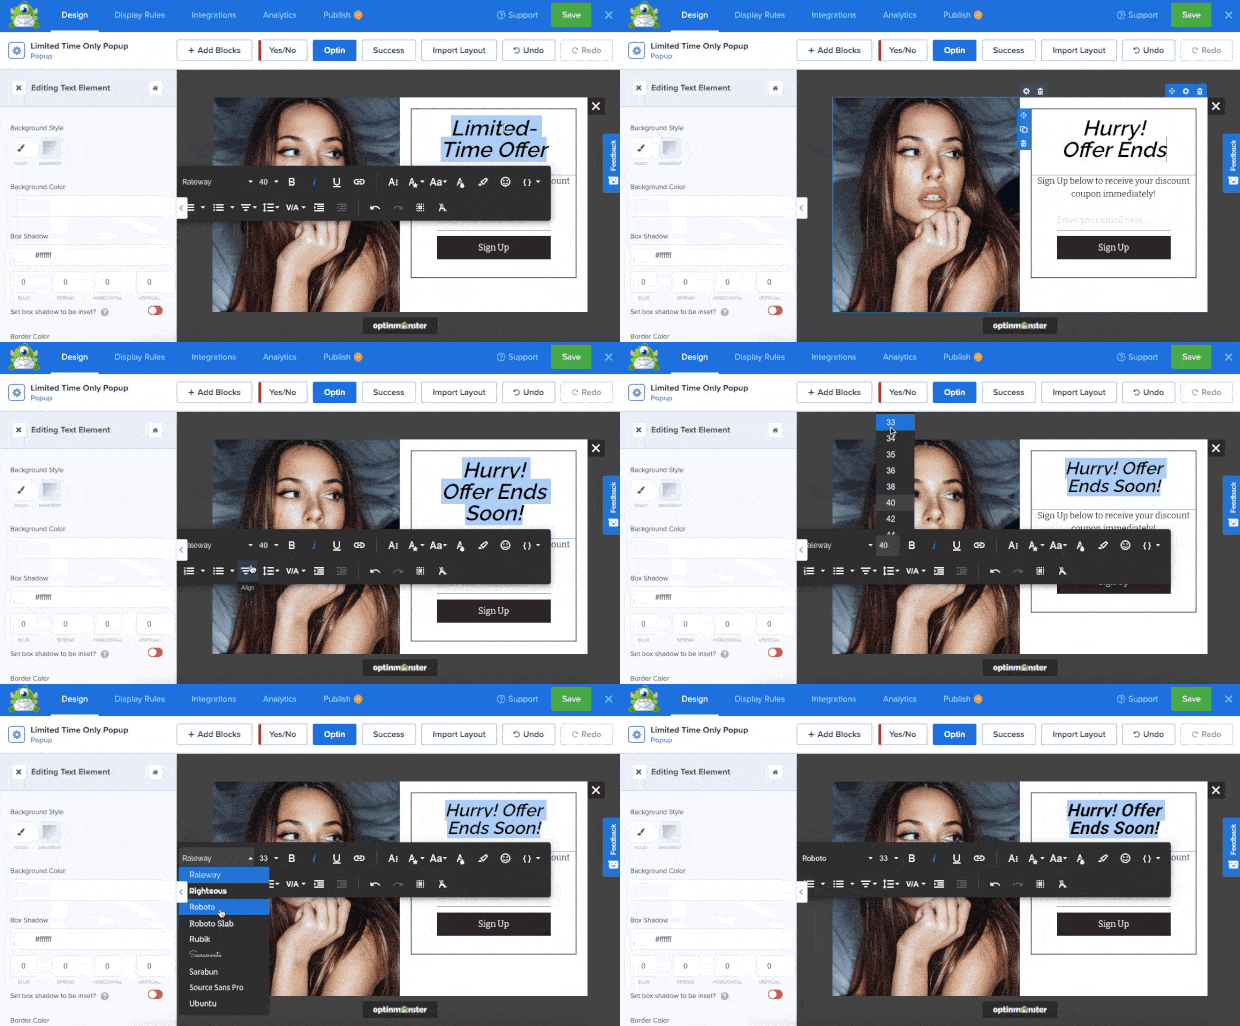
To change the text in your template, for example, you can use the inline editor.
That means you simply highlight any piece of text in your template and make your changes directly in the builder:
And when it comes to creating your limited time offer deals, we highly recommend adding a countdown timer.
Countdown timers are an excellent way to create a sense of urgency around your offer.
As people see the time ticking away toward zero, they’re more likely to take action and engage with your limited time campaign.
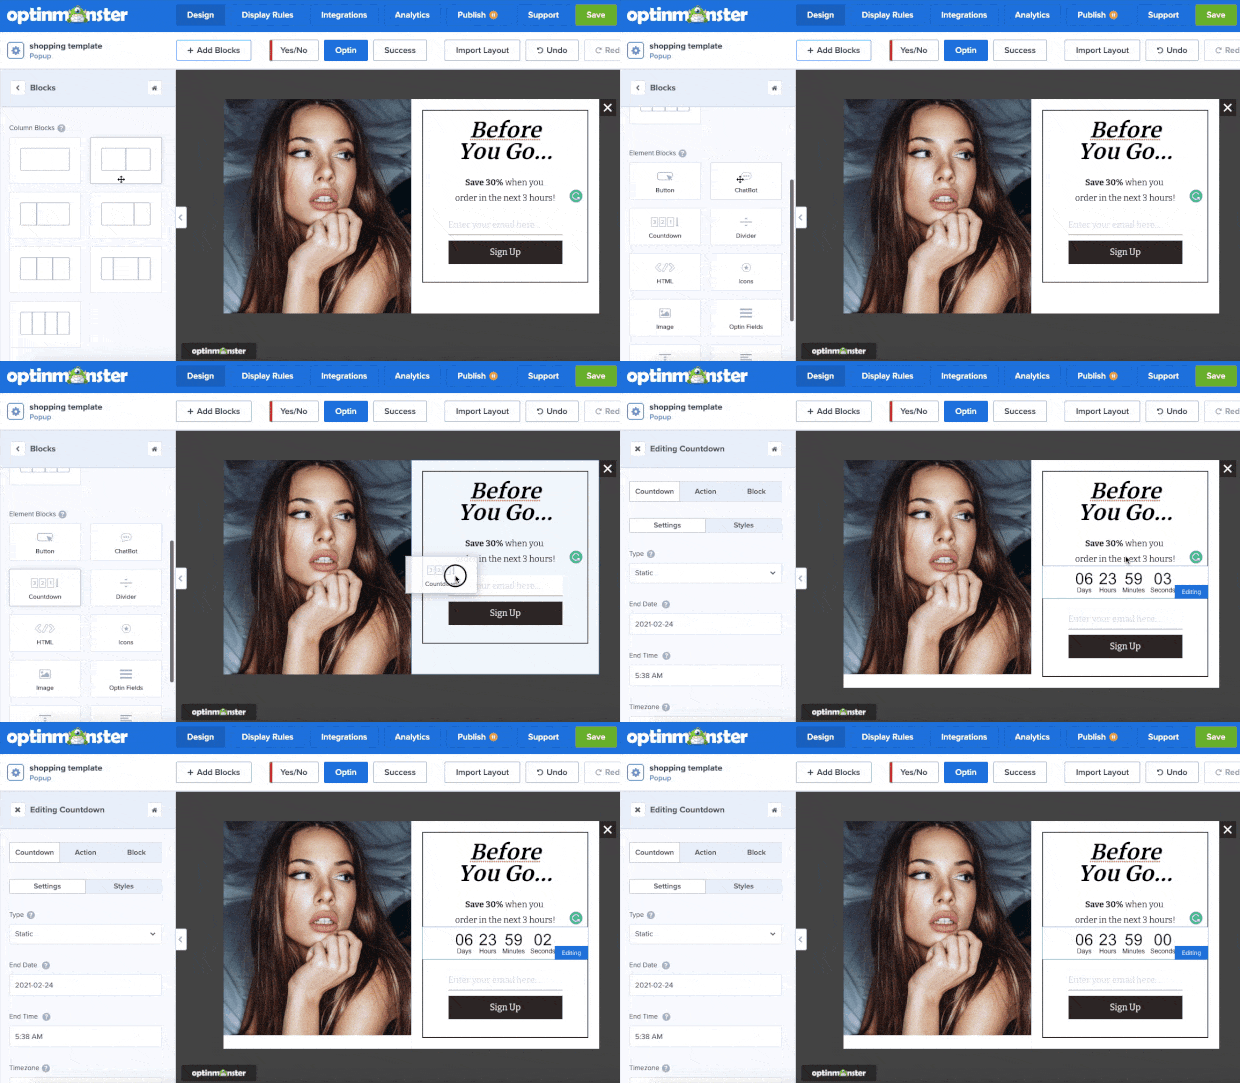
You can add features like countdown timers (and many others) in just a few clicks.
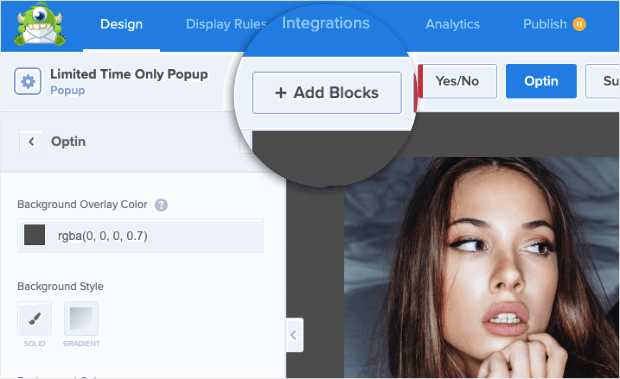
That’s because these features come in Blocks that stack into place on your template. All you need to do is click +Add Block at the top of your editor:
Then find the bock you want to use and drop it where you’d like:
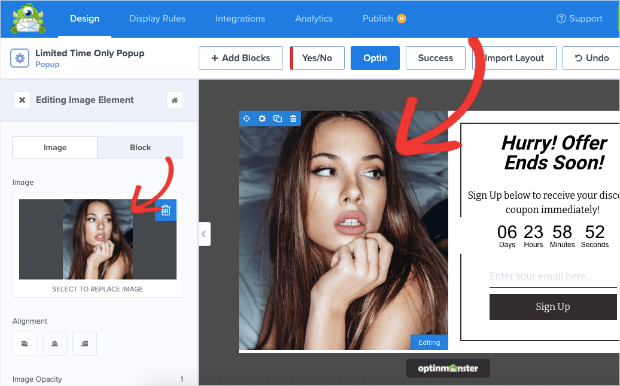
To change other elements of your campaign, like the image for example, you just need to click on it in the builder.
This will pull up the editing tools on the left-hand side:
This gives you 100% control over how your campaign looks, the message it delivers, and how it functions.
These are the kinds of things that make OptinMonster the #1 conversion toolkit on the market.
You don’t need to be a professional designer to build stunning campaigns FAST. Again, here’s what we built for today’s demo:
But creating the campaign is only half the battle. The other half is presenting that offer in the right way.
For that, you’ll need OptinMonster’s powerful targeting rules.
Step 3) Target Your Audience
If you’re serious about getting more people to engage with your limited time offers, then you need to determine when, where, and to whom this campaign appears.
The more personalized you can make your message, the more conversions you can expect.
That’s why you should leverage OptinMonster’s targeting rules to get the best results.
For your limited time offers, most users would be happy with the default rules already in place with your template:
- Time on page is 5 seconds
- Current URL is any page
That’s because you want to get your limited time offers to as many people as possible before the deal ends.
However, in some cases, you might want to use other targeting rules.
We won’t go through all of your options today, but let’s make our limited time offer popup appear on a few specific pages of our website.
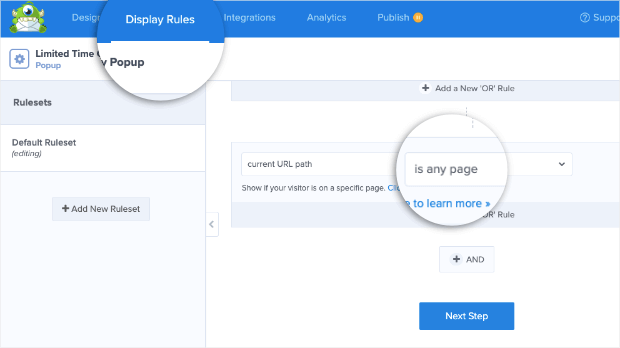
Click on Display Rules from the top menu of your OptinMonster dashboard.
Then click the second box for the second rule, which says, “is any page“:
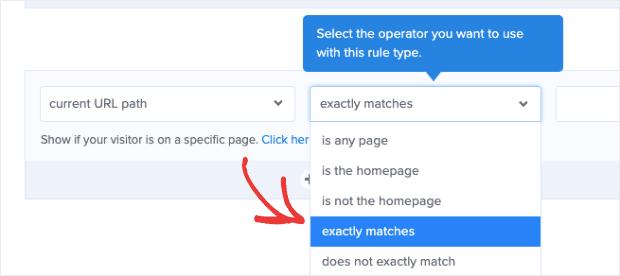
You can now select options to modify the URL paths that will trigger this campaign.
For today, we’ll select exactly matches:
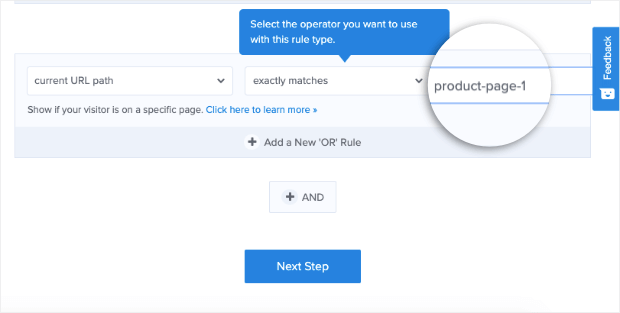
And we’ll add the URL slug (the part of the URL that comes after your root domain) to the empty field box on the right:
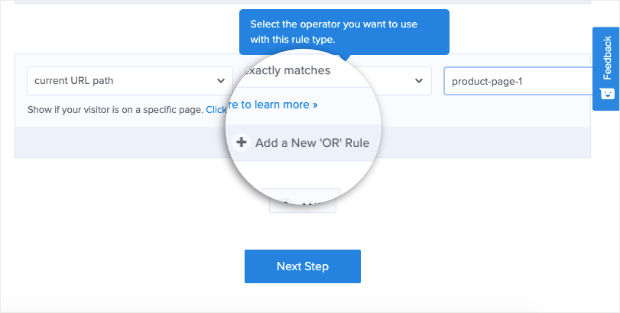
When targeting multiple pages, remember to add pages with the “+ Add a New ‘Or’ Rule button:
That’s because this means people need to be on one page OR the other page for it to trigger.
A common mistake is using an “+ And” rule, but that would require users to be on 2 different pages at once to trigger your campaign.
But with an ‘OR‘ rule, visitors can be on any pre-configured URL to see your limited time offers.
You can also explore OptinMonster’s other targeting rules, like Exit-Intent® Technology, Scroll Depth, OnSite Retargeting®, and more.
Again, the exact rules you choose will depend on your audience, your brand, and your limited time offer.
Once you’ve set this up, we’ll connect your campaign to your email service provider (ESP).
Step 4) Connect Your ESP
One of the best parts about OptinMonster is that it helps automate your email marketing strategy.
That’s because it will send leads directly to your ESP. In fact, you can even create sub-groups (also known as “audience segments“) within your ESP.
Then you can tell OptinMonster which list you want to send new leads to.
Once you’ve created a few automated email series through your email provider, the rest can run on auto-pilot.
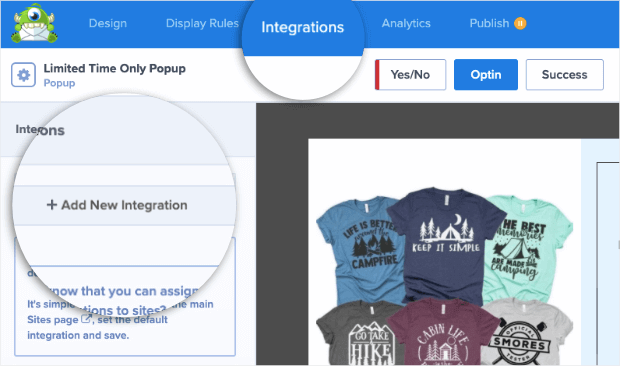
To connect your ESP, click Integrations at the top of your OptinMonster editor.
Then find and click + Add New Leads from the left-hand side menu:
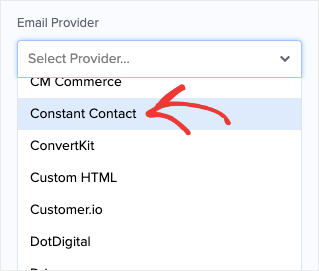
Then select your ESP from the drop-down list:
OptinMonster integrates with the most popular email providers on the market.
In most cases, you’ll simply need to copy and paste the API key found in the account you have with your ESP.
But if you don’t see your email provider listed, that’s not a problem. Check out this helpful tutorial: How to Connect OptinMonster to ANY Email Provider With Webhooks.
When you’ve set up your integration, there’s one step left: publishing your campaign.
Step 5) Publish Your Limited Time Offer Campaign
Head over to the Publish tab in your OptinMonster editor.
You can click the Preview button to see how your campaign looks.
You can also test the campaign on specific URLs. This will ensure that your targeting rules are working properly.
And once you’re finished, you can switch the tab from Draft to Publish. And Save your campaign.
We also recommend WordPress users verify their campaign’s state under OptinMonster » Campaigns from your admin menu:
And that’s it! You’ve now got a limited time offer (while supplies last) campaign that can be used for both digital AND physical goods.
Were you just following along with the theory but now ready to put it into action?
Just click below for your 100% risk-free OptinMonster account today:
We hope you enjoyed this post. If you did, then you’ll definitely want to check out the following resources:
- 11 eCommerce Case Studies You Can Steal from to Drive Sales
- 9 eCommerce Strategies to Drastically Increase Profits
- 21 Best eCommerce Plugins for WordPress
These articles will have even more information on how you can boost sales for your eCommerce store!




Add a Comment