Did you know a lead generation quiz can boost conversions and engagement on your site?
Lead generation quizzes are a neat way of keeping visitors on your site for longer and giving them something fun to do. In some cases, like in health plans, quizzes are needed to assess the user to find the right plan and move them along in their customer journey.
When used right, lead generation quizzes can not only engage an audience but also capture valuable leads to grow your website.
In this guide, we’ll discuss lead generation quizzes, what they are, some classic lead generation examples, lead generation best practices and how to make a lead generation from scratch in 5 easy steps.
- What Is a Lead Generation Quiz?
- Why Do Lead Generation Quiz Perform?
- What Are the Types of Lead Generation Quizzes?
- Lead Generation Quiz Examples
- Lead Generation Quiz Best Practices
- How To Make a Lead Generation Quiz
What Is a Lead Generation Quiz?
A lead generation quiz is interactive content that helps online businesses collect information about their website visitors by asking relevant questions. This type of quiz is designed to engage the audience by asking pre-determined questions about the products or services offered. By answering the questions, the respondents reveal their preferences, needs, and pain points, which can be used to provide them with personalized recommendations and solutions.
Quizzes are an innovative lead generation tool. Because to engage with the quiz, site visitors are typically asked to submit their email addresses. In this simple way, you get to grow your email list, which you can later retarget via email marketing to convert them into paying customers.
Why Do Lead Generation Quiz Perform?
You may already have optin forms on your site that may or may not do well. Adding a lead generation quiz in the mix can increase your average optin rates by 55%!
Quizzes pique curiosity in humans, and we love discovering new things about ourselves or finding the answer to something we don’t know.
They can turn a passive browser into an active participant on your site. But they can do more than that! By adding an optin form to the quiz, you can collect emails by asking the visitor to sign up to:
- Start the quiz
- Reveal the last question
- Get results
- Get more engaging content
Studies show users are far more responsive to calls to action (CTAs) after 6-10 quiz questions. They’re highly engaged at this point, so they’ll be more likely to give you their email address.
Now you know why lead generation quizzes perform, let’s look at the types of quizzes one can use for lead generation.
What Are the Types of Lead Generation Quizzes?
Below are four, but not limited to, different types of lead generation quizzes online business use to grow their email list.
- Personality Quiz: This quiz asks about the user’s personality type or preferences. For example, a fitness company might create a quiz to determine if the user is a morning or evening exerciser and collect their email address to send them personalized workout plans.
- Trivia Quiz: A trivia quiz tests the user’s knowledge of a specific topic, such as pop culture or history. In exchange for their email address, the user may be entered into a prize draw or receive exclusive content related to the topic.
- Survey Quiz: A survey quiz asks users for their opinions on a specific topic or product. For example, an online store may create a quiz asking customers to rate their shopping experience and suggest improvements. The user may receive a discount on their next purchase in exchange for completing the quiz and providing their email address.
- Compatibility Quiz: A compatibility quiz assesses the user’s compatibility with a specific product or service. For example, a dating site might create a quiz to match users with potential partners, collecting email addresses to notify them of their matches.
The key is to make the quiz for lead generation engaging and relevant to the user so that they are motivated to provide their email address in exchange for the quiz results or other incentives.
Lead Generation Quiz Examples
GoPro
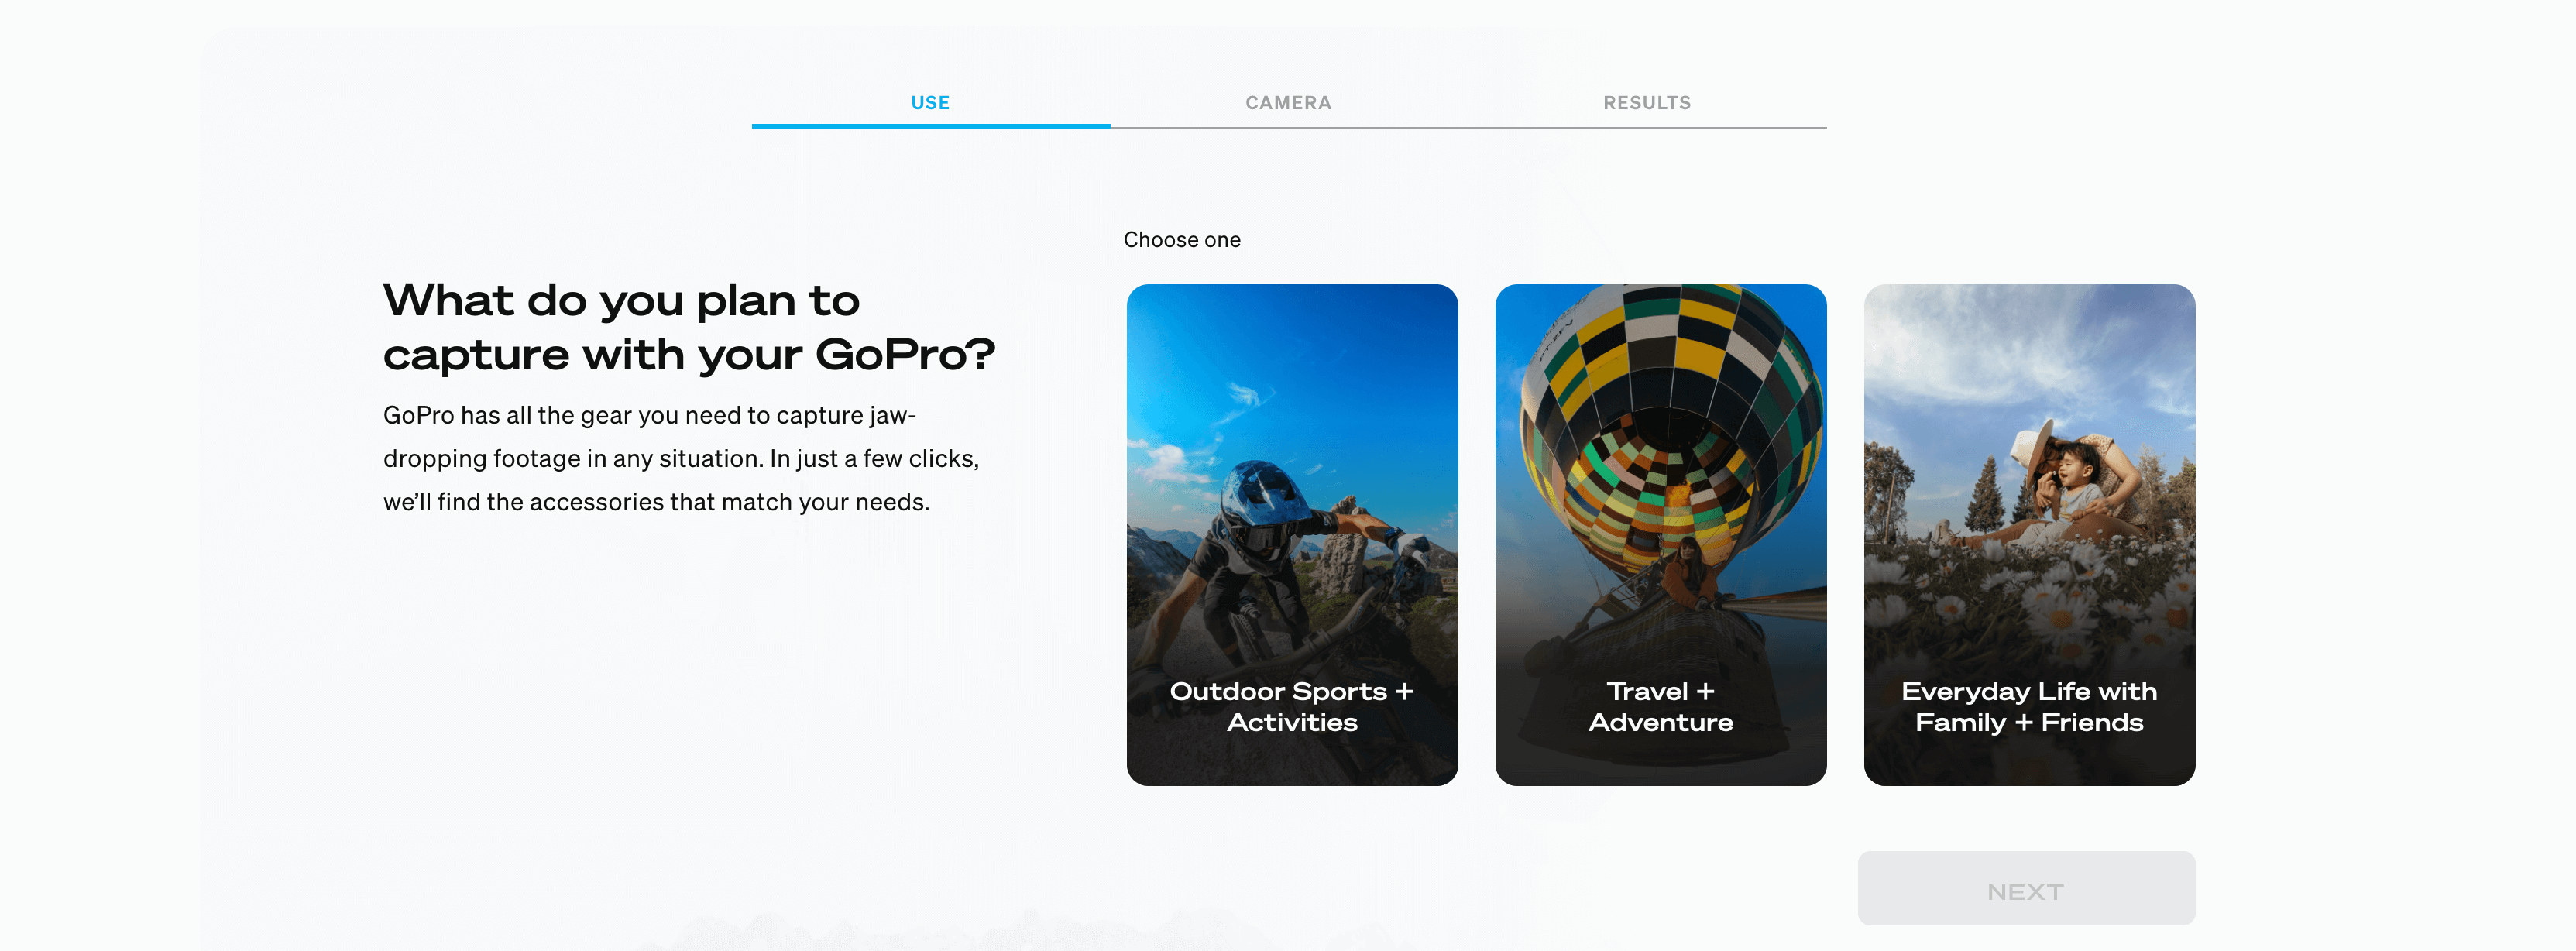
Our first example of a lead generation quiz is from GoPro, a manufacturer of action cameras.
They created a “Personality Quiz” to help users determine which GoPro camera is right for them. The questions revolve around what sporting activities they want to capture and if they already own a model for GoPro.
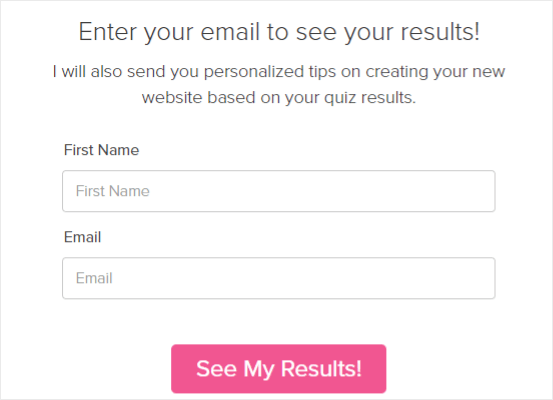
After completing the quiz, users are prompted to enter their email addresses to receive the right products based on their preferences.
Y-OUR Skin
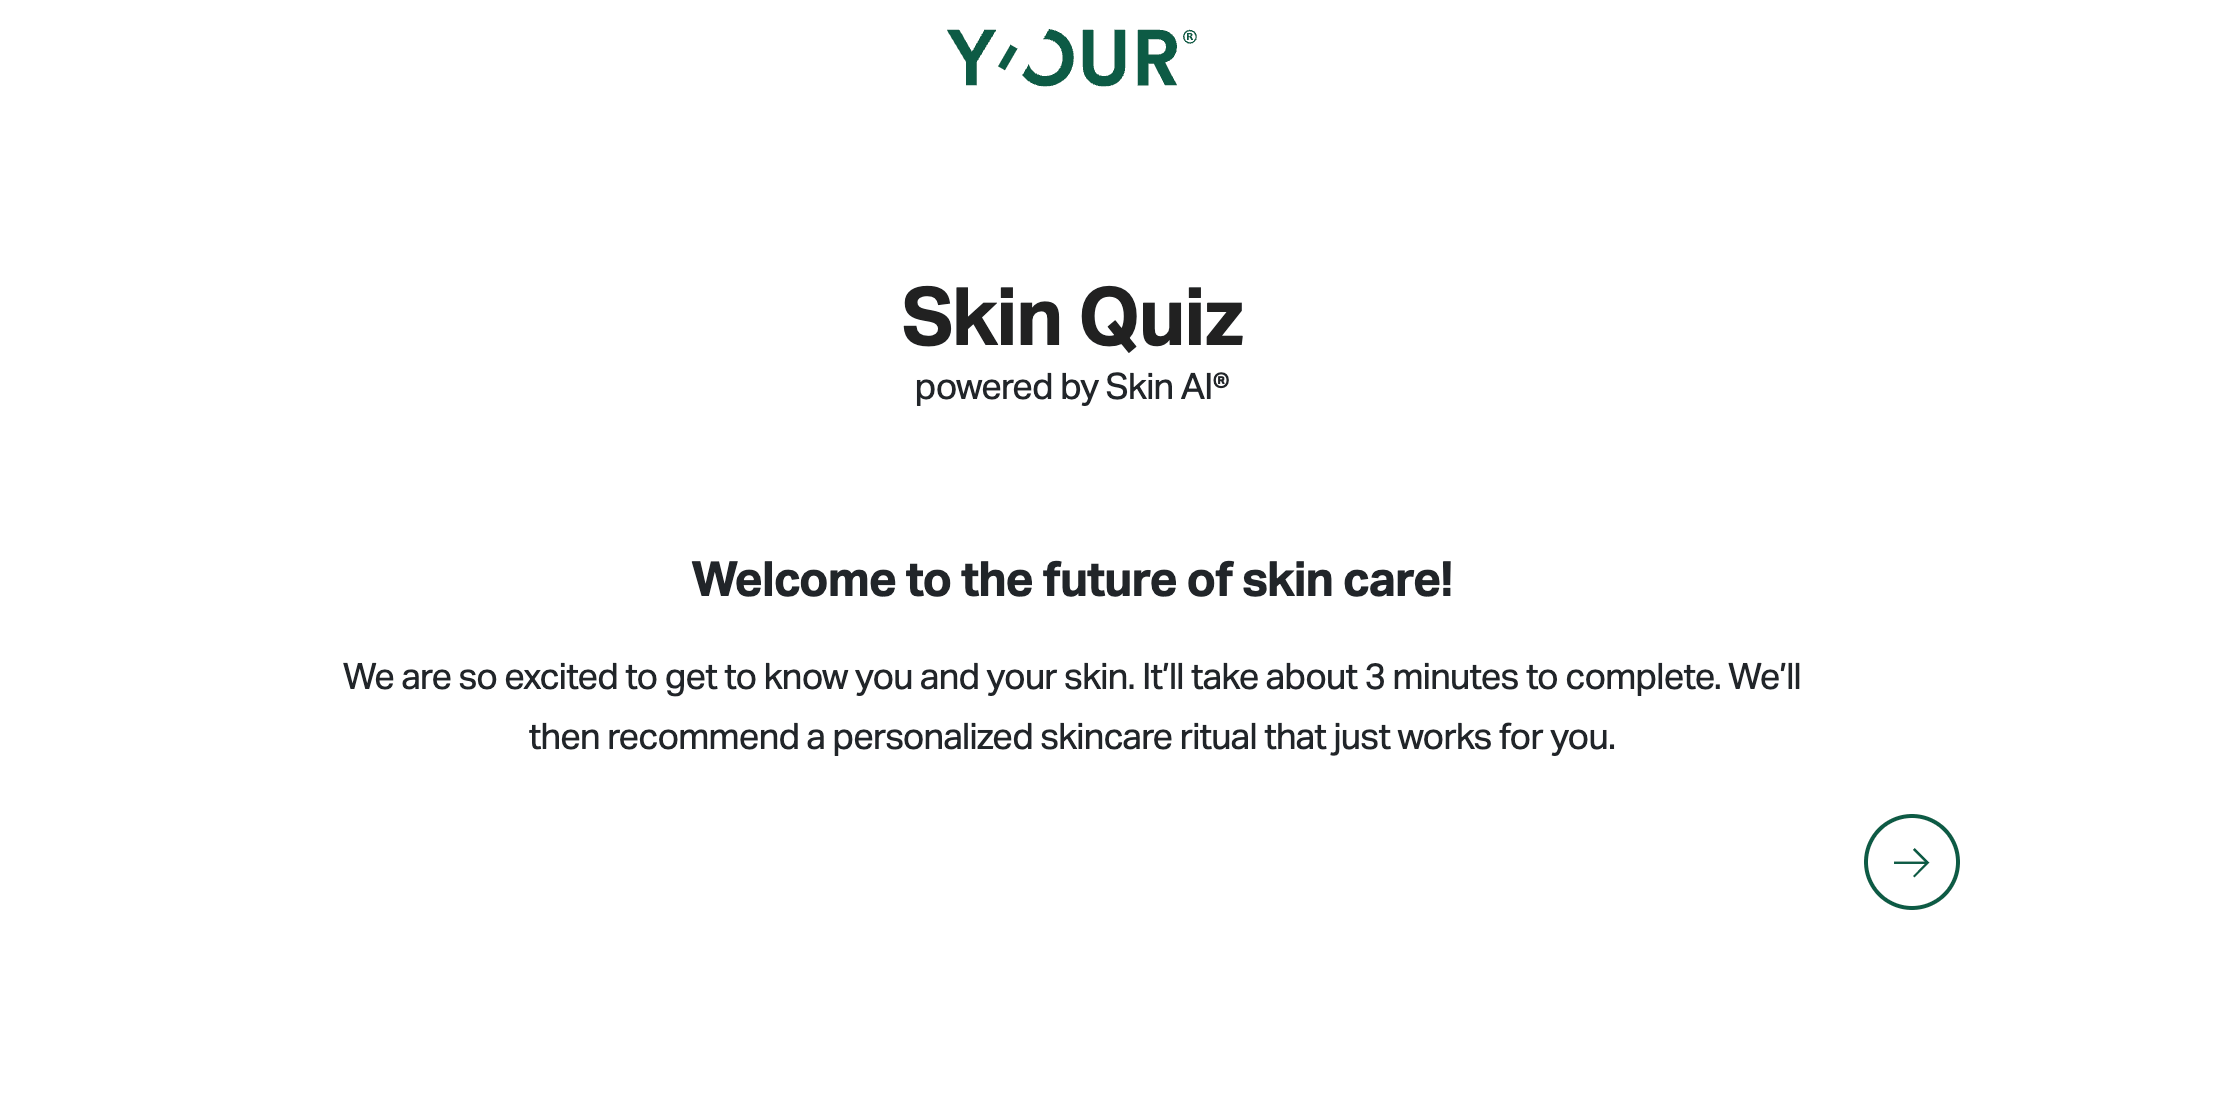
The second on our list for lead generation example is Y-OUR Skin.
They have a bit lengthier quiz, asking questions regarding your goal, biology, behavior, and habitat.
In exchange for the email, users get a custom skin report, product recommendations, and free shipping on any order.
Birchbox
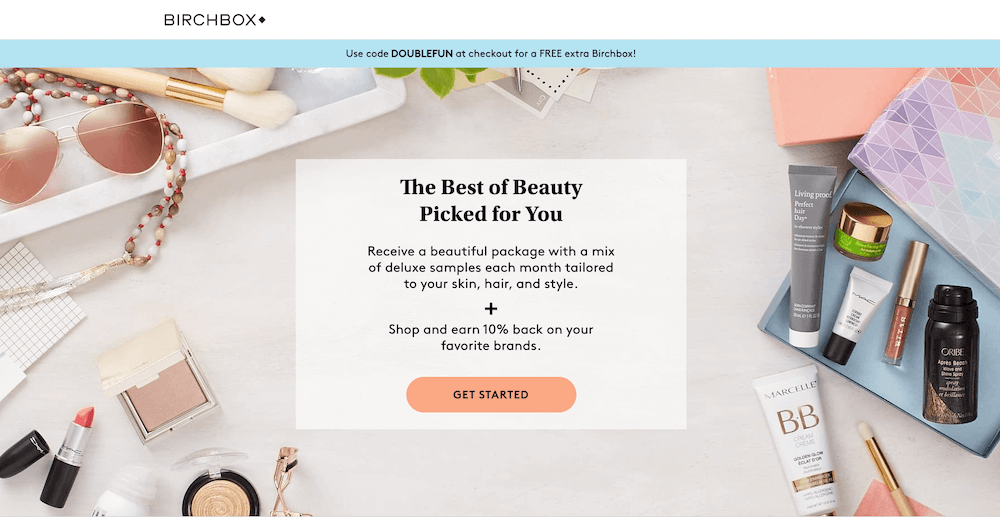
Lastly, we want to mention Birchbox as they are an excellent example for a lead generation quiz.
Birchbox, a service that offers beauty subscriptions, creates a sense of FOMO (fear of missing out) by asking questions about skincare, hair, and personal style preferences in their quiz.
Although an email address is not mandatory to begin the quiz, subscribing is necessary to receive the quiz results.
They recommend the right products for your skin, hair, and style.
Lead Generation Quiz Best Practices
1. Know Your Quiz Questions and Goals
Before you set out to create a quiz, you’ll first want to come up with good ideas that match your brand, industry, and marketing goals.
It would make sense if a health coach created a quiz about an exercise or diet routine. Or if a travel blog had a quiz about the best place for you to travel.
A brainstorming session can go a long way in developing relevant ideas that will attract your target audience.
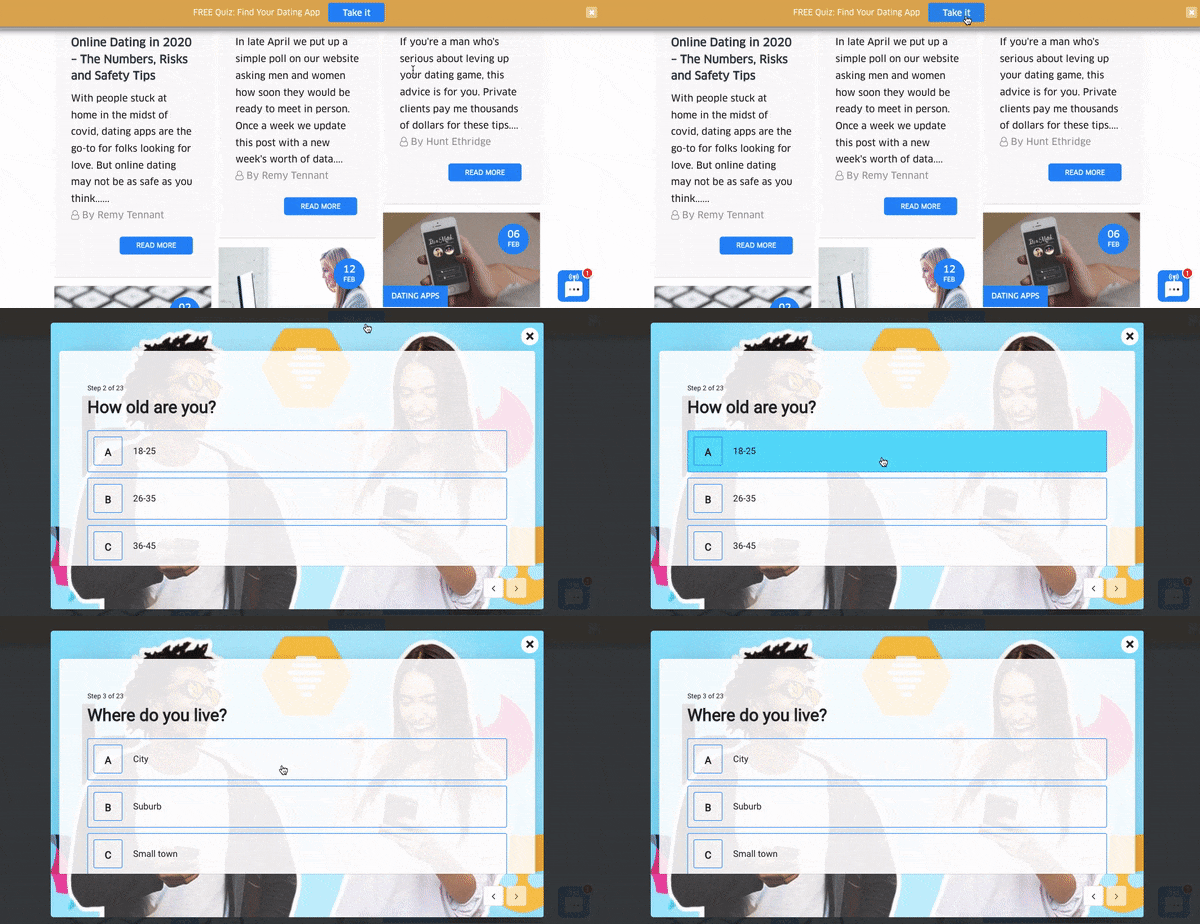
Check out how DateID, a website that verifies online dating profiles, runs a quiz on their blog. They help you find the best dating site based on your quiz answers.
The quiz is displayed in a floating bar, so the reader can take it at any time while browsing the blog.
2. Create a Compelling Title and Copy
Did you know we spend most of the time talking about ourselves and not others? It’s 80% of the time if it’s online!
That statistic plays a big role in the success of your quiz. We love quizzes so much because we want to know more about ourselves.
Once you have your quiz aligned with your target market, you need to come up with a compelling title that will be irresistible to your readers. Your quiz has to be all about them.
For example, “What is July 4th really about?” is very generic. Instead, if you turn it around and make it “How much do you really know about July 4th?” you involve the reader in the question.
Not only is it all about them, but you’ve also created a challenge.
3. Use the Right Quiz Tool
Quizzes don’t have to be fun only for your audience; they can be fun for you too! That’s if you use the right tool.
We recommend two powerful tools here depending on what your needs are:
1. WPForms
WPForms is the best form builder for WordPress, and it comes with an addon to create surveys and polls. You can use this addon to create a customized quiz for your site.
2. UserFeedback
UserFeedback is a WordPress survey plugin that lets you create popup survey forms to gather feedback from your website visitors. It comes with a user-friendly setup wizard and customizable templates for different types of feedback. The plugin integrates with Google Analytics and can be embedded with a shortcode or targeted to specific pages using easy rules.
4. Use the Right Lead Generation Tool
The best targeting tool to maximize your lead gen quiz results is OptinMonster.
OptinMonster is the #1 lead generation tool in the world and it can help you take your quiz to a whole new level.
How?
OptinMonster lets you create stunning lead generation campaigns like popups, floating bars, gamified wheels, slide-ins, and fullscreen mats. You can add your quiz inside these campaigns to entice visitors to take it.
OptinMonster comes with 100+ beautiful templates and a drag and drop builder to create eye-catching campaigns in minutes.
To ensure your leads are qualified, you can capture details about your leads beyond just name and contact information. You can easily include radio buttons, checkboxes, text areas, number fields, dropdowns, and more in your popup lead generation forms.
And the best part? You can do all this with zero coding skills!
Read How to Use Field Mapping to Add Extra Fields to Your Campaign Form.
Would this really help optimize results?
Yes! OptinMonster gives you access to super-powerful targeting rules to display the quiz to visitors when they’re most likely to take action.
For example, you can use OptinMonster’s Exit-Intent® technology to display the quiz to visitors who are just about to leave your site.
This will help you capture abandoning visitors and get them to sign up. So instead of losing visitors, you gain subscribers that you can engage with over email and get them to come back later.
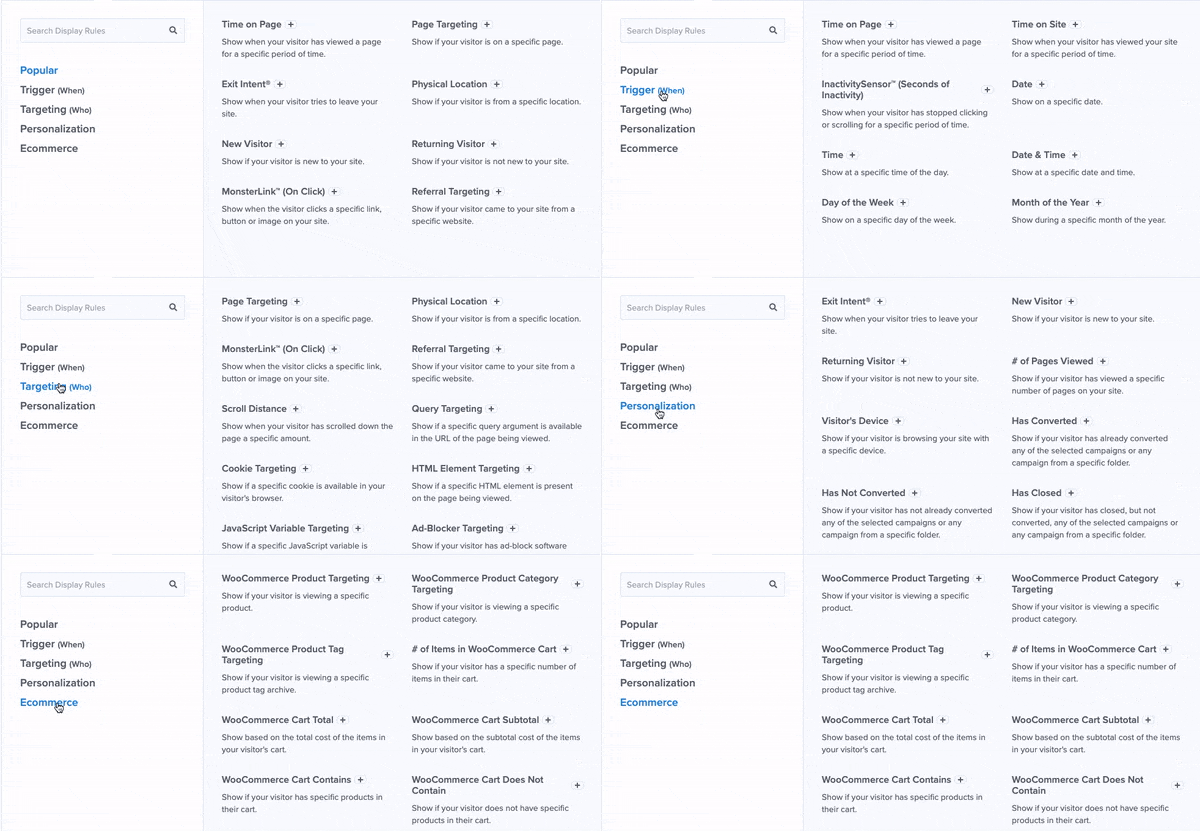
In this way, OptinMonster has tons of display rules that include:
- On click: Make a quiz appear when a user clicks on a button, link, or image on your site
- Page view: Show only if a visitor is on a specific page
- New/Returning visitor: Display based on whether it’s a first-time visit or they have been to your site before
- Physical Location: Interact with a visitor based on their geographical area
- Scroll Depth: Engage with visitors that show interest by scrolling down the page
- Time and Date: Schedule campaigns to appear at a specific time, date, day of the week, and month of the year
- Referral Targeting: Connect with visitors that are coming from specific channels like Facebook or Google
These are just a few examples of OptinMonster’s advanced targeting rules, though there are many others.
Plus, OptinMonster integrates with all popular email service providers including Constant Contact, Mailchimp, AWeber, Brevo (formerly SendinBlue), and ActiveCampaign.
This lets you trigger autoresponder emails when someone submits the quiz.
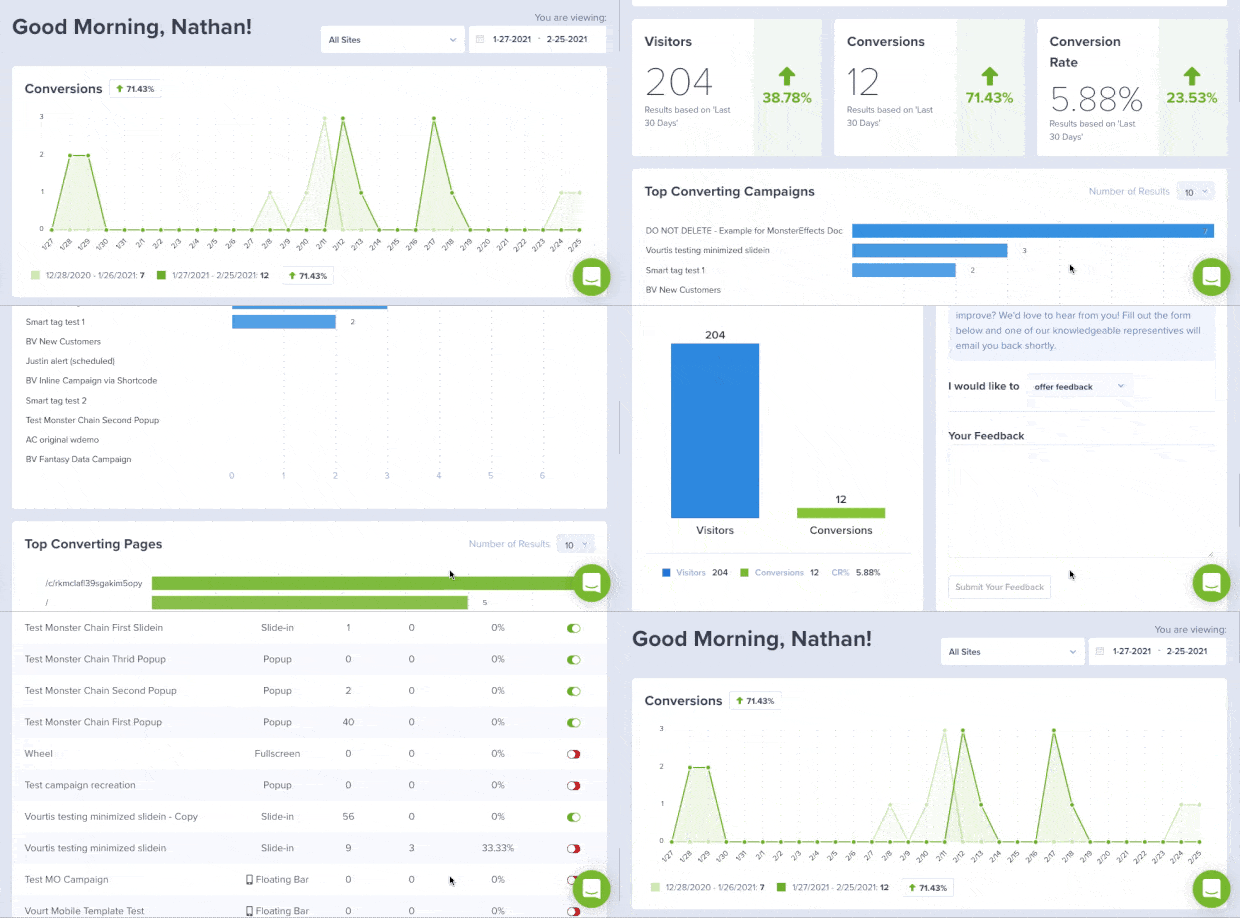
To top it all off, OptinMonster lets you track the performance of your campaigns. That way you can see exactly how many people signed up and converted through your quiz.
If you’re selling a product, you can even see how much money your campaigns make for you.
Not totally convinced? Take a look at how IMSource increased conversions by 6,500% using Optinmonster’s behavioral automation features.
Ready to create your own high-converting quiz campaign? Then sign up for your 100% risk-free account right away by clicking below:
Next, we’ll show you how to create a lead generation quiz with OptinMonster in just 5 simple steps.
How To Make a Lead Generation Quiz
Step 1: Sign up for OptinMonster
The first thing you’ll want to do is sign up for an OptinMonster account.
Then you can sync your website to OptinMonster. OptinMonster works with any website platform including HTML websites.
We have extensive documentation to sync your site in just a few clicks.
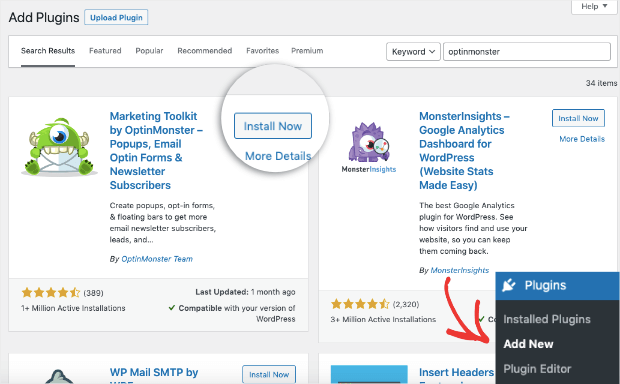
If you’re using WordPress, you can install the OptinMonster plugin on your site.
There are apps available for Shopify and BigCommerce sites, too.
While installing these apps, make sure you’re logged into your OptinMonster account in another tab. OptinMonster will auto-detect your account and sync it to your website app/plugin.
For all other websites, you can go ahead and create your first campaign and we’ll show you how to add it to your website after that.
Step 2: Create an OptinMonster Campaign
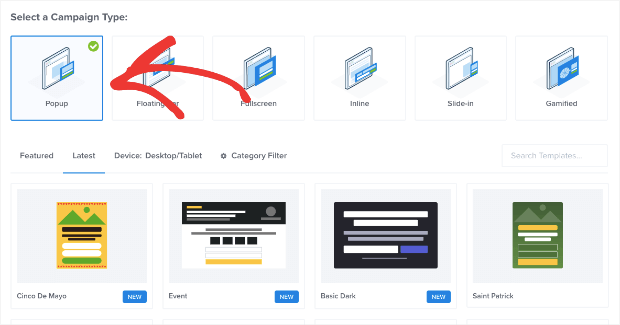
In the OptinMonster dashboard, you can get started by clicking on the Create New Campaign button.
This will open up a page where you can select a campaign type and template. For this tutorial, we’ll show you how to create a quiz popup to generate leads.
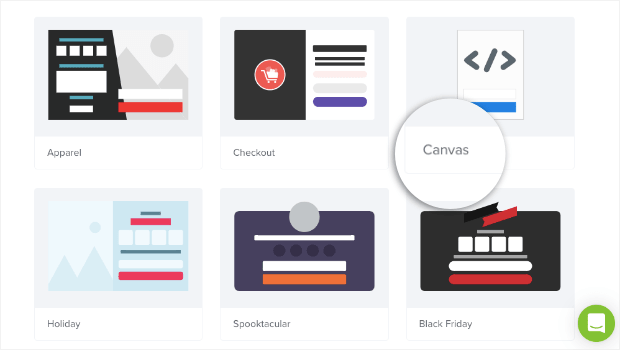
OptinMonster has tons of beautiful templates that you can explore on this page. Today, we’ll use the Canvas template that lets you start from scratch.
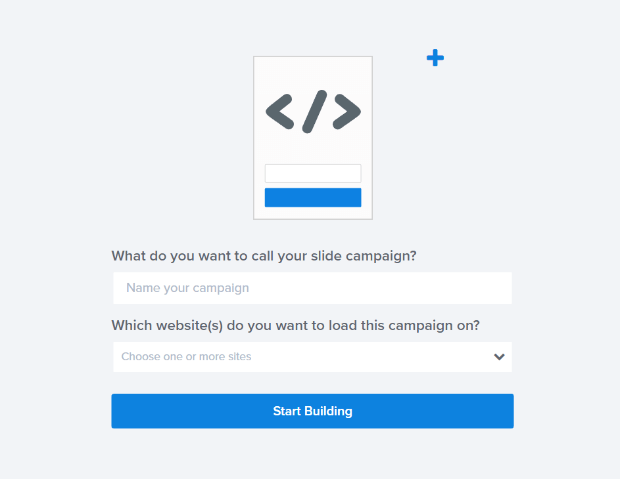
When you select a template, OptinMonster will ask you to add a name for your campaign after which you can click on the Start Building button.
This will take you to the campaign builder where you can embed the form.
Step 3: Add the Quiz to OptinMonster Campaign
Inside the campaign builder, you’ll see a preview of the template on the right and a settings menu on the left.
To embed a quiz inside a popup, you’ll need to use an HTML short code.
Never used a short code before? Don’t worry, it’s just going to be a simple copy and paste.
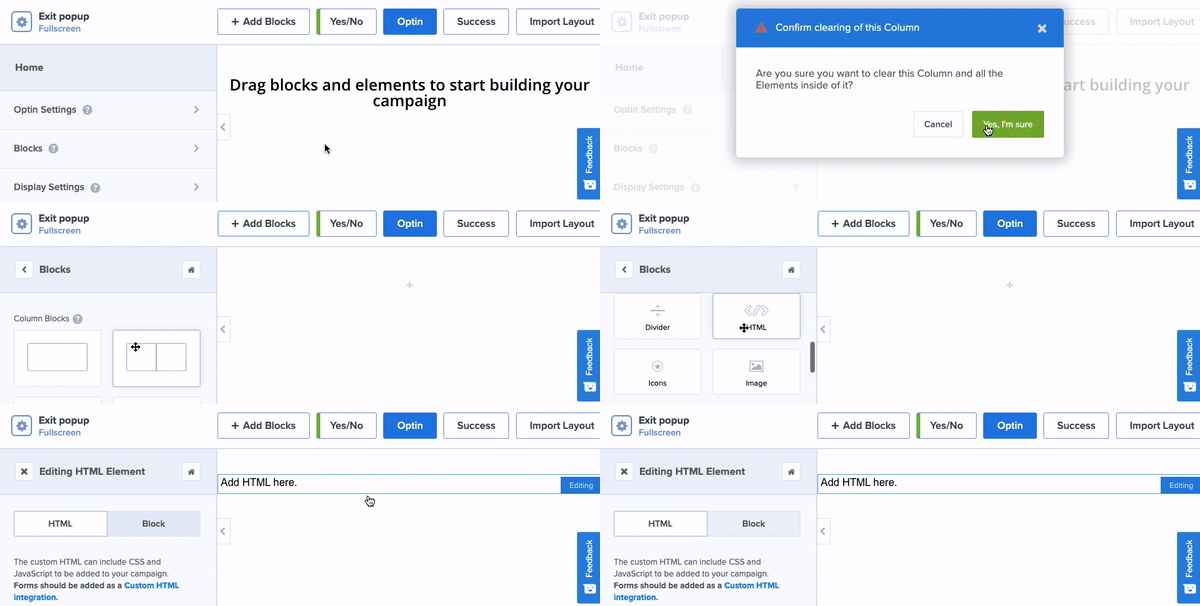
First, you’ll want to remove elements you don’t need using the delete option that appears above every block. Then, select the Add Blocks button and drag and drop an HTML block into the template.
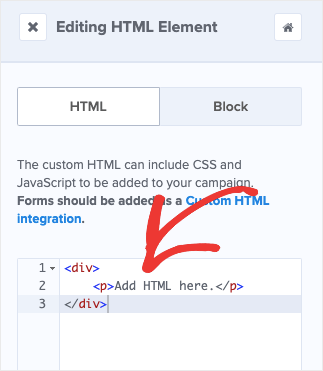
Inside this block, you can paste the short code of your quiz form.
If your using WPForms, head over to your WordPress dashboard. Navigate to WPForms » All Forms tab and you’ll see a short code next to your quiz form like this:
Copy and paste this short code inside the HTML block in OptinMonster.
Using Formidable Forms? That plugin will give you a short code for your form the same way as WPForms.
Almost all form builders have this feature, so you can simply copy-paste it into OptinMonster campaigns and you’re all set!
OptinMonster campaigns are designed to look great, but short codes need a bit of styling to make sure the form appears nicely.
To style the form, we’ve created a snippet of code for you. All you need to it is copy and paste this code inside the OptinMonster builder.
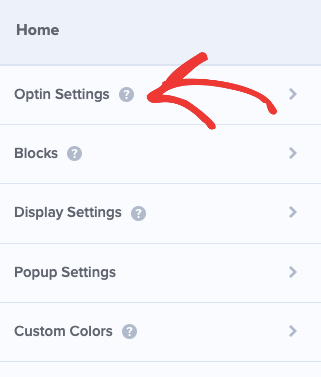
To do this, use the home menu on the left to open the Optin Settings tab.
Scroll down to the Custom JavaScript section, where you’ll see an empty field to enter your own code.
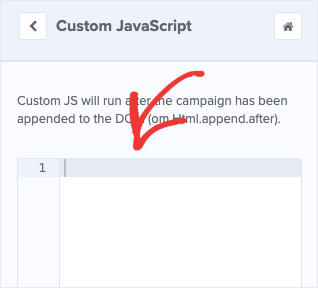
This will add a few styling rules to your quiz popup so your campaign looks much nicer.
This code is enough to style any form in most cases. However, if you’re experienced with Javascript and CSS, you can customize it even further.
Keep in mind that you won’t see a preview of your quiz in the campaign builder just yet. We’ll show you how to view your campaign after we add targeting rules.
Step 4: Add Targeting Rules
Here is the most interesting part about OptinMonster campaigns: the targeting rules will help you skyrocket your leads by getting more people to take the quiz.
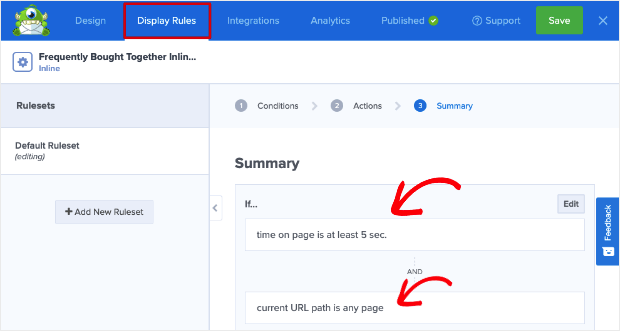
In the campaign builder, open the Display Rules tab, and you’ll see that, by default, your popup quiz will appear to every user who spends at least 5 seconds on a page.
When you edit this rule, OptinMonster will display a list of all the available targeting rules.
They’re neatly categorized so you can find what you’re looking for easily. Plus, each rule has a note about what it is used for so you can quickly figure out which rule you want.
Today, we’ll show you how to display the quiz in 3 different ways:
1. On Exit:
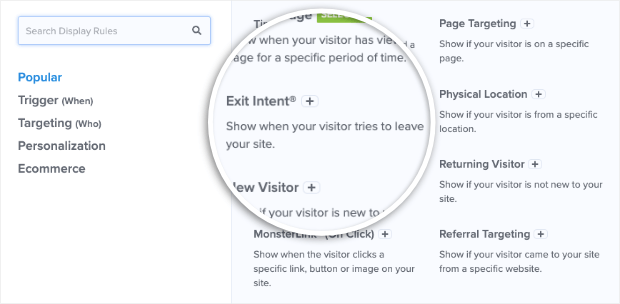
If you want to display the quiz just before a visitor is leaving your site, select the Exit-Intent® rule like so:
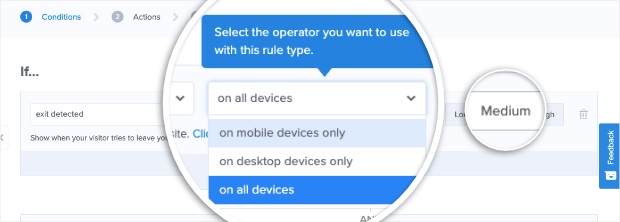
Then back on the Display Rules page, you can decide whether you want it to appear on all devices, mobile-only, or desktop-only.
You can even determine how sensitive you want the detector to be.
We recommend leaving it on medium.
2. On Click:
OptinMonster lets you embed your campaign inside buttons, hyperlinked text, and images. When a user clicks a button, the quiz will appear inside a popup.
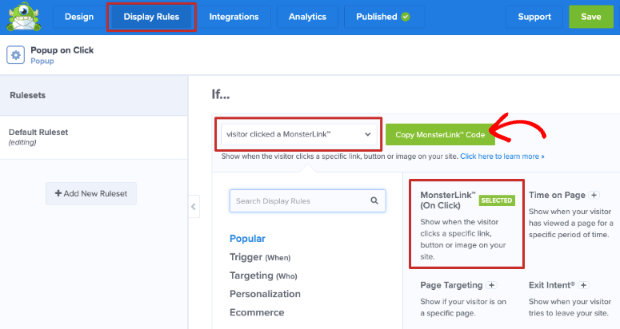
To set this up, select the MonsterLinks™ (On-Click) rule.
Then copy the MonsterLink™ code by clicking on the green button. You can use this code to hyperlink any button, text, or image on your site.
The popup will then appear when you click on it.
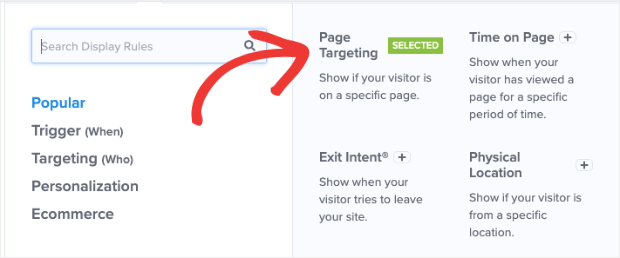
3. Page Targeting:
This rule lets you add the quiz only to specific pages of your site. That way, you can target your audience based on what they’re viewing or interested in.
To filter by page, select the Page Targeting rule:
Then, in the Display Rules page, you can add more rules like ‘exactly matches’, ‘is the homepage’, and ‘contains’ to filter your pages.
For example, if you want to appear on all blog pages, then you can choose the ‘contains’ operator and enter ‘blog’ in the last field.
OptinMonster lets you add multiple rules together, so you can create targeting combinations like display only on blog pages when the visitor is about to exit the page.
This gives you endless possibilities to target your visitors and maximize your conversions.
Step 5: Integrate and Publish Quiz Campaign
Now that you’ve set display rules for your campaign, it’s ready to go live on your site.
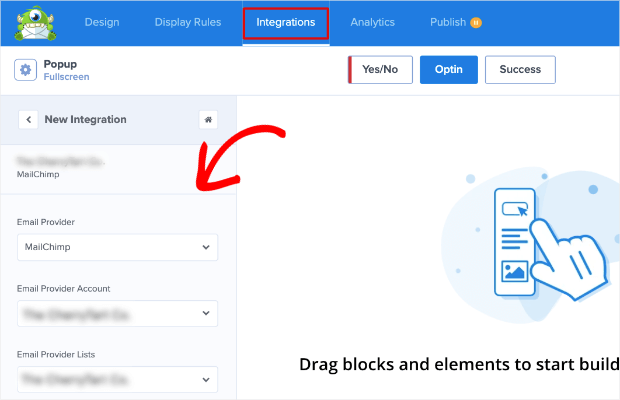
In case you want to add an email integration, you can do that under the ‘Integration’ tab. Simply select your email service provider and follow the onscreen instructions to connect your account.
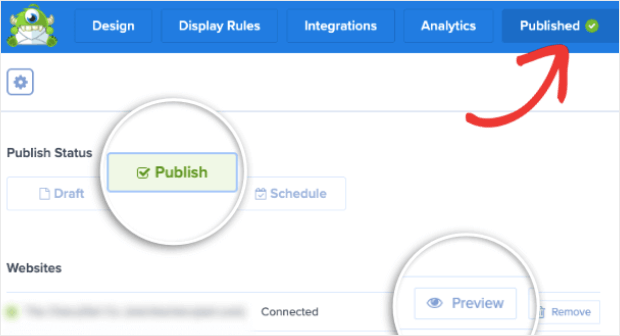
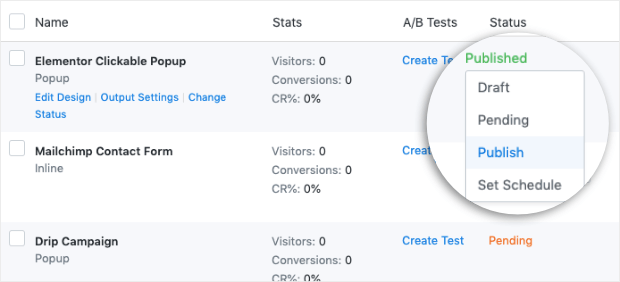
Next, switch to the Publish tab. You can preview a sample of your campaign here and then change the status to ‘Publish’ to make it live.
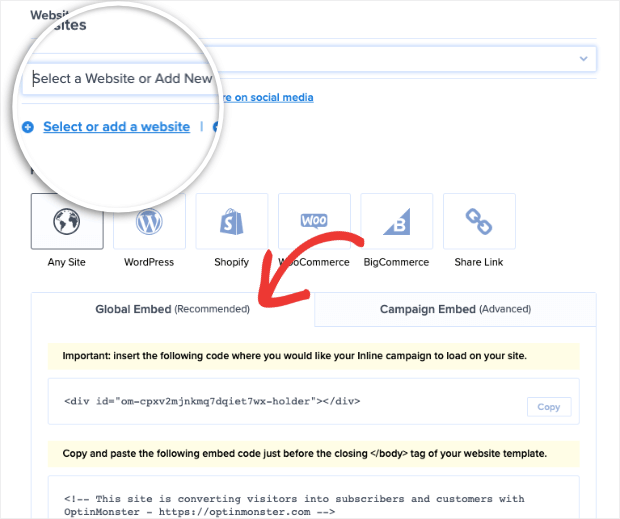
In case you haven’t connected your OptinMonster account to your website yet, you’ll find onscreen instructions to do so on this page.
For more help on that, OptinMonster has plenty of documentation you can follow. Check out the following detailed guide: How to Add OptinMonster to Any Website.
And there’s one last thing…
Since we’re working with short codes, we recommend exiting the campaign builder and reloading the OptinMonster dashboard. You can also clear your browser cache to make sure the latest changes are reflected on your site.
If you’re using WordPress, head over to your WordPress dashboard and navigate to the OptinMonster » Campaigns tab and make sure the status is set to ‘Published’ here.
With that, your quiz will appear in a targeted popup. You’ve now learned to display your quiz at the right time to the right people to maximize your lead generation.
Want to see how OptinMonster works on a real site? Check out how DowntownOrlando.com adds over 4k subscribers each year using OptinMonster.
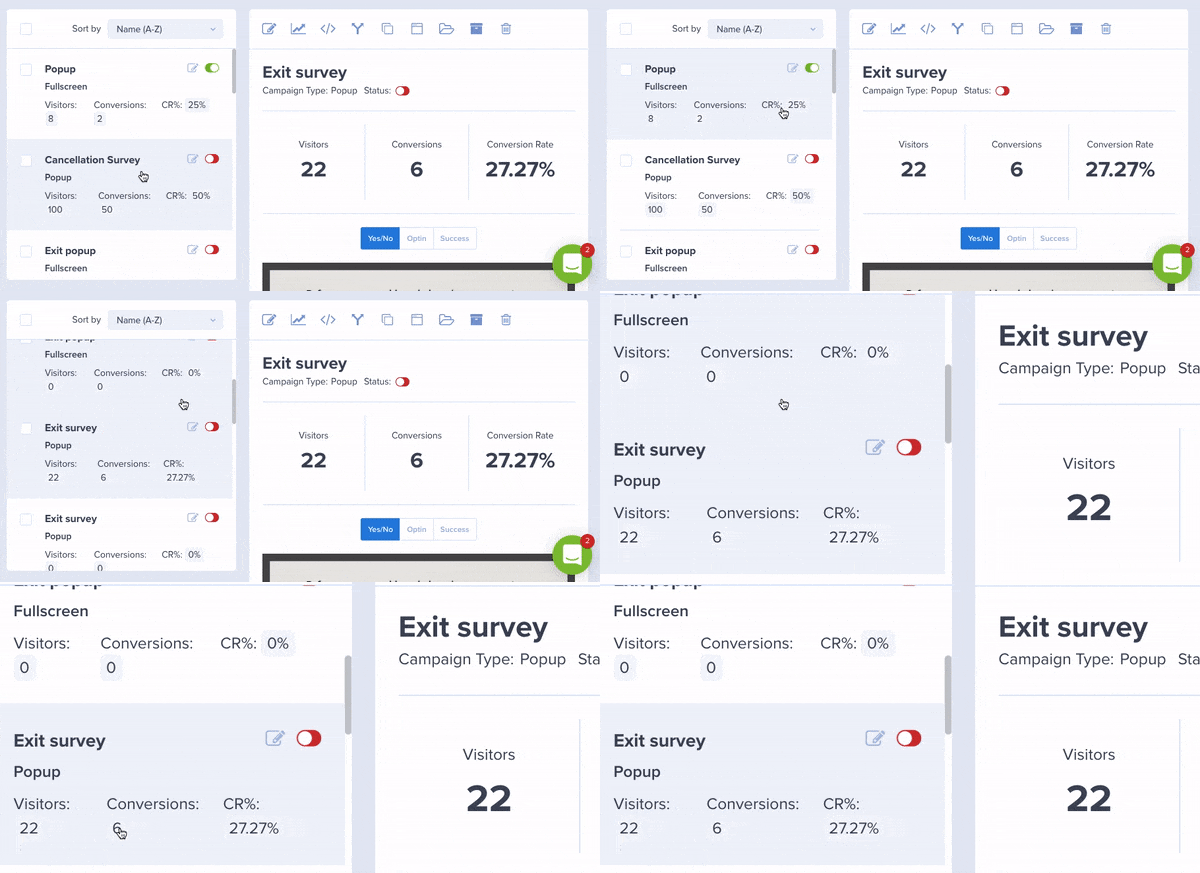
Once your quiz campaign gets some engagement, you can see how many people saw it and how many converted.
And remember, if you’re selling a product, you can even connect OptinMonster to Google Analytics in a few clicks. Then you can see more statistics including how much money your popups are making for you.
Ready to join OptinMonster? Get your 100% risk-free OptinMonster account now by clicking below:
We hope you found this guide helpful in creating a high-converting lead generation quiz for your site that actually grows your conversions.









Add a Comment