Do you want an easy way to connect your WordPress site to ActiveCampaign?
ActiveCampaign is a powerful platform that lets you automate your entire customer experience. This includes getting people to sign up, sending automated emails, and generating sales.
ActiveCampaign has a native WordPress integration, but it is extremely limited in features and functionality.
So today, we’re going to show you the easiest way to connect your ActiveCampaign account with WordPress that lets you make the most out of both platforms.
Let’s get started.
BEST Way to Integrate ActiveCampaign and WordPress
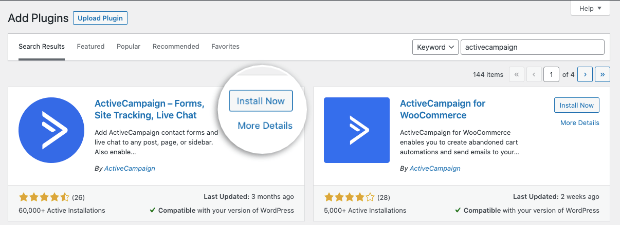
ActiveCampaign has a connector plugin available in the WordPress repository that you can install on your site.
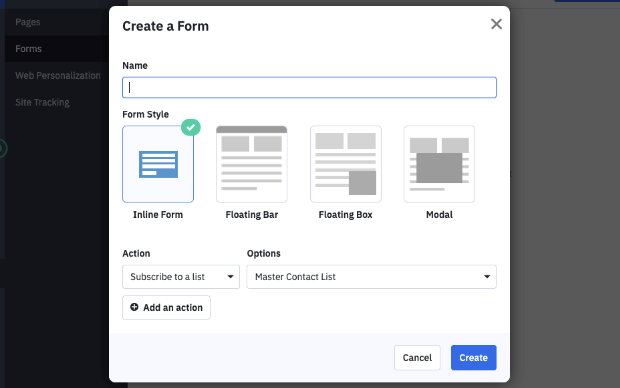
ActiveCampaign will give you an API URL and API key to connect your account. Then you can create signup forms in ActiveCampaign and add them to your WordPress pages and posts.
ActiveCampaign has a forms block inside the Gutenberg editor. For all other instances, you’ll need to copy/paste a shortcode or embed a link each time you want to add a form.
But the downside is that there are no options to target visitors and incentivize them to signup.
That’s because ActiveCampaign is primarily an email service provider (ESP) and not a lead generation software. They’re very different products that lead to very different results.
While ActiveCampaign is an excellent option as an ESP, it may not get as many new leads as you’d like.
If you really want to grow your email subscriber list, you need to use a powerful integration that connects ActiveCampaign with WordPress.
That’s where OptinMonster steps on the scene.
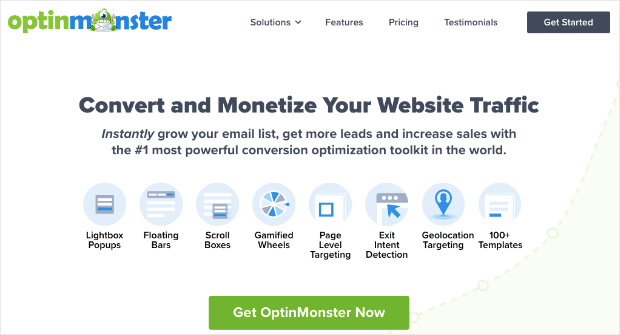
OptinMonster lets you create high-converting campaigns for your WordPress site that are synced with ActiveCampaign. This means you can grow your email list at incredible rates!
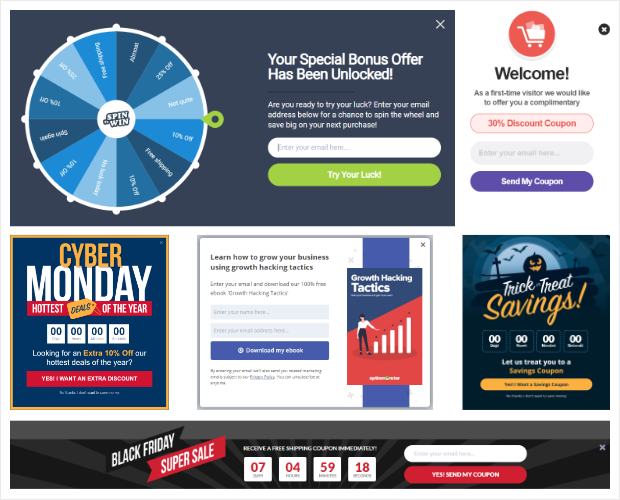
OptinMonster is a premium WordPress plugin that lets you maximize your leads and conversions. You can create all sorts of lead generation campaigns like popups, floating bars, slide-ins, inline forms, and more.
Our setup is incredibly easy and you can connect to ActiveCampaign in just a few clicks.
Then all your new leads will automatically get sent to your ActiveCampaign account, so you can continue their user journey with automated triggers.
Plus, you can tag your leads so your contact list is organized right from the start.
OptinMonster lets you segment leads according to what they signed up for, such as your webinar, email newsletter, discounts, and more.
This means you can send autoresponder emails from ActiveCampaign that are relevant to what the subscriber is interested in.
Once you sign up for OptinMonster, you’ll get access to 50+ beautiful templates that are fully customizable using the drag and drop builder.
ActiveCampaign lets you trigger actions that will take place after a person signs up, such as sending a message and adding them to a deal.
But there are no options to trigger the signup campaign itself, so you won’t be able to target visitors at the right time and place to optimize conversions.
This is where the OptinMonster integration really stands out. There are tons of display rules and campaign triggers to target visitors at the right time.
Using OptinMonster’s display rules, you can show campaigns to visitors based on:
- where they are located geographically
- how much time they spend on your site
- what pages and products they show interest in
- whether they are a new or returning visitors
- whether they are about to leave your site
These are just to name a few, but there are many rules that help you target your visitors at the perfect time and place when they are most likely to sign up.
This means you can maximize the number of registrations, subscriptions, or sales you get.
In case you’re worried about form spam, OptinMonster comes with built-in honeypot spam protection.
It also has an add-on tool called TruLead® to verify every user that signs up. So you’ll collect only genuine email addresses and all spam and bot entries will automatically be blocked.
And the best part about OptinMonster? There are ZERO coding skills needed.
You can create targeted campaigns, integrate with your email service provider, and publish them on your site all with a few button clicks.
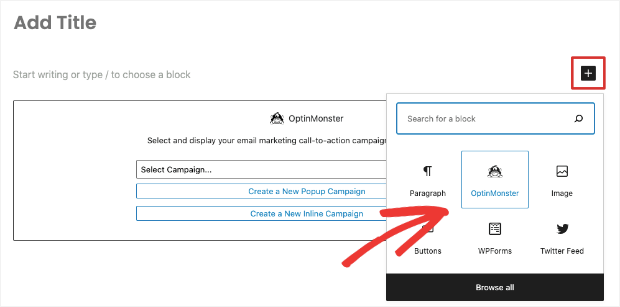
And if you want to add OptinMonster inline forms to pages, posts, and sidebars, there’s a readymade widget available in WordPress. You simply need to select it, choose your form, and save!
Want to see how OptinMonster performs when it’s live in action? Check out how FitSmallBusiness increased conversions by 1900% using targeted offers.
They use an ActiveCampaign integration as well.
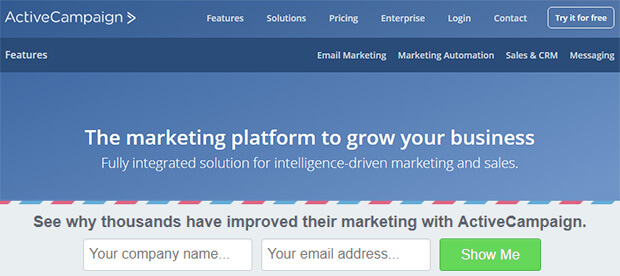
And, as a matter of fact, ActiveCampaign uses OptinMonster on their own site. They’ve been very successful and add roughly 800 free trials each month with just one optin bar.
You may have even signed up for ActiveCampaign through an OptinMonster campaign without knowing it!
Ready to seamlessly connect WordPress to ActiveCampaign? Then sign up for your 100% risk-free OptinMonster account below:
Integrating ActiveCampaign & WordPress
Step 1: Install and Activate OptinMonster
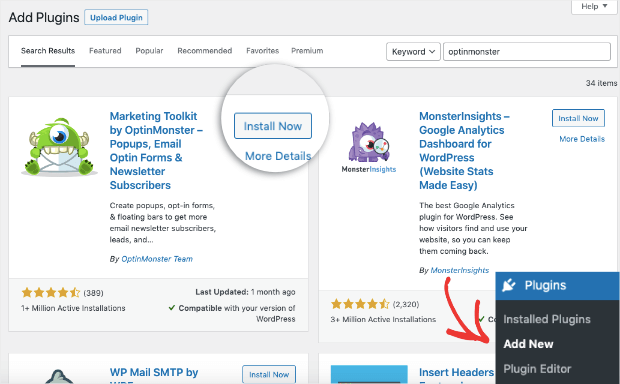
OptinMonster is really simple to set up. First, you’ll want to install the OptinMonster plugin on your WordPress site.
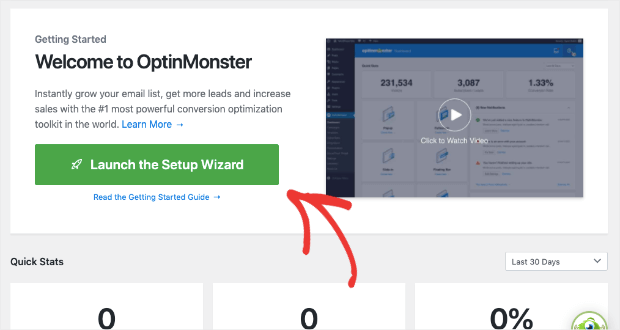
Once activated, access the OptinMonster page from your WordPress menu and launch the setup wizard.
Then follow the onscreen instructions to upgrade your account and, once you’ve finished, you’re ready to create your first campaign with OptinMonster.
Need a little more help? Check out this resource on How to Connect OptinMonster to WordPress.
Step 2: Create a New Campaign
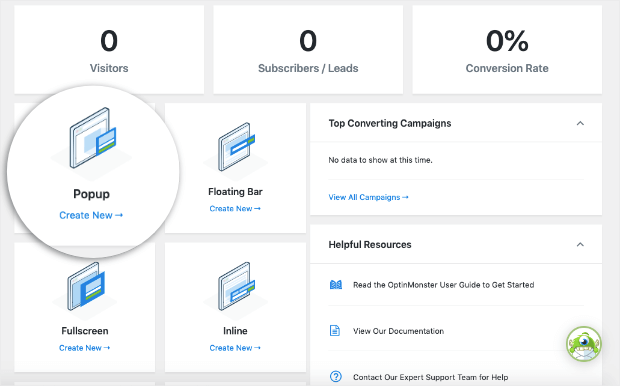
On the OptinMonster page in your WordPress dashboard, you’ll see that you can create all sorts of campaigns like popups, floating bars, inline forms, and slide-ins.
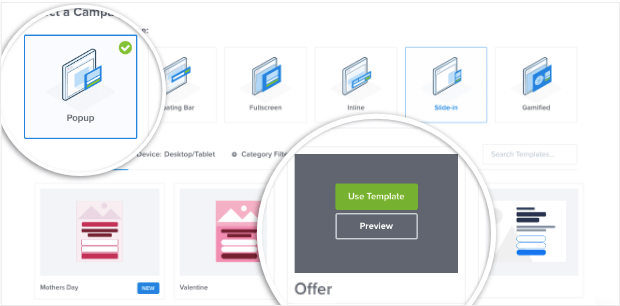
For this tutorial, we’ll select popup but feel free any other campaign type. The following steps will remain the same.
On the next page, you’ll see all the templates available. You can preview these templates and select the one you like.
OptinMonster will then ask you to give your campaign a name, after which you can enter the campaign builder to customize the template.
Step 3: Customizing an OptinMonster Campaign
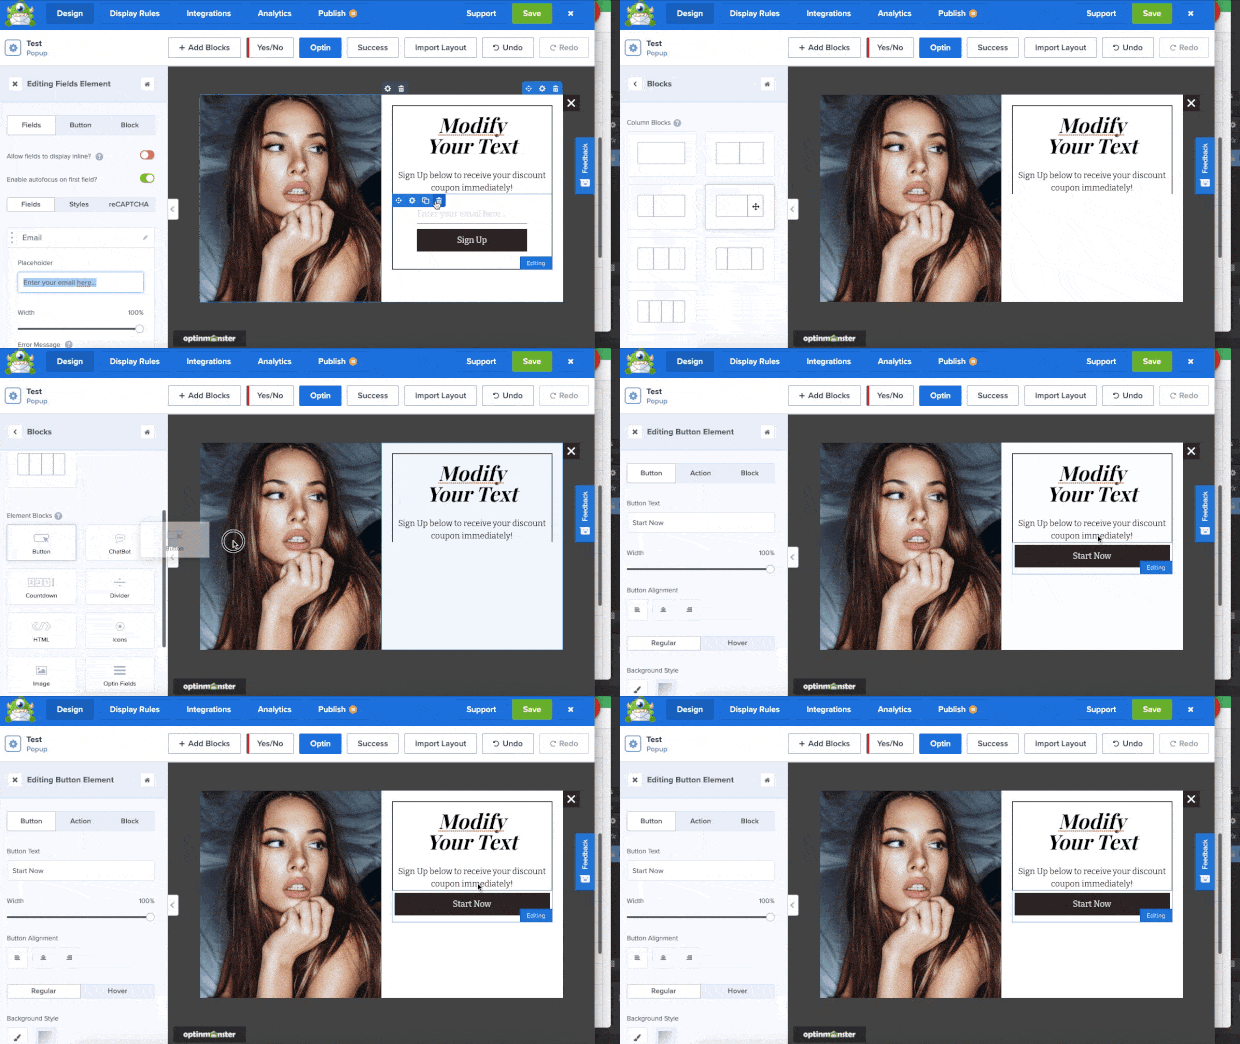
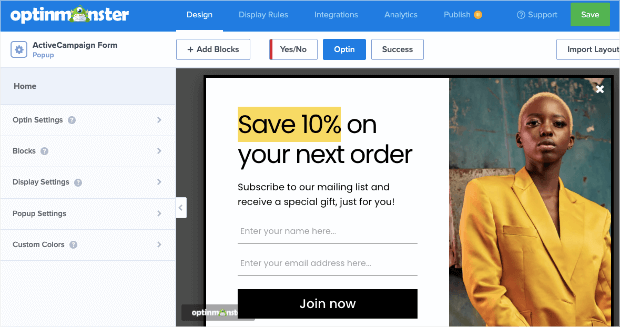
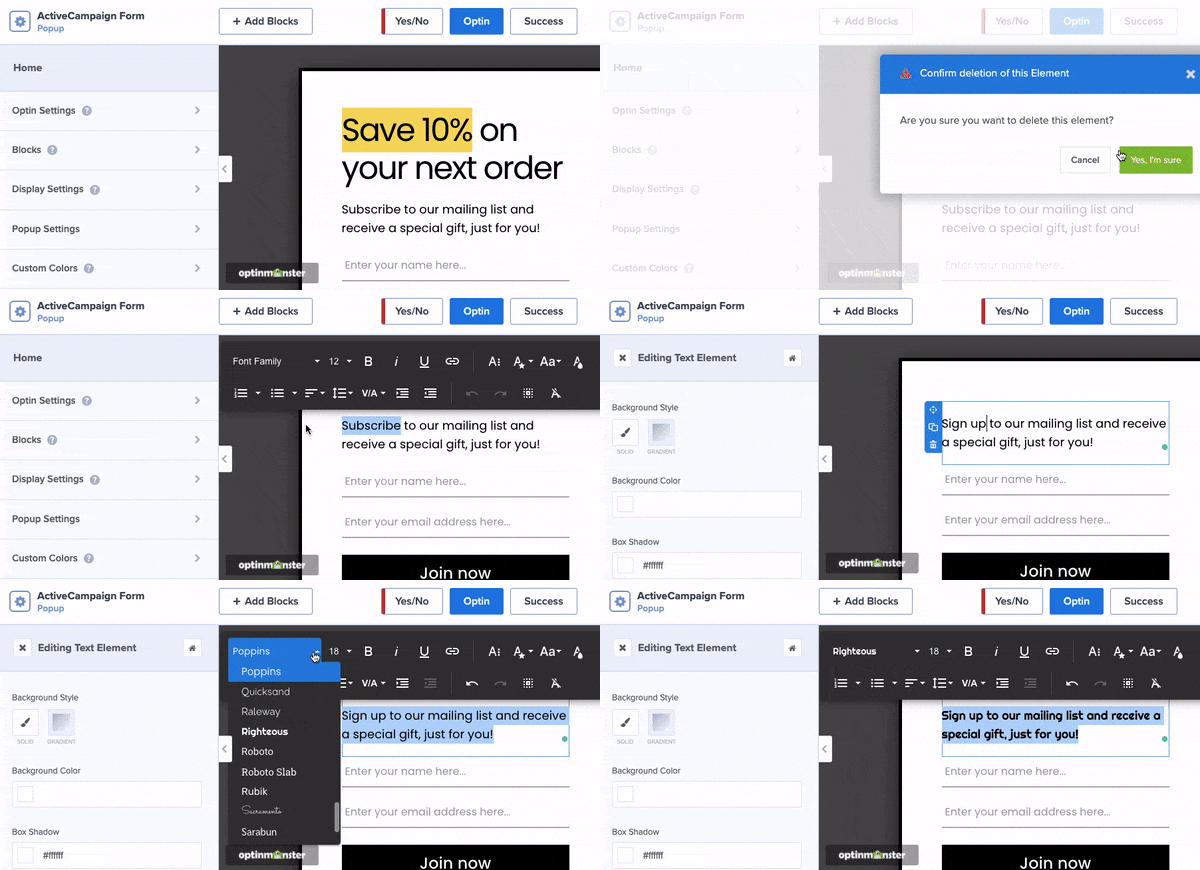
OptinMonster’s drag and drop builder is really simple to use. You’ll see a live preview of your campaign which you can edit directly.
The templates are designed to look great out of the box, so you won’t have to change much in the design. That said, OptinMonster gives you the freedom to customize every aspect of your campaign.
To change the text, simply select it and enter your own. There’s even a built-in text editor that will appear when you select all the text in a block. This will give you options to change every aspect of your text, including:
- Font
- Color
- Size
- Alignment
- Line height
- And much more…
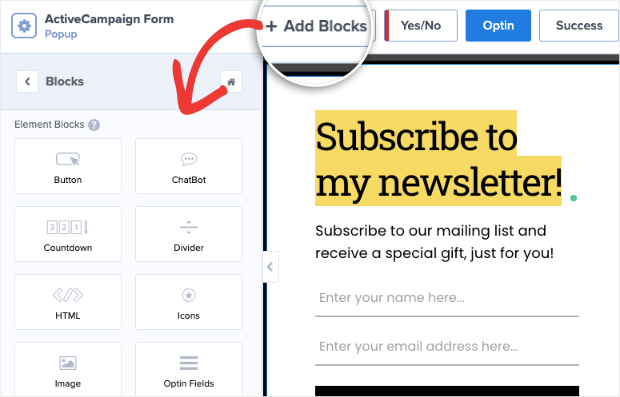
If you want to add more elements, you can use the Add Blocks button and then drag and drop new blocks into your campaign from the left-hand menu.
OptinMonster lets you change the images, background, logos, and so much more. We won’t go into too much detail here.
For more help on the OptinMonster campaign builder, we have a complete guide that you can follow: Creating Your First Campaign.
The next step is to set up display rules to target customers with relevant campaigns. This will help maximize the number of email subscribers you get.
Step 4: Setting Up Display Rules
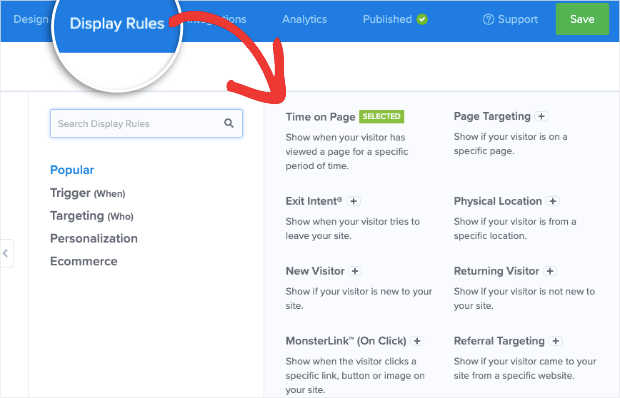
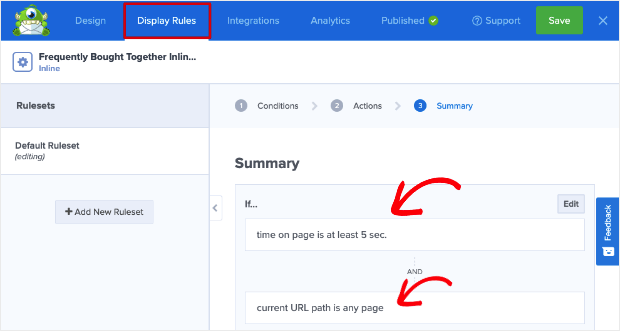
OptinMonster’s advanced targeting rules let you display your campaign at just the right time and place to optimize conversion rates. You can set up these targeting rules under the Display Rules tab in the campaign builder.
You’ll see that, by default, OptinMonster displays the campaign after a visitor spends at least 5 seconds on any page of your site.
To change this, simply edit the existing rule, and you’ll get more display options that include:
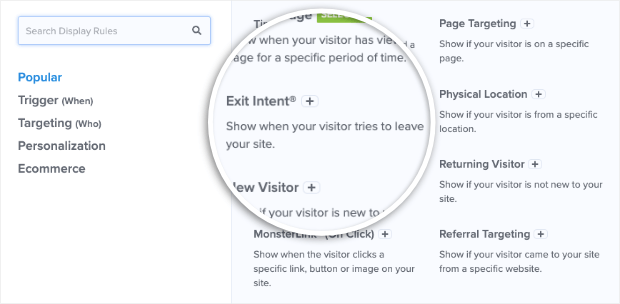
- Exit-Intent® Technology: Recover abandoning users as they’re actively leaving your website.
- OnSite® Retargeting: Keep users engaged by showing new campaigns to returning visitors.
- Geolocation: Customize the customer experience by targeting users based on their physical location.
- Referral Targeting: Engage with visitors based on which channel or source they’re coming from
To add a new rule, click on the one you want. It’s that simple.
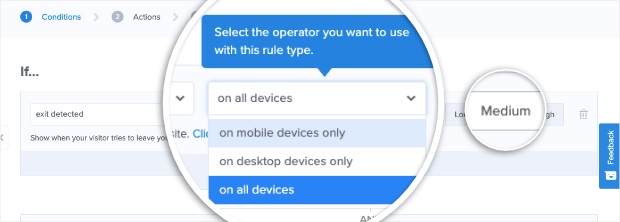
So for instance, if you want to show the campaign when a visitor is trying to leave your site, select the Exit-Intent® rule.
Then you can select whether you want to show it on desktop or mobile, or both. And you can set the sensitivity of the exit detector.
We recommend leaving it on the default medium setting:
With that, your campaign will appear if a visitor moves towards the close or back button of their browser.
Now that you’ve created targeting rules, you can integrate your popup with ActiveCampaign.
Step 5: Integrating with ActiveCampaign
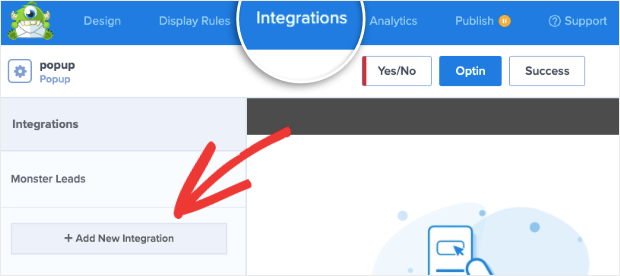
In the OptinMonster dashboard, open the Integration tab. You’ll see an option to Add New Integration.
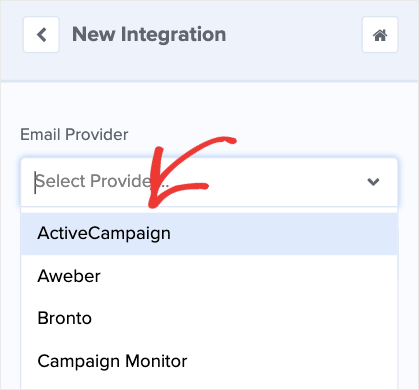
This will give you a dropdown menu of all the available service providers. Select ‘ActiveCampaign’ here and you’ll see new fields to enter a name for the connection along with your API URL and API key.
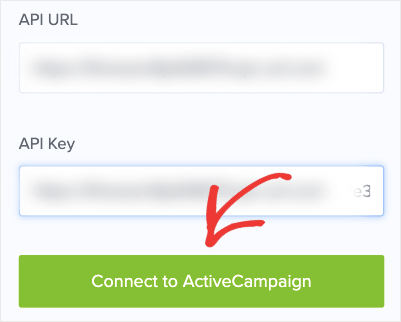
You can find your API details in your ActiveCampaign account. Navigate to the Settings » Developer page.
Copy your API URL and key and paste them in the correct fields in OptinMonster and click the Connect to ActiveCampaign button.
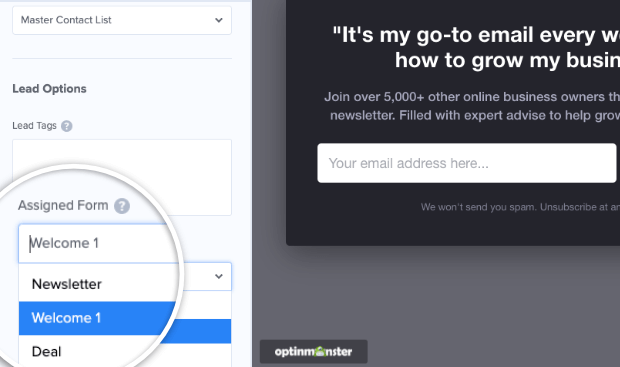
OptinMonster will detect your account automatically and sync it. Now you’ll see more options to select an email contact list, tags, and assigned form.
This lets you segment your leads so that they’re tagged and added to the correct email lists in your ActiveCampaign account.
So, for example, when you send weekly newsletters, you can simply select the ‘Newsletter’ list in ActiveCampaign and be sure that only people who signed up for newsletters are on this list.
You can also continue the subscriber’s journey by setting up automated emails using triggers and actions inside ActiveCampaign’s dashboard.
As soon as someone signs up for an OptinMonster campaign, an email will be triggered in ActiveCampaign to welcome them or deliver a lead magnet you promised.
Now all that’s left to do is publish the campaign on your site.
Step 6: Publish ActiveCampaign Popup in WordPress
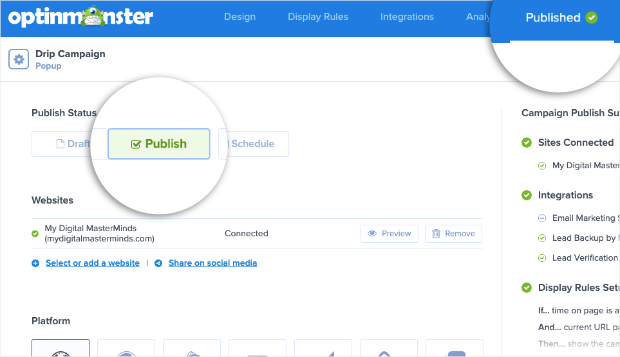
To make your campaign live, switch to the Publish tab. There’s an option to see a preview of your campaign, then set the status to ‘Publish’ here.
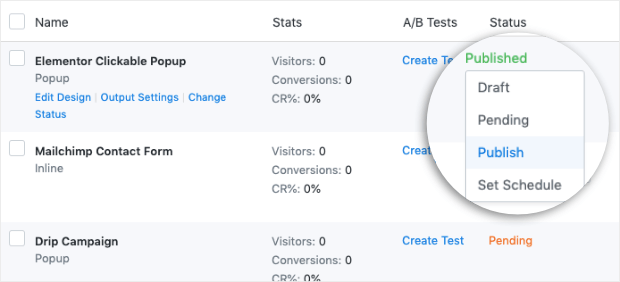
Next, go back to your WordPress dashboard and open the OptinMonster » All Campaigns page. Make sure the campaign status is set to Publish here as well.
In case you’re creating an inline form, you’ll need to add it to your post, page, or sidebar using the OptinMonster block.
It’s really simple and you can learn more about that here: How to Create an Inline Form.
Now there’s one final step we want to show you to make the ActiveCampaign integration your default connection for all OptinMonster campaigns.
Step 7: Make ActiveCampaign Your Default Integration
OptinMonster lets you make ActiveCampaign your default integration. This means any campaign you create for your website will automatically be synced with ActiveCampaign.
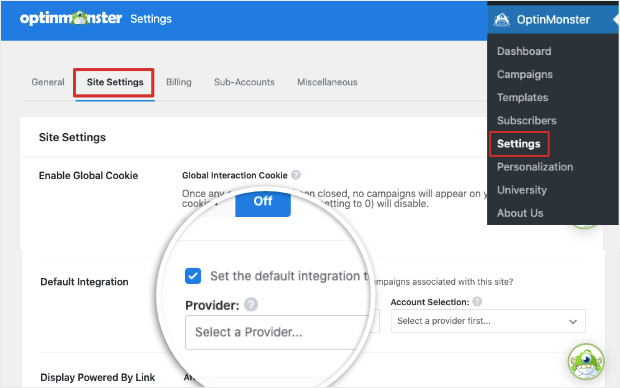
To set this up, in your WordPress admin panel, open the OptinMonster » Settings page. Under the Site Settings tab, scroll down to the Default Integration section.
You’ll need to check the box to enable this option “set the default integration to be used for campaigns associated with this site?”
Then from the drop-down menu, choose ActiveCampaign and your account name. Make sure to hit the Save Changes button at the bottom of the page.
Now all campaigns you create for this website will automatically be linked to ActiveCampaign.
With this integration, you’ll be set to get the maximum number of subscribers from your site. And all new leads will be tagged and added to the correct ActiveCampaign list.
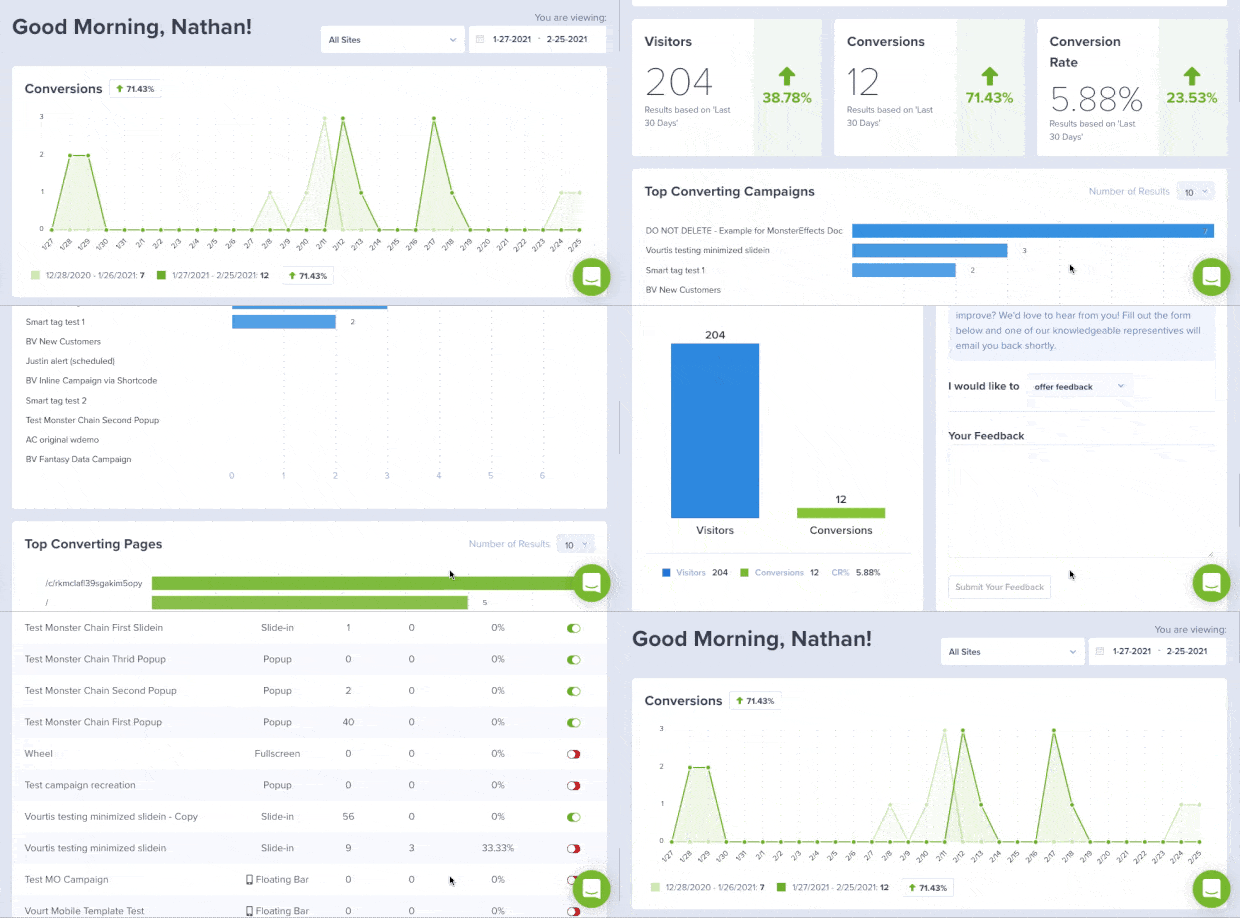
After your campaign has got some engagement, you can track its performance with OptinMonster’s built-in analytics.
You can see graphs and reports on all the stats that matter like:
- Visitors
- Conversion rate
- Top Converting Pages
- Top Converting Campaigns
This way you’ll know what your visitors like and don’t like. You can then tweak your campaigns or use A/B testing to better your lead generation results.
If you haven’t signed up for OptinMonster yet, what are you waiting for? Get your 100% risk-free OptinMonster account now by clicking below:
Now that you know how to create a targeted ActiveCampaign Popup, you can create follow-up campaigns to grow your list faster by targeting visitors that have:
- Already converted from a previous campaign
- Not converted yet
- Seen and closed a campaign
- Visited a specific page
- Not yet visited a specific page
You can even make sure subscribers never see the same campaign again to improve their user experience.
With OptinMonster, there are so many opportunities to retarget visitors and encourage them to sign up.
Follow this detailed guide that has all the steps to create a follow-up series for your WordPress site: How to Make a Profitable Follow-Up Campaign to Drive More Revenue.
That’s all we have for you today.
We hope you found this tutorial helpful. If you’re looking to grow your subscriber list to further your email marketing efforts, you’ll find these resources helpful:
- 9 B2B Lead Generation Best Practices (That Actually Work)
- How to Create a Lead Capture Page in WordPress (The Easy Way)
- 27 Awesome Newsletter Ideas That Will Keep Subscribers Engaged
These posts will help you expand your audience really fast and keep them engaged in your brand.






Add a Comment