Do you want to get MORE conversions by building scarcity with countdown timers?
Countdown timers are a proven method for getting your audience to take action. They show people how long your offers will last and, more importantly, remind your visitors that they simply won’t last forever.
But how do you build a reliable countdown timer for your website if you’re not super technical?
That’s exactly what we’re going to cover in today’s post.
We’ll teach you how to build scarcity with countdown timers in just 5 easy steps.
Ready to get started? Let’s dive straight into the tutorial.
How to Create Scarcity With Countdown Timers
In this article, we’ll show you how to create 2 types of countdown timers:
- Static: These have a fixed start and end date that is the same for all your site’s visitors.
- Dynamic: These give users a timeframe within to act that’s personalized to when they initially see the offer.
We’ll talk in more detail about why you’d use each one for your business.
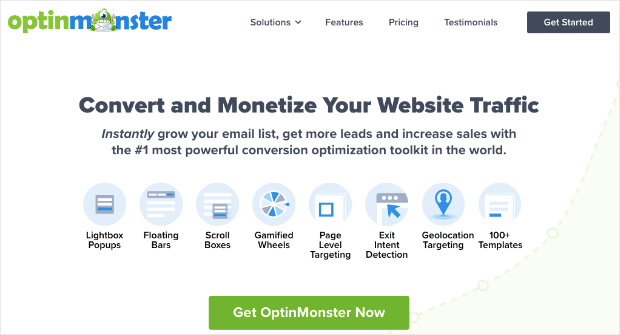
For now, it’s important to note that for this tutorial, we’ll build scarcity with countdown timers using OptinMonster:
OptinMonster is hands down the best lead generation tool on the market. It allows anyone to build professional and high-converting campaigns in a matter of minutes.
Plus, you won’t need any technical or design experience to build stunning optin campaigns, including:
- Popups
- Floating bars
- Fullscreen welcome mats
- Gamified spin wheels
- Inline campaigns
- And much more…
Each of these campaigns types can get your site MORE conversions. And every single one of them can have a countdown timer added to it in a single click.
Ready to follow along? Click below to start your 100% risk-free OptinMonster account today:
Remember, OptinMonster can be used with any platform. So if you need some help getting connected, that’s no problem. You can get set up by following whichever tutorial fits your specific needs:
Now you’re ready to start building scarcity with countdown timers across your site. Let’s dive in.
Step 1) Select Your Campaign Type & Template
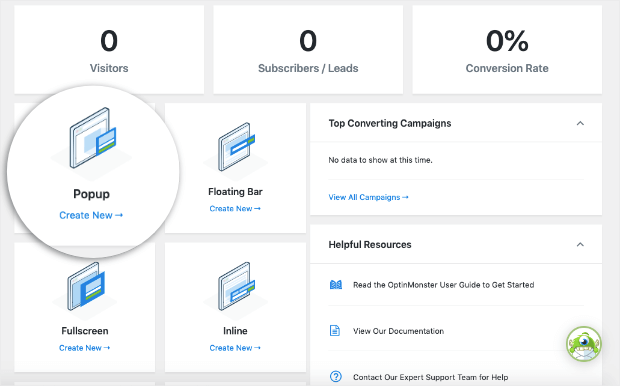
When you’re in the OptinMonster dashboard, your first step is to create a new campaign.
If you’re in WordPress, you can do this by clicking directly on the campaign type you want to build. Today, we’ll go with a popup:
If you’re not using WordPress, this part of the process will look a little different.
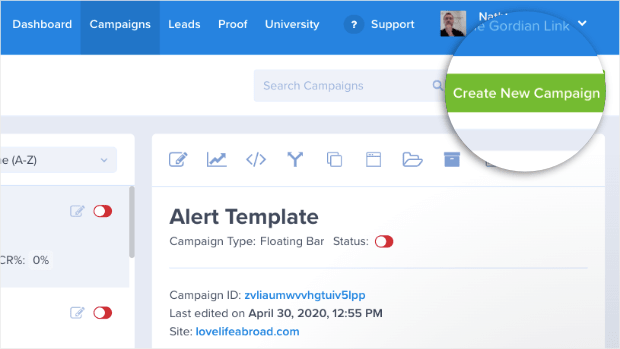
From your OptinMonster dashboard, click Create New Campaign in the upper right-hand corner of your account:
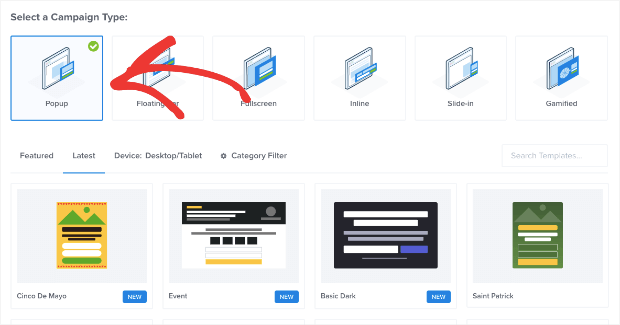
Then you can choose your campaign type from your OptinMonster account. Again, for today, we’ll go with a popup:
Next, you’ll need to determine which template you’d like to use.
OptinMonster has over 50+ pre-built templates that are full-responsive and mobile-friendly. Many of these templates also work out-of-the-box without much modification needed.
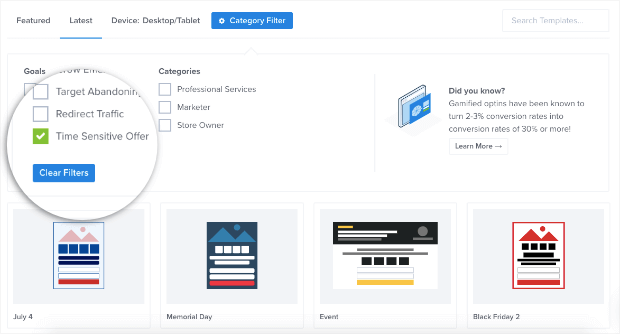
You can even filter these templates for Time-Sensitive Offers:
This will pull up the templates that are specifically designed to create scarcity for your offers.
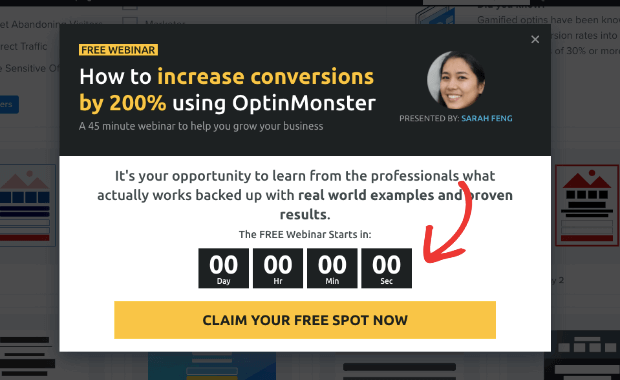
And many of the templates with this filter already have a countdown timer built-in. Take the Event template, for example:
This could be used RIGHT AWAY, and you’d only need to change a few elements to make the offer personalized to YOUR audience.
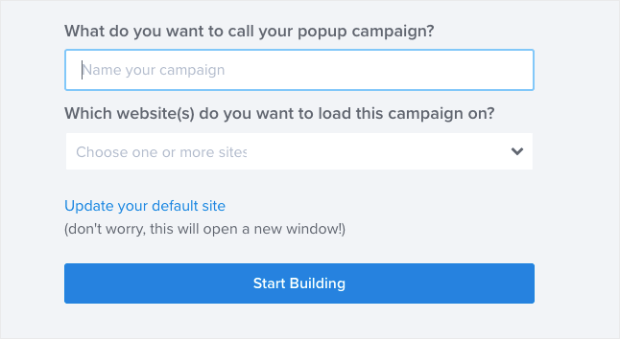
Once you’ve selected the template you want to work with, all you need to do is name your campaign and click Start Building:
Now you can customize your scarcity countdown timer campaign.
Step 2) Modify Your Campaign (& Add Your Countdown Timer)
So far, you’ve chosen a campaign type and a template that fits your brand’s voice and style.
From here, all you need to do is personalize the messaging of your offer, so it resonates with your target audience.
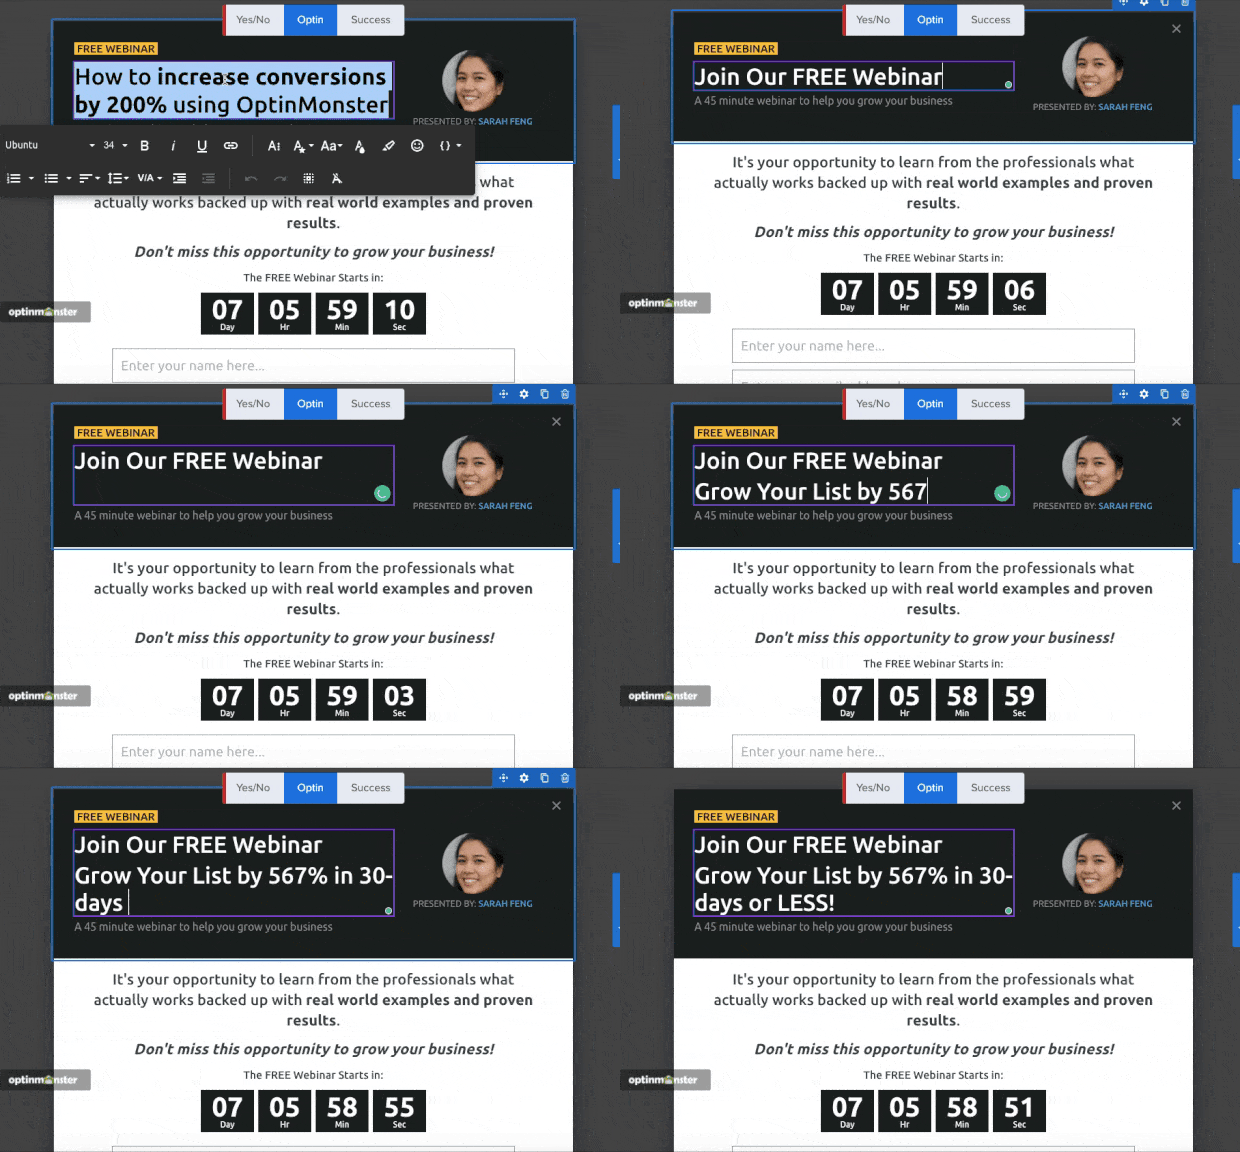
Doing so couldn’t be easier. You can simply select the text you want to change and modify it directly in the campaign builder:
But what if you chose a template that didn’t already have a countdown timer in it?
That’s not a problem.
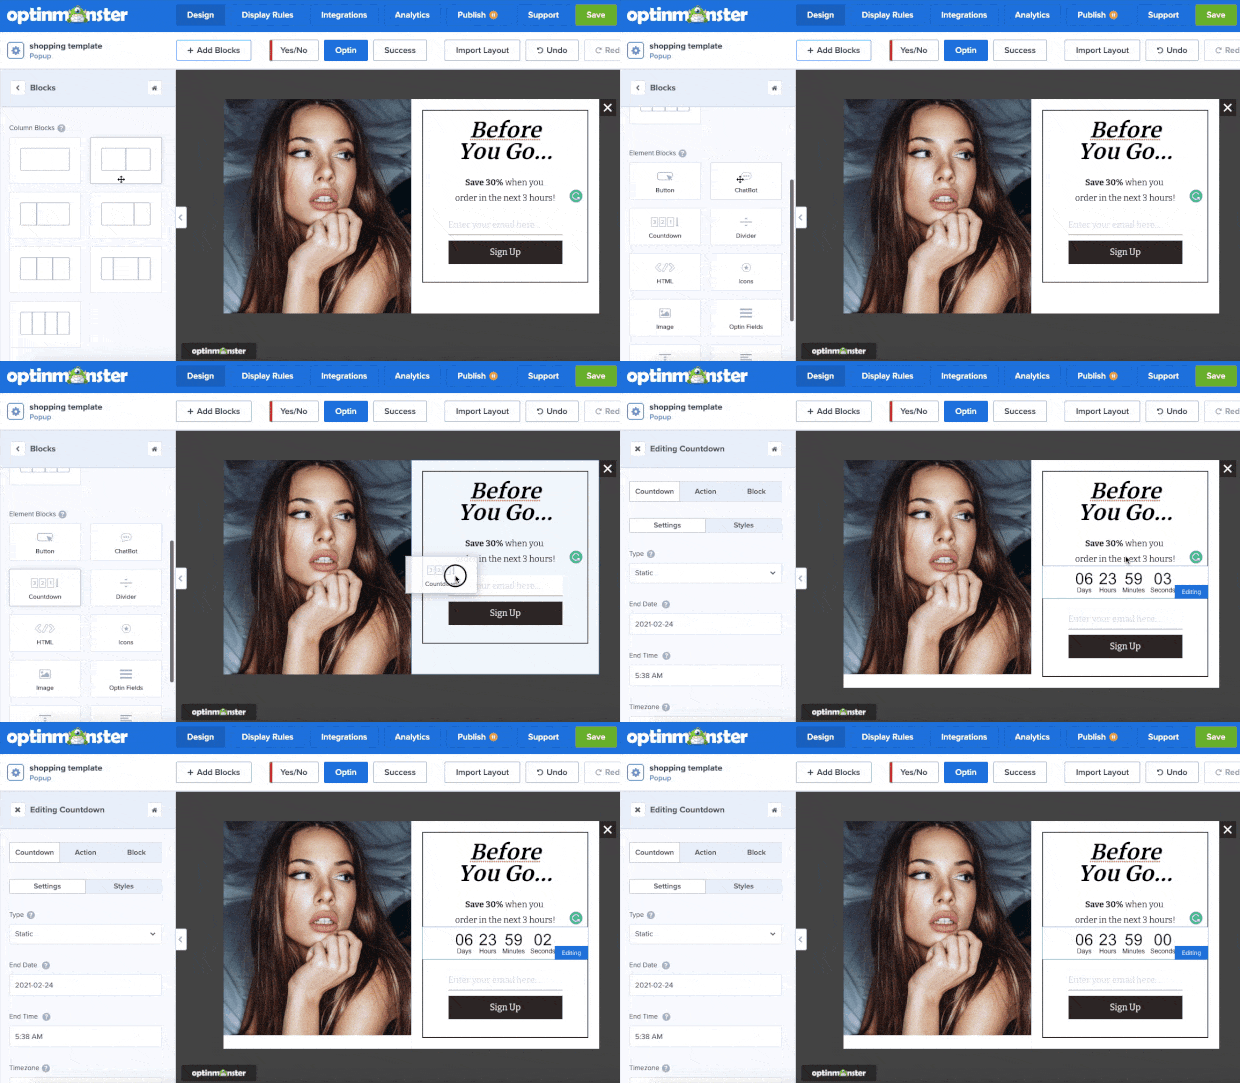
You can add that and many other features to your campaign with a drag and a drop. Just go to + Add Blocks at the top of your dashboard.
Then select the Countdown Timer block and drop it into your campaign:
You can add other features, too, like:
- Images
- Videos
- Text
- Custom HTML
- Icons
- Dividers
- And much more…
The bottom line is that OptinMonster makes it EASY to customize your scarcity campaigns.
You won’t need any coding skills, and you’ll have 100% control over the look, style, and messaging of your popup.
Now that we have a campaign with an active countdown timer, let’s find the right settings for your promotional offer.
Step 3) Configure Your Countdown Timer’s Settings
As we mentioned earlier, there are 2 types of countdown timers you can choose from:
- Static
- Dynamic
Static countdown timers have a fixed start and end date. These are great for holiday deals like Black Friday and Cyber Monday that have universally known stopping times.
Dynamic countdown timers open up even more potential. These allow you to set a time window for your offers rather than a fixed date.
So let’s say you wanted to give new visitors 7 days to redeem a 25% discount from your online store.
Your first guest comes on a Tuesday, sees the popup, and learns they have 7 days to act (or until next Tuesday).
Then, the next day, another guest comes and sees they have 7 days to act, too (or until next Wednesday).
This is the main function of dynamic countdown timers: they present limited time offers but give everyone the same amount of time to take action.
You’ll need to decide which type of countdown timer is best for your offer.
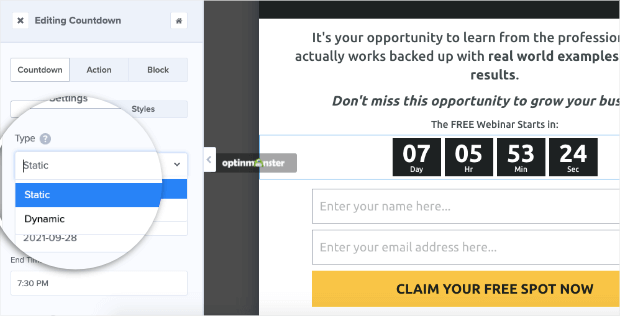
Once you’ve answered that question, click on the countdown timer block in your builder. This will pull up the editing rules on the left-hand side menu.
Here you’ll be able to set your Static or Dynamic countdown type:
Then you’ll be able to set your start and end times.
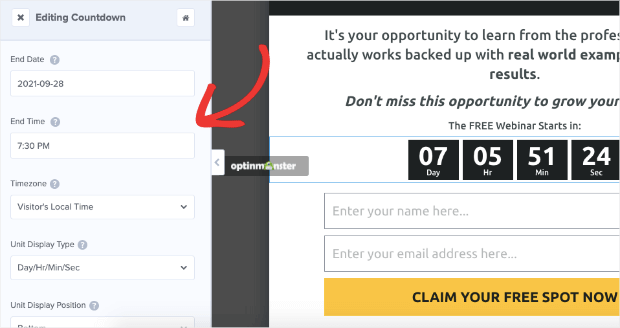
Static countdown timers let you change you:
- End date
- End time
- Timezone
- Unit Display Type
- And more…
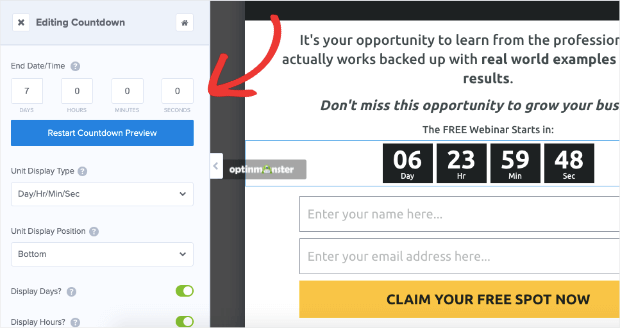
Dynamic countdown timers let you configure settings like:
- End date and time
- Unit display type
- Unit display position
- And more…
These settings allow you to quickly and easily customize your countdown timer to build the right amount of scarcity for your unique offers.
Next, we’ll just need to set up a few targeting rules.
Step 4) Set Your Targeting Rules
Once you’ve built your scarcity countdown timer popup, you’ve completed half the battle.
The next step is to add a few basic targeting rules, so this campaign appears in the right places, to the right people, and at just the right times in their customer journey.
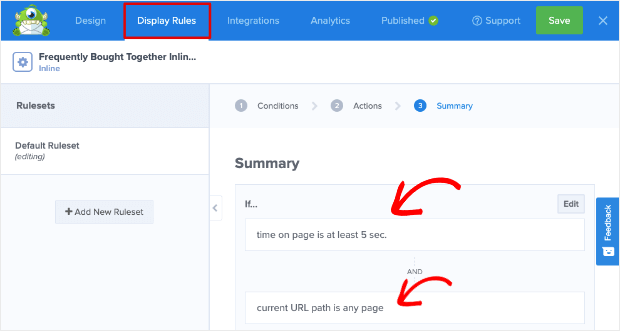
Start by clicking the Display Rules tab at the top of your OptinMonster dashboard.
By default, you have 2 rules set:
- Time on page is at least 5 seconds
- Current URL path is on any page
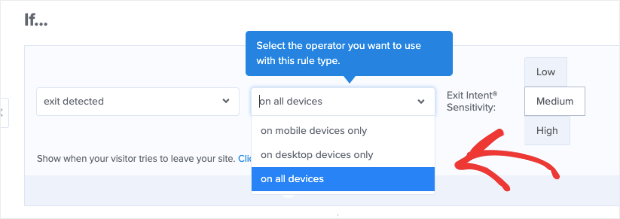
You can use any of OptinMonster’s powerful display rules to customize your offer.
We won’t get into much detail on all of the display rules OptinMonster has, but here are a few of the most popular:
- Exit Intent® Technology: Recover abandoning visitors as they’re actively leaving your website for good.
- Geolocation: Personalize your offers by targeting people based on their physical location.
- Page-Level Targeting: Boost conversions by matching your offer with the on-page content your visitors are reading.
- OnSite Retargeting®: Keep users engaged by showing fresh campaigns to returning visitors.
These and similar targeting rules are how companies like Crossrope grew their list by 900%.
And countdown timers are how Cracku boosted conversions by 300% AND converted 3.29% of visitors into sales.
Plus, all of these rules can be configured without any technical experience.
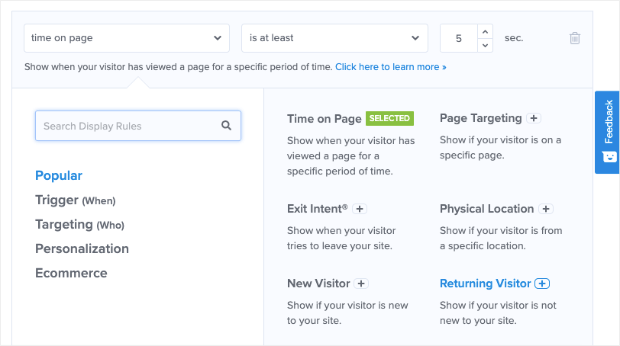
Simply choose the rules you want from the drop-down menu:
And customize those rules with easy-to-navigate drop-down menus, too:
Finally, we’re on to the last step: connecting your email service provider (ESP) to OptinMonster.
Step 5) Integrate Your Email Service Provider
This last part is optional but highly recommended.
That’s because OptinMonster gives you the ability to send new leads directly to your ESP.
That way, you can automate your email marketing strategy to save yourself time, energy, and headaches while growing your business.
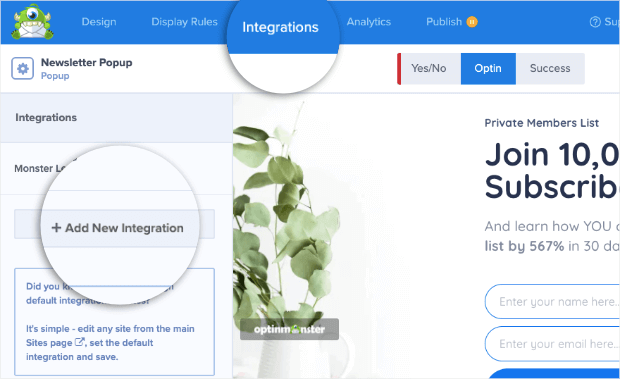
From the Integrations tab in your OptinMonster dashboard, click Add New Integration:
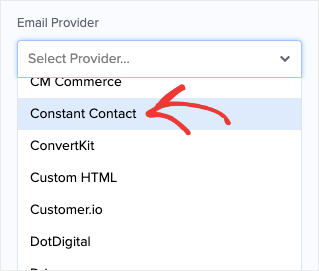
Then select your ESP from the drop-down menu:
In most cases, you’ll simply need to enter your email provider’s API Key to get everything connected.
Don’t see your ESP on the list? No worries.
Check out this article on how to set up OptinMonster with ANY email provider with webhooks.
But now, let’s take things one step further.
If you’re trying to make the MOST of your email marketing efforts, then you should be organizing your email list into sub-groups.
This is a process called “audience segmentation,” and it’s really important for boosting conversions.
You can create different sub-groups in your ESP based on similarities in buying patterns, purchase history, demographics, and more.
This lets you personalize your messaging, so you can create better and more irresistible offers.
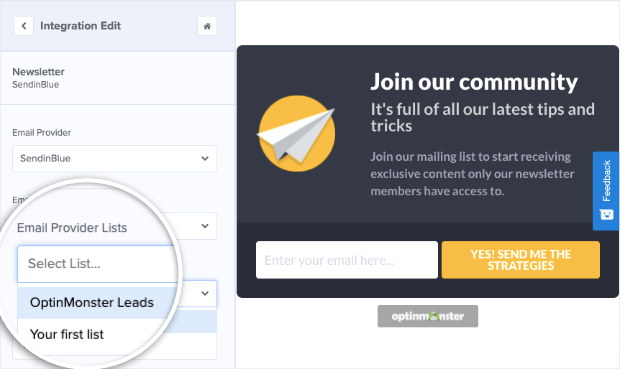
Then, when a user signs up, you can designate which sub-group you want your new leads to go to. And you can do all that from your OptinMonster dashboard.
Once you’ve connected your ESP, simply select the list you want your new leads to go:
And now you have a fully automated email marketing system in place.
Now all that’s left is to save, preview, and publish your campaign!
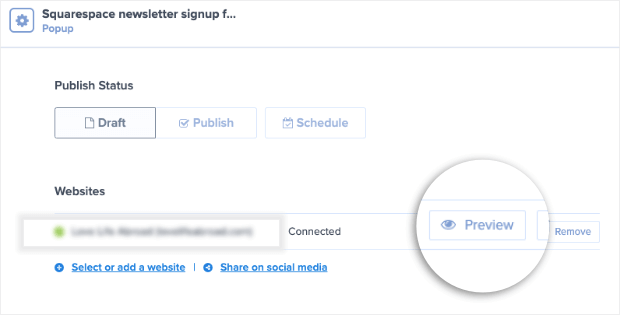
You can do that by switching to the Publish tab in your OptinMonster editor.
Then preview your campaign:
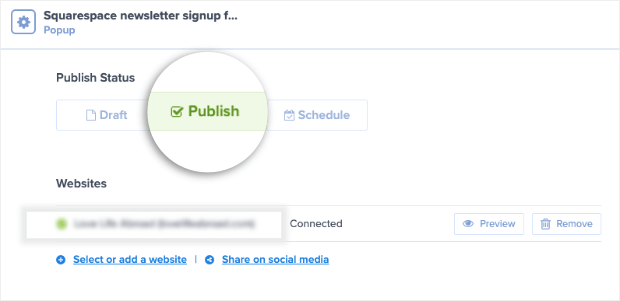
And when you’re happy with how it looks, you can switch the publish status from Draft to Publish:
If you’re using WordPress, it’s also a good idea to check the campaign status there too.
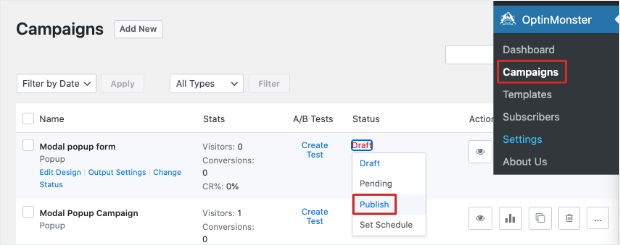
From your WordPress dashboard, go to OptinMonster » Campaigns.
Then locate your campaign and make sure the status is set to Publish:
You now have a fully functional scarcity countdown timer popup for your website.
Remember, countdown timers can be added just as easily to:
- Floating bars
- Slide-in scroll boxes
- Fullscreen welcome mats
- Gamified spin wheels
- Inline campaigns
- And more…
This gives you plenty of flexibility in creating irresistible offers with limited time for your visitors to act.
If you add one of these campaigns to your current marketing strategy, we’re confident you’ll see higher conversions and MORE sales in no time.
We hope this tutorial helped you add a scarcity countdown timer to your website.
If you enjoyed the post, you’ll definitely want to check out the following resources:
- 34 Clever Scarcity Examples to Skyrocket Your Conversions
- How to Use Urgency to Hack Your Conversion Rate
- Email Marketing Made Simple: A Step-by-Step Guide
These articles will have even more information on how you can grow your list, drive conversions, and increase sales today!



Add a Comment