Are you struggling to create a popup for your SMS marketing campaigns?
Small businesses across the globe are embracing SMS marketing because it earns higher open rates than email. Plus, it’s fast! 90% of SMS messages are read within the first 3 minutes.
SMS can pack an extra punch for time-sensitive offers.
Whether you want to send limited-time promotional offers or transactional info to your customers, building an SMS popup will help you boost engagement and even generate sales almost instantly.
So, today, we’re going to teach you how to create an SMS popup with OptinMonster. That way, you can start using text message notifications to keep your customers informed and drive more sales.
But first, let’s get clear on what SMS marketing is and why you’d want to get your customers’ phone numbers in the first place.
What Is SMS Marketing?
SMS marketing is when businesses send promotional offers or notifications to their customers in the form of a text message. This helps users quickly read and reply to your notifications.
In fact, SMS marketing has many benefits for both businesses and customers. SMS marketing will:
- Personalize communication for the customer
- Simplify access to the promotional offer
- Strengthen the business/client relationship
- Provide higher open rates for the company
If you want to learn more about SMS marketing, check out this in-depth guide: SMS Marketing: The Good, the Bad, and the Don’t You Dare.
But here’s the big question: How do you get your customers’ phone number in the first place without scaring them off?
The best way is to use an SMS popup campaign.
SMS popup campaigns are designed to target your users’ phone numbers. When they visit your site, they’ll see something like this:
In fact, the image above is the SMS popup campaign we’ll be building in today’s tutorial.
Let’s dive in and see how we can build a convenient popup to get more customer phone numbers.
How to Create an SMS Popup
Video Tutorial
We understand that everyone learns a little differently. So if you’re more of a visual learner, here’s a helpful video tutorial to help you out:
But if you’d like to have the written instructions at your side, just keep reading.
Today we’ll be using 2 tools for our SMS popup campaign:
OptinMonster is the world’s best lead generator and conversion toolkit on the market. What that means is that OptinMonster is excellent at getting your customers to take the action you want them to.
We help you:
- Grow your email list
- Get more sales
- And ultimately boost your conversions
Today, we’ll specifically be using OptinMonster to get you more phone numbers with an SMS popup campaign.
Don’t have OptinMonster yet? No problem.
Sign up for OptinMonster today, risk-free with our 14-day money-back guarantee. Or, for more information on OptinMonster, check out this post: How Does OptinMonster Work: 8 Benefits (+ 12 Case Studies).
But once you have the phone number, you’ll need a way to send text messages to your customers.
That’s where Brevo (formerly Sendinblue) comes in to save the day:
Most people know Brevo is a popular email service provider. But it’s so much more than that.
Brevo works wonders for your entire marketing strategy. It’s an all-in-one customer relationship management software (CRM) that uses email, SMS, and live chat to keep you connected with your audience.
And when you combine its features with OptinMonster, you’re looking at an unstoppable lead conversion combo.
So let’s begin with creating a convenient popup to get more phone numbers with OptinMonster.
Step 1: Choose an SMS Campaign Type and Template
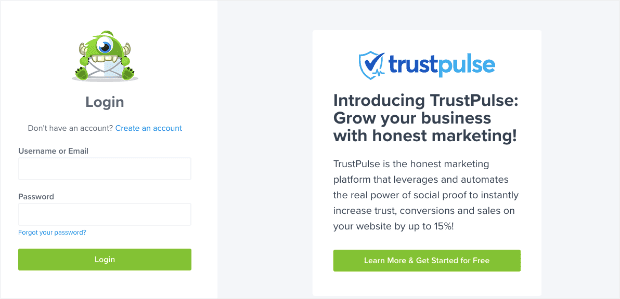
First, you need to log into your OptinMonster account:
Now select your campaign type. For today’s tutorial, we’ll choose a Popup:
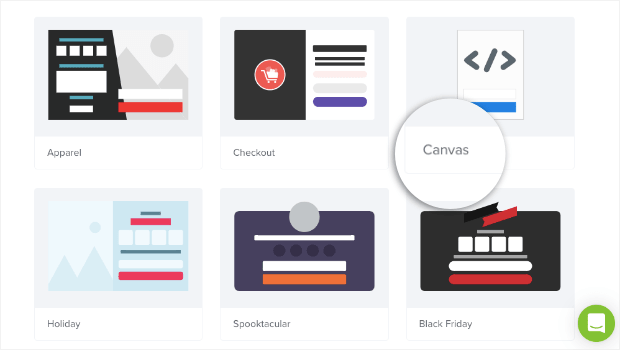
Then you’ll need to select a template. OptinMonster has over 50 pre-built templates to choose from. All of our campaigns are designed to work across desktop, tablet, and mobile devices.
You can also build a campaign from scratch using our Canvas template:
This lets you start with a blank campaign so you can have a popup that’s 100% unique to your brand.
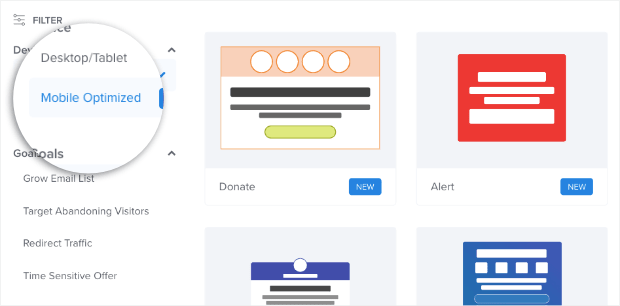
If you want, you can filter our templates for designs that are specifically made for smartphones:
This is helpful when you know that most of your customers interact with your site from their mobile phones.
Today, though, we’ll go with a Desktop/Tablet template because they still look and work great with mobile phones. Let’s go with the Magnet template today:
This is a good option because it gives you plenty of room to write compelling copy on the left-hand side.
But you can also show an image of your lead magnet, which is something you use to entice customers to enter their email address or phone number.
Need some lead magnet ideas? Check out this list of 69 lead magnets you can use to grow your lists today.
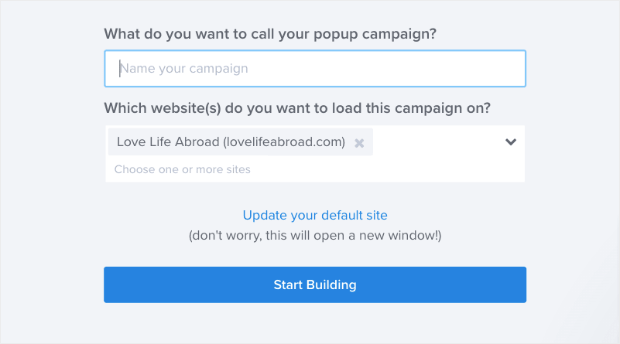
Once you have your campaign type and template, you’re ready to design your SMS popup campaign. Just name your campaign and assign it to your website:
Then click Start Building.
Step 2: Design Your SMS Popup
You’ll now be in your editor where you can customize your SMS popup. We won’t go into too much depth on how to design your campaign.
There are simply too many customization options to cover in one post. If you get stuck at any time, though, you can check out this post on creating your first campaign with OptinMonster.
Today, it’s important that you know that you can change literally anything you want to about your campaign.
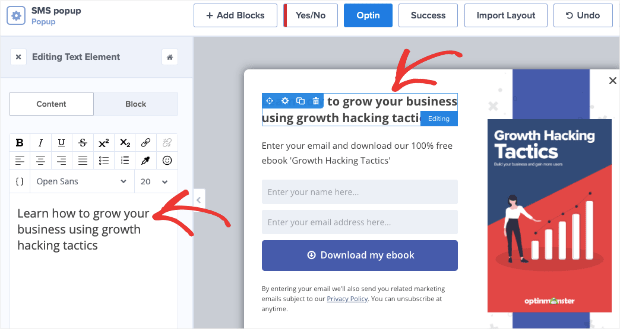
If you want to change the text, for example, just click on the text block to pull up the editing tools on the left-hand side:
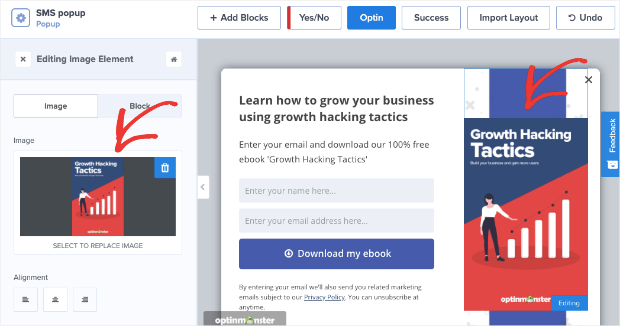
You can do the same thing with the image. Simply click on the image in your editor, and you’ll have the ability to change the image on the left:
You can upload a new image or choose one from a previous campaign.
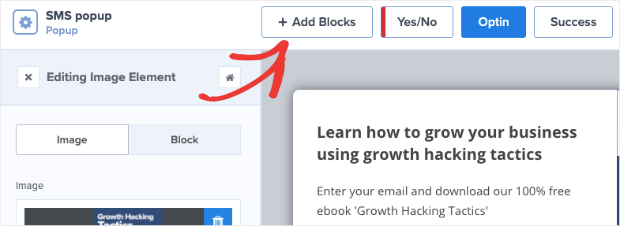
Plus, our drag and drop editor makes it easy to add new blocks. Simply click + Add Block at the top of your editor:
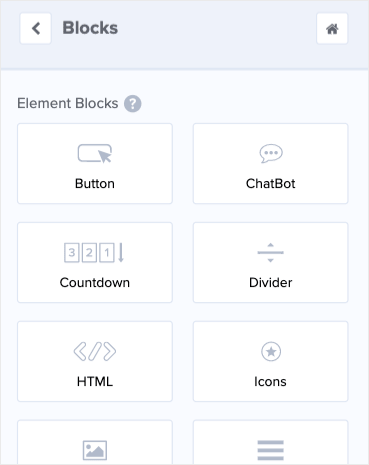
Then you’ll see tons of options for features you can add, including:
- Button
- ChatBot
- Countdown Timer
- Divider
- Text
- Image
- Video
And much more. Then you drag and drop these blocks into place in your editor.
But there’s one change you absolutely need to make for your SMS popup: adding a phone number field.
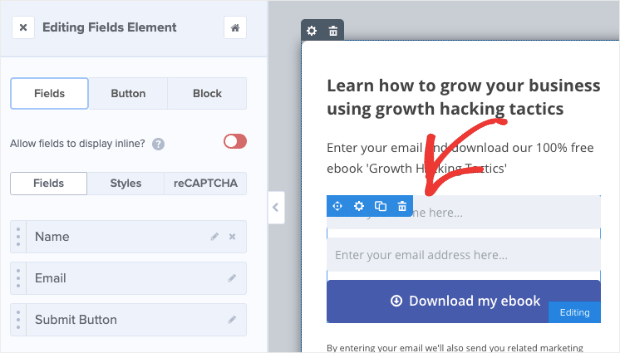
Click on the optin field in your editor. That’s the one that asks for your customer’s name and email address above the sign up button:
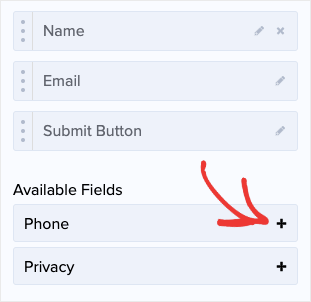
On the left, you’ll see options to add or remove fields. By default, you’ll have Name, Email Address, and Submit button in your template.
Next, scroll down a bit, and you’ll see Phone. Click the + icon to add a phone number field to your sign up form:
Now when your customers see your popup campaign, they’ll be prompted to enter their phone number. Here’s a look at the demo SMS popup we built for this tutorial from the Magnet template:
This took us less than 10 minutes to design thanks to OptinMonster’s easy-to-use campaign builder!
At this point, you simply need to determine where and how you’ll display your SMS popup across your site.
Step 3: Display Your SMS Popup
OptinMonster offers more targeting and trigger rules than any of our competitors. What that means is that we let you decide when, where, and to whom you’ll show your popup.
You can create display rules based on your audience’s demographics, which is called “targeting.” Or you can create rules based on your users’ behavior, which is called a “trigger.”
We have super effective targeting rules, such as:
- Referrer Detection
- Page-Level Targeting
- Geo-Location Targeting
- Device-Based Targeting
And more. Plus, our triggers are unbeatable. We offer:
- Exit-Intent® Technology (now available for mobile, too)
- Scroll Triggers
- MonsterLinks™ (which shows your campaign when a user clicks the link)
- InactivitySensor™
And, again, much more.
So when it comes to when and where you show your campaign, your possibilities are endless. You can decide the best strategy for your website that will get you the most phone numbers.
Today, we’ll go with a simple but powerful strategy. Head to the top of your editor and click Display Rules:
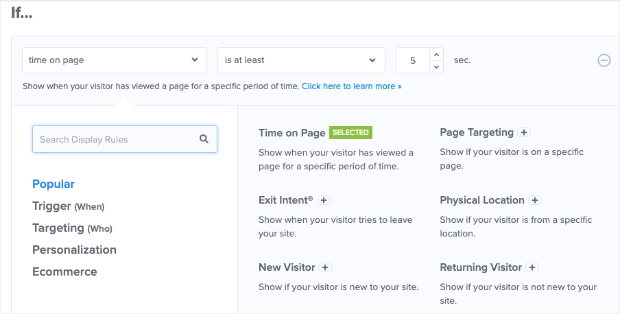
By default, your first rule will be Time on page. Click that to pull up your display options:
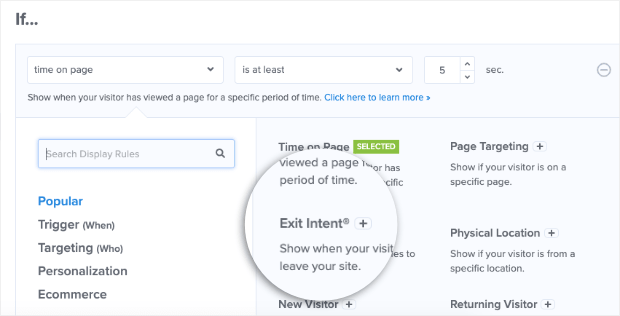
Find and click on Exit Intent +:
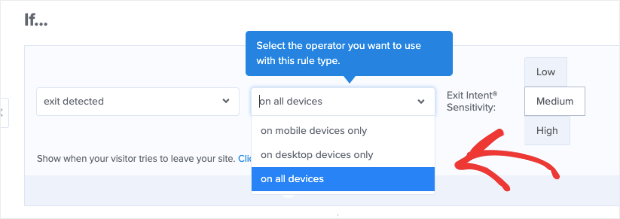
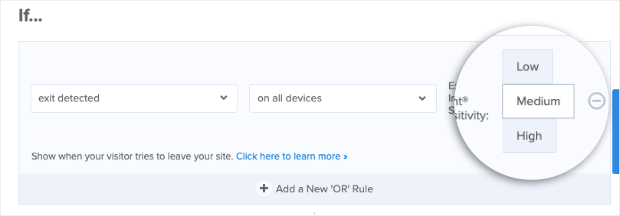
Then select whether you would like this rule to apply to desktop users, mobile users, or both:
Finally, set your exit-intent trigger’s sensitivity:
Keep in mind that mobile devices have 2 exit-intent triggers. Low and Medium sensitivity create a scroll up trigger. And High sensitivity creates a back button trigger.
To learn more about this, check out this resource on how to create a mobile exit-intent trigger.
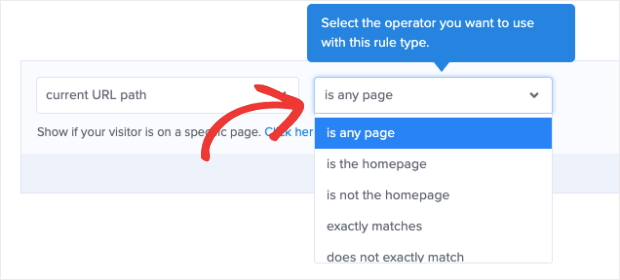
The second targeting condition is Current URL path is any page by default. That means your campaign will appear on every page across your site.
If you want to change this, simply click the drop-down menu for is any page:
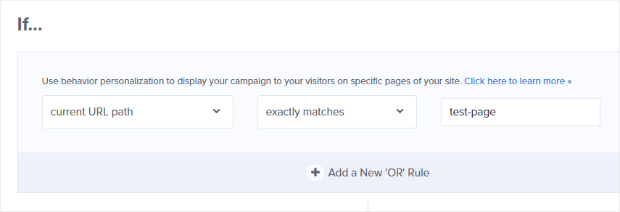
Now you can decide to show your campaign on specific URLs with is exactly matches plus the URL for the page you want:
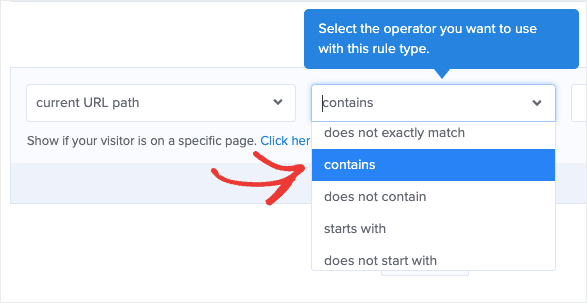
Or you can select contains and add unique terms from your URLs where you want your SMS popup to appear.
For example, let’s say you want all of your blog posts to have an SMS popup, and all your posts have the term “blog” somewhere in the URL.
Then your rule would be Current URL path contains blog:
Now anyone who visits one of your blog posts will see your SMS popup when they try to leave the page.
Again, this is just one example you can use. To target and trigger your SMS campaign, you can choose whichever method will work best for your brand.
Now there’s just one last step: hooking up OptinMonster with Brevo.
Step 4: Connect OptinMonster With Brevo
Earlier in this post, we talked about why Brevo is so great for SMS marketing. But when you get the phone numbers with OptinMonster, how do you hook them up to your Brevo account?
That part’s easy.
Go to the top of your editor and click Integrations:
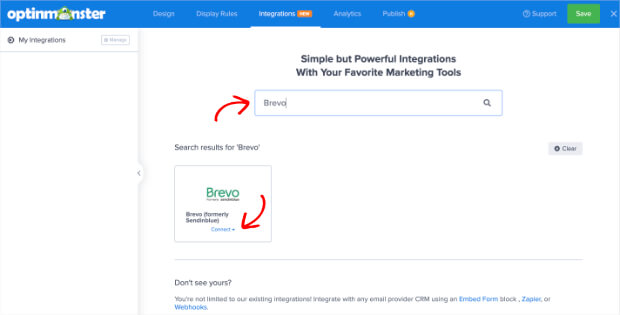
Type Brevo in the Search box and click Connect.
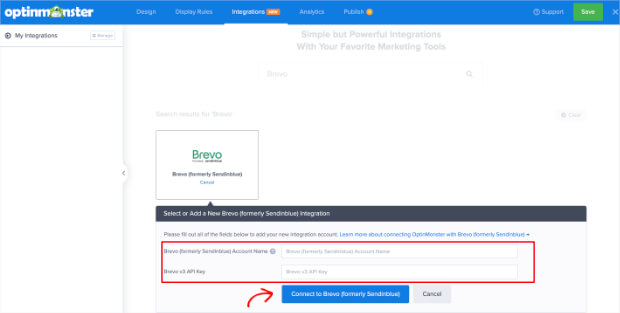
Now you’ll need to enter 2 things:
- Brevo Account Name
- Brevo API Key
Your account label won’t be seen by others. This is just to keep you organized, so you can label it however you want. If you’re pressed for ideas, you can simply label it My Personal Brevo Integration.
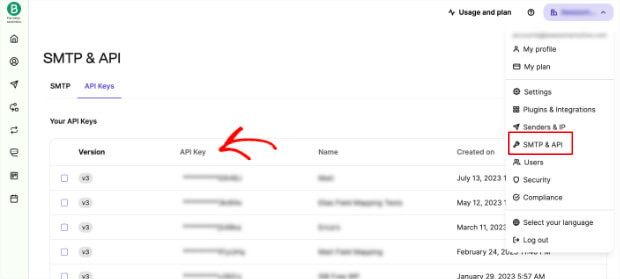
Then you need your API key from Brevo. For that, head over to your Brevo dashboard. Click on your account drop-down menu in the upper right corner, and click SMTP & API.
This will take you to the page containing your API key:
Copy and paste the API key back in your OptinMonster integrations page, then click Connect to Brevo:
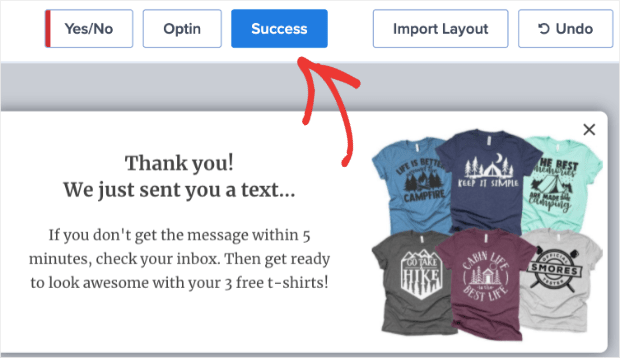
And that’s it! Well, almost. Don’t forget to click on Success view in your editor to modify the thank you message your new leads will see when they sign up to your SMS popup:
Then you just need to Save and Publish your campaign. 😉
You now have a fully functioning SMS popup campaign that syncs automatically to your Brevo account. You can even segment where your contacts go in Brevo from your OptinMonster account.
Audience segmentation is a great strategy for personalizing communication with your customers. For more information about that, check out these 50 audience segmentation tips you need to know.
If you’re reaching out to customers by phone, you may also want to give them a way to call you. That means you need a good business phone system.
Ready to improve your SMS marketing strategy? Sign up for OptinMonster risk-free today!











Add a Comment