Do you want to let more visitors to your Shopify store know about your offers and sales? An announcement bar could be the answer.
An announcement bar, also called a welcome header bar, lets every visitor see your important news. Whether you’re telling new customers about your shipping deals or announcing a time limited sale, it’s one of the easiest ways to get visitors’ attention.
A floating bar is also a great complement to other marketing campaigns. Popups are highly effective, but once visitors click that “X”, your message is gone. Repeating your message in a floating header bar will ensure your visitors don’t miss out. Repeating the same offer on a single page is super effective – Lilach Bullock used message repetition to convert 57% of all her website visitors!
In this tutorial, we’re going to show you how to boost sales with a Shopify announcement bar.
Video Tutorial
Not a video fan, or need more details? Just keep reading for a step-by-step tutorial.
We’re going to be creating a floating announcement bar just like this one:
Ready? Let’s get started.
Step 1. Create a Campaign
Login to the OptinMonster dashboard and click Create Campaign to get a new campaign started.
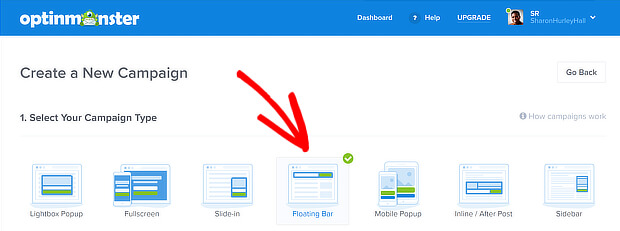
Choose a campaign type. We’ll use the Floating Bar, which is perfect for a Shopify hello bar type of announcement.
Choose a theme. We’re using Tiles.
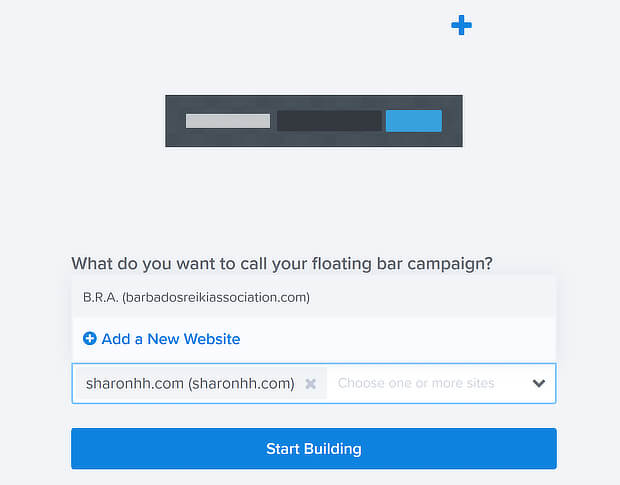
Name your campaign, and add the website where you want it to display. If you haven’t already done so, here’s how you add a website to your OptinMonster account.
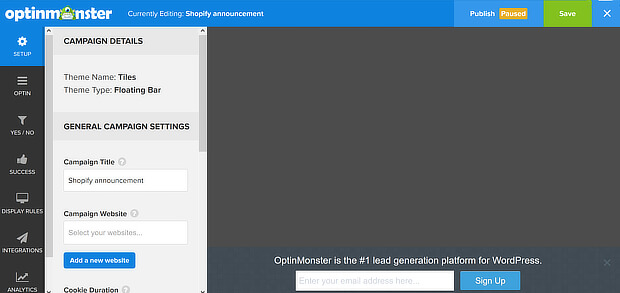
Press the Start Building button to go to the OptinMonster campaign builder, where you’ll see the default floating bar campaign.
Step 2. Edit the Campaign
The next step is to edit the campaign to create your Shopify announcement bar.
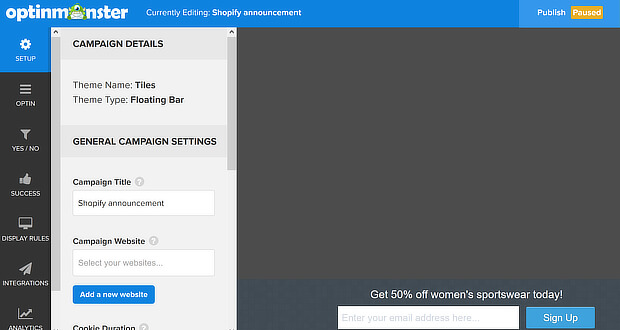
First, click to select the text on the floating bar and change it to the text you want to display.
You can also use the popup toolbar to change font, formatting, text alignment, and color.
You can also choose where you’d like the floating bar to display. By default, it shows at the bottom of the page. To move it to the top, go to Optin » Design Fields, and toggle the button next to Load Floating Bar at Top of Page?
This is a good way to make sure visitors see your offer as soon as they land on your Shopify store.
Step 3. Enable the Yes Button
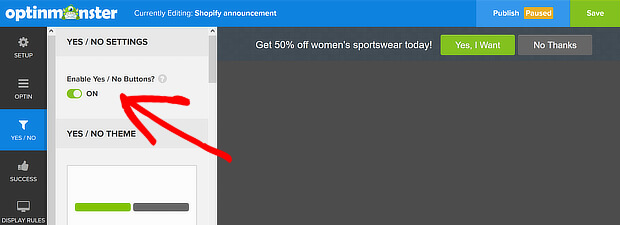
Since you’re making an announcement, you won’t want the email field. This is easy to change. Just go to Yes/No, and click the toggle to enable it. The display will change to show you two buttons.
Scroll down to No Button, and disable the no button, so you’re left with a single button for visitors to click to take advantage of your announcement.
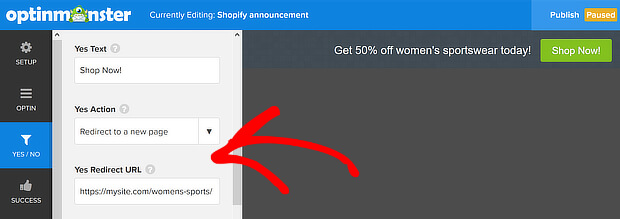
Scroll back up to Yes Button, and go to Yes Text to change the button text.
Next, choose a Yes Action. We’ll use Redirect to a new page to send visitors to the desired location. Add the URL of the product category where you have the sale.
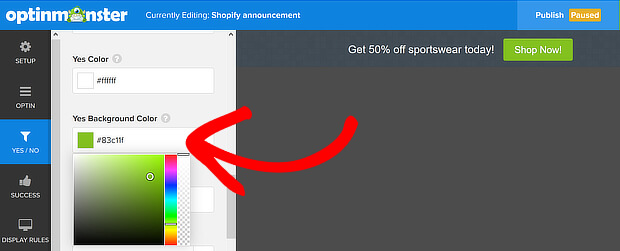
You can also change the font, color and border color of the yes button in this section.
Step 4. Choose Display Rules
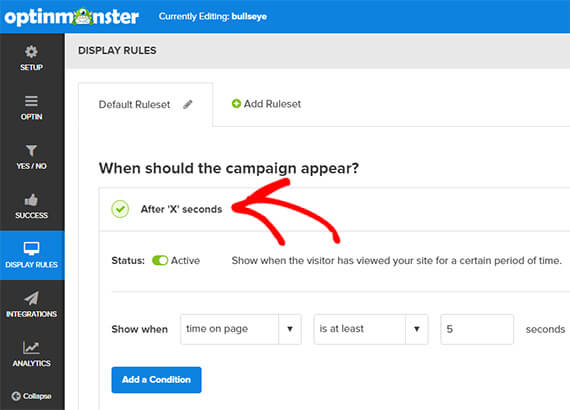
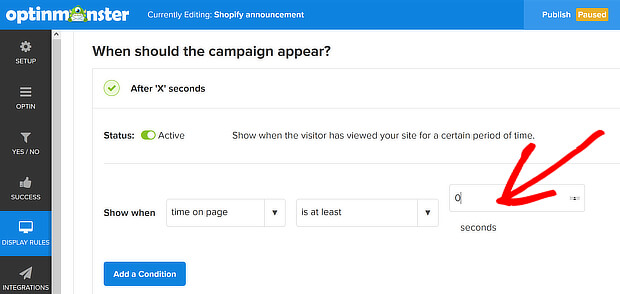
Next, go to Display Rules to decide how your campaign will display. By default the After ‘X’ seconds display rule is enabled, to ensure that everyone sees your announcement after they’ve been on your site for a while.
However, if you want to make the Shopify announcement bar permanent, so all visitors see it, you can set the default timing to 0. This would be a good option if you want to let all visitors know you have free shipping.
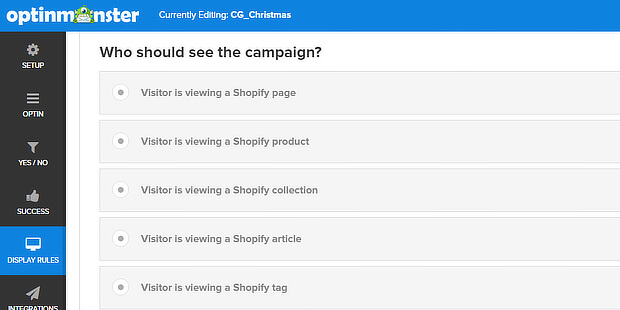
You can also set your announcement bar to display on a specific Shopify collection, article, product, or tag.
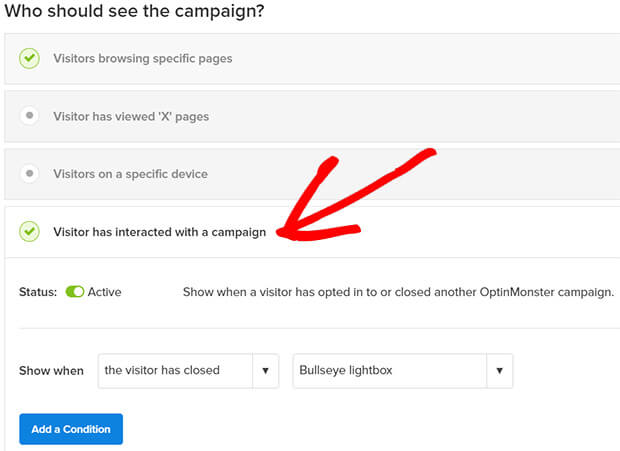
If you’re repeating an offer you displayed in a popup, you can make sure your visitors only see your announcement bar if they close that specific popup:
In the next step, we’ll show you how to publish your announcement bar on a Shopify store.
Step 5. Add Your Campaign to Shopify
Before you can publish a campaign on Shopify, you’ll need to link your Shopify and OptinMonster accounts with our Shopify integration.
https://youtube.com/watch?v=WOLStotUhd0%3Frel%3D0
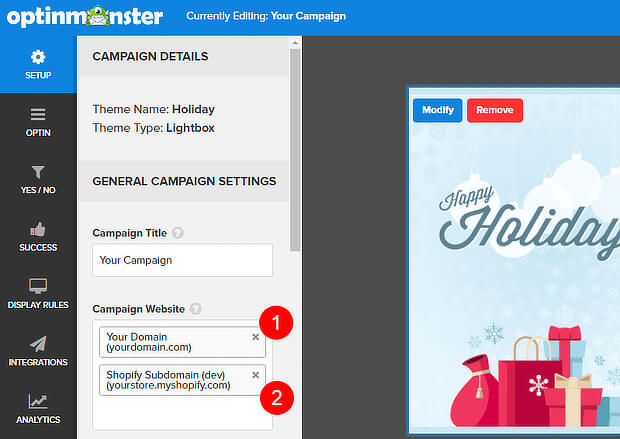
Then make sure you have added your Shopify website in the website field in the Optin tab, as described earlier.
Set your display rules as described above, then click the Publish tab in the upper right corner of the campaign Builder. Toggle the campaign to LIVE, and the optin will appear on your Shopify store.
Other Ways to Use an Announcement Bar in Shopify
While you can easily create a simple announcement bar for Shopify, you can also take advantage of OptinMonster’s other features to get even more sales.
For example, you can use OptinMonster’s Countdown Timer or holiday themes to create a time limited sale.
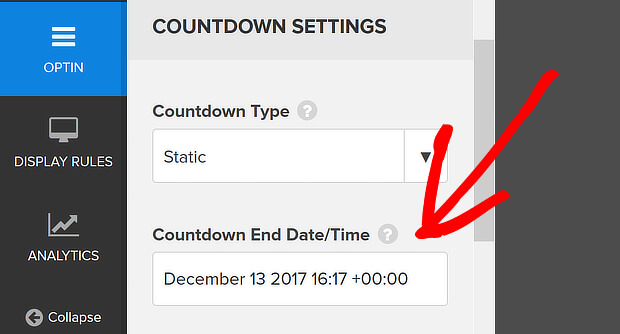
Just create and edit your campaign as described above, then scroll down to Countdown Settings in the Optin tab. You can choose a static timer, which is the same for each visitor, or a dynamic one, which starts a new countdown for each visitor.
One OptinMonster customer gained an additional $23,700 in revenue with a dynamic countdown popup.
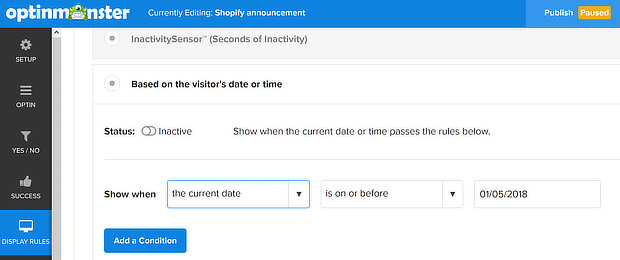
Set the start and end date for your countdown. You can also change this in display rules by using When should the campaign appear? » Based on visitor’s date and time, and setting the parameters there.
If you want to use the Shopify announcement bar to drive email subscriptions from your Shopify traffic, then stick with the default campaign which includes an email field.
You can also go to Optin » Name Field tab and enable the name field so you can collect more information to personalize your marketing. Edit the signup button text and color as previously described.
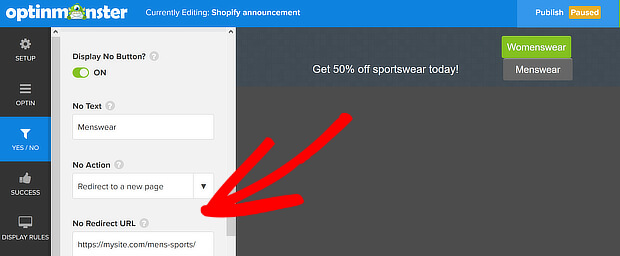
Another option is to use both the Yes/No buttons to send people to different offers depending on the choice they make. In this instance, you’d simply enable the No button with a different redirection page.
That’s it! Now you know how to boost sales with an announcement bar in Shopify, check out some useful floating bar hacks, and our roundup of the best sale-boosting Shopify apps. If you’re using MailChimp, see our guide on how to create a Shopify MailChimp signup form, too. You can also reduce shopping cart abandonment with our guide on how to create a Shopify email popup.
Related ContentLove announcement bars but use WooCommerce? Check out this post on how to make a WooCommerce announcement bar to boost sales!
And don’t forget to follow us on Facebook and Twitter for more tips, guides, and tutorials.











Add a Comment