Do you want to create a WooCommerce popup to cross-sell?
Cross-selling popups can lead to a huge boost in profits, but only if you target those popups strategically. With all the other things to manage for your WooCommerce store, finding the time to create cross-selling campaigns can be tough.
That’s why, today, we’re going to teach you how to create a cross-selling popup campaign for your WooCommerce store. As we take you step-by-step through the whole process, you’ll see just how quick and easy it is to set up.
In fact, you can have a cross-selling popup ready to go in under 10 minutes. But before we get to the tutorial, let’s get clear on what a cross-selling popup is.
What Is a Cross-Selling Popup?
A cross-selling popup is when you make product recommendations based on other items your customer has shown interest in. So if your customer was looking at men’s jeans or t-shirts, you might show a popup displaying men’s watches, too.
The image above is also the popup campaign we’ll be building in today’s tutorial.
The idea is to sell additional products or services to your customer, so their average purchase amount increases. To do this most effectively, you want to pair your suggestions with items that are related in some way.
But keep in mind that cross-selling is slightly different than upselling.
That’s because cross-selling will display related products regardless of price. Upselling attempts to get your customers to purchase higher-ticket items.
Keep this in mind as you build your WooCommerce popup. Think about which of your products pair well together rather than how much any product costs.
Now for the big question: How do you create a WooCommerce popup to cross-sell and increase your eCommerce sales?
While there are different WooCommerce cross-sell plugins you can use, OptinMonster is hands down your best bet.
OptinMonster lets you quickly make popups that can be synced with your WooCommerce store.
You can make product recommendations based on:
- Specific items in your customer’s WooCommerce shopping cart
- Number of items in your customer’s cart
- Products your customers are viewing in your WooCommerce store
- Categories your customers are browsing through
Along with other targeting options. But more on that later in this tutorial.
For now, let’s go step-by-step on how to create a WooCommerce popup to cross-sell.
But first, do you not have an OptinMonster account yet? Start today risk-free with our 14-day money-back guarantee.
Create a WooCommerce Popup to Cross-Sell
Step 1: Select a Campaign Type and Template
First, log into your OptinMonster account:
Then select your campaign type. For today’s tutorial, we’ll choose Popup:
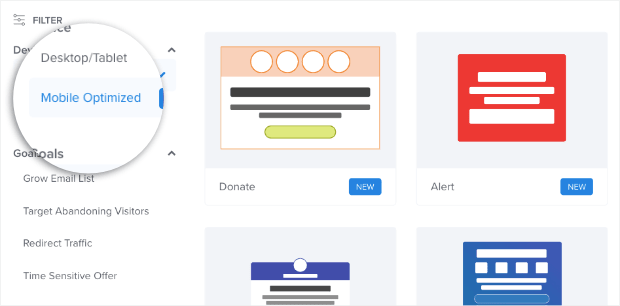
Now you need to select a template. OptinMonster has over 50 pre-built templates to choose from that work on any device (desktop, tablet, or mobile).
Do most of your customers shop from their smartphones? If so, you can filter your options to display mobile optimized templates:
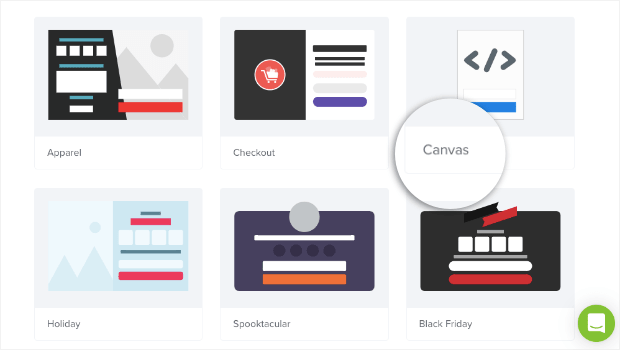
These were specifically designed with mobile in mind. You can also choose the Canvas template to build a popup campaign from scratch:
This lets you create a popup that’s 100% unique to your brand and style. Today, though, we’ll choose the Shopping template:
This template is great for cross-selling because it lets you show the product image on the left and write powerful campaign copy on the right.
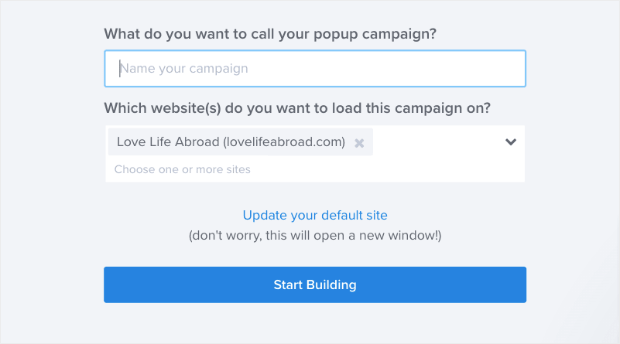
Then all you need to do is name your campaign, assign it to your WooCommerce store, and click Start Building:
You’ll be taken to the editor where you can begin to design your campaign.
Step 2: Design Your WooCommerce Popup to Cross-Sell
Once you’re in the editor, designing your campaign is easy. We won’t go into much depth in this article on how to design your specific campaign.
That’s because your campaign’s design will depend on your brand’s style, voice, and message.
But know that you can customize your campaign to look exactly how you need it to in just a few minutes.
For instance, here’s the WooCommerce popup we created for today’s tutorial:
This popup took us under 10 minutes to build.
If you get stuck at any time, check out this resource on how to create your first campaign with OptinMonster.
What you need to know is that you can change any element of your campaign by clicking on it in the editor. This will bring up the editing tools on the left-hand side.
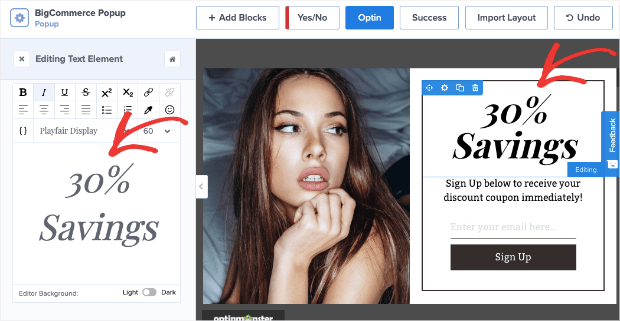
So if you want to change a text block, for example, just click on the block to edit the text on the left:
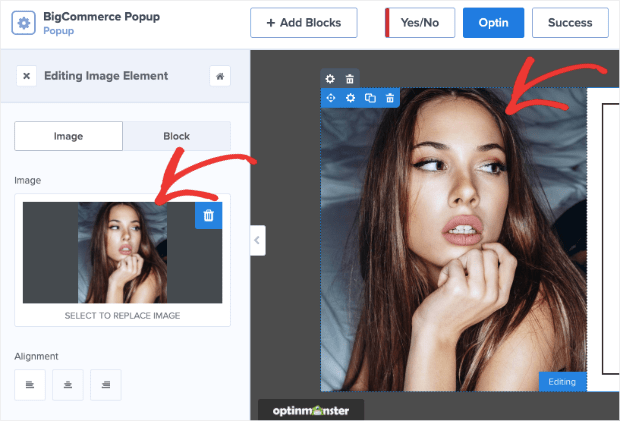
Or you can click on the template’s image. The editing tools that appear let you delete the standard image, upload a new image, or use an existing image in your account:
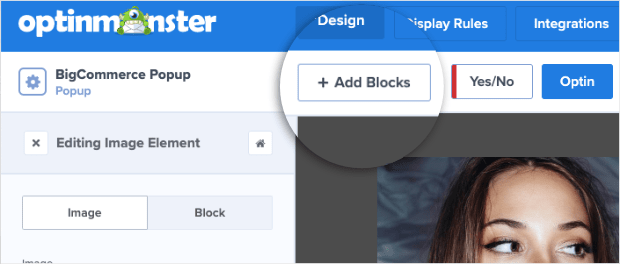
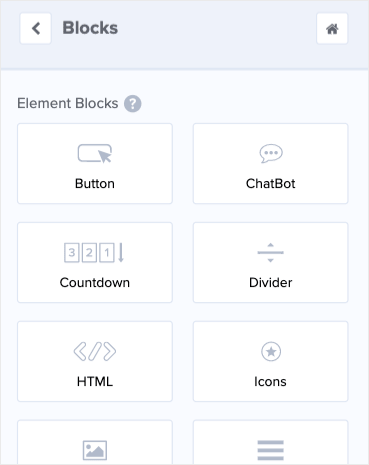
You can also add blocks to create custom features for your WooCommerce popup. Click on + Add Blocks at the top of the menu:
You can add new elements, such as:
- Button
- ChatBot
- Countdown Timer
- Divider
- Image
- Text
- Video
And more.
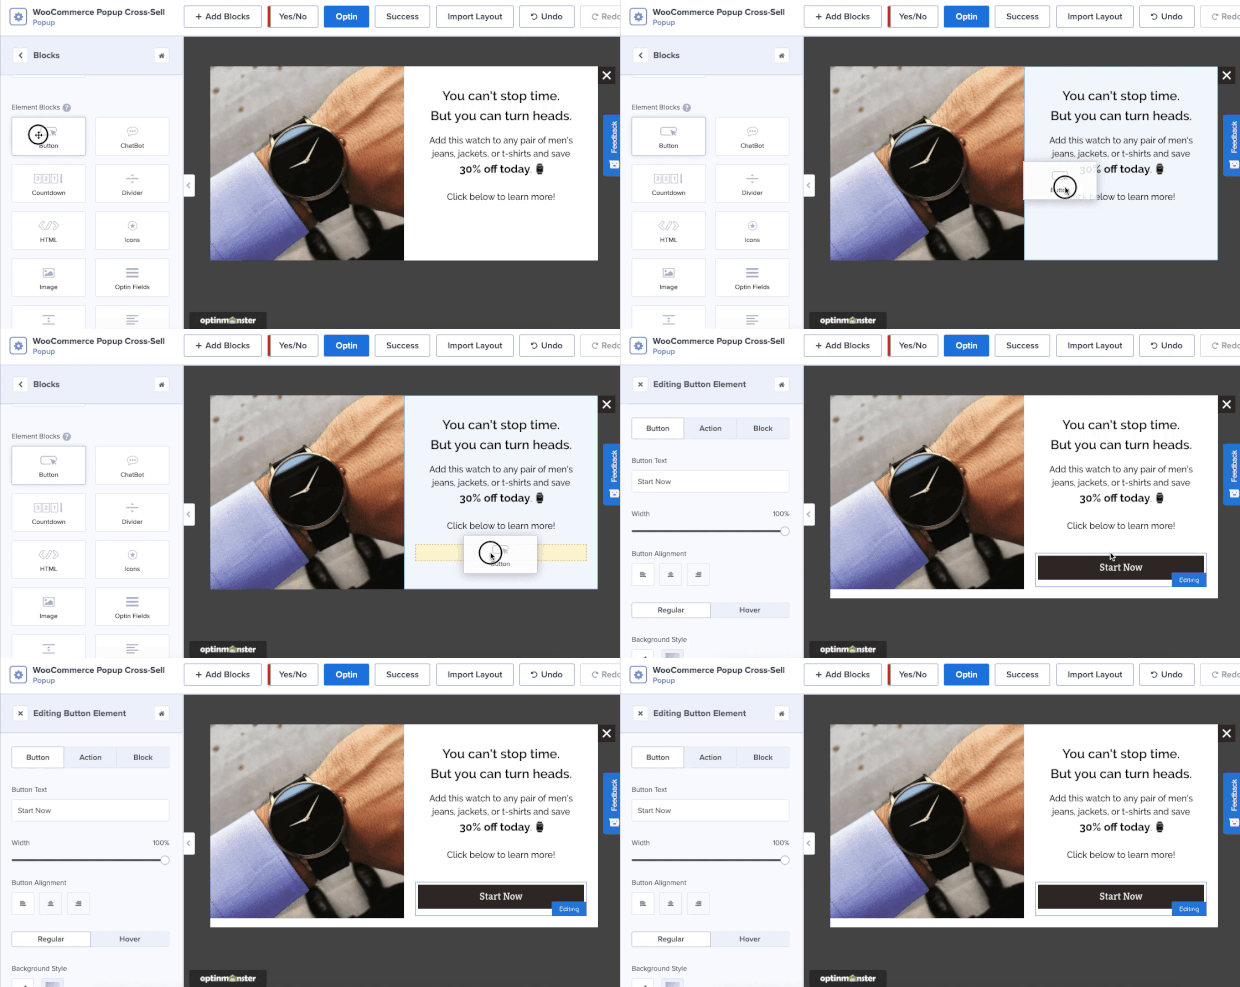
When you’ve found the block you want to add, simply drag and drop it where you’d like:
Again, these are just a few examples of what you can do with OptinMonster’s editor. You can change any aspect of your campaign to make sure it looks exactly like you want it to.
Once you’ve landed on the perfect design for your cross-selling campaign, you need to set display rules. That way, it will appear in the most effective places in your WooCommerce store.
Step 3: Connect OptinMonster With WooCommerce
Cross-selling with a WooCommerce popup couldn’t be easier. That’s because OptinMonster connects with your WooCommerce store from your WordPress dashboard.
That means you can create highly targeted cross-selling campaigns with just a few drop-down menus.
But first, you need to connect OptinMonster with your WooCommerce store.
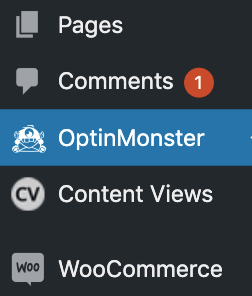
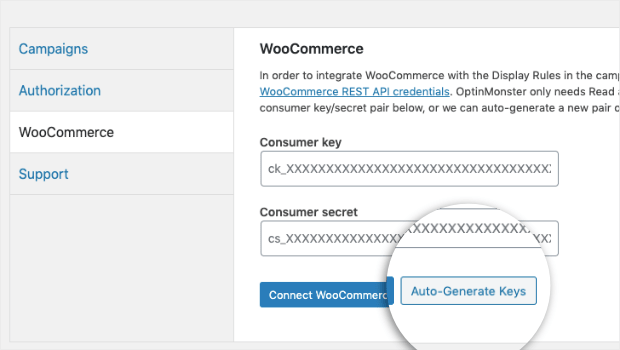
Head over to your WordPress dashboard and find your OptinMonster plugin:
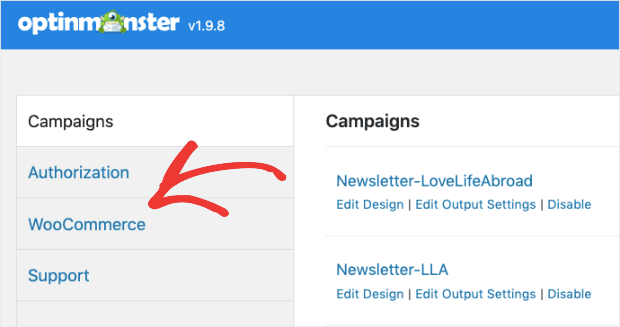
On the OptinMonster plugin dashboard, find and click WooCommerce:
You’ll now see 2 fields:
- Consumer key
- Consumer secret
You can manually create these keys in your WooCommerce store’s Advanced Settings, or you can simply click Auto-Generate Keys:
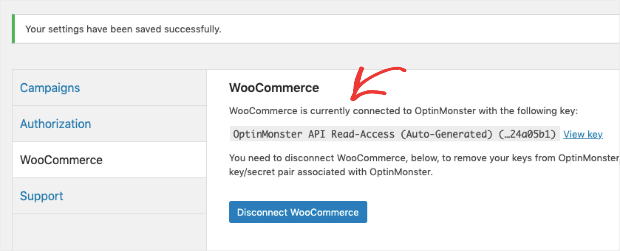
You’ll get a confirmation message when your store is hooked up to OptinMonster’s plugin:
Now you’re ready to create your display rules in OptinMonster.
Step 4: Set up Your Cross-Selling Display Rules
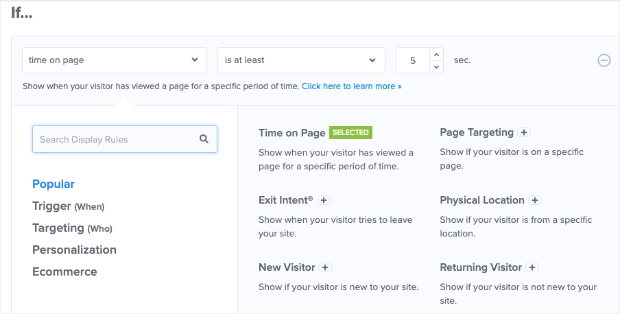
Head back to your WooCommerce popup campaign in your OptinMonster editor. Go to the top menu and click Display Rules:
Then click on the first condition field box, which says Time on page. This will pull up your other targeting options:
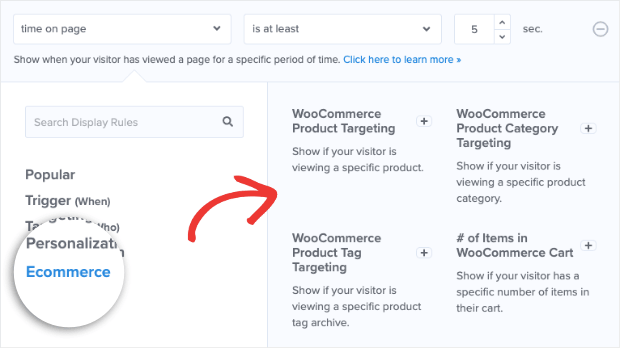
Click the eCommerce filter, and you’ll see options specifically for your eCommerce store:
These rules allow you to make dynamic WooCommerce popups to cross-sell. You can target your audience based on how they interact with your site and products.
You can display your popup when your visitor:
- Looks at a specific product page
- Browses through a product category
- Views products with certain tags
- Adds a product to their cart (or doesn’t add a product to their cart)
- Has a certain number of items in their cart
- Reaches a particular total or subtotal for their cart
With all of these options, it’s easy to create powerful cross-selling campaigns.
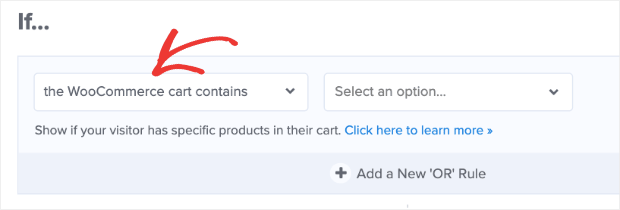
For example, we could take the campaign we built in this tutorial and add the rule WooCommerce Cart Contains:
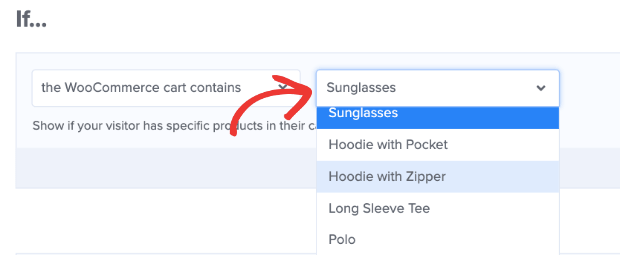
Then select products from the drop-down menu on the right-hand side:
Now, whenever this product is added to the cart, our visitor will see the WooCommerce product popup for a related suggestion.
Or rather than having your customers add something specific to their cart, you can make a more general campaign. For instance, you could change the display rule to WooCommerce Product Category, and select is or is not:
Then, in your final drop-down menu, simply add the name of the category you wish to include or exclude from your rule:
As your shoppers are browsing specific categories in your online store, they’ll get relevant product recommendations.
Every one of your WooCommerce popup display rules is just as intuitive to use.
Plus, you can combine these rules with other targeting and trigger options OptinMonster offers. These targeting and trigger rules include:
- Exit-Intent® (now available for mobile, too)
- InactivitySensors™
- Scroll Triggers
- Page-Level Targeting
- Device-Based Targeting
- OnSite Retargeting®
And so much more.
All of these tools let you create totally dynamic popup campaigns to cross-sell and drastically boost profits.
Now you can cross-sell products by creating dynamic campaigns across your entire site. And as we saw today, you can set up your cross-selling campaigns in just a few minutes!
We hope you enjoyed this article and, if you did, you may want to check out the following resources:
- 15 Upsell Tips & Examples Proven to Boost Average Order Value
- 23 Best WooCommerce Plugins to Boost Sales
- 8 Amazing Cross-Promotion Ideas to Triple Your Customers
- How to Create a WooCommerce Popup (+7 Ways to Boost Sales)
These posts are loaded with information to generate even more revenue from your WooCommerce store. And for more information on OptinMonster, check out this post: How Does OptinMonster Work: 8 Benefits (+ 12 Case Studies).
Ready to get started? Sign up for OptinMonster risk-free today!








Add a Comment