Do you want to create a custom Mad Mimi popup to grow your email list?
Building a mailing list is challenging when you’re a business owner with a lot on your to-do list. But with a popup, you can skyrocket your email list quickly without even having to hire a designer.
In this tutorial, we’ll show you how to easily create a custom Mad Mimi Popup that will get you more subscribers fast.
What Is a Custom Mad Mimi Popup?
A Mad Mimi popup is an email optin form that displays on top of your content, designed to capture your users’ attention quickly.
It’s connected to your Mad Mimi account, so when people complete your popup form, their details are stored in your Mad Mimi database.
With an email marketing service like Mad Mimi, you can send bulk emails with updates about new content, products, or discount offers.
If you’re using Mad Mimi, you can easily:
- Create email newsletters with a drag and drop builder
- Review analytics to study which content, offers, and subject lines perform best
- Segment subscribers so you can send targeted emails
All this means you’re able to send personalized emails without too much work from your side.
Out of the box, Mad Mimi doesn’t allow you to create a popup to grow your list.
Here’s where OptinMonster comes in.
OptinMonster is the best conversion-optimized popup software. This means OptinMonster helps you convert your site visitors into subscribers with stunning popups.
Once you start engaging those subscribers with interesting content and relevant offers, they’re more likely to become paying customers.
More than 1 million websites use OptinMonster to generate more leads from their traffic.
And with less time and effort.
OptinMonster comes with:
- Stunning templates that attract your site visitor’s attention
- Campaign triggers that show your popups at the right time when they’re more likely to subscribe
- Detailed targeting to display your popups to people based on their behavior on your site
- Real-time campaign stats to help you test and improve your lead generation strategy
Put simply, instead of generic campaigns, OptinMonster lets you display the right campaign to the right person at the right time.
And more targeted popups lead to more subscribers.
One of the advantages of OptinMonster is that it’s easy to put all of these campaigns into action.
You don’t need any coding or design skills to create targeted, beautiful popup campaigns.
Kindlepreneur.com increased their email list by 528% using OptinMonster! Dave Chesson, the owner of Kindlepreneur, took just two hours to set up his popups and doubled his daily optin rates.
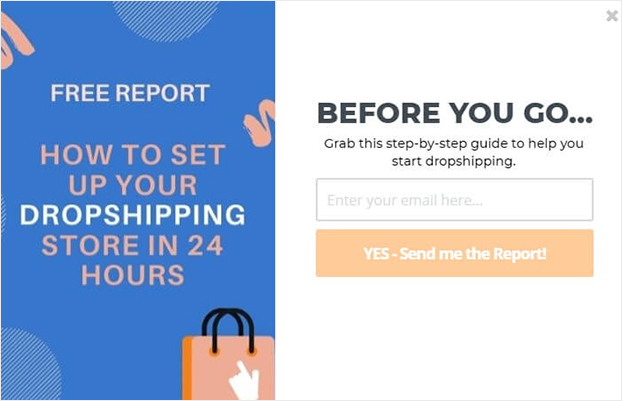
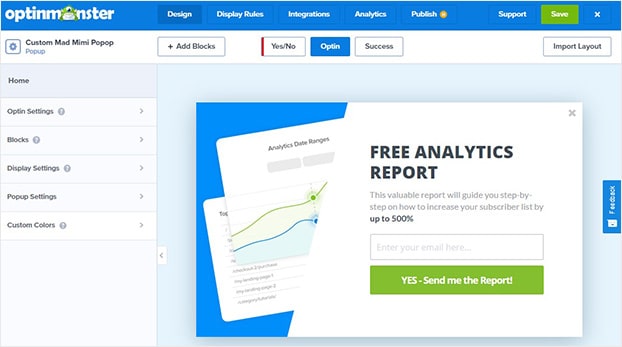
Today, we’ll build this popup in under 15 minutes:
And, we’ll refine the targeting to increase the chances of our site visitors giving us their email addresses.
Let’s get started.
How to Create a Custom Mad Mimi Popup
Before we begin, you’ll need to sign up for an OptinMonster account.
Step 1: Create Your OptinMonster Campaign
To get started, you’ll need to log into your OptinMonster account.
Select Create New Campaign.
Now, it’s time to choose your campaign type.
OptinMonster campaign types include:
- Floating bar: a footer or header bar that scrolls with your site visitor
- Slide-in scroll box: an alternative for a popup that slides from the corner
- Inline forms: forms that you can embed on any page
Different campaigns increase conversions in different contexts.
For example, a floating bar is a great way to promote free shipping on an online store. Inline campaigns work well to convert people who’ve already shown interest in your content. That’s because your site visitor only sees the campaign once they’ve committed to reading your content.
For this tutorial, we’ll go with Popup.
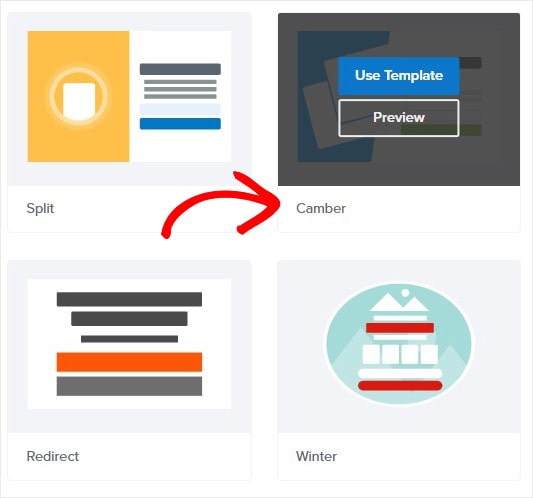
Now, select your template.
You can choose from 50+ templates for any type of campaign. But if you want to build a popup from scratch, you can choose the Canvas template. With Canvas, you can create a unique popup without any HTML.
Today, we’ll choose Camber.
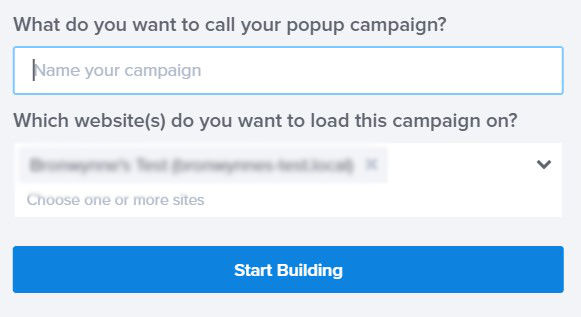
Name your campaign and click Start Building.
Now you’re ready to customize your Mad Mimi popup.
Step 2: Design Custom Mad Mimi Popup
The next screen is OptinMonster’s editor.
Customizing your Mad Mimi popup in OptinMonster is simple.
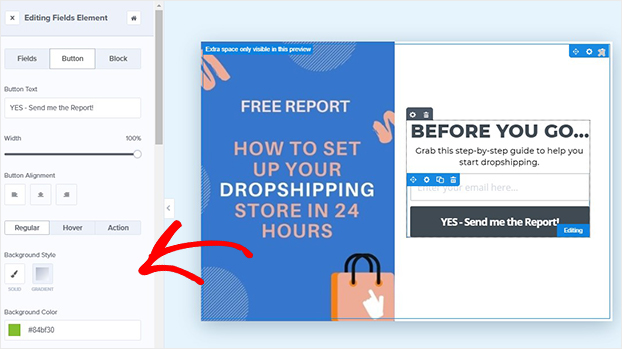
All you need to do is click on an element to change it or drag an element onto your optin form.
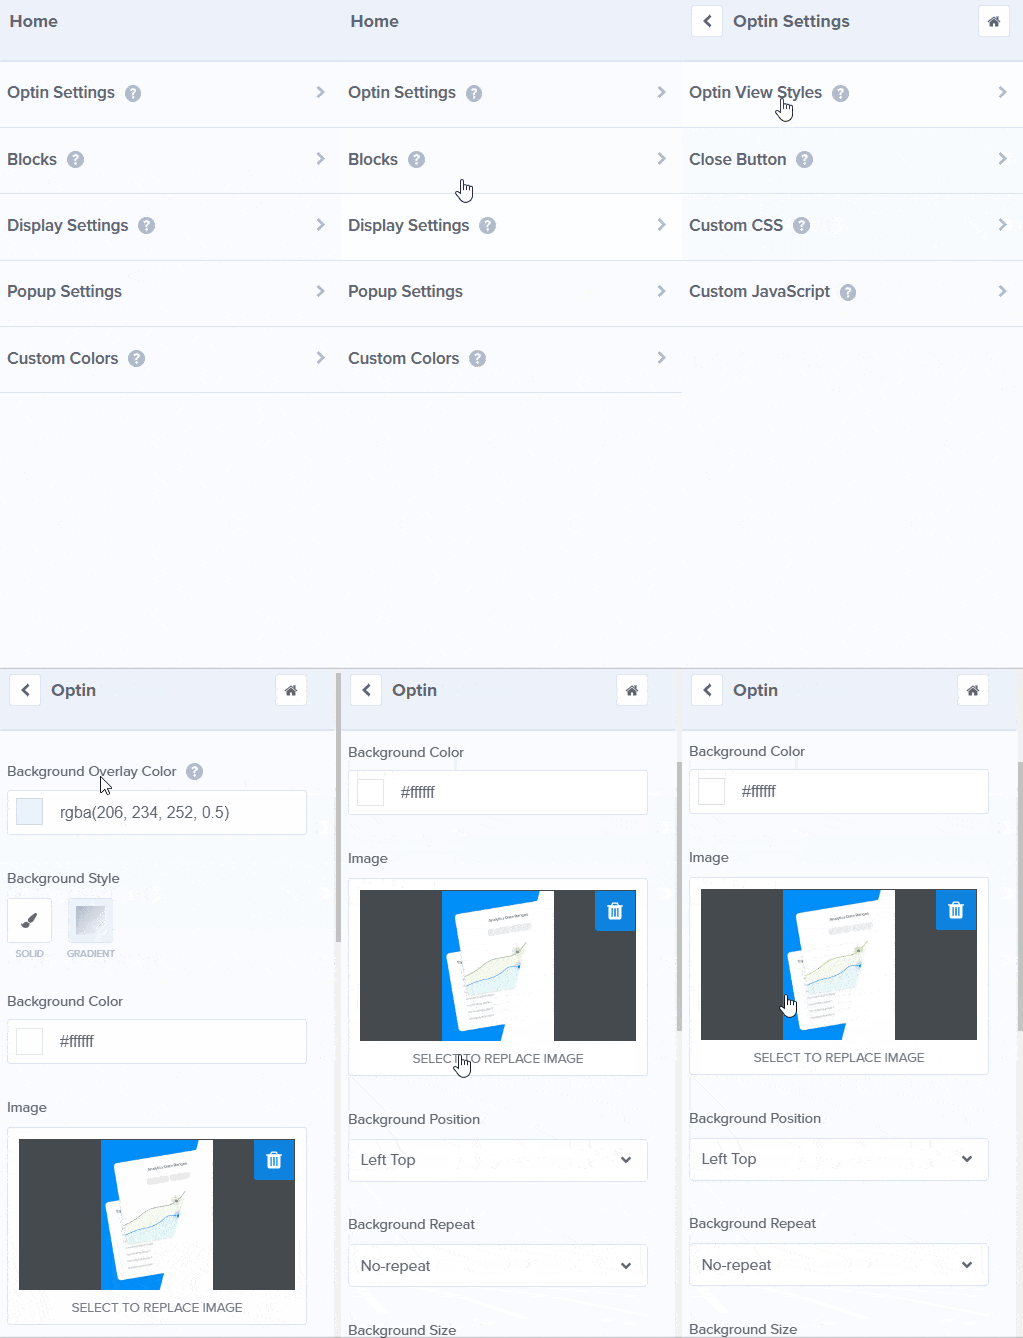
Now, let’s change the image.
Click on Optin Settings and select Optin View Styles.
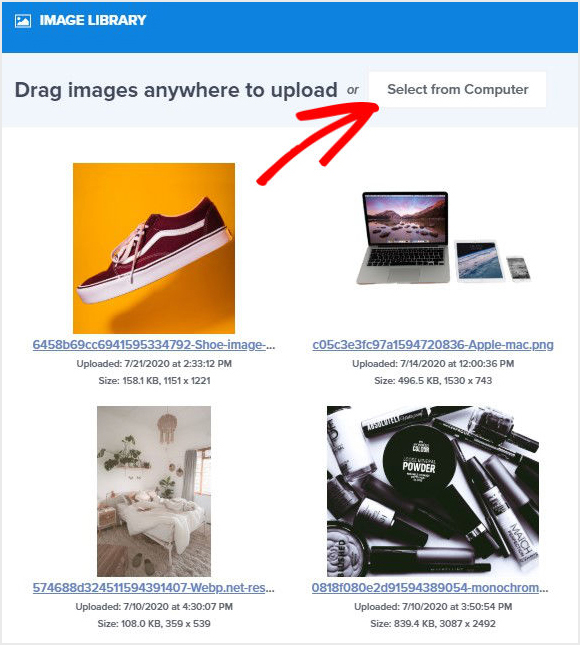
From the image library, choose Select from Computer. Upload your image.
To edit the button, we’ll click on it and edit the text and color on the left.
Maybe you want to add something to your optin form?
Head over to Add Blocks at the top of your editor.
Here you’ll see more elements, like:
- Video
- HTML
- Additional optin fields
Once you’re happy with your design, you can hit Save at the top of your editor. And you can save your work at any time.
Now, we’ll display our Mad Mimi popup.
Step 3: Display Your Custom Mad Mimi Popup
There are so many different ways you can display your Mad Mimi popup.
OptinMonster lets you create smart popups with two powerful features:
- Triggers
- Targeting
Triggers control when to display your popups:
- Scroll trigger: only show campaigns after the visitor has scrolled a certain percentage of the page
- Timed display control: avoid showing popups too soon and only show after a visitor has spent a certain amount of time on your site or page
- InactivitySensor™: monitor behavior to detect when your visitor has stopped activity on your site, which usually means they’re about to abandon their carts
Targeting lets you control who sees your popups:
- Referrer Detection: create targeted messages for visitors coming from specific traffic sources, like a social media site
- Geo-Location Targeting: customize campaigns based on your visitor’s physical location
- OnSite Retargeting: display special offers for returning visitors
Today, we’ll look at two powerful display rules:
- Exit-Intent®
- Scroll Trigger
Exit-Intent
Exit-intent detects when your visitor is about to leave your site. Right then, your popup appears with a targeting offer.
On desktop, exit popups are triggered when users move their cursor towards the browser bar. Check out this article for a step by step guide on how to create a mobile exit popup.
Scott Wyden Imagery used exit-intent optins to recover 21.6% of abandoned carts!
First, head over to Display Rules.
Find and select Exit-Intent.
Scroll Distance
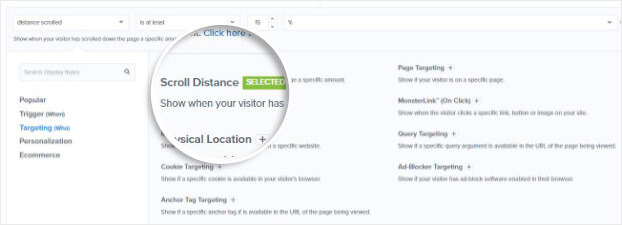
Scroll Distance only shows campaigns after your visitor has scrolled a certain percentage of the page. It’s a great way to only display your campaigns to engaged site visitors.
Under the Display Rules tab, click Scroll Distance.
Next, set the percentage of the page your visitor needs to scroll to trigger your popup.
Now, we’ll connect OptinMonster to your Mad Mimi account.
Step 4: Connect OptinMonster to Mad Mimi
At the top of your editor, select Integrations.
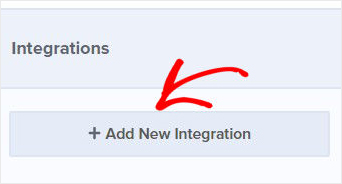
Click Add New Integration.
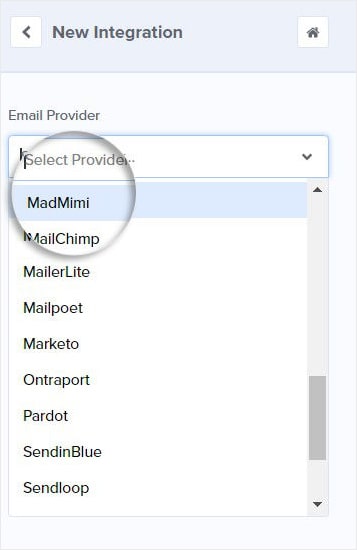
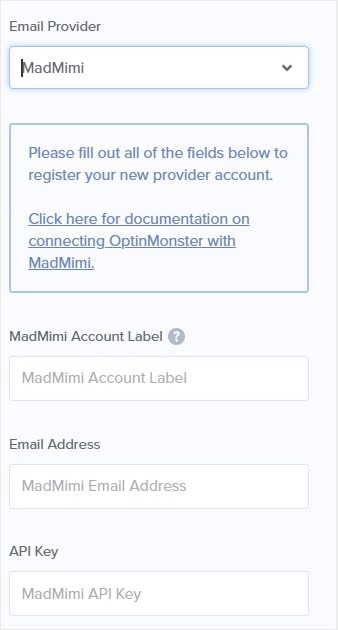
From the Email Provider dropdown, select Mad Mimi.
You’ll need to do three things now:
- Name your integration: this is only for personal use
- Add your email address: enter the address you used to set up your Mad Mimi account
- Enter your API key: find your API key in your Mad Mimi account
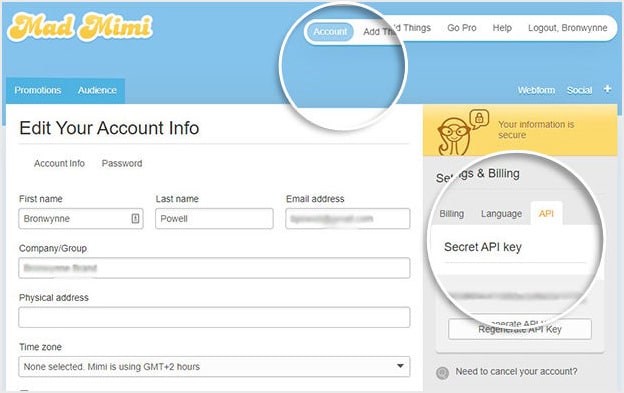
So, log into your Mad Mimi account.
Click Account from the top menu.
Head to Settings and Billing and copy your API key.
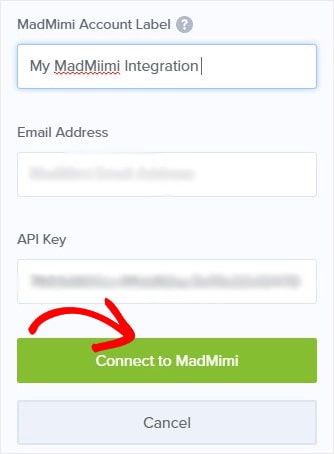
After that, go back to your OptinMonster account.
Paste your API key and click Connect to Mad Mimi.
Finally, publish your campaign.
That’s all there is to it. In less than 15 minutes, you’ve made a long-term investment into your email marketing strategy.
Once you start collecting your subscribers, you want to make sure you’re sending the right emails.
Want to know how to create campaigns that will encourage your subscribers to read your content or buy from you?
Check out these articles:
- Email Marketing Made Simple: A Step by Step Guide [+ Examples]
- 17 Tips for Writing Email Marketing Copy that Converts
Want to get started? Get OptinMonster today and start growing your list right away.









Add a Comment