Do you want to add a popup to your Jimdo website?
Popups are an effective way to communicate with your audience. And using popups can help you to grow your email list, drive website traffic, and increase sales.
But crafting the right kind of popup campaign takes time.
That’s why we’re covering the fastest, simplest way to add a Jimdo popup to your site.
By the end of this article, you’ll know exactly how to create a Jimdo popup that converts.
Why Add a Jimdo Popup
A Jimdo popup is a lead capture form that’s specifically designed to grab your audience’s attention when they land on your site. It typically appears on top of a webpage, covering the content behind it.
Why put all that effort into getting emails?
Once you’ve built an engaging email audience, you can share content and updates with your subscribers. Over time, and with the right emails, you can build a long-lasting relationship and convert your visitors into paying customers.
That’s not all you can do with popups.
Popup campaigns have different goals:
- Share important business information: Changing your store hours? Offering free shipping? Use a popup to display this information.
- Reduce shopping cart abandonment: Show a custom popup on the checkout page to convince users to engage with your offer when a customer abandons the cart
- Redirect traffic: Page redirects will take your visitor to a new post or product page. This way, you can send visitors to related products or posts.
- Offer lead magnet download: What’s a common customer problem? Give your site visitors a piece of content that responds to that need.
- Present coupon codes: Offer discounts for products your site visitors are interested in.
Of course, popups only work if they’re highly targeted. On the other hand, generic campaigns are more likely to irritate your visitors.
You want to show the perfect offer to the right visitor at the right time.
OptinMonster makes it incredibly easy for you to add a targeted popup to your Jimdo website.
OptinMonster is the best popup software for Jimdo. It allows you to easily create eye-catching popups with prebuilt templates and a drag and drop builder.
With OptinMonster, you can control where and when you show your popup, like on a specific page, only to new or returning visitors, and more.
OptimizeMyAirBnB used these OptinMonster features to grow its email list 650%.
And it’s incredibly easy, too.
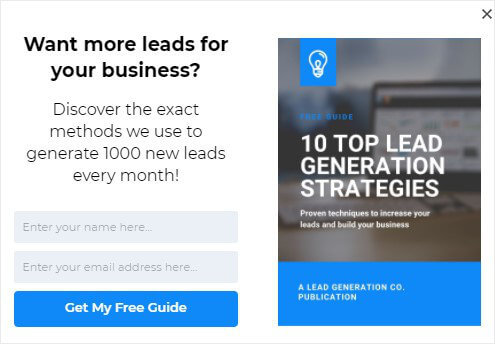
You can create a popup like this one in just a few minutes:
How to Create a Jimdo Popup
Now, we’ll walk you through each of the steps to create a Jimdo popup.
If you want to build the popup as you go, you’ll need an OptinMonster account.
You can sign up for your OptinMonster account using the link below. It’s risk-free with our 14-day money-back guarantee.
Ready?
Let’s get started.
Step 1: Create an OptinMonster Campaign
Once you’ve logged into your OptinMonster account, you need to choose Create Campaign from the dashboard.
Now, select your campaign type.
There are 6 different campaign types.
All work well in different contexts:
- Popup
- Floating Bar
- Fullscreen
- Inline
- Slide-in
- Gamified
Today, we’ll go with Popup. And this will display a lead capture popup over your Jimdo site’s content.
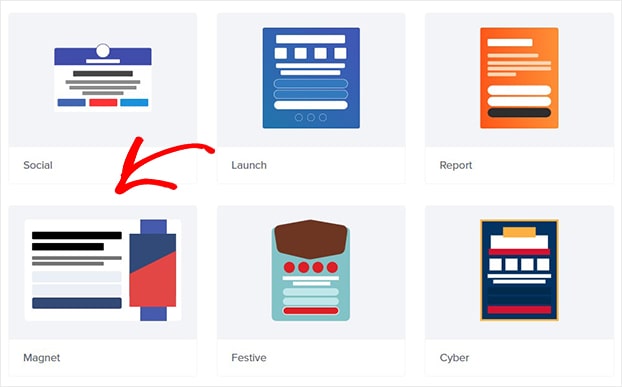
Now, we’ll need to choose a template.
There are tons of attractive options.
Need help deciding which template to choose?
Try narrowing your search with these filters:
- Campaign goal: grow email list, target abandoning visitors, redirect traffic, or time sensitive offer
- Category: professional services, marketer, or store owner
Or, you can design you own popup from scratch with our Canvas template. No code required.
All templates work across computer, tablet, and smartphone.
Today, we’ll go with Magnet because it’s perfect for the lead magnet we’re offering. A lead magnet is an incentive you give to site visitors in exchange for their email address.
Again, it’s usually a piece of downloadable content that solves a common reader problem.
Popular lead magnet types include:
- Ebook
- Guide
- Checklist
- Cheat sheet
Do lead magnets work?
Lead magnets that solve your target audience’s biggest problems or goals are a proven lead generation strategy. It’s how Inbound Marketing increased conversions by 189%.
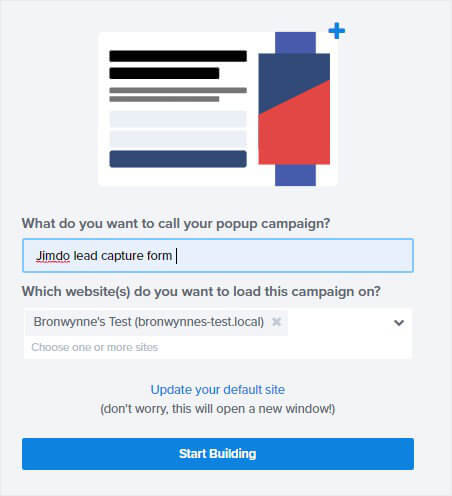
You’ll now be prompted to name your campaign.
Click Start Building to enter the OptinMonster editor.
Now, you’re ready to design your popup.
Step 2: Design Your Jimdo Popup
Customizing your template is easy with OptinMonster’s drag and drop builder.
Simply click on any part of the popup to make the changes you want. The result is that you only need to spend minutes designing your popup instead of hours.
Let’s have a closer look.
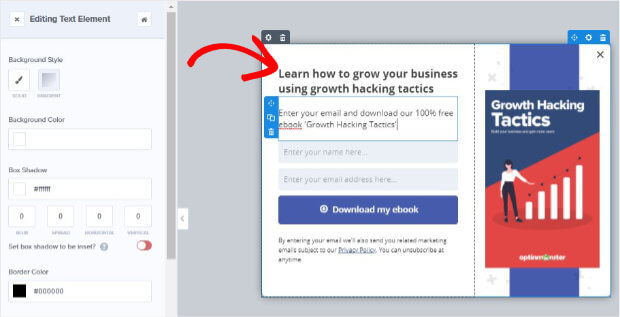
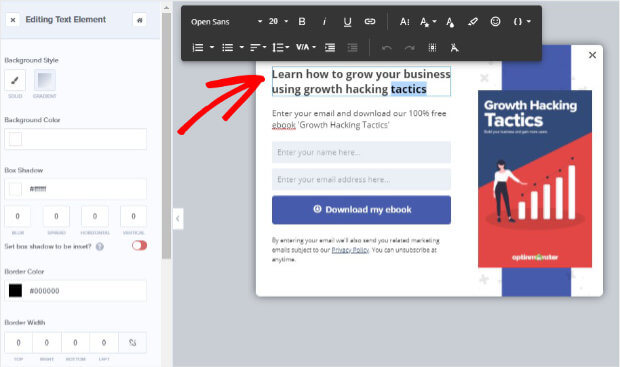
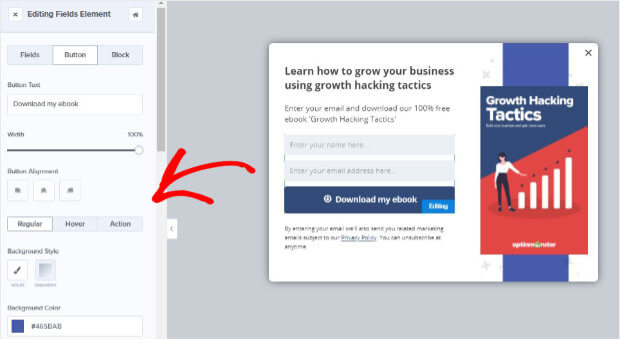
OptinMonster’s inline editor lets you add your copy directly to the popup.
So, to change your text, you only need to click on the text box to add and customize your own content.
When writing copy for your lead capture form, make sure to cover the best practices:
- Strong headline
- Clear call to action
Need help writing copy for your optin form?
Check out these resource for more for expert tips and examples:
- 130+ Proven Opt-in Headline Ideas to Get More Email Subscribers (Cheat Sheet)
- 63-Point Checklist for Creating the Ultimate Optin Form (with Examples)
- 69+ High Quality Copywriting Templates Proven to Work
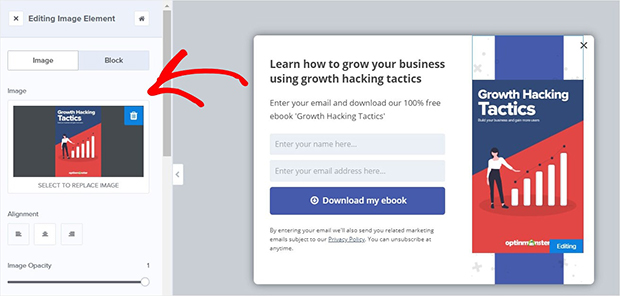
Along with compelling copy, a great lead capture form needs an eye-catching image.
Today, we’ll include an image of our eBook.
You can make your own in 15 minutes with visual content creation tools.
Again, simply click on the popup. From the left, you’ll be able to add your own image.
Similarly, to change anything about the button on the popup, just click on it.
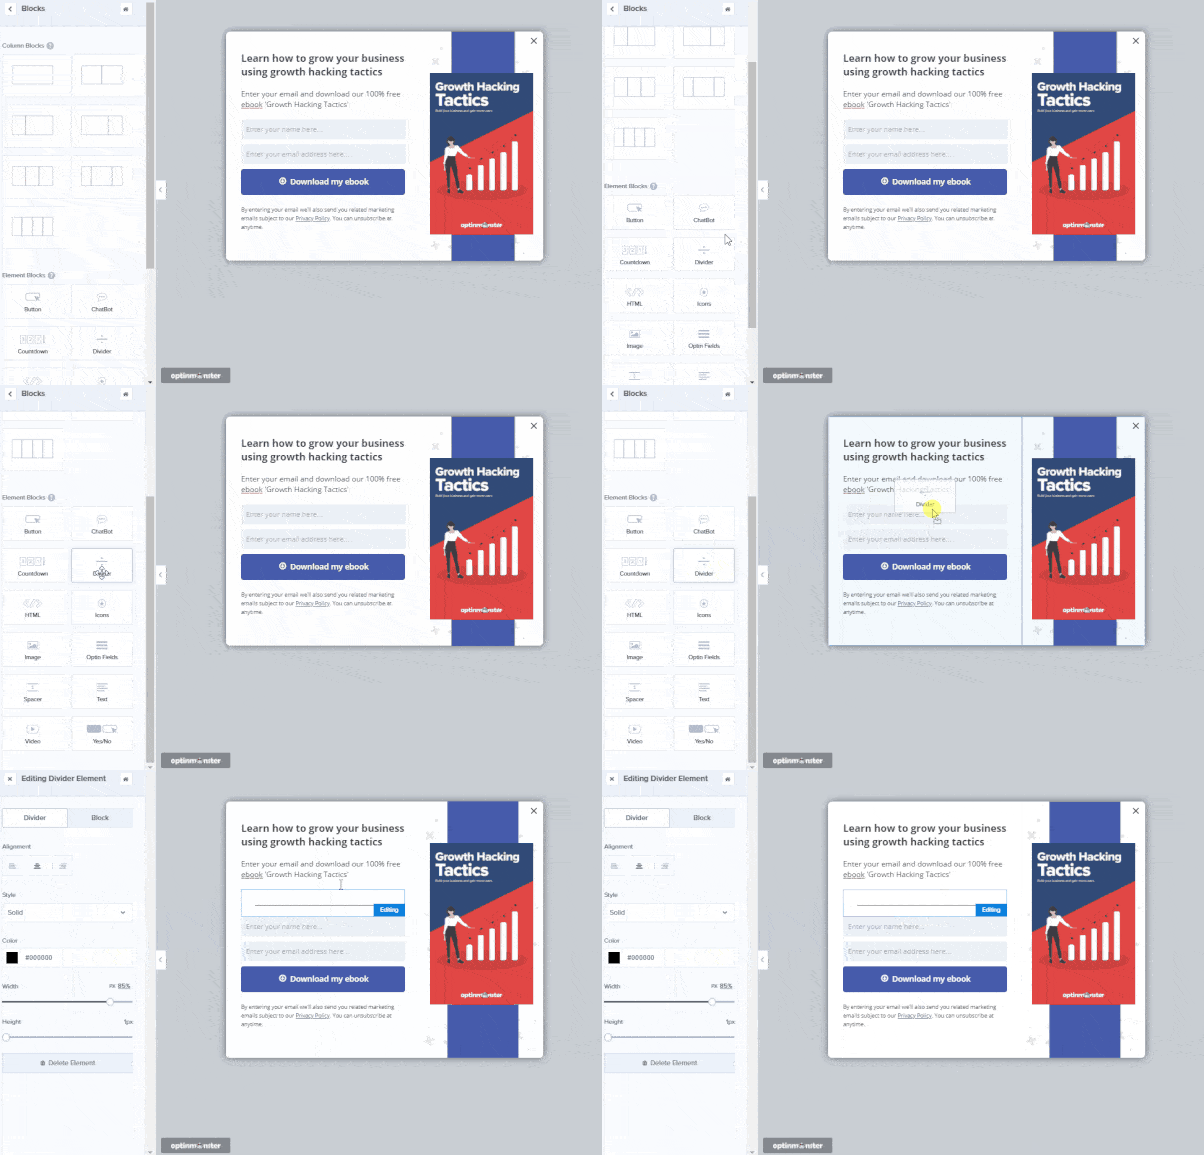
Want to add a new block to the popup?
Click Add Blocks at the top of your editor.
All you have to do is drag the block to your popup:
In just a few minutes, we created this popup:
In the next step, you’ll determine when and where to show your popup.
Step 3: Display Your Jimdo Popup
OptinMonster shows popups based on your site visitor’s behavior and interests.
For example, you can create special popups for visitors depending on their physical location or the device they’re using.
And so much more.
OptinMonster does this with targeted campaigns and campaign triggers.
Here are examples of targeting rules:
- Show a targeted offer as a visitor is about to leave your store
- Offer a discount for a product someone’s looking at
- Display a popup only after a visitor has spent some time engaging with your content
- Show targeted messages based on which site the visitor is coming from, like from a specific social network
- Create special promotions for returning visitors
- Display tailored offers to existing subscribers using cookie retargeting
Today, we’ll look at two display rules, Scroll Distance and Page-Level Targeting.
Scroll Distance
The Scroll Trigger shows your popup after your visitor has scrolled down a certain amount of your webpage. These scroll-triggered boxes are proven to reduce bounce rate and increase visitor retention.
This targeting rule works because your visitor has already made a commitment to engaging with your content.
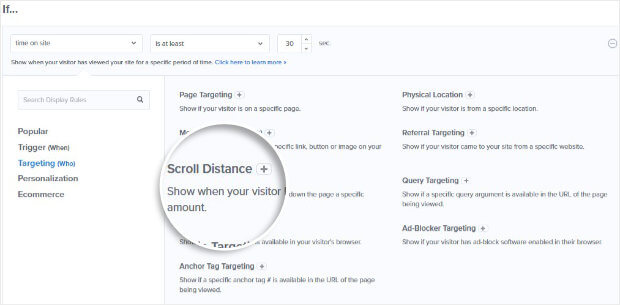
First, you need to head over to Display Rules at the top of the editor.
Next, find and select Scroll Distance.
Now you need to choose scroll depth.
Next, choose the modifier. You can choose between percentage scrolled and pixels.
Check out this article for more: Scroll Triggered Boxes: 11 Hacks To Boost Your Conversions
Page Targeting
Imagine your site visitor is reading an article about growing their web traffic and you showed a popup on that page offering a free ebook on boosting web traffic. Your users are more likely to engage with the popup because the lead magnet offers what your user is interested in.
That’s the kind of refined targeting you can do with Page Targeting.
Flywheel increased engagement 660% using Page Level Targeting.
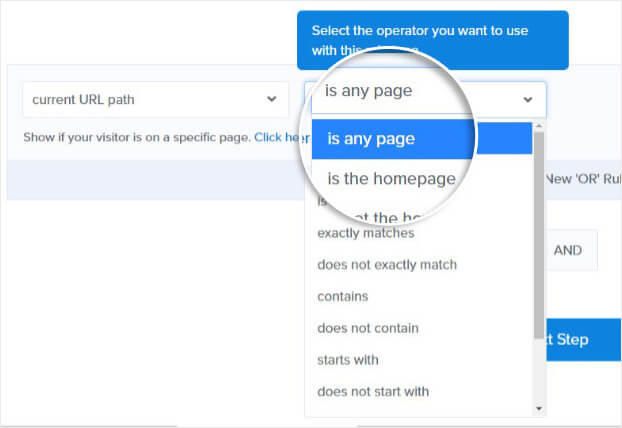
From the Display Rules tab, select Page Targeting.
Choose the page where you want to show your campaign.
In the next step, you’ll publish your Jimdo popup.
Step 4: Integrate OptinMonster and Jimdo
All that’s left now is to integrate OptinMonster with your Jimdo site.
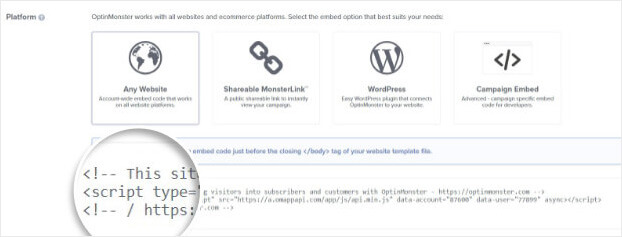
For that, we only need to paste one embed code onto our Jimdo site.
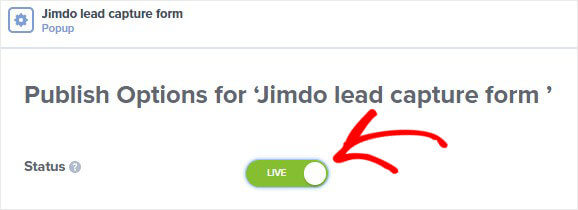
Head over to Publish at the top of your editor.
Now, switch the campaign status to Live.
Scroll to the bottom of the page and copy the embed code.
First, log in to your Jimdo admin area.
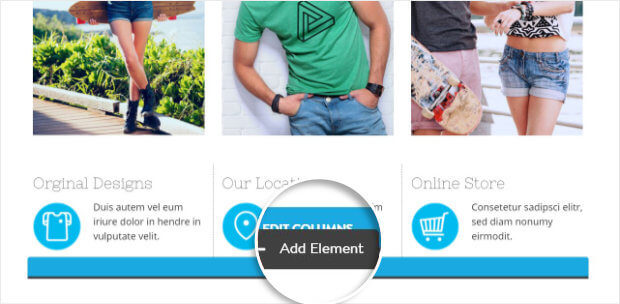
Hover over the section of the page where you want to place your embed code and select +Add Element.
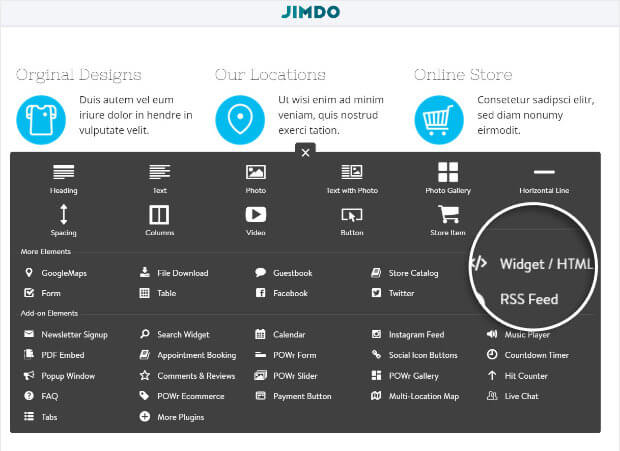
Select Widget/HTML.
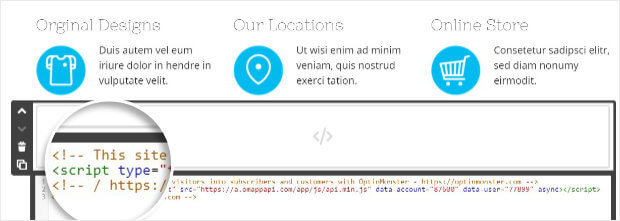
You’ll see a text box appear. Paste the embed code. Go ahead and click Save.
That’s it! Now, your lead capture popup will appear on your Jimdo site.
If you enjoyed learning about how to build a high-converting popup, you might enjoy these articles:
- Email Marketing Made Simple: A Step by Step Guide [+ Examples]
- 50 Email Segmentation Tips You Need to Use Now
You now have a few resources to help you turn email marketing into an important asset.
Want to convert your casual site visitors into subscribers? Get OptinMonster today!










Add a Comment