Do you want to create a custom Emma popup to increase your mailing list?
Email marketing is one of the best ways to build long-lasting relationships with your website visitors, increase site traffic, and drive conversions.
But building an email list isn’t always easy. Finding the right tools and techniques can be overwhelming.
Fortunately, the right kind of Emma popup will grow your list fast.
By the end of this tutorial, you’ll know exactly how to create a custom Emma popup that boosts your list.
What is a Custom Emma Popup
Emma is an email marketing software that lets you easily create personalized campaigns.
Emma’s features include:
- Automated emails based on subscriber activity, like whether they’ve visited your website or made a purchase
- List segmentation so you’re sending targeted emails to your subscribers
- A/B content testing to track the performance of your emails, giving you data to build better campaigns
Emma comes with an easy to use drag and drop editor. But, if you want, you can code your own emails in HTML.
With all of these features, Emma makes it easy for you to send targeted emails to your subscribers.
But, where does an Emma popup fit into your email marketing strategy?
An Emma popup is a signup form that sits on top of your site content, and its goal is to collect email addresses. In this case, the popup is connected to your Emma account.
So, do popups work?
It’s true untargeted popups distract your visitors, interrupt their browsing experience, and chase them off your site.
But, beautiful, well-timed popups grab your site visitor’s attention with the right message at just the right time.
And the best thing is you can create one easily today.
Emma comes with a basic popup form feature for beginner-level users. The problem is that they’re untargeted and boring, which could negatively impact your user experience and signup rates.
This is where OptinMonster comes in.
OptinMonster is the best popup builder tool that lets you easily create a custom popup with any email marketing service, including Emma to instantly grow your email list. OptinMonster comes with an easy to use drag and drop builder and more than 50 stunning templates.
With OptinMonster, you’ll get:
- Beautiful templates that are built for creating visually stunning campaigns
- Multiple campaigns, like floating bar, full-screen welcome mat, and more
- Targeting features that let you control when you show the popup, like as you visitor is about to leave your site
Trading Strategy added 11,000 subscribers in just over one month using OptinMonster.
And it’s incredibly easy to create high-converting popups.
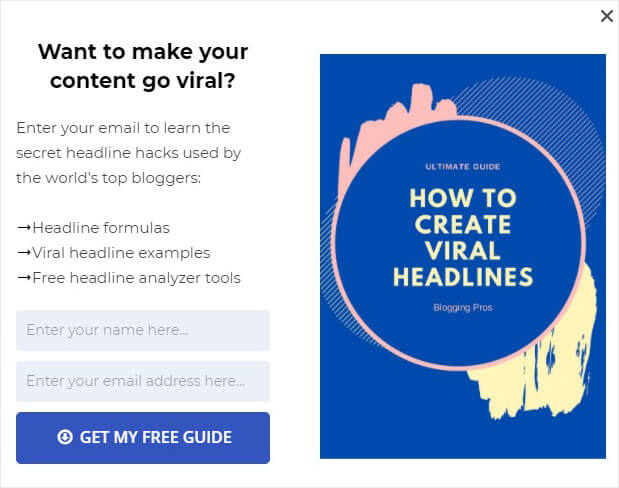
Today, we’ll build this popup together:
Ready?
Let’s begin.
How to Create a Custom Emma Popup
Before you start building your custom Emma popup, you need an OptinMonster account.
If you want to learn more about how OptinMonster can help your site grow, check this article: Is OptinMonster Worth It? (An Extensive Review for 2020)
Let’s begin.
Step 1: Create OptinMonster Campaign
First, you’ll need to log into your OptinMonster account.
Click Create New Campaign in the top-right corner of your dashboard.
Now, you’ll need to choose a campaign type.
OptinMonster customers use different campaign types for different goals:
- Fullscreen welcome mats present targeted offers as visitors land on your site
- Floating bars stick to your site header or footer and are often used to promote seasonal offers
- Inline forms are embedded in your content and are ideal for converting visitors who are already engaging with your content
Today, we’ll go with Popup.
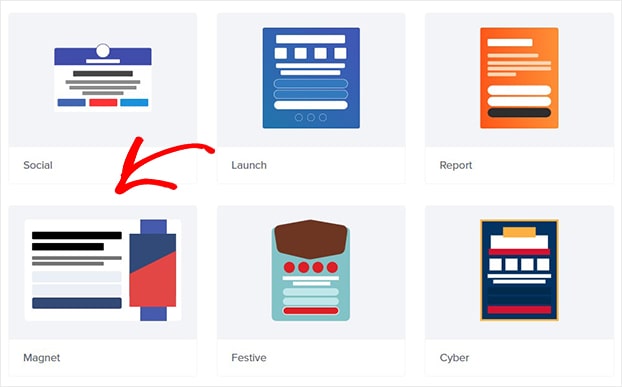
Then, you’ll select a template.
You can choose from more than 50 templates.
For this tutorial, we’ll use Magnet because it’s perfect for the custom Emma popup we’re creating today. There’s space for an image and compelling copy.
The next step is to design your popup.
Step 2: Design Custom Emma Popup
Now, you’ll be in the OptinMonster editor.
Here, you can easily change everything about your popup.
Simply click on any part of the popup to edit it. Then, you’ll see the editing tools appear on the left.
For today’s tutorial, we’ll be offering our subscribers a guide in exchange for their email addresses.
Our guide is called a lead magnet, an incentive marketers offer subscribers in exchange for their email addresses.
Check out this article for highly effective lead magnet ideas to grow your email list.
One way to grab attention is to add an image of your guide to your popup.
Don’t have an in-house designer? Try these visual content creation tools.
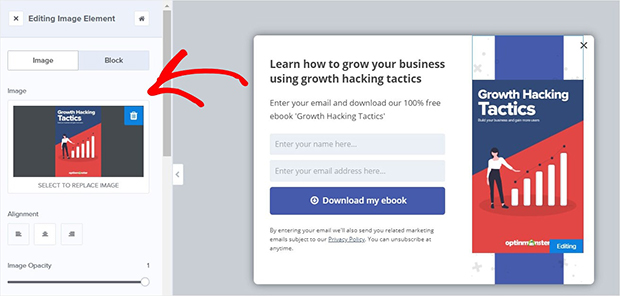
Simply click on the image. That will pull up the editing panel on the left.
From there, you can select an image from your computer or browse your image library.
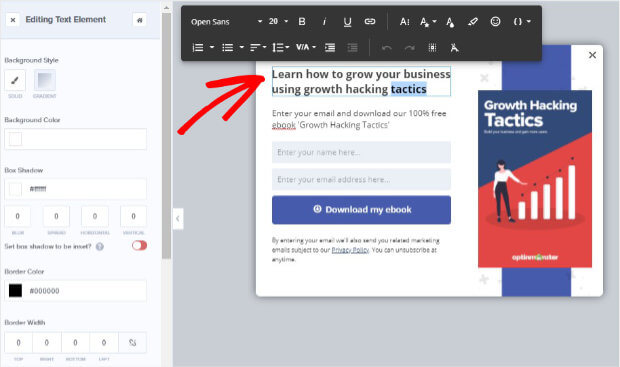
Now, we’ll edit the text. Simply click on the text block to make your changes.
You can customize the copy, font color, size, and alignment of the text.
Follow the same steps to edit the other text blocks.
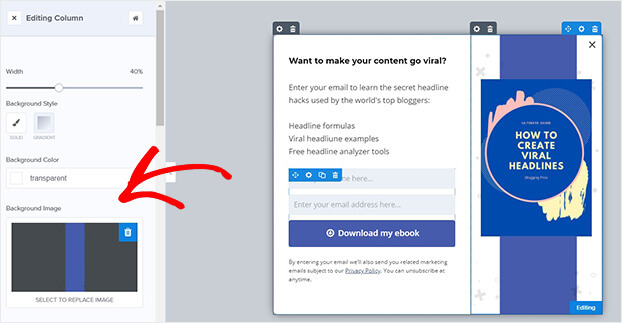
You can also remove blocks from your popup.
For instance, we might not want the purple strip in the background.
Simply click on it to delete it.
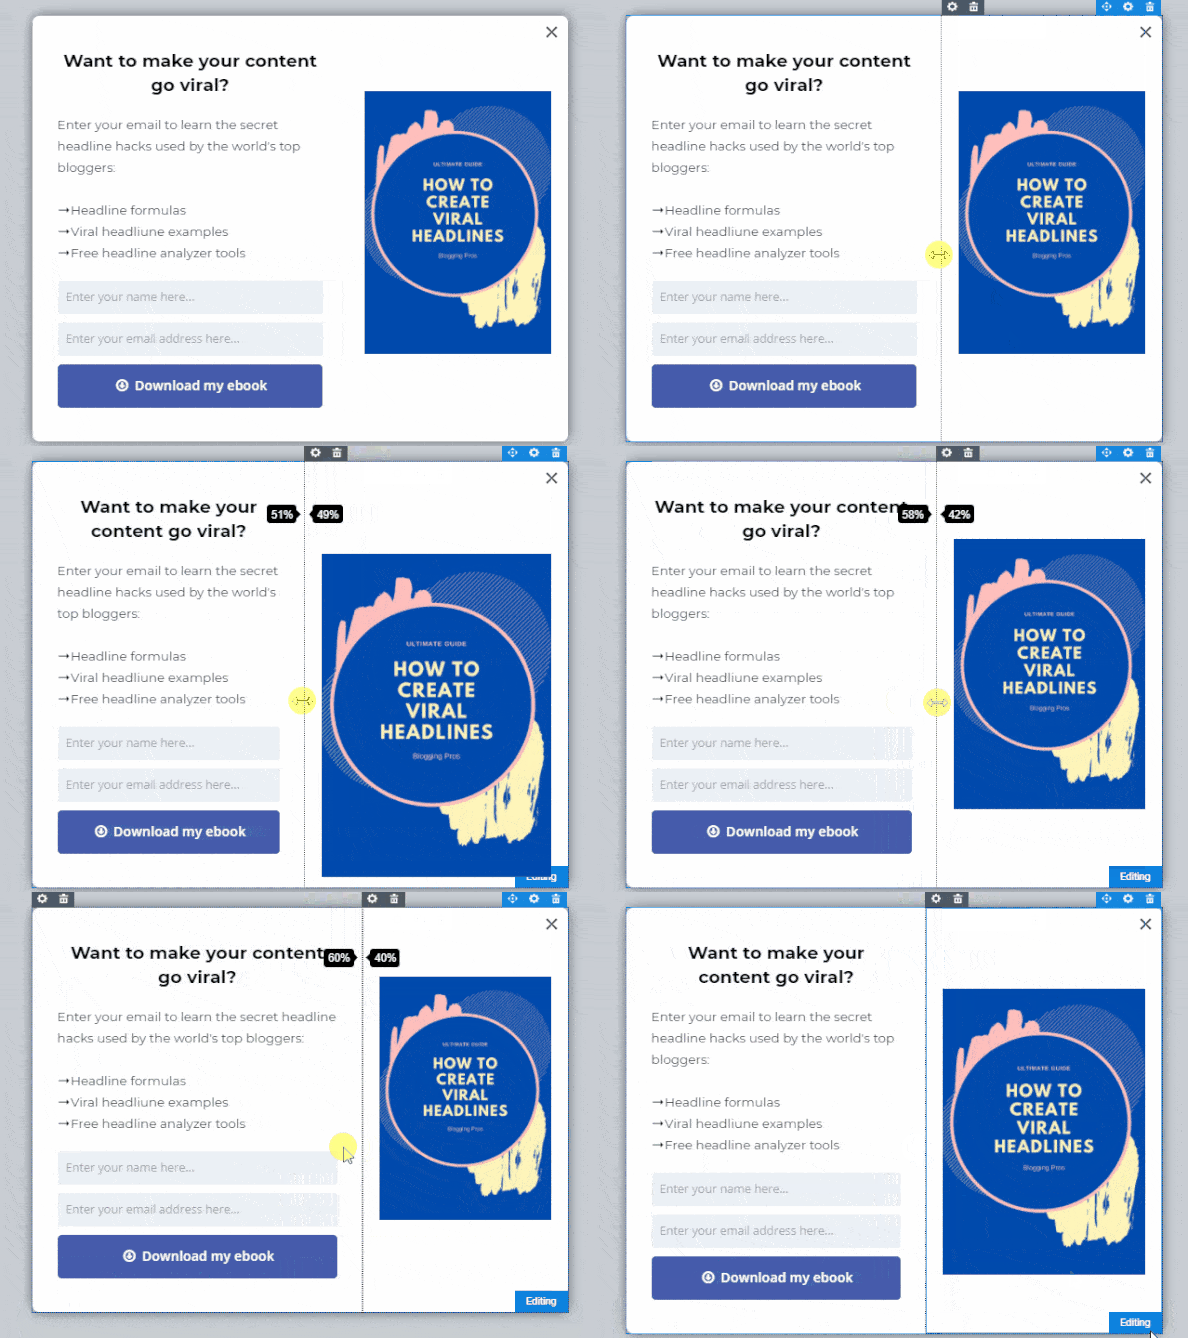
Want to tweak the layout?
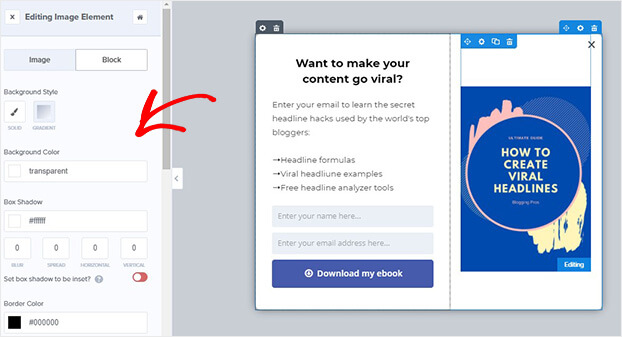
You can drag columns to resize them.
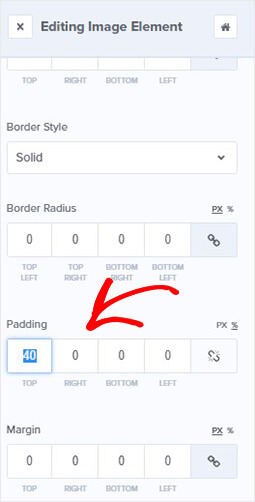
You can also change the space around elements to center your image or text.
Let’s try that with the image.
So, we’ll click on the image to bring up the editing tools.
Scroll down and tweak the padding.
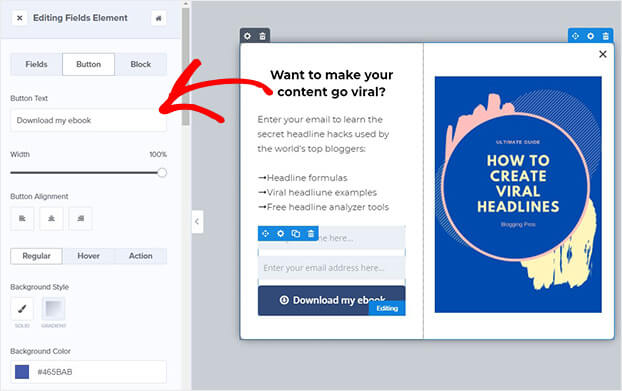
Finally, let’s edit the button.
Again, you can customize everything about the button, like its color, font size, and alignment.
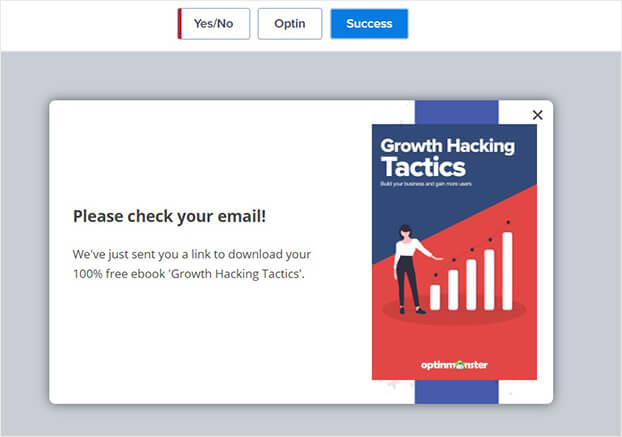
Once your subscriber completes your optin, they will see the Success view to let them know they’ve completed the form.
You’ll need to edit the success view to match your optin form.
Simply click on the Success tab at the top of your editor and follow the same steps to customize.
Remember you can hit Save at the top of your editor at any time.
Once you’re happy with your popup design, it’s time to decide when and where to display your popup.
Step 3: Display Custom Emma Popup
Have you ever been annoyed by a website popup?
That’s because the popup was likely showing you an irrelevant offer at the wrong time.
When it comes to popups, timing matters.
And OptinMonster’s display rules lets you show your popups at the perfect time:
- Targeting: control who sees your popups, like only showing messages to returning visitors or new visitors
- Triggers: decide which site visitor behavior will trigger a popup, like the time they’ve spent on your site
What this means is you can show popups to your site visitor right when they’re most engaged.
For example, you could display a discount popup to a site visitor for the product they’re looking at.
Today, we’ll look at two highly effective display rules:
Exit Intent
Did you know 70% of your site visitors leave your site without taking any action?
And most of them are never coming back.
You can show those visitors one last targeted offer with exit intent.
Exit intent technology detects when your visitor moves their mouse towards the browser bar. Right when they’re about to leave, your exit popup displays a targeted message.
Ryan Robinson increased his email subscribers by 500% overnight by using an exit-intent popup.
Go to Display Rules at the top of your editor.
Find and select Exit Intent®.
Once you’ve selected the Exit Intent rule, you’ll be able to decide on the sensitivity.
The sensitivity setting determines when your popup is triggered and is on Medium by default.
You can read more about exit intent sensitivity in this article.
Page Targeting
Do you want to show targeted offers to the right audience?
Then you should use OptinMonster’s Page Targeting rule. This rule shows campaigns only on certain pages of your site.
Under the Display Rules tab, click Page Targeting.
Now, you can show your popup only on relevant pages. For example, on a blog post about headline formulas.
Step 4: Integrate Emma with OptinMonster
Once you’ve done this, it’s time to connect your Emma account with OptinMonster.
This is a simple, quick process.
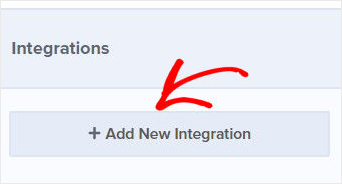
First, head over to Integrations at the top of your editor.
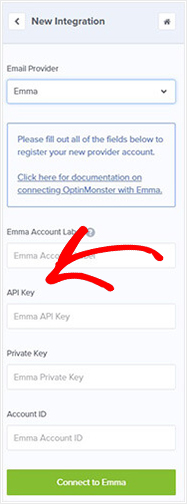
Next, click Add New Integration.
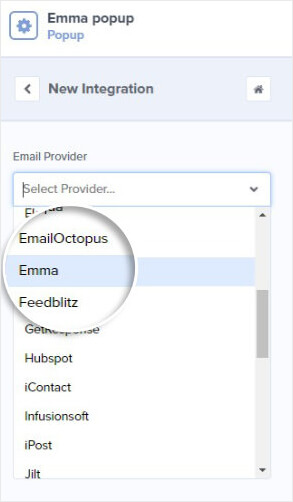
Select Emma from the Email Provider dropdown.
Now, you’ll need to fill in a few fields:
- Account label
- API keys
- Account ID
For the account label, choose anything that’s easy for you to remember. This is only to help you organize your OptinMonster integrations.
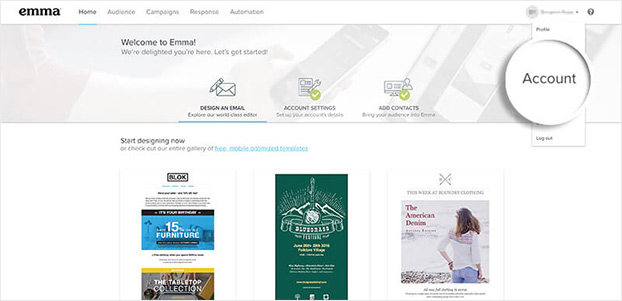
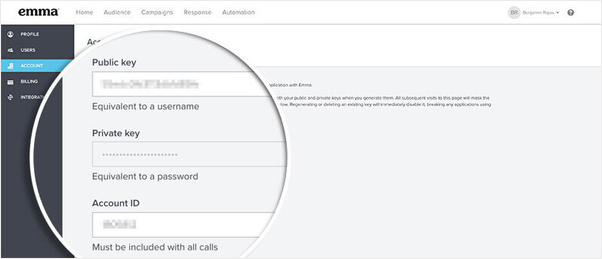
You’ll need to log into to your Emma account to get your API keys and account ID.
Click Account from the dropdown menu on the top-right.
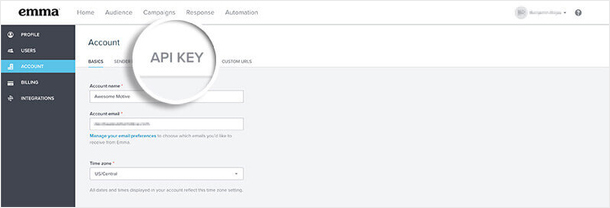
On the next screen, select API KEY.
Copy the keys. You’ll now head back to OptinMonster.
In OptinMonster, add the API keys into the relevant fields.
Click Connect to Emma.
After you’ve connected your Emma account, you can select the email group you want new subscribers to belong to.
Finally, you can publish your campaign.
We hope you enjoyed this article.
If you’re looking for more resources to grow a targeted, engaged list, check out these articles:
- How to Grow Your Email List: 80+ Proven and Simple Ways
- Email Marketing Made Simple: A Step by Step Guide [+ Examples]
- How to Run a Successful Email Marketing Campaign (Step by Step)
Ready to turn your site visitors into subscribers? Get OptinMonster now.







Add a Comment