Are you looking for a better, faster way to grow your email list? Creating a custom AWeber popup form with OptinMonster can help you skyrocket list growth.
If you’re using AWeber, you’ve probably already tried their built-in signup forms. With OptinMonster, you can move beyond the AWeber signup form templates and benefit from a much wider range of campaign types and themes, including floating bars, countdown timer campaigns, content locking signup forms, and much more.
Even better, OptinMonster has a huge range of campaign triggers. That means you can get more signups creating AWeber popups that relate to:
- the page your visitors are browsing (with page-level targeting)
- what they’ve already seen on your site (using onsite retargeting)
- where they’re located (with geo-location targeting)
These are great ways to get more conversions by being super-targeted and relevant to your visitors’ needs.
On some sites, once your visitors ignore an email signup form, there’s no comeback. But OptinMonster’s signature Exit-Intent® technology gives you one last chance to turn visitors into subscribers. This advanced feature detects when visitors are about to click away from your site. Then it shows your custom AWeber popup form at the perfect time to get their attention just before they leave.
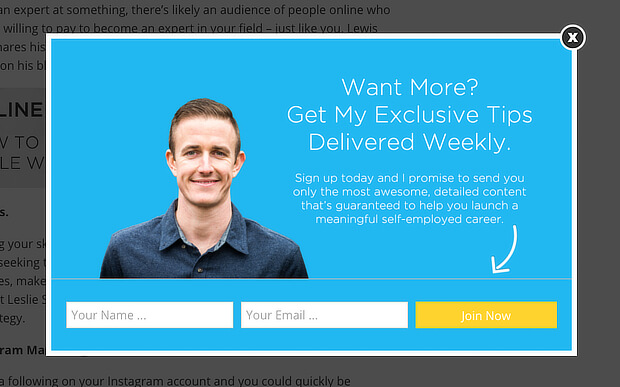
This technology is proven to increase subscriber numbers. OptinMonster customer Ryan Robinson increased subscriber conversions by 500% when he integrated OptinMonster to create an AWeber optin form.
And Social Media Examiner used OptinMonster with AWeber to grow his email list by 66%.
Want to combine OptinMonster with AWeber to explode your own subscriber numbers? In this tutorial, we’ll show you how to create an AWeber popup form to jumpstart your email marketing.
Step 1. Create the Campaign
First, you’ll need to sign up for OptinMonster. Once you’ve got an account, log in to the OptinMonster campaign builder and press Create Campaign.
Choose a campaign type. We’ll use Popup. As you’ve seen, the lightbox popup campaign type converts very well for OptinMonster customers.
Choose a theme. We’ll use Simple.
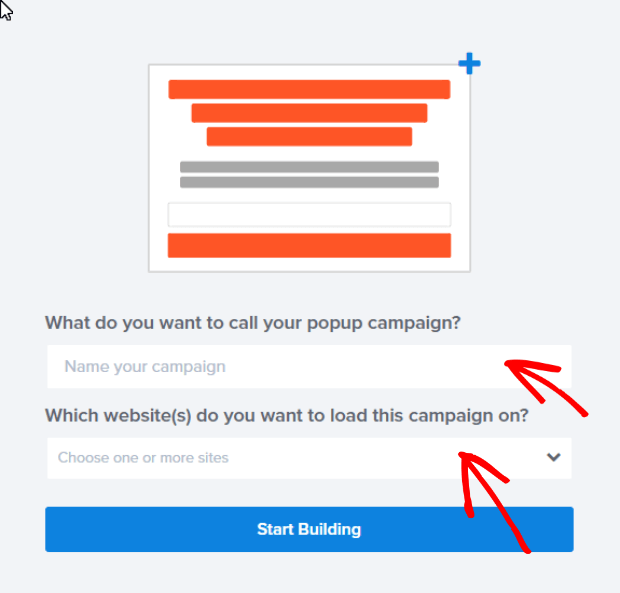
Name your campaign, choose the website you’ll use it on, and press the Start Building button.
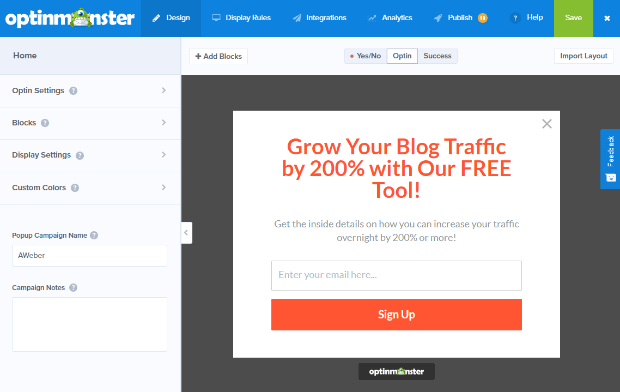
You’ll go to the OptinMonster campaign builder, where you’ll see the default Simple campaign.
Step 2. Edit the Campaign
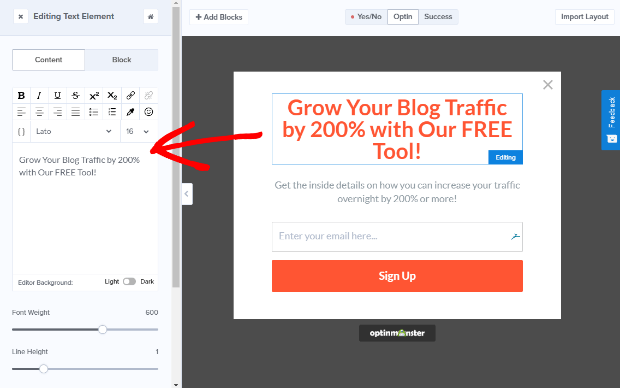
The next step is to edit your AWeber popup form. To edit your popup just click on the element you want to edit in the right side of the screen to bring up the editing tools on the left side of the screen.
Save your campaign as you go along.
Once you have your campaign set up the way you want, you’re ready to add Display Rules.
Step 3. Set the Display Rules
To choose when your custom AWeber popup form will display, go to the Display Rules tab of the campaign builder. Here are a couple of options to try.
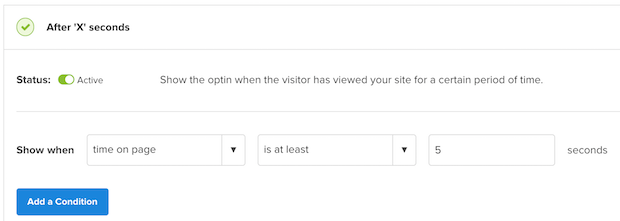
Time Delay Setting
OptinMonster’s time-delay display rule is enabled by default. This means that your AWeber optin form will show after visitors have been on the page for at least 5 seconds.
Exit-Intent®
Many OptinMonster customers have achieved major improvements in conversions with exit-intent popups. To enable this for your AWeber optin form, set a condition to display your campaign If exit detected. Then, choose the level of sensitivity.
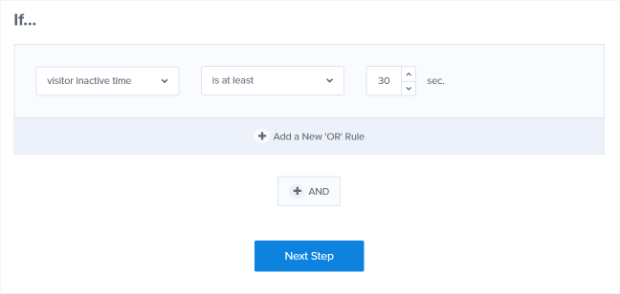
InactivitySensor™
For mobile visitors, you can create a campaign with one of OptinMonster’s mobile themes, then use the InactivitySensor™ display rule. This mimics the functionality of Exit-Intent® Technology but is specifically intended for mobile devices.
Step 4. Connect to AWeber and Choose Your List
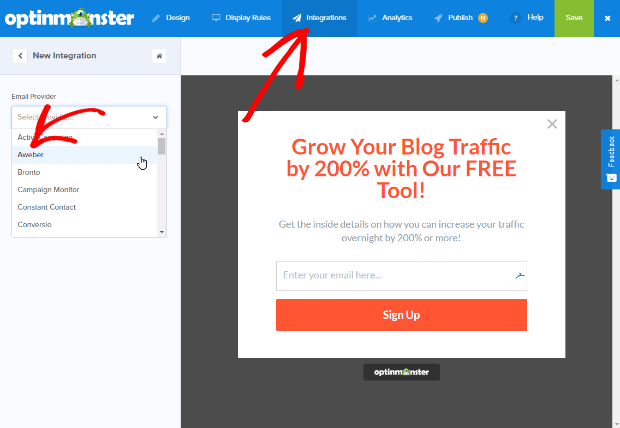
If this is the first time you’re creating an AWeber popup form, you’ll need to add AWeber to your OptinMonster account. To do this, go to the Integrations tab in the OptinMonster campaign builder, and click on New Integration.
Go to Email Provider, and choose AWeber from the dropdown menu.
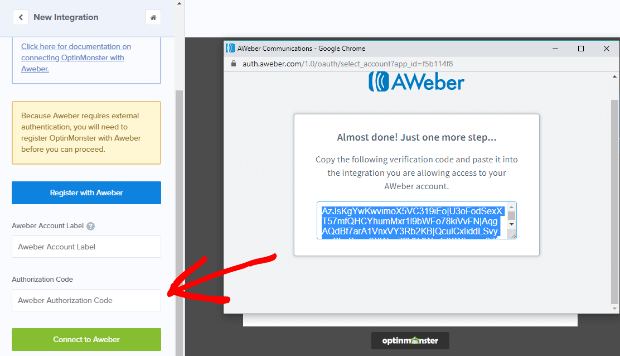
Click Register with AWeber to begin the process of authorizing the integration.
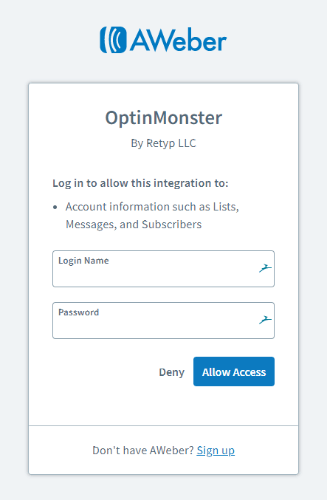
You’ll see a popup window, where you’ll need to enter your AWeber login details. Click Allow Access, and you’ll get an authorization code.
Copy and paste it into the AWeber Authorization Code field in the campaign builder.
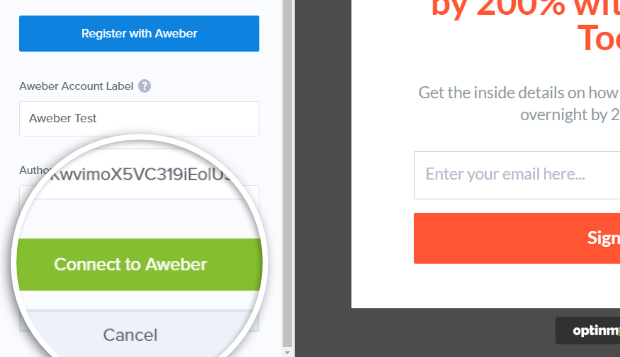
Label your AWeber integration, then press Connect to AWeber. OptinMonster will then fetch details of your lists.
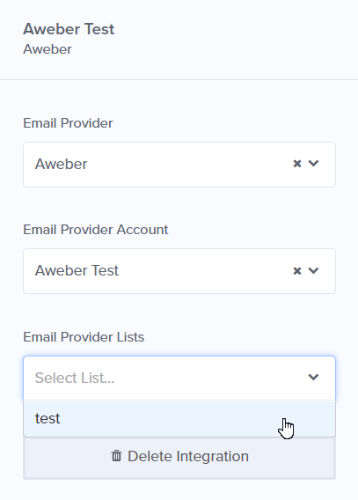
Next, choose the AWeber email marketing list you want visitors to subscribe to.
You can add Lead Tags and an Ad Tracking Identifier in the relevant boxes.
This will allow you to integrate AWeber features that identify the source and type of leads.
Step 5. Publish the Campaign
When you’ve completed the campaign setup, save it one last time, then click the Publish button at the top of the page.
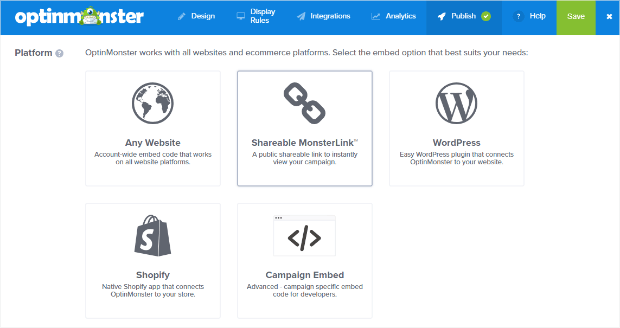
This will bring up the publishing options, which include:
- Embed code for your website or for specific campaigns
- Shareable MonsterLinks™ to let you publish your campaign anywhere
- Shopify
- WordPress
Since WordPress is a popular option, powering more than a quarter of the web, let’s look at how to publish your AWeber lightbox in WordPress.
How to Publish Your AWeber Campaign to WordPress
Before you can publish your AWeber lightbox on WordPress, you’ll need to install our WordPress connector plugin.
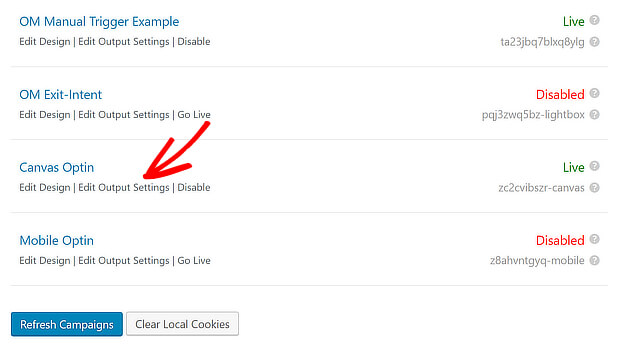
If you’ve done that, go to your WordPress dashboard, and click on the OptinMonster icon to bring up a list of all your campaigns on that site.
If you don’t see your AWeber popup form campaign in the list, click Refresh Campaigns, and it will appear.
Click the Go Live button next to the campaign name to make it live on your WordPress site.
You can also refine the display of your AWeber optin form by clicking the Edit Output Settings link below the campaign name. For example, this lets you choose to show your campaign only in particular categories or tags. When you’re done, click Save Settings to make your changes live.
That’s it! Now you know how to how to create an AWeber popup form in OptinMonster to grow your email list. Next, learn how to boost eCommerce revenue with an in-cart upsell popup, and how to get even more conversions with gated content.
And don’t forget to follow us on YouTube, Twitter, and Facebook for more guides and tutorials.












Add a Comment