Do you want to learn how to create a WordPress contact form the easy way?
If you want your site (and business) to grow, you need a contact form. Contact forms don’t only collect leads, but they also give your site’s visitors a fast and simple way to get in touch with you.
Now, by default, WordPress does not come with a built-in contact form.
There’s no need to worry because there is an easy way to add contact forms to your site.
In fact, we will show you how to add a contact form in WordPress in just 5 steps without touching a single line of code.
Choosing a WordPress Plugin for Contact Forms
Before starting this tutorial, we need to pick a plugin to create our contact form. Previously, we’ve handpicked the best WordPress contact form plugins for you.
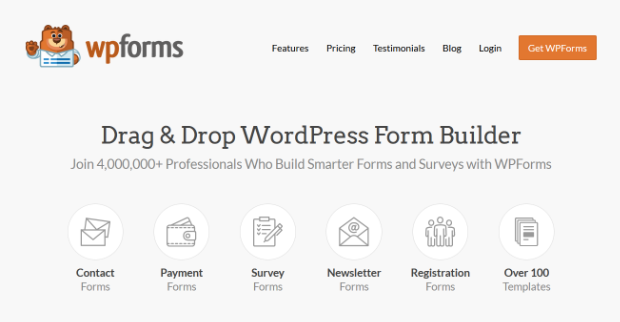
For this tutorial, we’ve chosen WPForms because it’s the best WordPress contact form plugin. It has all the features and functionality you’re looking for in a form-building tool.
There are quite a few free and paid WordPress plugins for contact forms out there, but we firmly believe that WPForms is hands down the best option out there.
Plus, you can use WPForms Lite to create a free, simple WordPress contact form. Then, when you’re ready for more advanced features, you can upgrade to WPForms Pro.
With WPForms Pro, you get access to survey reports, user registration forms, payment forms (for eCommerce), post submission forms, smart conditional logic, conversational forms, and a lot more, all without touching any code.
This is the perfect solution for all kinds of businesses. Not only can it collect contact information (which we’ll teach you how to do in a minute), but it can take payments through PayPal and Stripe too.
That means it has your entire sales funnel covered from start to finish!
It also works with all of your WordPress themes to get all kinds of forms on your site FAST.
Of course, both WPForms Lite and WPForms Pro come with the intuitive drag and drop form builder to make building forms a breeze.
Let’s jump right into our tutorial so you can learn how to create a WordPress contact form.
How to Create a Contact Form Using WPForms
Let’s walk through how to create a contact form for a WordPress website. This can be done in 5 simple steps.
Even better is that after you create your first form, this goes down to just 4 steps!
Before we get started, we did want to offer a more detailed resource from WPBeginner on installing WordPress plugins. We will go over it in our tutorial, but this will be helpful if you are new to WordPress or need some extra help.
Step 1: Install WPForms
First, you’ll need to install the WPForms on your WordPress site.
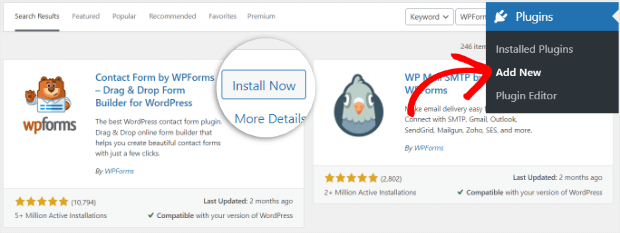
To do this, log onto your WordPress site and go to Plugins >> Add New.
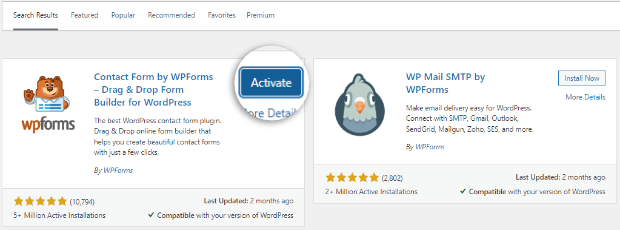
Search for WPForms and then click on Install Now.
Once the plugin installs, notice that the button you just clicked is now blue and says Activate. Click on that button.
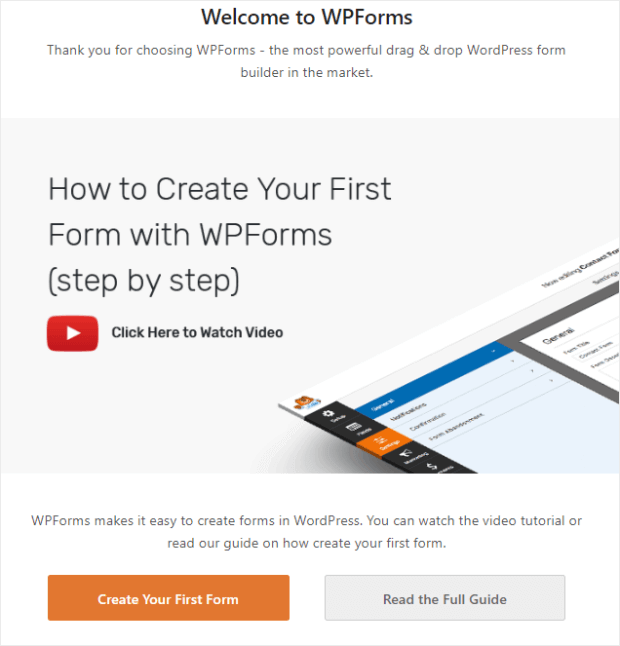
Now, you should see a welcome message from WPForms, including a tutorial video and buttons to Create Your First Form and Read the Full Guide.
Go ahead and click on the Create Your First Form button. This will take you to the form builder.
You can get to the form builder for future forms by clicking on WPForms on the left side of your site’s WordPress admin dashboard. Then, select Add New.
Step 2: Select Your Contact Form Template
We are now ready to create a contact form for your WordPress website.
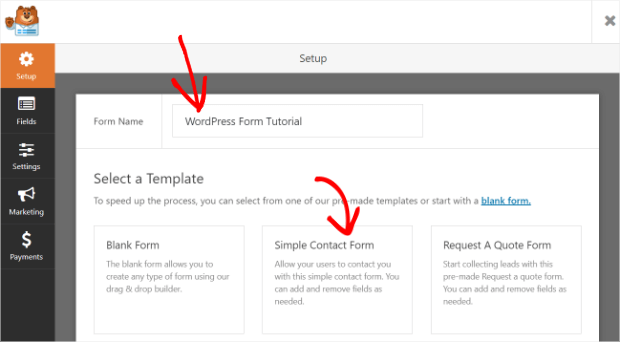
First, pick a name for your form and put it in the Form Name field. Use something descriptive so you can find it later.
Next, we will choose a template.
WPForms does allow you to design a form from scratch. However, the tool has a variety of templates to make getting a contact form on your WordPress site even easier.
Let’s go ahead and select the Simple Contact Form.
By using a template, the contact form will automatically include some commonly used fields, saving you from the guesswork.
For instance, the Simple Contact Form includes fields to collect the person’s name, email, and message.
But, what if you want to collect EVEN MORE information than that? Then, keep reading.
Step 3: Design Your Contact Form
The next step in our tutorial on how to create a contact form is all about design.
Looking over the simple contact form, you can use it as-is without changing anything.
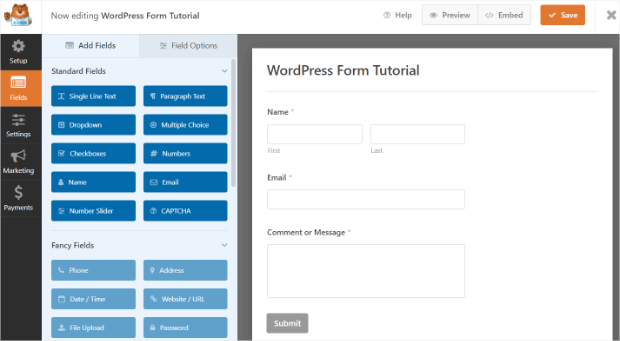
Though, if you’d like, you can also add, remove, or move fields by using WPForms’ simple drag-and-drop builder. Just click on the field you want from the left side of the builder and drag it where you want it in your form.
There are also options to add fields like:
- Checkboxes
- CAPTCHA
- Phone number collection
- Address collection
- Section dividers
- Single line and paragraph text
- And more…
You can also modify your form with custom CSS and HTML. We strongly recommend that this should only be done if you have CSS or coding experience.
When you’re happy with how your form looks, click Save.
Now your WordPress contact form is ready. Up next, we’ll show you how to configure the form settings.
Step 4: Configure Your Contact Form’s Settings
Next up in our guide on how to create a contact form, we will be doing some behind-the-scenes work on your form by customizing the form’s settings.
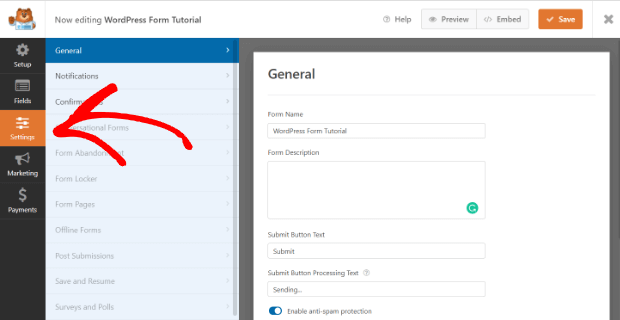
To get to your settings, click on the Settings tab on the right side of the WPForms builder.
A list of new tabs will appear on the left side of the builder. In the free plan, you will only have access to 3 of them: General, Notifications, and Confirmations.
General Settings
The general settings cover some basic form settings. Here you can configure several things about your form:
- Form Name- Updates your form’s name.
- Form Description- Gives your form a description.
- Submit Button Text- Changes the text on the submit button, including what it shows while the form is processing.
- Spam Protection- You can enable the honeypot feature to keep bots and spammers from submitting forms. This feature is automatically enabled on all WordPress forms, but unclick this option if you use another form of spam prevention (like CAPTCHA).
- GDPR Enhancements- You can disable storing entry information and user details, like IP addresses and user agents, to comply with GDPR requirements.
If you do business or contact overseas customers, the GDPR Enhancements is particularly helpful. It keeps small businesses safe from breaking international laws concerning international clients from the European Union (EU).
Notification Settings
When someone submits their information in your WordPress contact form, you will get an email with their data.
You can personalize how these emails will appear in a mail inbox in notification settings.
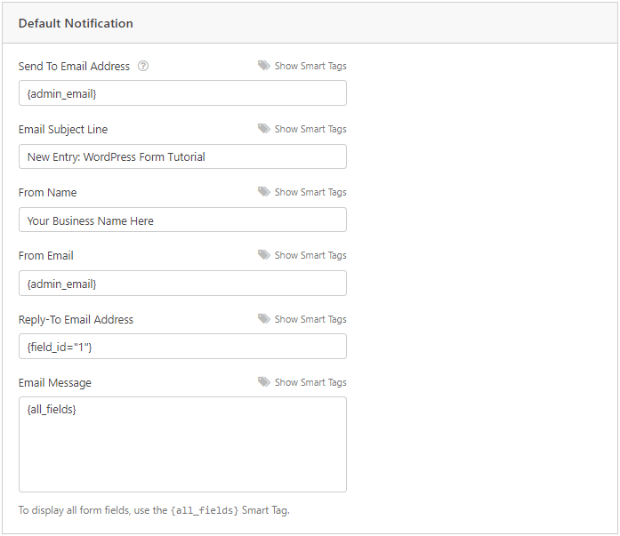
WPForms automatically send these emails, but you can control some basic settings. To change these settings, go to Settings >> Notifications.
By default, the notification email will go to the admin email for your WordPress site. If you would like this email to go to someone else, type their email address in the Send To Email Address box. You can add multiple addresses, just separate each one with a comma.
The Email Subject Line field is pretty self-explanatory. It’s the email’s subject.
From Name lets you specify which person or company is sending the confirmation email. Most will just use their business name here.
From Email works in a similar way. It is just the display email address that is sending the form responses.
Suppose you accept replies from the notification emails. In that case, you can input the email address they should go to in the Reply-To Email Address field.
Finally, you can customize the actual email address in the Email Message field. By default, it contains the fields in the contact form.
Confirmation Settings
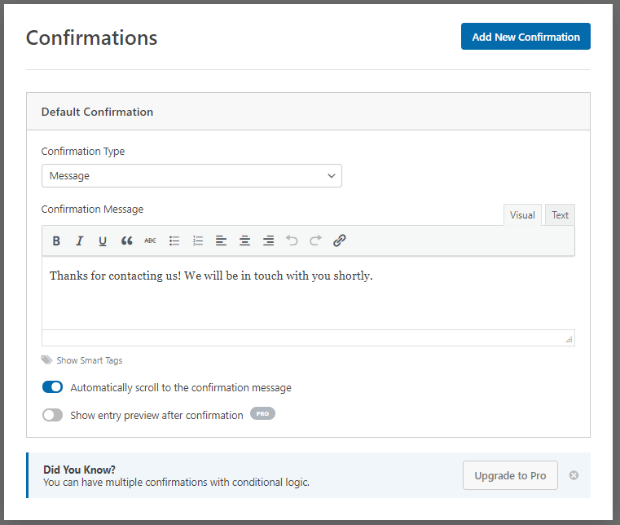
The last setting is for the confirmation message displayed to people who fill out your comment form.
In the drop-down menu, you have three options.
You can choose if the confirmation will display as a message, redirect visitors to a different page on your website (Show Page option), or direct them to a specific URL.
If you choose to design a standard “Thank You” or another confirmation page, you won’t need to spend much time here.
Though if you want a simple message to appear as a confirmation, the WPForms builder does let you format the font in either a visual or text editor. This editor is similar to most WordPress-style editors.
Once you finish up, click on Save on the upper right-hand corner of your screen.
Your WordPress contact form is all ready to go! All we have to do now is add it to your WordPress site.
Step 5: Add Your Contact Form to Your WordPress Website
The last step to create a contact form for a WordPress website is to embed your form on a page.
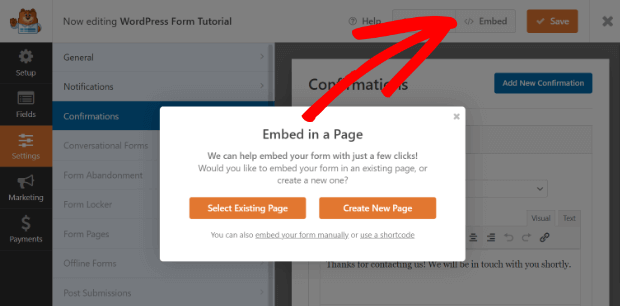
First, click on the Embed button on the top of the builder. You’ll then be asked if you will be embedding the form on an existing page or creating a new page.
We will click on the Select Existing Page button.
A list of your WordPress site’s pages will appear in a drop-down menu. Select the page you’d like your contact form to appear on and click the Let’s Go button.
The builder will then take you to your page editor on WordPress.
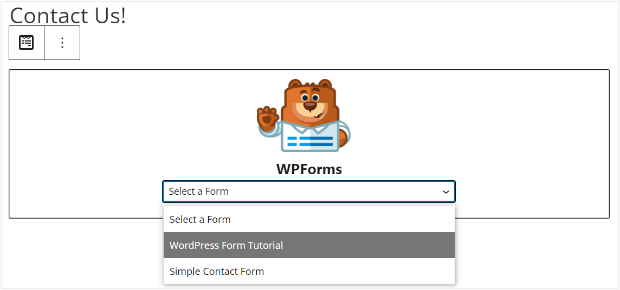
Click where you would like your contact form to appear and click on the blue + button on the upper left corner of your screen. Then, in the search box, type WPForms.
Then, click on the WPForms button that appears.
In the drop-down menu, you’ll see the forms you’ve created. Next, select the one you’d like to display on this page. In this case, we will choose WordPress Form Tutorial.
Click on Update on the upper right of your screen.
And that’s it! Your contact form is now live and working on your website.
That’s all it takes to create a contact form for a WordPress website using WPForms.
How to Use Your WordPress Form
Now that the contact form is live on your WordPress site let’s explore another way to use the form.
Did you know that you can also embed your WPForms contact form into lead generation and conversion campaigns? By connecting your form to a powerful lead generation tool like OptinMonster, you can also use your contact forms to increase conversions and sales.
OptinMonster is the most powerful lead generation tool in the market. It lets you create marketing campaigns like slide-ins, popups, inline forms, and more.
You can embed your contact form inside OptinMonster campaigns and get it to open on click. Check out how Stays.net boosted monthly sales 10% using this OptinMonster on-click campaign:
Visitors won’t have to search for your contact form with a campaign like this. Instead, you can make it easily accessible through buttons and links.
You can also use OptinMonster’s powerful targeting features to display the form at the right time for the right audience. For instance, the Exit-Intent® trigger detects when a visitor is about to leave your site and displays the contact form.
So, you can collect their contact details before they leave your site for good.
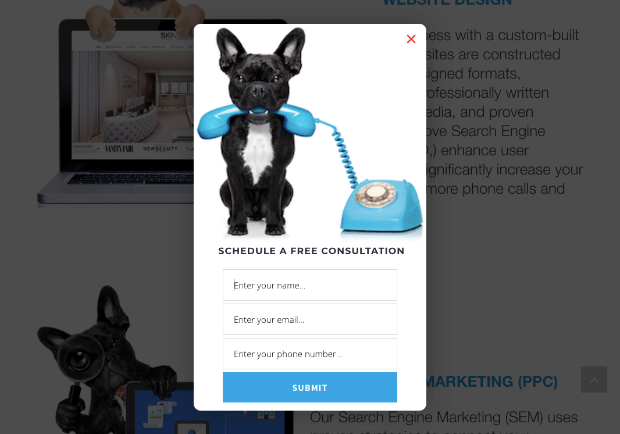
Need proof? See how Medstar Media used this OptinMonster exit campaign with a contact form and increased clients’ conversions by 500%!
OptinMonster also lets you target visitors based on which page their viewing, where they are located, and what actions they’re taking on your site.
When you combine the incredible lead generation power of OptinMonster with the right contact form builder plugin, you can use your contact form to increase your conversions.
Want to create stunning contact campaigns for your site? Sign up for OptinMonster below:
We hope you found this WordPress contact form tutorial helpful. If you’re looking for more resources on converting site visitors into subscribers, you’ll definitely want to check out:
- 35 Best Lead Generation Software & Tools for Targeted Leads
- How to Add an Email Optin to WordPress in Under 5 Minutes
- 7 Best Email Subscription Popup Plugins for WordPress (Compared)
These posts will help you discover new tools and tricks to make your WordPress site a huge asset for your company by improving your lead generation efforts.





Add a Comment