Do you want to use a Constant Contact popup for WordPress to grow your email list?
An email list is one of the most valuable assets your business can have. Using an email list, you can inform customers about new promotional deals, product releases, or new content.
And when it comes to finding an email service provider to help with your email marketing, one popular choice is Constant Contact:
Constant Contact is an email service provider that also comes with a website builder. But what if you already have a WordPress site up and running? Can you still use popups on your WordPress site and send them to your Constant Contact email list?
Yes, you can! And in this tutorial, we’ll show you exactly how. We’re going to cover:
- Which is the best tool to build your Constant Contact popup
- How to connect OptinMonster with your WordPress site
- How to make your Constant Contact popup for WordPress
By the end of this post, you’ll know how to build a stunning popup campaign that gets you more subscribers fast.
But before we get started, let’s quickly look at what a Constant Contact popup is and why you need one.
What Is a Constant Contact Popup
A Constant Contact popup is typically a lead capture form that displays on top of your content, designed to quickly capture your users’ attention and collect their email addresses. This popup is obviously connected to your Constant Contact account.
From there, you can create segmented contact lists and send personalized emails to those lists.
With a popup form, you can exponentially grow your email list and generate more profit. In fact, email marketing sees an average return on investment (ROI) of 4300%.
Using OptinMonster is the best way to build a popup form for your website. OptinMonster offers dozens of pre-built stunning templates that are proven to boost signup rates. Plus, with its targeting and segmentation engine, you can show your popup to the right people at the right time.
OptinMonster can be used with any website platform, including WordPress. Plus, we have several advantages over Constant Contact Forms that are hard to ignore.
OptinMonster offers:
- Pre-Built Templates: over 50 templates built for desktop, tablet, and mobile
- Campaign Types: popups, floating bars, slide-ins, content lockers, and more
- Targeting Options: to decide where and when you show your campaign
- Campaign Triggers: to display campaigns based on user behavior
We also sync seamlessly with every email service provider on the market. So if you want to change your email service provider, for whatever reason, OptinMonster gives you the freedom to do so.
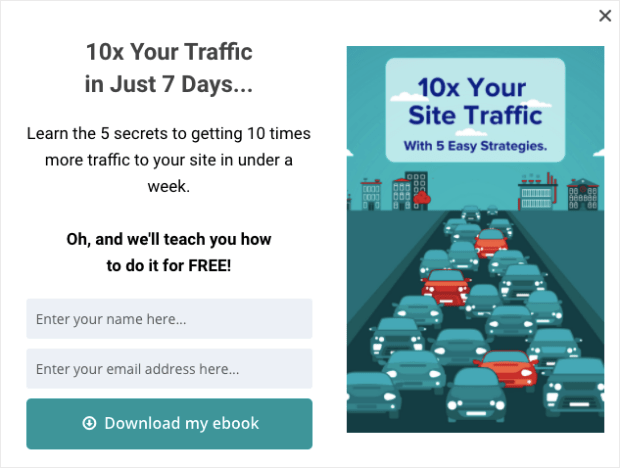
Here’s an example of the popup we’ll build for this tutorial:
This campaign took a total of 5–10 minutes to create and sync to Constant Contact.
All of these features get you the fastest amount of growth in the least amount of time. OptinMonster is actually how Adam Enfroy was able to grow his email list to over 11,000 contacts in under 1 year.
Since then, he’s exploded his list and is currently making over $70,000 per month through email marketing.
And in case you were wondering, Adam uses WordPress, too.
Want to get started? Sign up for OptinMonster risk-free to start getting more email subscribers now. Once you’ve gotten started, you’ll be ready to hook up OptinMonster to your WordPress site.
Connecting OptinMonster With Your WordPress Site
Like we said earlier, OptinMonster is one of the best lead generating plugins for WordPress. And setting it up is simple.
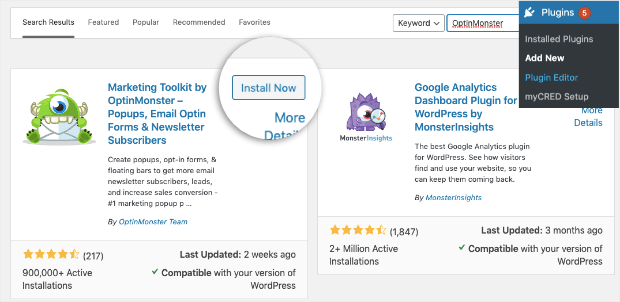
Just head over to your WordPress dashboard and find Plugins » Add New. Then search for OptinMonster to pull up the plugin. Click Install Now once you’ve found it:
Once you’ve installed the plugin, click Activate.
If you’ve never installed a plugin before, no worries. Just check out this helpful resource on how to install and activate a plugin (with 3 different methods).
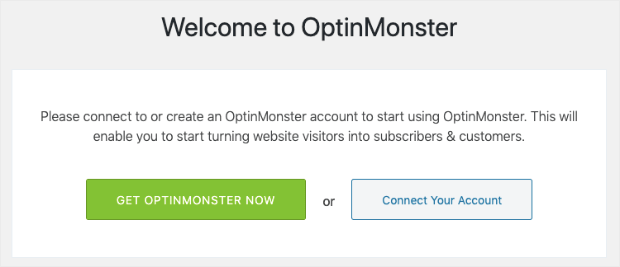
Once you’re in your OptinMonster dashboard in WordPress, you’ll see 2 options:
- Sign up for OptinMonster
- Connect your account
If you’ve already signed up, simply click Connect Your Account. And that’s it!
If you haven’t signed up, you can get started with OptinMonster here. Then come back and click Connect Your Account.
On the next page, click Authorize OptinMonster:
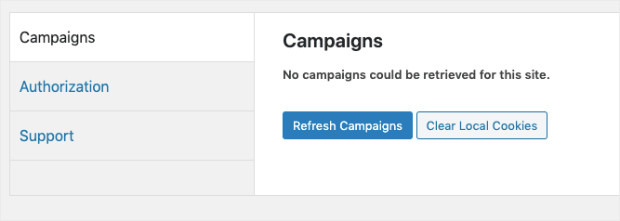
Now your OptinMonster account will be synced seamlessly with your WordPress website. At this point, you won’t have any campaigns from OptinMonster in your WordPress dashboard:
Let’s get started in building your first Constant Contact popup with OptinMonster.
Constant Contact Popups for WordPress
Not everyone learns the same way. Some of us are more visual. If you prefer, here’s a video tutorial to help you create your Constant Contact popup for WordPress:
Otherwise, feel free to keep reading this in-depth tutorial.
Step 1: Create Your Popup Campaign
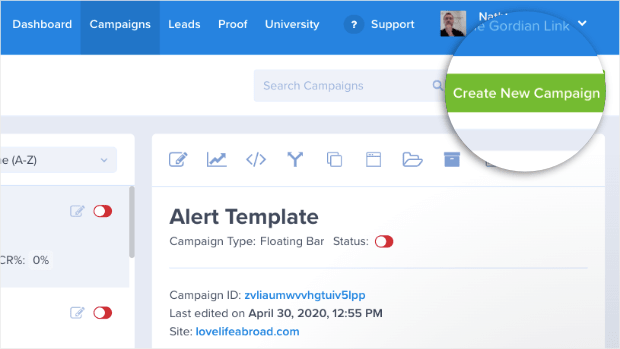
The first thing you need to do is log into your OptinMonster account:
Once you’re in your dashboard, click Create New Campaign in the upper right-hand corner:
Then you need to choose which type of campaign you would like to build. For today, we’ll select Popup:
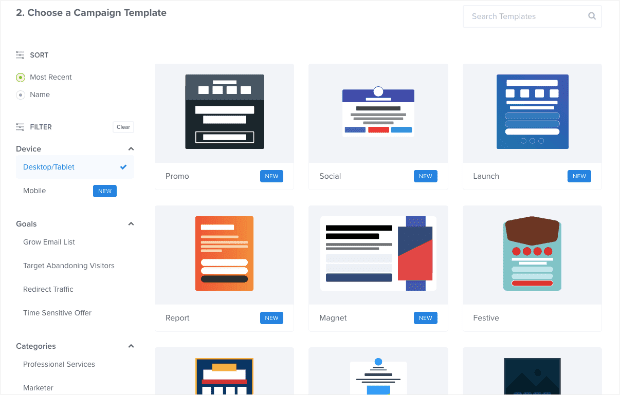
Next, you can choose which template you would like:
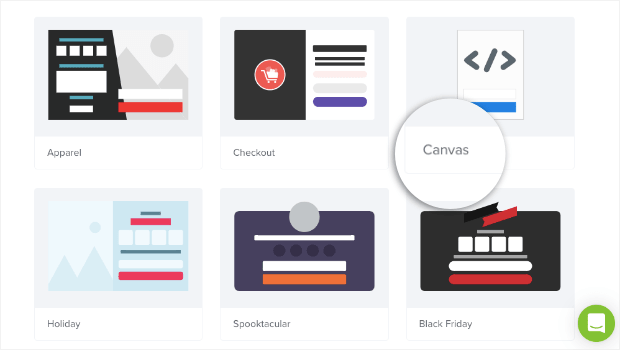
OptinMonster also gives you the option to make a popup from scratch, with no coding skills required. Simply choose the Canvas template:
Then use our drag and drop editor to create a popup that is 100% tailored to your brand and message.
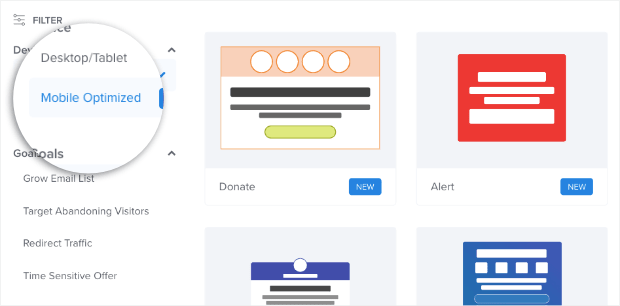
But no matter which template you choose, they all work great for desktop, tablet, and mobile devices. If you want a mobile-first template though, you can get that with our Mobile Optimized filter:
For this tutorial, we’ll use the Magnet template for Desktop/Tablet:
This is a great option for lead magnets because it lets you show your offer on the right-hand side while leaving room for compelling copy on the right.
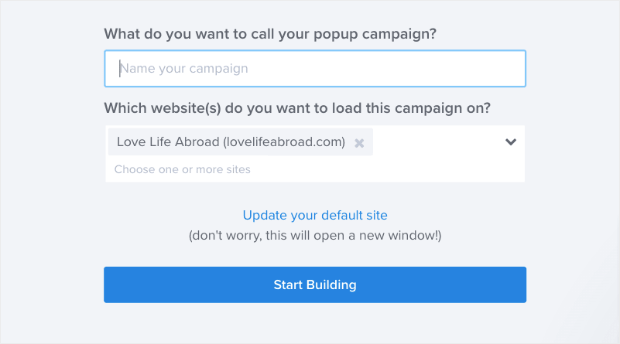
Once you’ve selected the template that’s best for you, there’s just one more step. Give your campaign a name, assign it to your website, and click Start Building:
Then you’ll be in your editor.
Step 2: Design Your Constant Contact Popup
Designing a campaign with OptinMonster couldn’t be easier. We won’t dive into too much detail on how to customize your campaign for this tutorial.
That’s because there are simply too many options to demonstrate in one post. If you need some extra help, feel free to check out this resource that walks you through creating your first campaign with OptinMonster.
Here’s what you need to know for today:
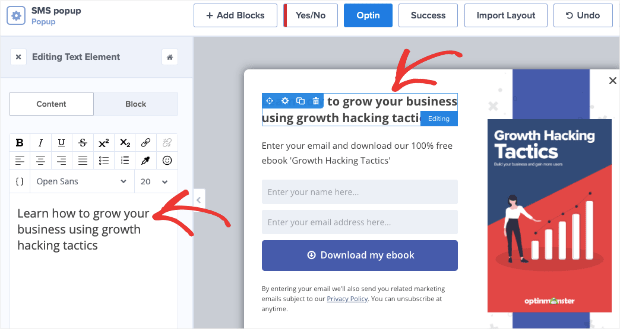
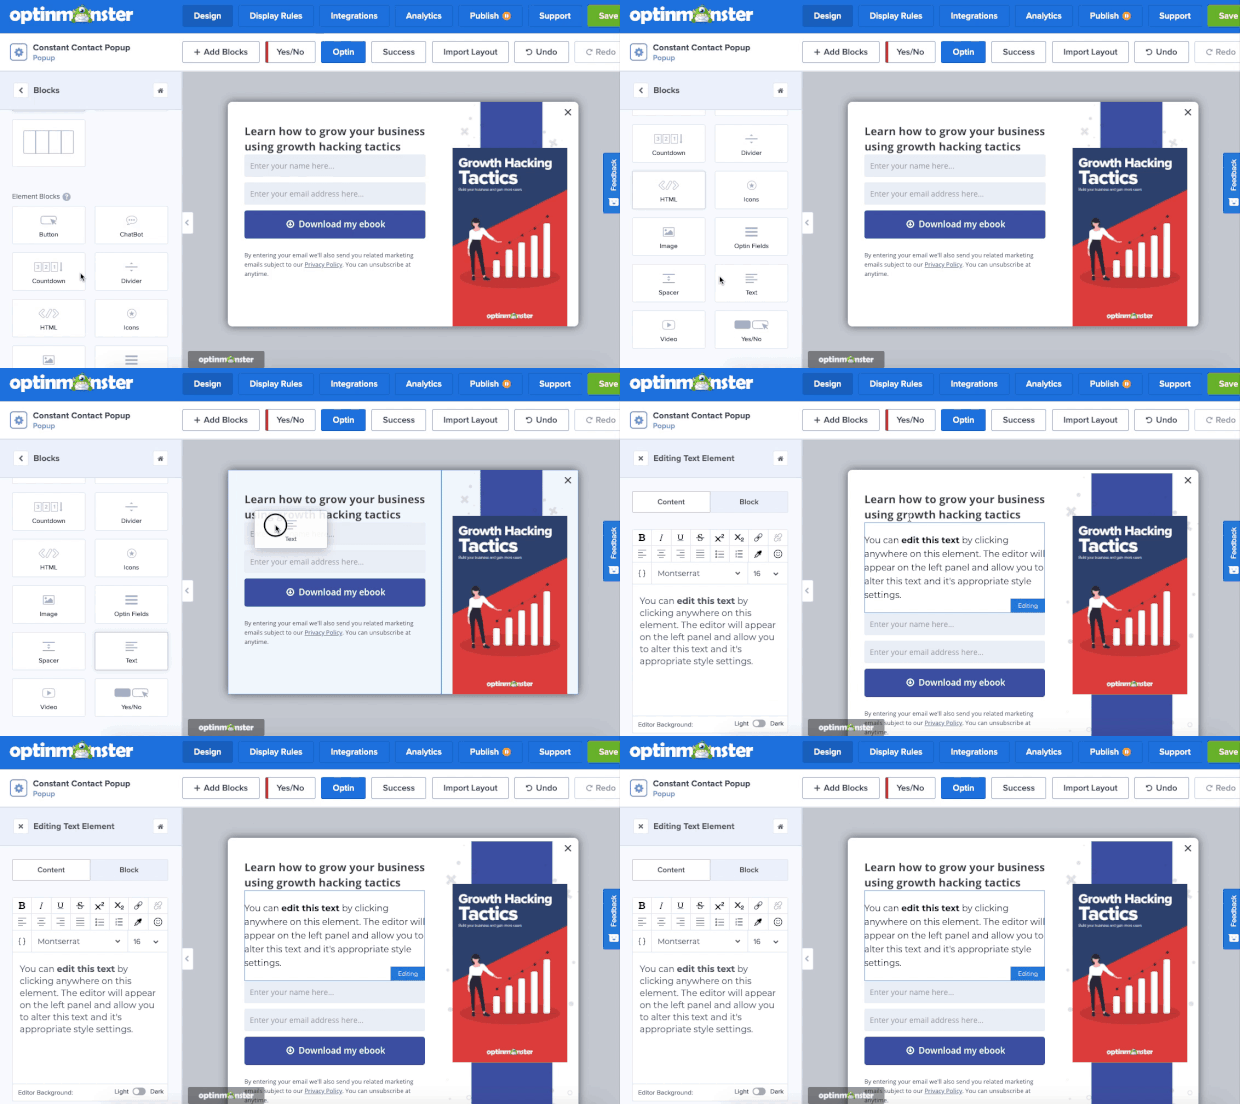
You can change literally any aspect of your campaign with a click or a drag and a drop. If you want to change your popup’s text, for example, click on the text in your editor. That will pull up the editing tools on the left-hand side:
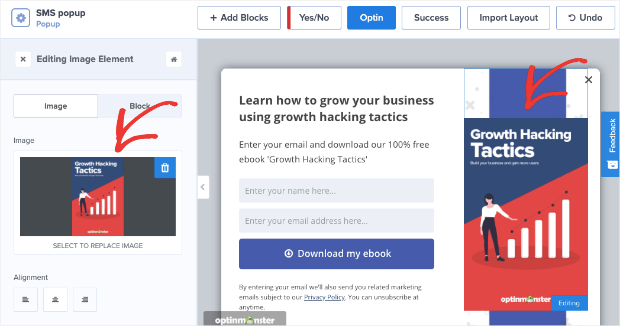
You can do the same for the image. Click on the image in the editor and the editing tools will appear on the left:
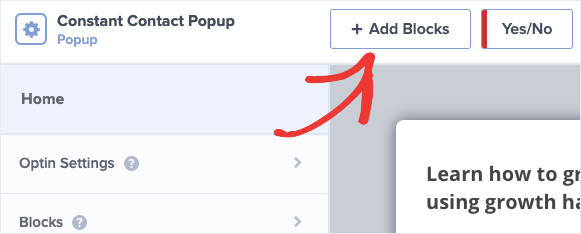
You can also add any new element to your campaign. These would be things like text, video, optin fields, and more. We call those elements “blocks.”
To add a new block, go to the top of your editor and click + Add Block:
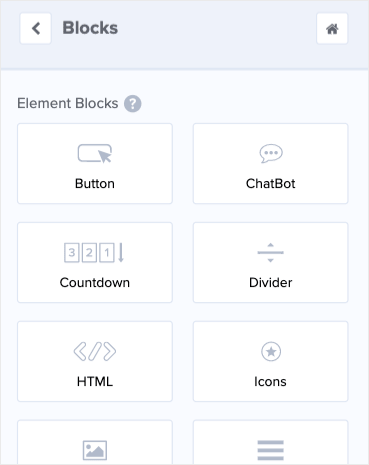
This will show you the elements you can add to your campaign, including:
- Button
- ChatBot
- Countdown Timer
- Divider
- Text
- Image
- Video
Then select the block you want to add and put it wherever you’d like with a drag and a drop:
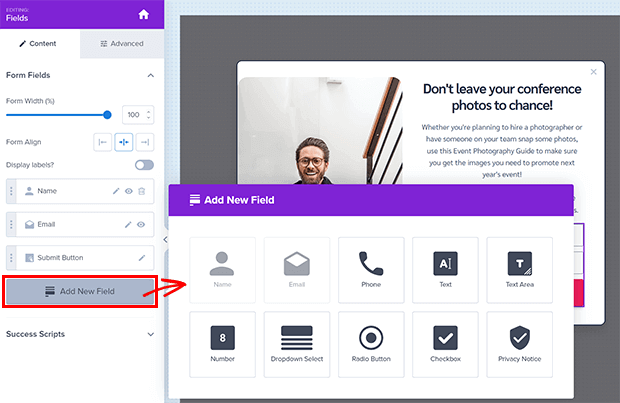
To get detailed lead information, you can add additional fields like:
- Text Areas
- Numbers
- Radio Buttons
- Checkboxes
- Dropdowns
- And more!
The Field Mapping feature lets you effortlessly map these fields to your marketing integration’s popups, including Constant Contact.
You can make your campaign look exactly how you want it to. That way, it will fit your brand’s style and message.
In the end, that leads to getting more emails for your contact list.
Here’s an example of the popup campaign we built today for this demo:
This campaign took less than 10 minutes to create! It highlights a lead magnet that’s used to entice people to enter their email address.
If you’re not sure how to create a quality lead magnet, here are 69 ideas for lead magnets to get you started.
Once you’ve built your Constant Contact popup, you’ll need to decide where to display it on your site.
Step 3: Display Your Popup
First, head over to Display rules at the top of your editor:
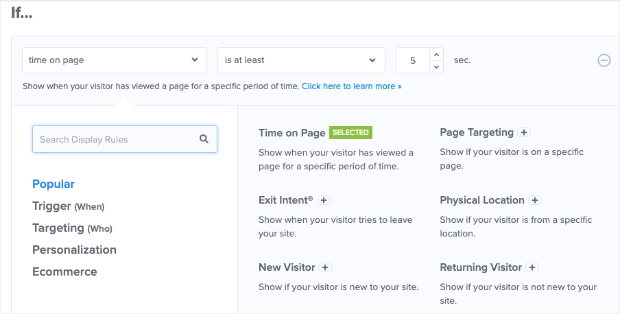
Now you can choose where, when, and to whom you’d like to show your popup campaign. The default settings will show your popup when the visitor has stayed on your page for at least 5 seconds. It will also display on any page.
This is a great starting place for targeting your audience, but it may not be exactly what you need. Another powerful trigger is using our Exit-Intent® technology.
Exit-intent popups display your campaign when a user is actively leaving your website. In the past, this was limited to desktop use only, but it’s now available for mobile devices, too.
Check out this resource on how to make an exit-intent popup for smartphones.
Exit-intent popups are incredibly powerful. That’s the same strategy Bonjour Lisbonne used to double their email list and increase sales by 30%.
To set this trigger, click on your first default condition Time on page to show your drop-down menu:
You can easily navigate all of our targeting and trigger options for your campaign through this menu. That way, you can find the best campaign triggers and targets for your popup in the least amount of time.
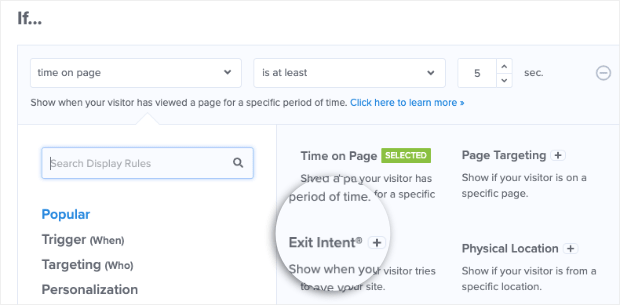
Today, we’ll choose Exit-Intent®:
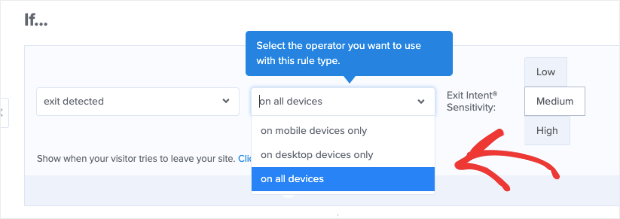
Then choose which device you’d like to create your exit-intent trigger for. You can select desktop only, mobile only, or both:
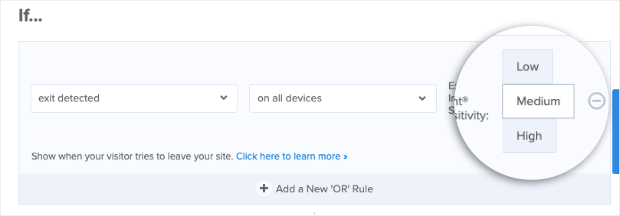
Finally, choose your exit-intent sensitivity:
Keep in mind that the sensitivity level you select will have an impact on your mobile exit-intent popup. Low and Medium create a scroll up trigger, while High sensitivity creates a back button trigger.
Click here to learn more about these 2 types of exit-intent triggers for mobile.
You can then choose where you want to display your popup. You can select a specific page, categories of pages (blogs, products, and so on), or leave it to display on every page.
For today, we’ll show the popup on every page to increase our chances of getting more subscribers. Now we just need to hook up OptinMonster with our Constant Contact account.
Step 4: Integrate Constant Contact With OptinMonster
One of the best parts of OptinMonster is that we sync seamlessly with any email service provider on the market. That includes Constant Contact. To do so, head to Integrations at the top of your editor:
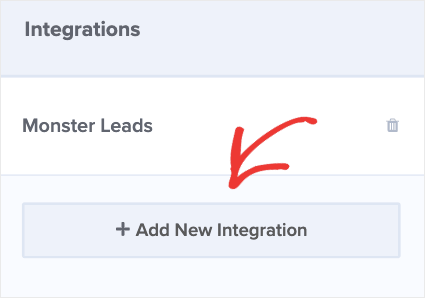
Click + Add New Integration in the left-hand side menu:
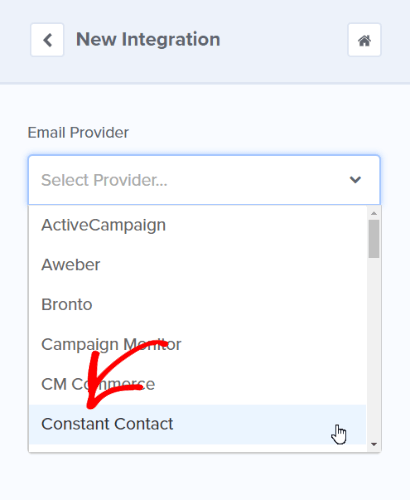
Then select Constant Contact from the drop-down menu:
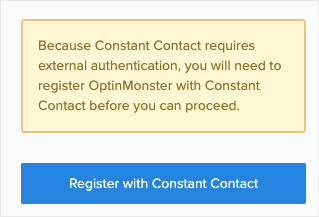
Click Register with Constant Contact:
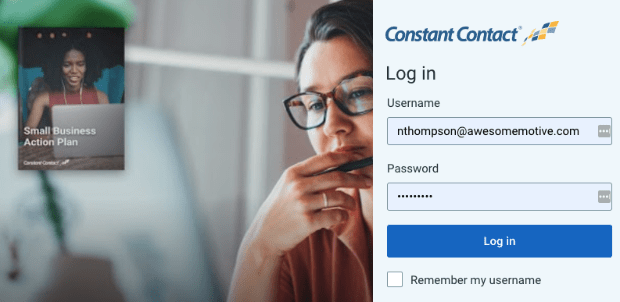
A new window will appear, asking you to log into your Constant Contact account. Enter your details and click Log in:
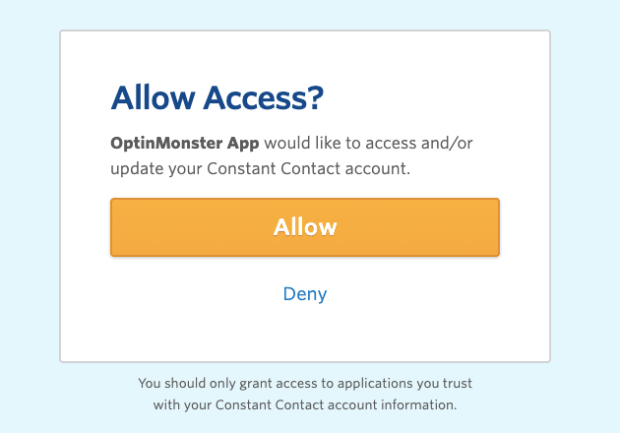
You’ll get a message asking your permission to connect OptinMonster with Constant Contact:
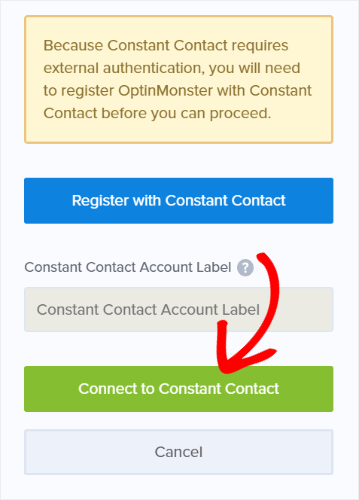
Click Allow. Now you can click Connect to Constant Contact in your OptinMonster dashboard to finish the process:
And that’s it! Your Constant Contact account is now synced with OptinMonster.
You can even decide which contact lists your new leads go to in your Constant Contact account from your OptinMonster dashboard.
We hope you enjoyed this post. But even more importantly, we hope it helps you grow your email list and generate more profit.
Speaking of which, you may be interested in the following posts to help you monetize your email list once you’ve increased your subscribers:
- Email Marketing Made Simple: A Step-by-Step Guide
- 17 Tips for Writing Email Copy That Converts
- How to Run a Successful Email Marketing Campaign
And for more information on OptinMonster, check out this post: How Does OptinMonster Work: 8 Benefits (+ 12 Case Studies).
Ready to get started? Sign up for OptinMonster today, risk-free with our 14-day money-back guarantee.









Add a Comment