Want to add your YouTube videos to your WordPress site?
Adding a YouTube feed to your website can build engagement on your website and grow your YouTube audience. If someone’s reading your blog content, chances are they might be interested in your YouTube channel as well.
In this article, we’ll show you how to embed a YouTube feed on your WordPress site in just 5 easy steps.
Why Should I Embed A Youtube Feed On My Website?
You may be wondering why you can’t just upload your video content directly into WordPress.
Well, doing this takes up a lot of bandwidth and web hosting storage. Your videos also won’t be nearly as shareable and discoverable as they are on YouTube. Plus any views from your website won’t contribute to your stats on YouTube, which you may need for monetization or increasing your reach.
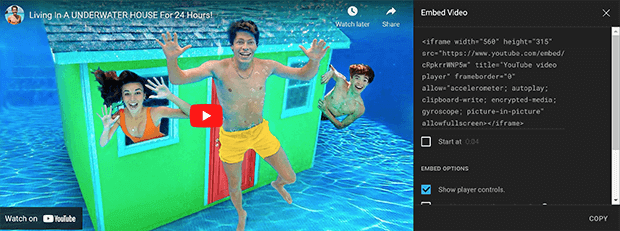
It’s possible to manually embed YouTube videos on other sites. But you’d have to generate an embed code for each video, which takes way too much time. You also can’t customize the video player appearance without advanced knowledge of HTML and CSS.
We recommend using a WordPress plugin like Smash Balloon.
Smash Balloon is a suite of social feed plugins, including YouTube Feed Pro. It’s the best WordPress plugin for adding a YouTube gallery to your website.
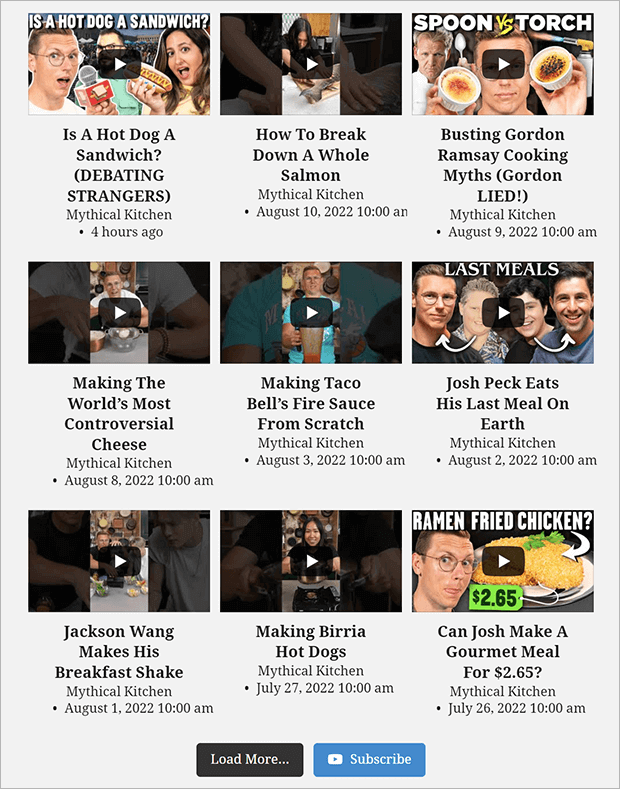
This YouTube plugin lets you automatically embed custom YouTube feeds with just a few clicks. Individual videos will appear in a popup video player when clicked. You can match your video player to your website or customize the styling completely.
Let’s take a quick look at some of the special features of YouTube Feed Pro.
Smash Balloon YouTube Feed Pro Features
Our favorite feature of all the Smash Balloon plugins is that they just work, even for WordPress beginners. No coding experience or advanced tech skills needed!
Simply install the plugin, connect your YouTube account, find your channel, and you’re done! We’ll show you a detailed step by step tutorial in the next section.
YouTube Feed Pro won’t slow down your site. It uses lazy loading so more videos are only loaded when the user clicks on Load More.
You can show videos from a specific channel or YouTube playlist, your favorites list, a specific search term, live streams, or simply single videos.
For more information, check out our complete Smash Balloon review.
And now, for that tutorial we promised you!
How to Add a YouTube Feed to Your WordPress Website (5 Steps)
Step 1: Install the YouTube Feed Pro Plugin
The first thing to do is to pick a Smash Balloon plan that works for your business. You can purchase YouTube Feed Pro by itself or get the All-Access Bundle that includes all the Smash Balloon plugins and extensions.
There is also a free version of YouTube Feed Pro called Feeds for YouTube available on WordPress.org. It has limited functionality compared to the pro version, but is still a usable video gallery plugin for small business owners with stricter budgets.
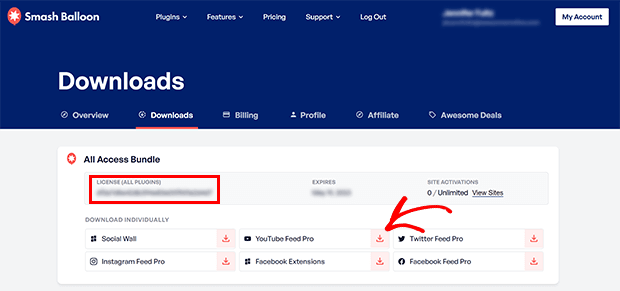
Once you have your plan, log into your Smash Balloon account and go to the Downloads section. Find the YouTube Feed Pro plugin and download the zip file. You will also need to copy your license key to a text file or other document to have it ready.
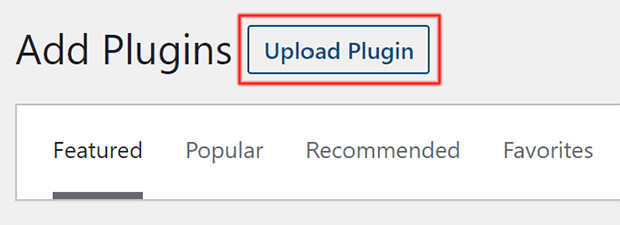
Now, go to your WordPress dashboard and click on Plugins » Add New.
Click the Upload Plugin button in the upper left corner.
Choose the file you just downloaded and click the Install Now button. WordPress will upload and install the plugin. Once that’s done, click Activate Plugin.
Next, let’s activate the plugin license for YouTube Feed Pro.
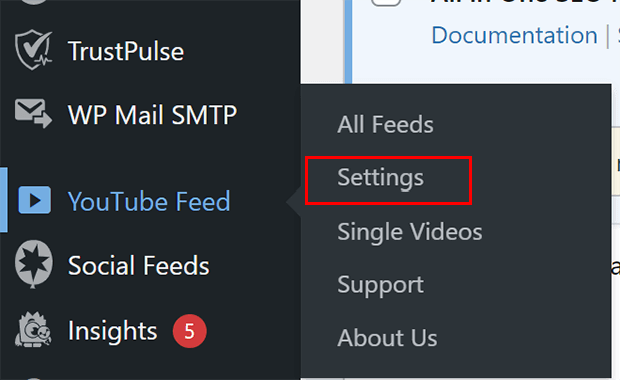
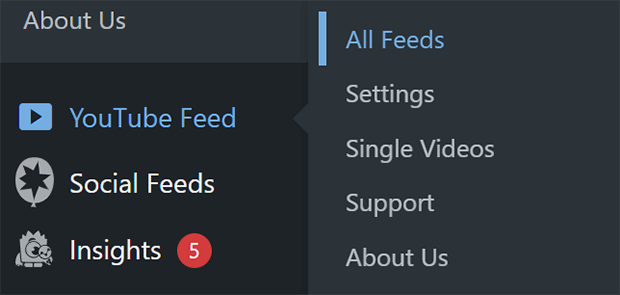
You will now see an option in the left sidebar called YouTube Feed. Click on YouTube Feed » Settings.
Paste your license key from your Smash Balloon account into the license key field and click Activate.
Step 2: Connect YouTube to WordPress
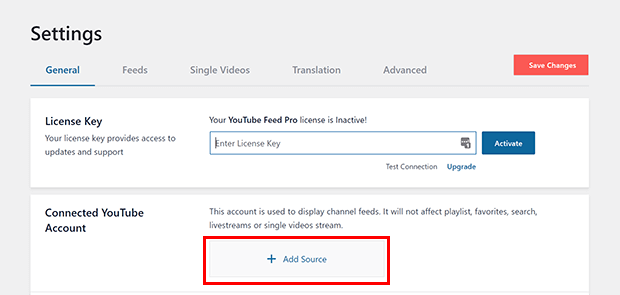
Now let’s connect your YouTube account. From the Settings screen, click on the Add Source button.
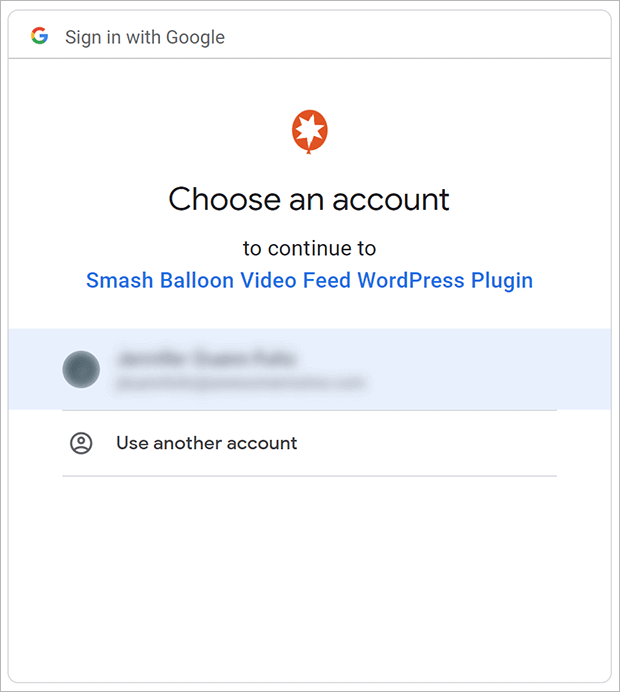
You’ll be redirected to a page where you can sign into YouTube using Google. Click on the account you want to use.
Then click Continue to give the plugin permission to access your YouTube account. You will then be redirected back to WordPress.
Now your YouTube account is connected to WordPress!
Step 3: Create a YouTube Feed
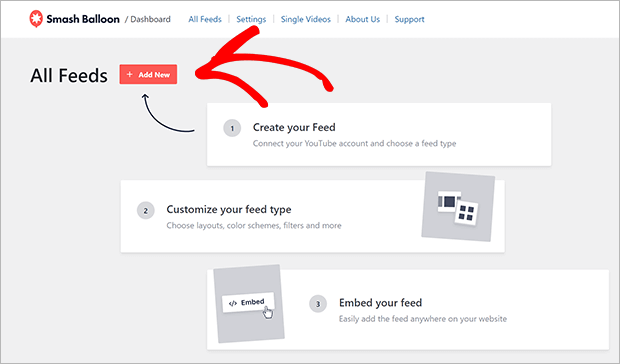
Next, we’ll create a YouTube feed in WordPress. Click on YouTube Feed » All Feeds.
Click on Add New.
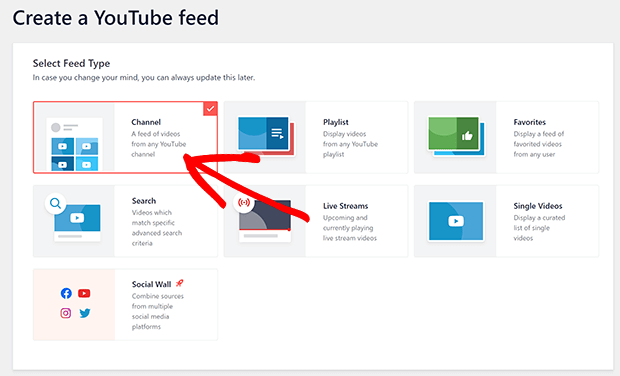
There are several feed types you can create. For this example, we’ll show you how to create a YouTube channel feed. If you’d like to create a playlist, favorites, search, livestream, or single video feed, you’ll need to add an API key.
Click on Channel and then click the Next button.
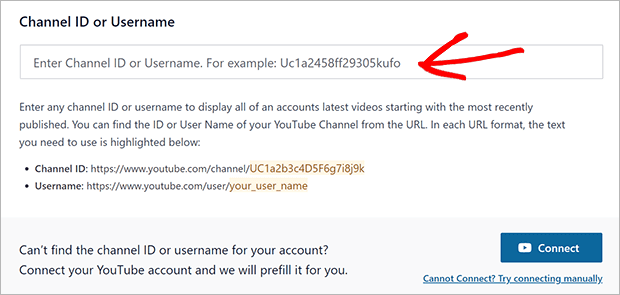
Enter the channel ID or username of the desired channel.
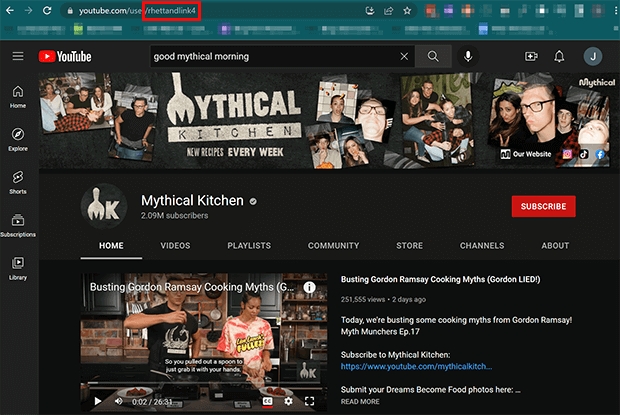
If you need help finding it, go to the YouTube channel you’d like to add. Copy the channel ID or username from the URL.
The part you need is in bold below:
- Channel ID: https://www.youtube.com/channel/UC1a2b3c4D5F6g7i8j9k
- Username: https://www.youtube.com/user/your_user_name
The channel ID will be a string of random numbers and letters. The username will usually contain more recognizable words and names.
Once you’ve entered the channel ID or username, click Next in the bottom right corner.
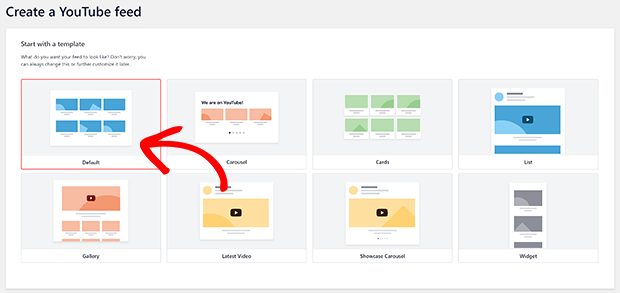
Choose one of the templates for your YouTube feed. You can always change this later. Click Next.
Once the feed is created, you’ll be taken to the feed editor. Here you can name your feed and customize the settings.
Step 4: Configure Your YouTube Feed (Optional)
Your YouTube feed will automatically pick up the styling of your existing WordPress theme.
But if you want to change the look, here are some of the many customization options available in Smash Balloon.
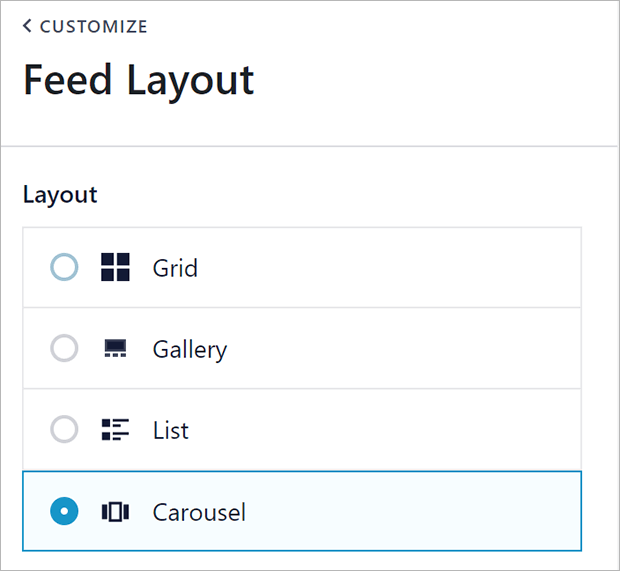
You can change your feed layout to grid, gallery, list, or carousel. Each option has its own settings you can adjust, such as the number of videos you want to show initially.
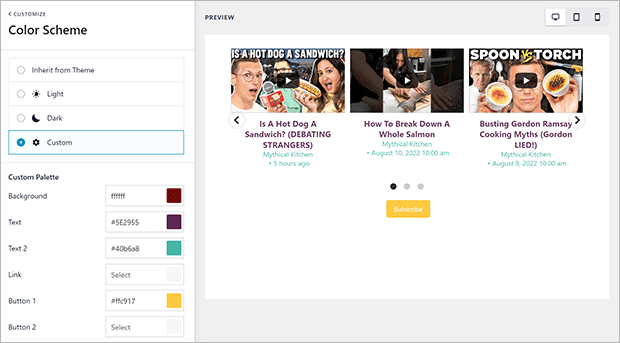
The color scheme can also be customized from the default. You can see changes as you make them in the preview pane on the right.
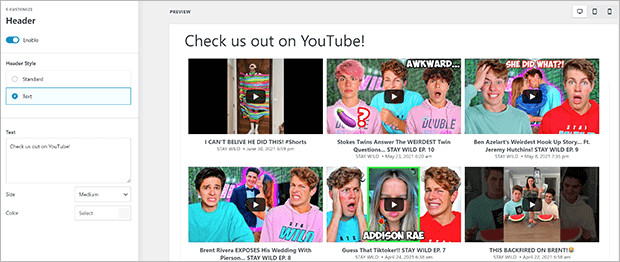
If you’d like, you can add a header to your YouTube feed. The header can be static text or pull information from your YouTube channel.
You can also tweak the appearance of individual videos in the feed and player.
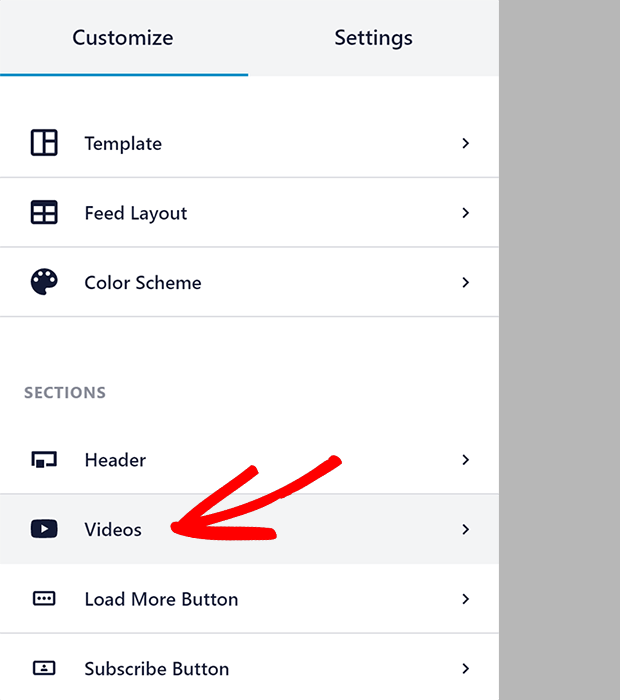
There are two settings in the Video Player Experience we especially want to point out. To get there, click on Videos under the Customize tab.
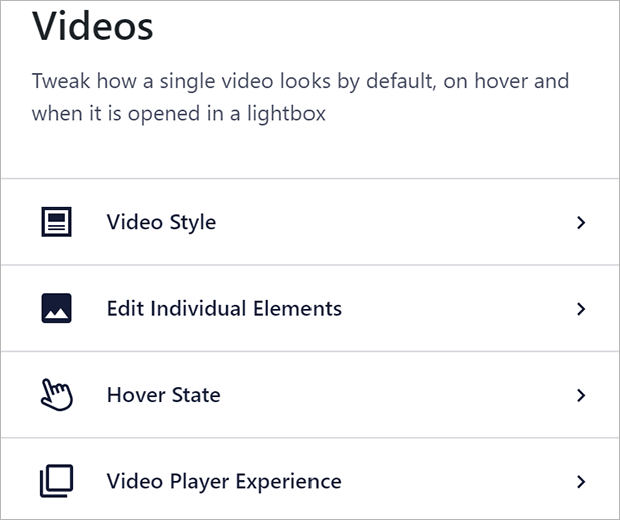
Next, click on Video Player Experience.
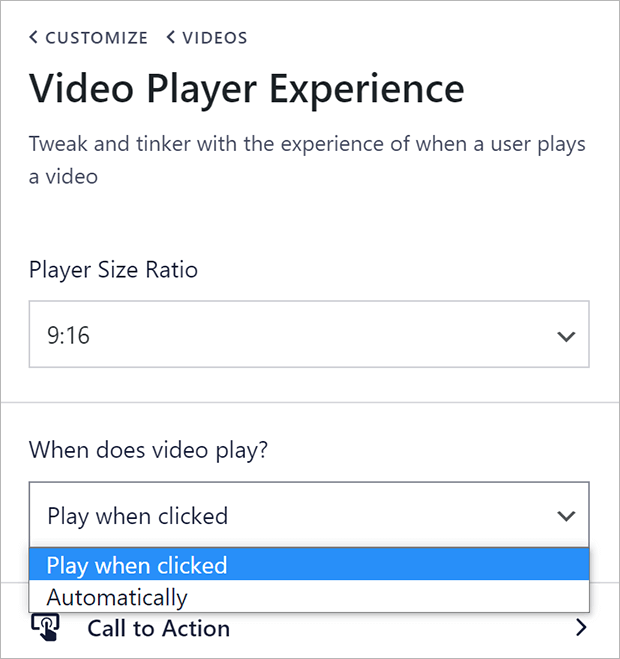
First, you can set whether you want videos to play automatically or after the user clicks. Select Automatically or Play when clicked from the dropdown menu.
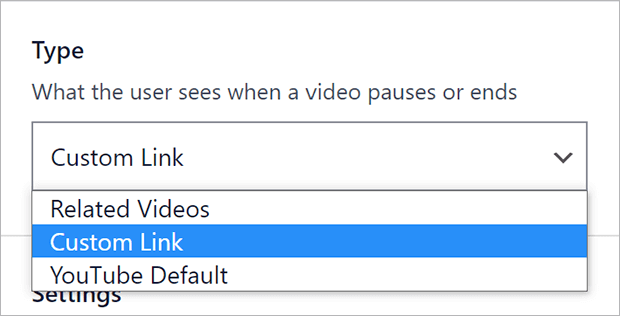
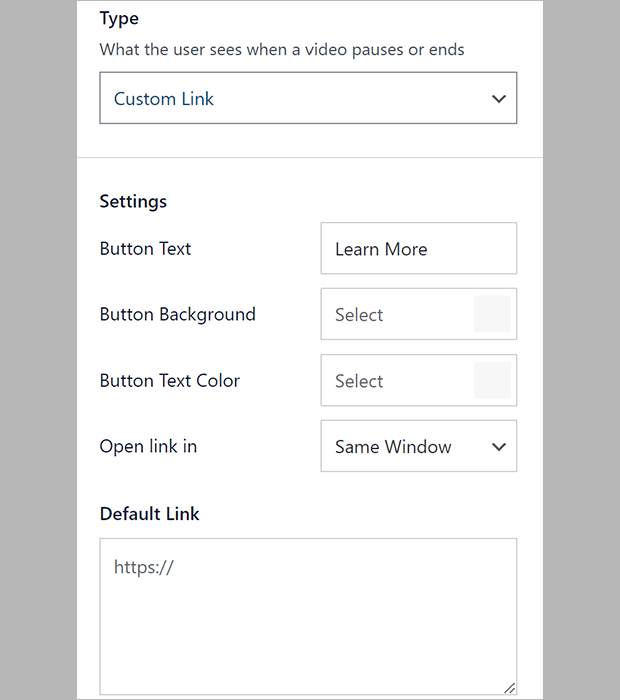
You can also add a special call to action at the end of your videos. Click on Call to Action from the Video Player Experience pane.
You can choose to show related videos, a custom link, or whatever the YouTube channel default is.
The custom link appears as a button. You can adjust the button appearance and link behavior as you see fit.
You can even display a custom link by adding the link and button text to your YouTube video description in this format:
{Link: Button Text https://my-site.com/buy-now/my-product/}
Once you have your YouTube feed the way you want it, make sure to save changes by clicking Save in the upper right corner.
Step 5: Embed Your YouTube Feed
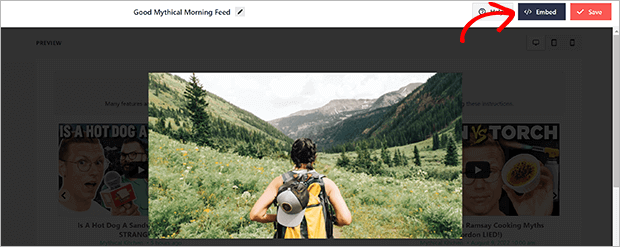
Now you can embed your YouTube feed on your WordPress site. Click on the Embed button in the upper right corner.
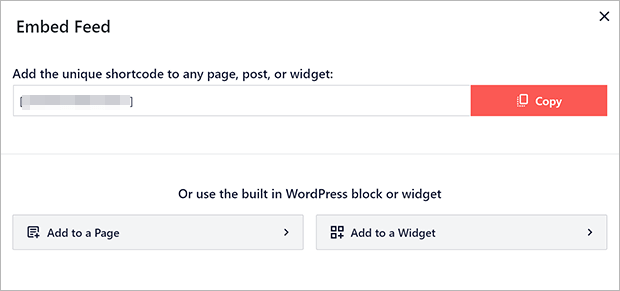
You can use a shortcode to add the feed anywhere you want, from posts and pages to OptinMonster campaigns.
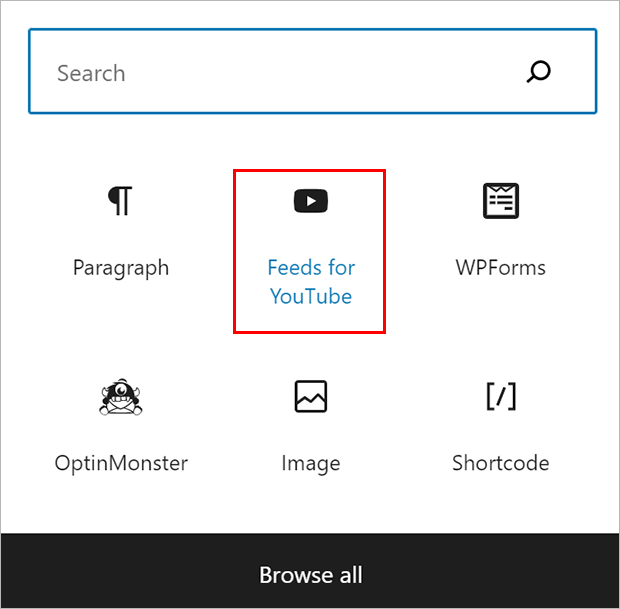
You can also choose a WordPress page or widget area to add the feed to. Simply choose the Feeds for YouTube block to add the feed to your WordPress post, page, or widget.
Add YouTube To WordPress
That’s a wrap! Now you know how to add a YouTube feed to your WordPress site.
YouTube is a powerful platform for engaging your audience and growing your email list. Once you’ve got your YouTube feed on your website, you can start improving your YouTube SEO.
Ready to embed your YouTube channel on your WordPress website? Get started with Smash Balloon today!
If you like this article, please follow us on Facebook and Twitter for more free articles.










Add a Comment