Does your site contain adult products or content requiring an age verification popup? Many age verification services can be time-consuming and expensive for what they deliver.
That’s why, today, we’re going to show you how to use OptinMonster to create your own age verification popup in less than 10 minutes.
By the end of this tutorial, you’ll be able to verify your customers’ age whenever they reach your site.
But first, let’s talk about what we mean by an “age verification popup.”
What Is an Age Verification Popup?
An age verification popup is a popup campaign shown to visitors to make sure they are old enough to browse the content of your site. Businesses who sell tobacco, alcohol, cannabis, or other adult products use verification to ensure their site’s visitors can legally (and safely) view their content.
The goal of age verification is to make sure that vendors selling adult products aren’t advertising to minors.
And while some companies make entire age verification pages for their site, others prefer a simple age check popup.
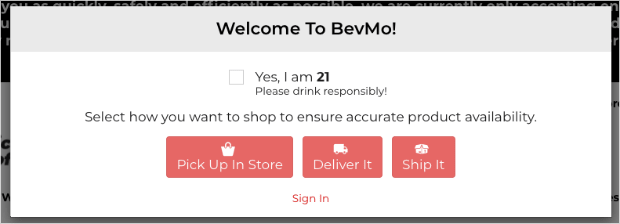
You’ve probably run into these age verification messages before. They look like this:
Many businesses add website age verification popups for both moral and legal reasons.
With an age verification popup, you can cover your bases to avoid fines or penalties if minors are caught making fraudulent purchases on your site.
And even though laws for checking your user’s age will vary depending on where you live, adding age verification to websites is a no brainer for anyone who works with adult products.
2 Ways to Create an Age Verification Popup
In this step-by-step tutorial, we’ll show you 2 different ways to create an age verification popup.
Method 1: Simple Age Verification (Yes/No)
Method 2: Age Verification by Submitting Birthdate
Let’s get started.
Method 1: Simple Age Verification Popup (Yes/No)
We’ll be using OptinMonster to create an age verification popup.
Without a doubt, OptinMonster is the best conversion toolkit on the market that lets you easily set up any onsite campaigns, including an age verification popup, lead generation form, and more.
It comes with powerful targeting options, so you can rest assured that your campaigns are shown to the right people on the right pages at the right time.
Step 1: Create a Yes/No Popup
First, you need to log into your OptinMonster account:
Don't Have an Account Yet?Sign up for OptinMonster to get started today or check out this extensive review to see if OptinMonster is right for you!
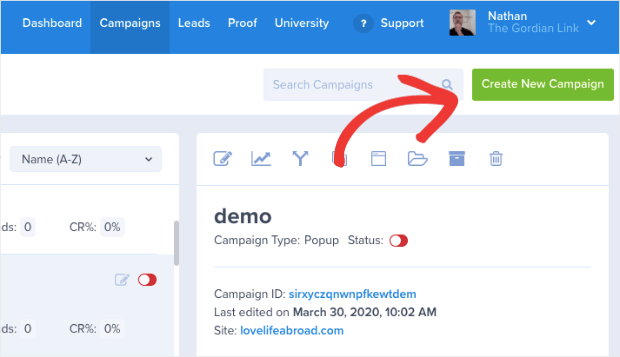
In your dashboard, go the upper right-hand corner and click Create New Campaign:
Then choose your campaign type. There are 2 types of campaigns that work for age verification:
- Popups
- Fullscreen
Love ’em or hate ’em, you just can’t deny that popups WORK.
It’s why you see so many famous brands using popups for age verification, optin campaigns, and more.
Alternatively, you can also create a Fullscreen campaign, which is the best choice especially if you’re only restricting specific URL paths on your site.
For today’s tutorial, though, we’ll choose a Popup:
Now it’s time to choose your template. OptinMonster comes with 50 pre-made templates that work for both desktop, tablet, and mobile. Or, you can also choose to create your own template from scratch.
Today, we’re using the Basic template:
This is a straightforward, non-distracting popup template that’s perfect for verifying the age of your site’s visitors.
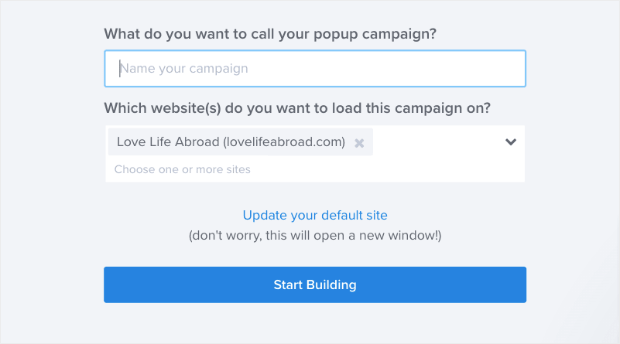
Next, you need to name your campaign and select which site you want to use it for:
Now you’ll see your template in the editor. With just a few minor adjustments, you’ll have your age verification popup up and running in no time.
Head over to the top of your editor menu and click Yes/No:
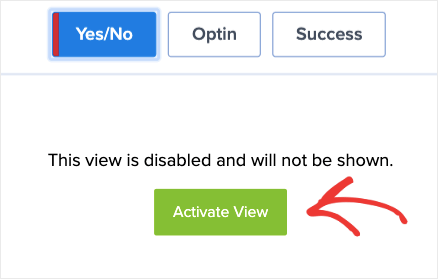
Then click Activate View in your editor:
This will activate the Yes/No feature typically used for our 2-step optin forms. However, they’re also useful for verifying the age of your visitors.
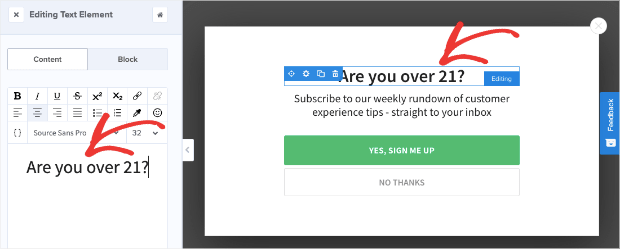
Click on the text in the editor to pull up the editing tools in the left-hand side menu. Change the text to ask the visitor if they are over the age required to view the information on your site:
We’ll also delete the subtext for our age verification campaign. To do so, click on the subtext’s trashcan icon directly in your editor:
Now we need to edit our Yes/No options.
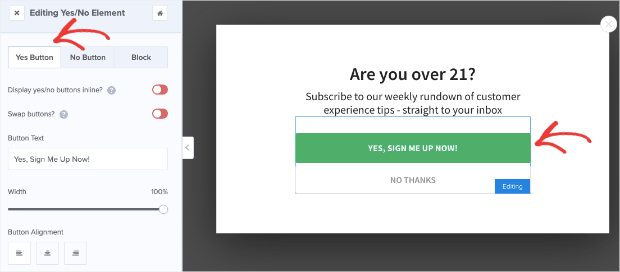
You already have your Yes and No buttons created. If you want, you can change the look and style of these buttons to match your brand. Simply click on the button to pull up the editing tools on the left-hand side menu:
You can change the button:
- Color
- Text
- Font
- Shadow
- Border
And more. With OptinMonster, it’s our mission to ensure that you can customize each popup to meet your specific needs.
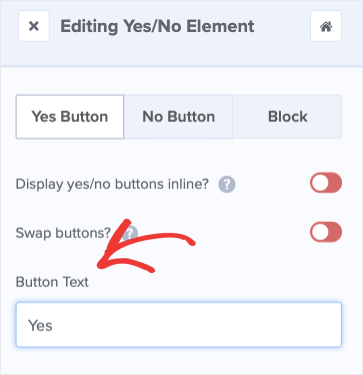
Today, we’ll change our Yes and No button text to be more straightforward than they are in the template. We only need them to say “Yes” or “No” for our age verification popup.
Click on the button you want to edit and find the Button Text field. Then modify whatever you’d like your Yes button to say:
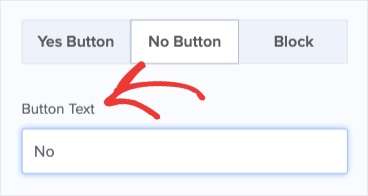
Click on your No Button and find Button Text to change that as well:
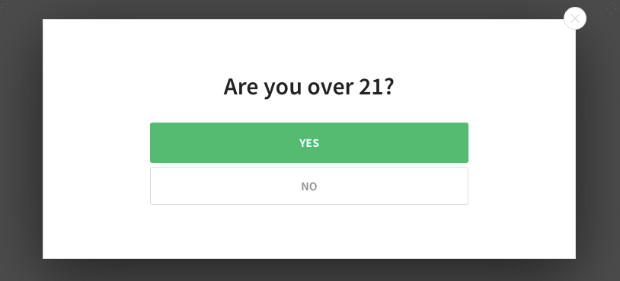
You should now have a simple Yes/No campaign in your editor:
Step 2: Make Age Verification Compulsory
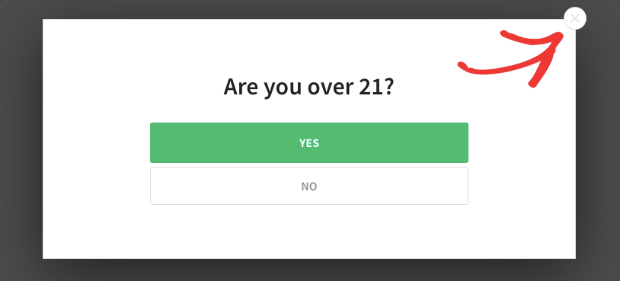
Notice there’s still an X close button in the top right-hand corner of the campaign:
We don’t want that to appear in our age verification popup.
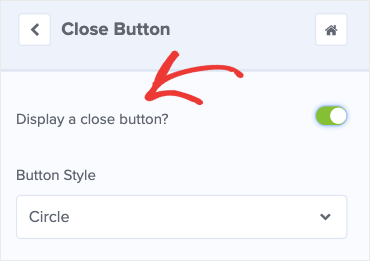
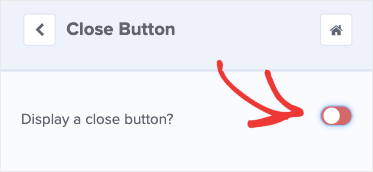
The only way this campaign should close is if the user clicks Yes because they are old enough to enter your site. For now, click on the X close element in the top right-hand corner and look for Display a close button in the left-hand editing menu:
Switch the toggle to Off:
Now it’s time to change your Yes and No buttons’ action. Let’s start with the Yes button.
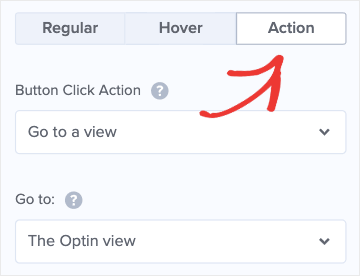
Click on the Yes button to pull up the editing options on the left-hand side menu. Scroll down to Action:
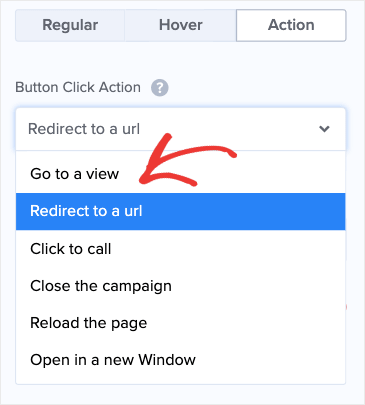
In the dropdown menu for Button Click Action, change the settings from Go to a view to Close the campaign:
This way, when your site’s visitors answer Yes to whether or not they meet your age requirements, the popup will automatically close, and they can access your site.
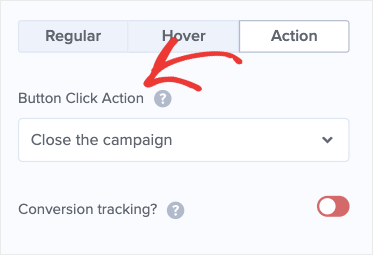
Now it’s time to modify the No button’s action. Click the No button to pull up the editing tools. Scroll down to Action:
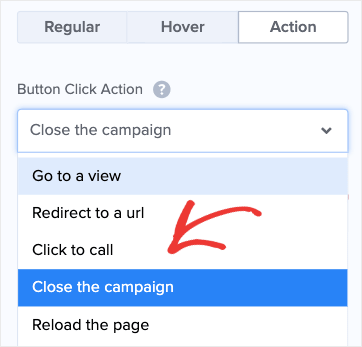
In the dropdown menu for Button Click Action, change the settings from Close the campaign to Redirect to a URL:
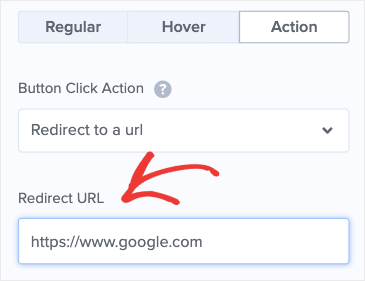
Enter the URL that you want your visitor to be redirected to in the field below:
You can choose any URL that you’d like. If you have other content or another site that isn’t age-restricted, you can send visitors there.
Otherwise, it’s a common practice to have your visitors go back to Google.
We’re almost done.
Next, we need to configure our display and trigger settings to make sure your age verification popup is shown to the right people and on the right pages.
Step 3: Show Age Verification Popup to Every User
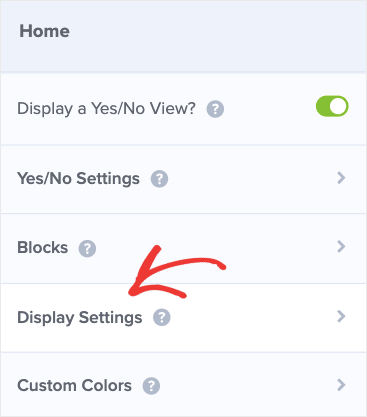
In the left-hand menu, click Display Settings:
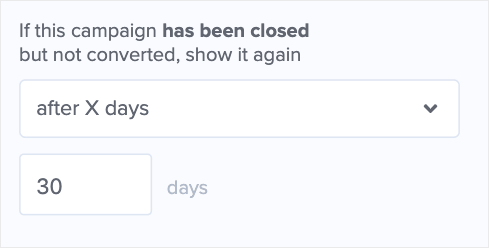
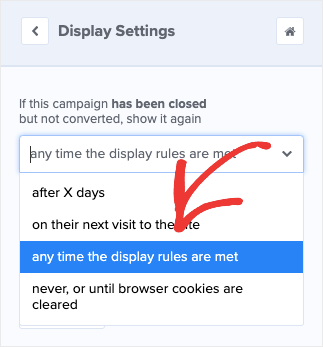
The first option is useful for optin campaigns. The default settings won’t show the same popup for 30 days to visitors who didn’t opt into your form:
But this isn’t an optin form, so we’ll want to change that.
In the drop-down menu, change this field from after X days to anytime the display rules are met:
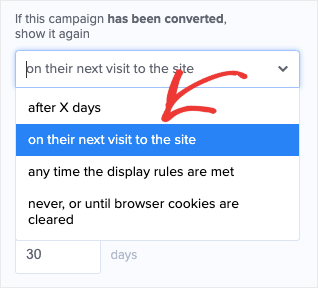
Then you’ll want to change the next field box for people who did verify their age so it will still appear on their next visit to the site.
For that, change the field “If this campaign has been converted, show it again” to on their next visit to the site:
And that’s it! Your age-verification campaign will show to each visitor every time they come to your site.
Step 4: Display the Popup Immediately
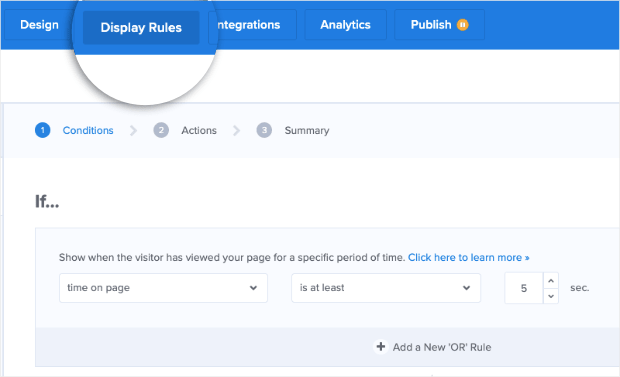
At the top of your editor menu, click Display Rules:
Typically, we don’t advise users to show their popups to users immediately. Our default settings will show the campaign to your visitors after the first 5 seconds of being on your page.
But in many cases, we recommend showing campaigns as users are leaving your site with our Exit-Intent Technology®.
Today, though, you need to do the exact opposite.
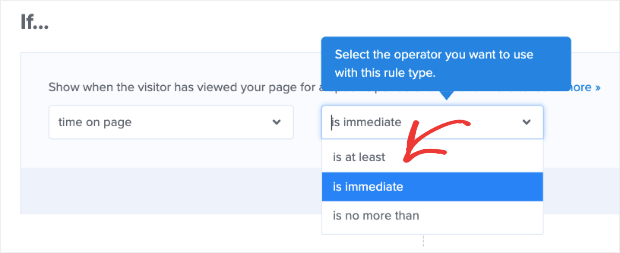
Leave the first condition as time on page but change the field next to it from is at least to immediately:
This means that your popup will appear as soon as anyone reaches your site.
The next step will be optional, depending on your needs. Right now, the default configurations will show your popup campaign on any page. However, you can change this if only certain pages of your site are age-restricted.
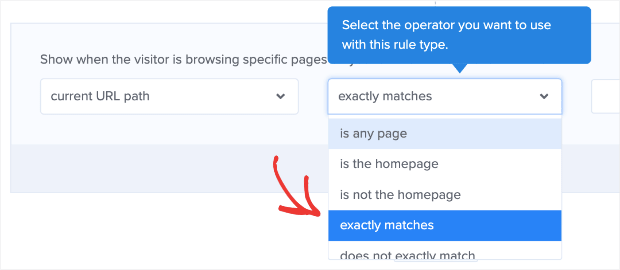
To do so, you can leave the option current URL path as is but change the field is any page to exactly matches:
Then you need to enter the URL of the age-restricted page on your site:
NoteSome users may think they should only show an age verification popup on their site’s homepage as they welcome new visitors. However, we recommend against this. Remember, your visitors may find your content in other ways and may not land on your homepage first.
To add more pages, click the AND button and recreate the display rule you just created with another URL:
If you have entire sections of your website that need to be restricted, you can change the field is any page to contains:
Then enter part of the URL slug that you want to include age verification.
So if all of your blog posts start with the URL path www.mysite.com/blog, you would add the term blog in the field next to contains:
Then any URL that contains the term blog will display your age verification popup.
And now you’re done! Well, almost.
Don’t forget to click Save and Publish.😉
You’ve now used OptinMonster as a free age verification service to make sure your site’s product and content is getting to the appropriate audience. This will display any time a visitor comes to your site and will show immediately.
Method 2: Age Verification by Submitting Birthdate
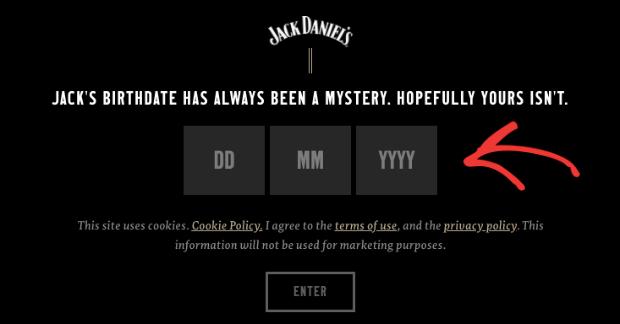
You may have noticed that on some websites, the age verification popup asks users to input their birthday:
Some states or regions may require that you do this. The question has always been, “How?”
Today we’re going to quickly share a bit of custom code that you can use to create this type of age verification popup with OptinMonster.
If you’re not familiar with HTML, CSS, or JavaScript, don’t worry. All you need to know is how to copy and paste.
Like you did earlier, log into your OptinMonster account and create a popup campaign. But this time, choose the Canvas template to start from scratch:
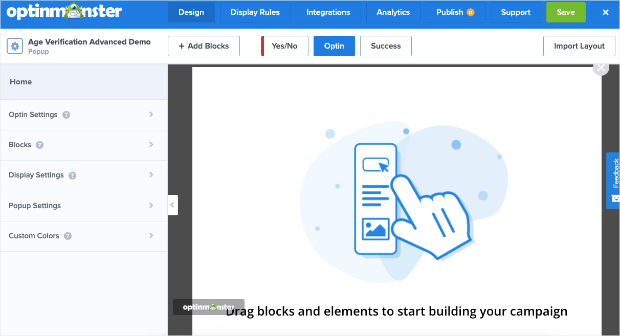
Then name your campaign and assign it to a website. Your editor should look like this when you arrive:
The first thing you need to do is delete the X close button for this template like we did earlier in this tutorial. Click the X close button element and locate the toggle switch:
Switch the toggle to Off:
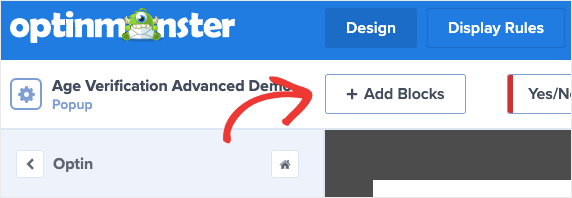
Now go to the top your editor menu and click + Add Blocks:
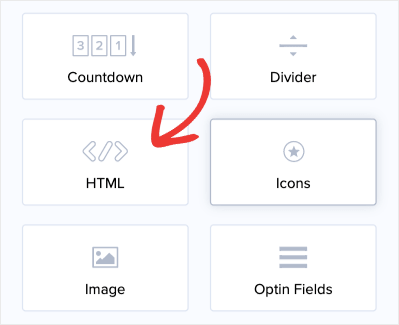
In the left-hand menu, you’ll see various block element options. Scroll down until you locate HTML:
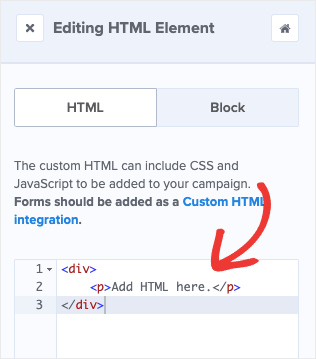
Drag and drop this block into your editor screen. You’ll now see a place to insert custom HTML in the left-hand menu:
Delete the code that is currently there and replace it with the following HTML code:
HTML
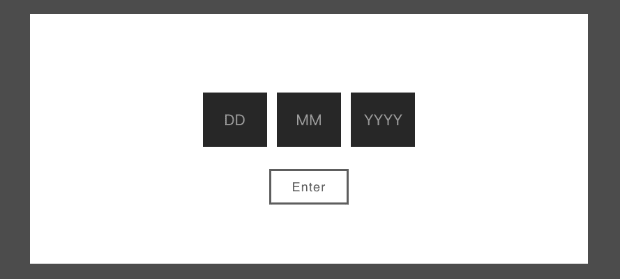
At this point, your campaign will look a little weird. No worries, that’s normal. Because next, we need to add the CSS.
CSS
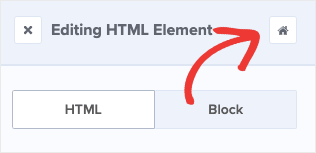
Click on the Home icon to return to your editing tools:
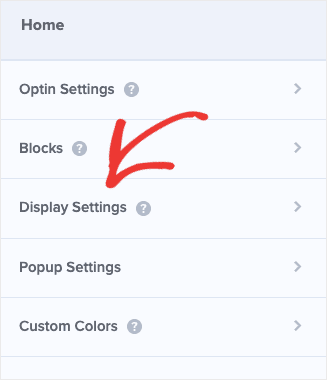
Then click on Display Settings:
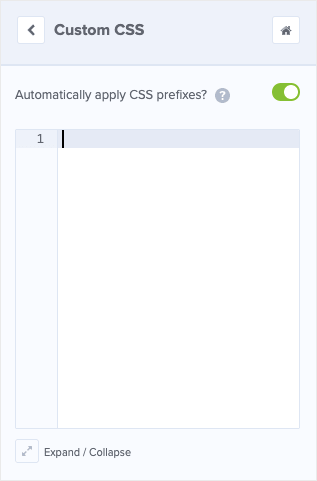
And scroll down until you see a CSS code box:
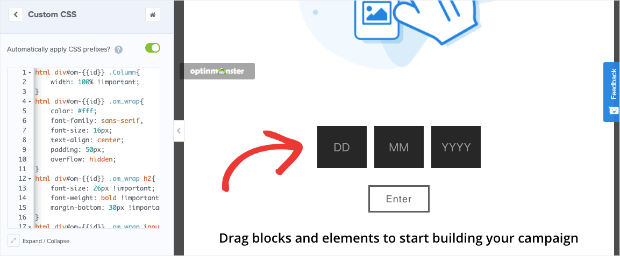
Copy and paste the code below into that box:
You’ll see that your birthday input fields have been styled:
Click the back button at the top of your left-hand menu next to Custom CSS:
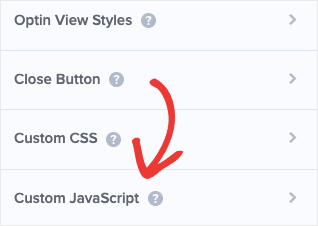
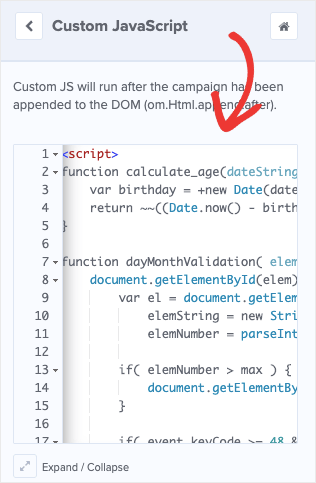
And click on Custom JavaScript:
JavaScript
Copy and paste the following JavaScript code:
And put it in the code box in your editor:
The one section of this piece of code you need to know is this:
You can change the “18” there to “21” (or any age) depending on your site’s product, content, and local laws. Doing so will change the popup to allow people who are 21 and old to enter, rather than 18 and older, as it is now.
Now you just need to clean up the design to fit your brand. Delete any excess element blocks from your campaign by using the trashcan icon directly in your editor:
Once you’ve cleared all the excess blocks, your campaign will still look plain:
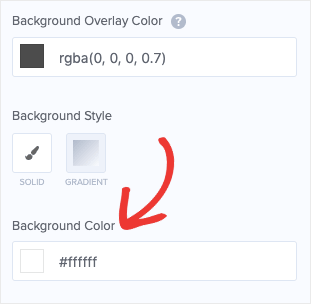
To fix that, change the background color. Click on the background of your campaign to pull up the editing tools. Locate background color:
We suggest using the color code “000000” to create a black background:
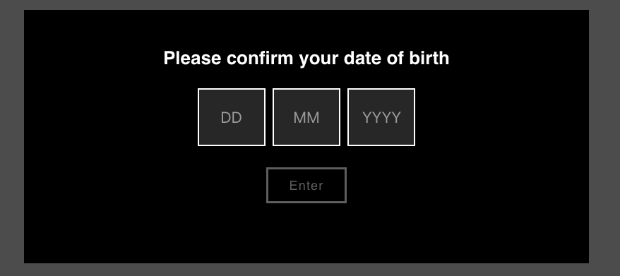
This will also bring out the text Please confirm your date of birth that is in white (which is why we couldn’t see it before).
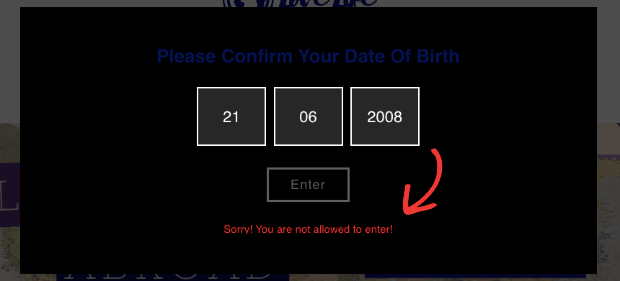
And voila, you now have an advanced age verification popup that allows you to insert your visitor’s date of birth. If they aren’t old enough to visit your site, they’ll get the message Sorry! You are not allowed to enter:
Oh, and again, don’t forget to hit Save and Publish. 😉
You’ll want to customize your display rules and triggers in the same way we did during the first half of this tutorial. Otherwise, you’re all set.
You can now rest assured that your site’s visitors are all of the appropriate age to view your content.
In Conclusion
That’s it! You’ve just learned how to add age verification to your website with ease.
Do you have any cool tips or tricks for verifying your site users’ age? If so, let us know via the comments section below. You might also want to check out how to use gated content to skyrocket conversions.
Or, since you’re now familiar with 2-step optin campaigns, you may be interested in reading this article, How to Add Multi-Step Popups to Boost Conversions.
And for more expert advice on increasing traffic, boosting conversions, and making more sales, head over to our YouTube channel. We’ve got loads of tutorials for all of your digital marketing needs.
Tired of theory and ready to take action? That’s what we love to hear.
Sign up for OptinMonster today, risk-free with our 14-day money-back guarantee, and start growing your business today.











Add a Comment