Do you want to add a MailerLite popup to your site to grow your email list?
If you’re a small business owner, building your email list can be a challenge.
Where do you find the right tools and the time to build a popup that will actually convert?
The good news is there’s a simple method for adding a MailerLite popup that boosts your list.
In this tutorial, you’ll learn how to easily create a MailerLite popup that converts your website visitors into email subscribers.
What is a MailerLite Popup
MailerLite is a popular email marketing service provider.
It comes with the following features to help you run email campaigns:
- Drag and drop editor to easily create beautiful email newsletters
- Email automation to automatically send messages at the right time
- Personalized campaigns with segmentation
With MailerLite, you can send targeted emails in bulk without a ton of effort from your side.
But, the first step in your email marketing strategy is to build your list.
And here is where a MailerLite popup comes in.
A MailerLite popup is built for one specific goal: convert more of your visitors into leads. In order to do that, it’s displayed above your content, dimming the rest of the area of your site.
And, whether you’re a beginner in email marketing or a seasoned pro, popups are one of the best ways to boost your email list.
OptinMonster is the best way to build a MailLite popup. With OptinMonster, you can easily create a stunning popup with its drag and drop builder and wide selection of templates.
OptinMonster increases the number of people who convert on your site with:
- Beautiful templates that are easy to customize
- Campaign triggers that make your popups appear at the right time when users are more likely to convert
- Targeting to show campaigns to the right people who are more likely to be converted
More than 1 million websites use OptinMonster to increase their subscribers and leads.
Crossrope grew their email list by 900% using OptinMonster.
And the best thing is it’s easy to use.
You don’t need to know code or graphic design to create campaigns that boost your subscribers. Plus, it works no matter which website builder you’re using.
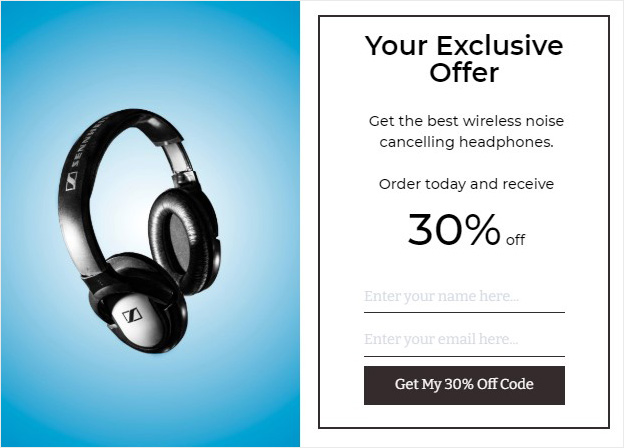
In this tutorial, we’ll walk you through how to create a popup shown below with MailerLite. Let’s get started!
How to Create a Mailerlite Popup
First, you need an OptinMonster account.
If you want to learn more about OptinMonster and get examples of how it can grow your business, check out this article: Is OptinMonster Worth It? (An Extensive Review for 2020)
Step 1: Create an OptinMonster Campaign
To begin, log into your OptinMonster account.
You’ll now be on your dashboard.
Click Create New Campaign in the top right corner.
Next, you need to choose a campaign type.
You can choose a campaign type based on what you want to achieve with your popup forms.
For example, Fullscreen mat is the best choice for you to draw the reader’s attention to your optin form by completely hiding your website content. Inline campaigns are ideal for converting engaged readers because these are typically placed within the body of your text.
Today, we’ll go with Popup.
Now, we’ll choose a template.
All Optinmonster templates work well across devices and are easy to customize. But if you want to design your own form with HTML, you can use OptinMonster’s Canvas template.
If you need help finding the perfect template, go ahead and filter by your campaign goal:
- Grow email list
- Target abandoning visitors
- Redirect traffic
- Time sensitive offer
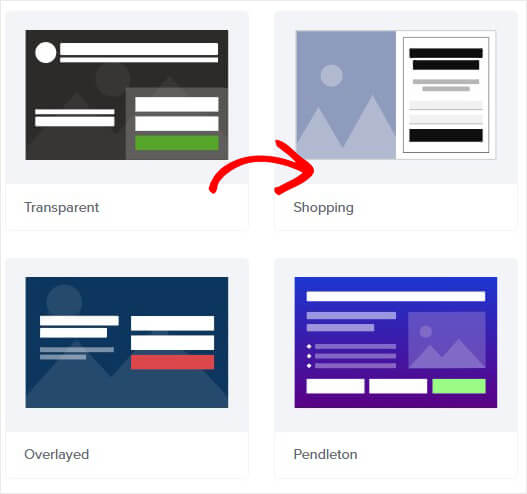
For this tutorial, we’ll go with the Shopping template, because it already has everything we need to promote our discount offer, like space for an eye-catching image and compelling copy.
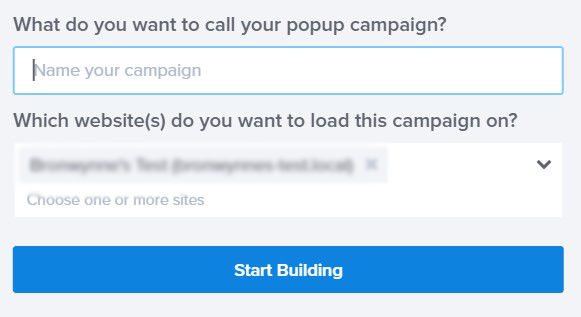
You’ll need to name your campaign and click Start Building to enter the campaign editor.
Now, it’s time to design our MailerLite popup in OptinMonster’s campaign builder.
Step 2: Design MailerLite Popup
OptinMonster gives you everything you need to easily design beautiful popups.
Even if you’ve never created a popup before, you won’t have any trouble putting together a stunning campaign.
The great thing about the templates is that you don’t have to make any changes if you don’t want to. So, you could just add your own image and copy.
But, if you want to change everything about your template, that’s easy too.
There’s two simple ways to customize the template:
- Click on the element you want to change
- Drag and drop a new block onto your optin form
We’ll walk through both methods in this tutorial.
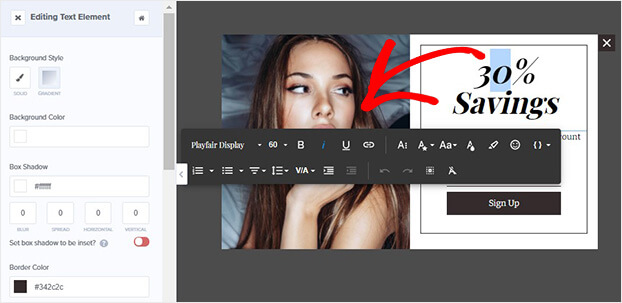
First, we’ll add our own copy.
A compelling copy can mean the difference between your reader accepting your offer and ignoring your popup.
Looking for inspiration? Learn about copywriting frameworks in this article.
Changing your text is as simple as clicking on the popup with OptinMonster’s text editor.
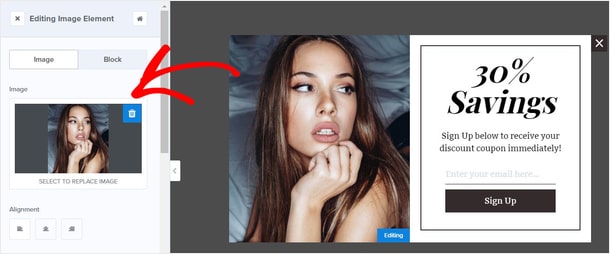
Next, let’s add our own image.
Simply click on the image. That will pull up the element editing tools on the left.
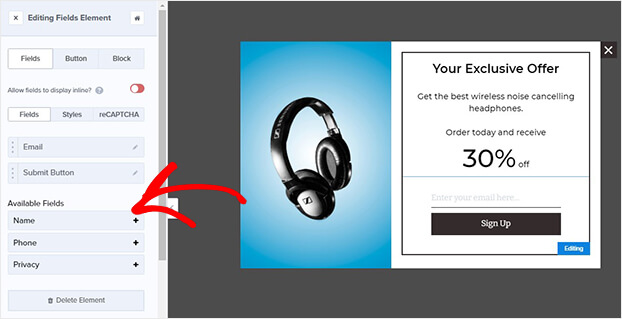
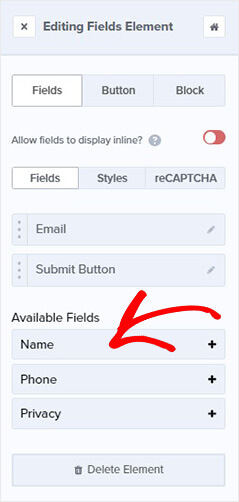
Next, we’ll add another field to our popup.
Because we want to personalize our emails, we’ll include our subscriber’s name.
Click the optin field.
Over on the left, you’ll see the editing tools.
Select the Name field.
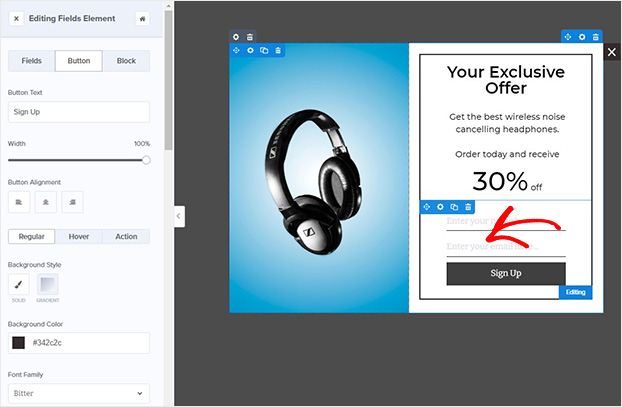
Finally, we’ll customize the button.
You have the option to change the call to action, color, font, and alignment.
That’s it.
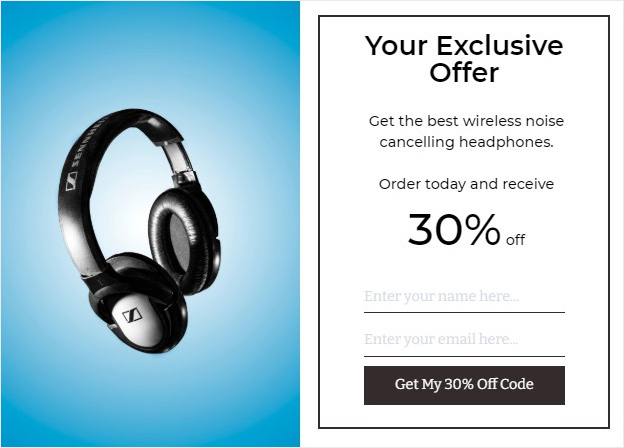
Here’s our popup:
We’ll stop there for today. But, you can customize anything about your popup.
Next, it’s time to decide where and when you want to display your MailerLite popup.
Step 3: Display MailerLite Popup
You’ll be able to control exactly who sees your popup and when it appears.
That’s all possible with OptinMonster’s advanced campaign triggers and targeting, called Display Rules.
Let’s have a look at some of these rules.
Targeting
OptinMonster’s targeting rules let you show campaigns based on:
- Visitor’s physical location
- Whether they’re new or returning site visitors
- The referring site, like Facebook or Twitter
Triggers
Triggers determine when a popup is displayed.
Here are examples:
- Timed display: show when a reader has spent a specific amount of time on your site
- Page-level targeting: trigger on a specific page or section of your site
- Scroll trigger: only show after the reader has scrolled a certain percentage of the page
And so much more.
These features give you the power to show your campaigns to the right person at the right time.
Today, we’ll look at a powerful display rule, Exit Intent
Exit intent technology triggers your popup when a visitor is about to leave your site.
With Exit Intent, you have one last opportunity to show them a targeted offer.
Do exit popups work?
Our customers convert an additional 2 to 4 % of their site visitors into email subscribers using Exit Intent.
Head over to Display Rules at the top of your editor.
Find and select Exit Intent.
Check out this article for exit popup hacks that will grow your subscribers and revenue.
Step 4: Integrate MailerLite with OptinMonster
Now, we’ll connect OptinMonster to MailerLite.
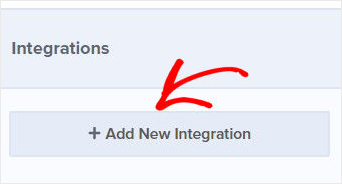
Click Integrations at the top of your editor.
Next, select Add New Integration.
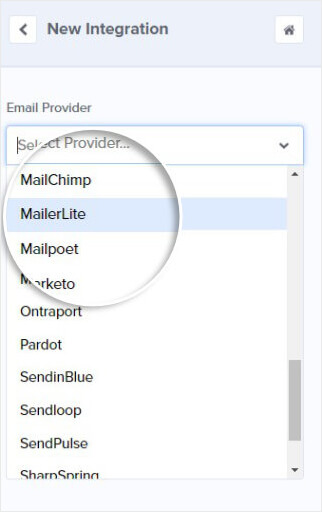
From the Email Provider dropdown, select MailerLite.
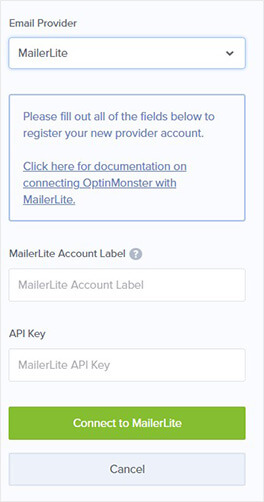
Now, you’ll need to add:
- Integration name
- API key
For integration name, choose anything simple to help you organize your integrations.
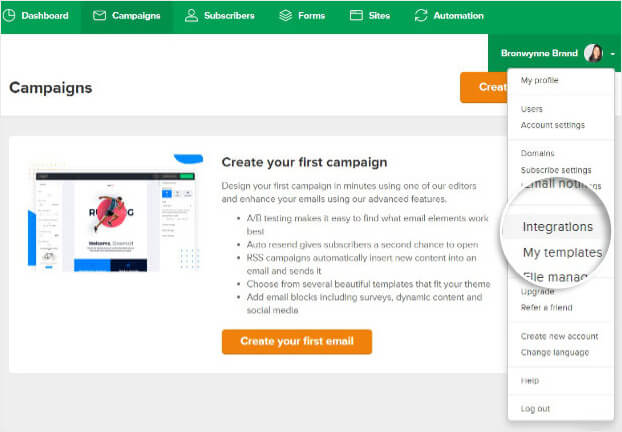
You’ll need to head over to your MailerLite account to get your API key.
From the account dropdown in MailerLite at the top-right corner, select Integrations.
On the next screen, select the Use button.
Next, copy the API key.
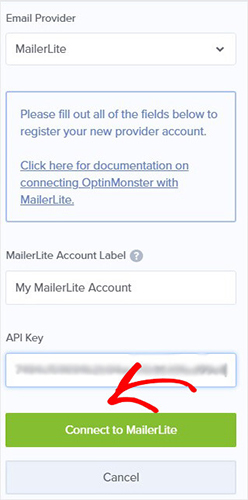
Return to the OptinMonster campaign builder and paste your API Key into the corresponding field.
Click Connect to MailerLite.
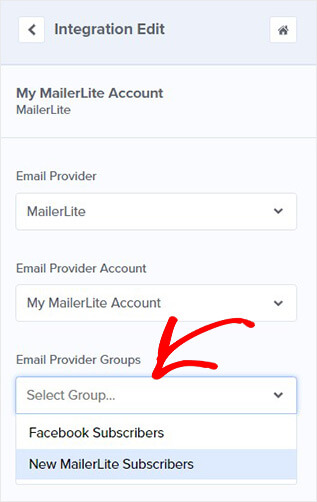
Finally, choose which Email Provider Group you want to add new subscribers to.
Now, all you need to do is publish your campaign.
Once you start collecting email addresses, you’ll need to send the right kind of emails that help you turn them into loyal fans or paying customers.
Here are resources to help you create emails that convert your subscribers into paying customers:
- How to Run a Successful Email Marketing Campaign (Step by Step)
- 17 Tips for Writing Email Marketing Copy that Converts
Want to learn more about how OptinMonster increases leads? Check out this article about how OptinMonster works, including 8 benefits and 12 case studies.
Ready to turn your site visitors into subscribers? Get OptinMonster today!









Add a Comment