Are you looking for a way to engage with your website traffic RIGHT NOW? Why not use Facebook Messenger to connect with your customers and site visitors?
According to Facebook, there are more than 2 billion messages sent on their messaging platform each month between people and businesses alone. That’s a lot of messages between regular folks and businesses, but people seem to like hearing from businesses this way.
In fact, more than half of users react positively when dealing with businesses via messenger apps:
In this post, we’re going to show you how to drive website traffic to Facebook messenger using m.me links so you can boost engagement with your customers and visitors right away.
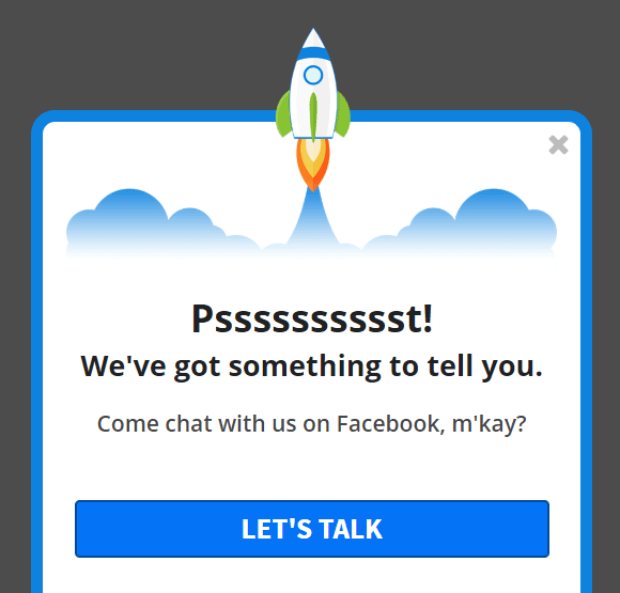
Our finished campaign is going to look something like this:
Before we get started, though, let’s talk about Facebook messenger marketing, why you should use it, and how to get started.
Why Use Facebook Messenger Marketing?
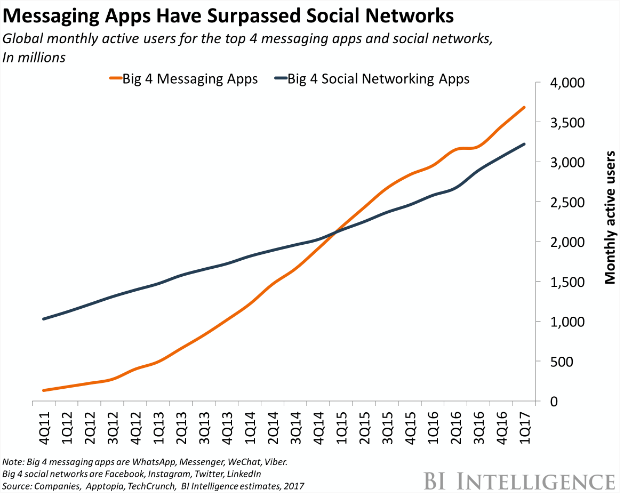
Communication has changed over the past 10 to 15 years and it’s not done yet. While email consistently wins out over other communication methods in terms of marketing ROI, social media, particularly Facebook, is gaining. And, as of 2017, messenger app use has overtaken social network use for global monthly active users.
Messenger marketing allows businesses to engage with customers and leads in a more conversational way than traditional email marketing. This gives businesses, particularly smaller businesses, a unique opportunity to develop relationships and build trust through a two-way relationship. And, it’s more personal and intimate than engaging directly on the social media platform where everyone else can see it.
How to Use Messenger Marketing
There are quite a few ways to use messenger apps for marketing, but they tend to fall into 3 categories:
- Content delivery
- Lead generation
- Customer support
Content Delivery
Facebook messenger offers you an alternative to gated content that is then delivered via email to users who opt in.
Instead of asking users to fill out a form to receive content via email, you can give them the option to skip the form and get the content via Facebook messenger.
HubSpot tested this method of content delivery for about a month and found that messenger broadcasts resulted in an 80% open rate and 13% click rate. This is a 242% higher open rate and 619% higher click rate than their control method of content delivery (email)!
In addition to broadcasting new content, you can use messenger to deliver personalized content to users. Or, let them pull the content themselves, rather.
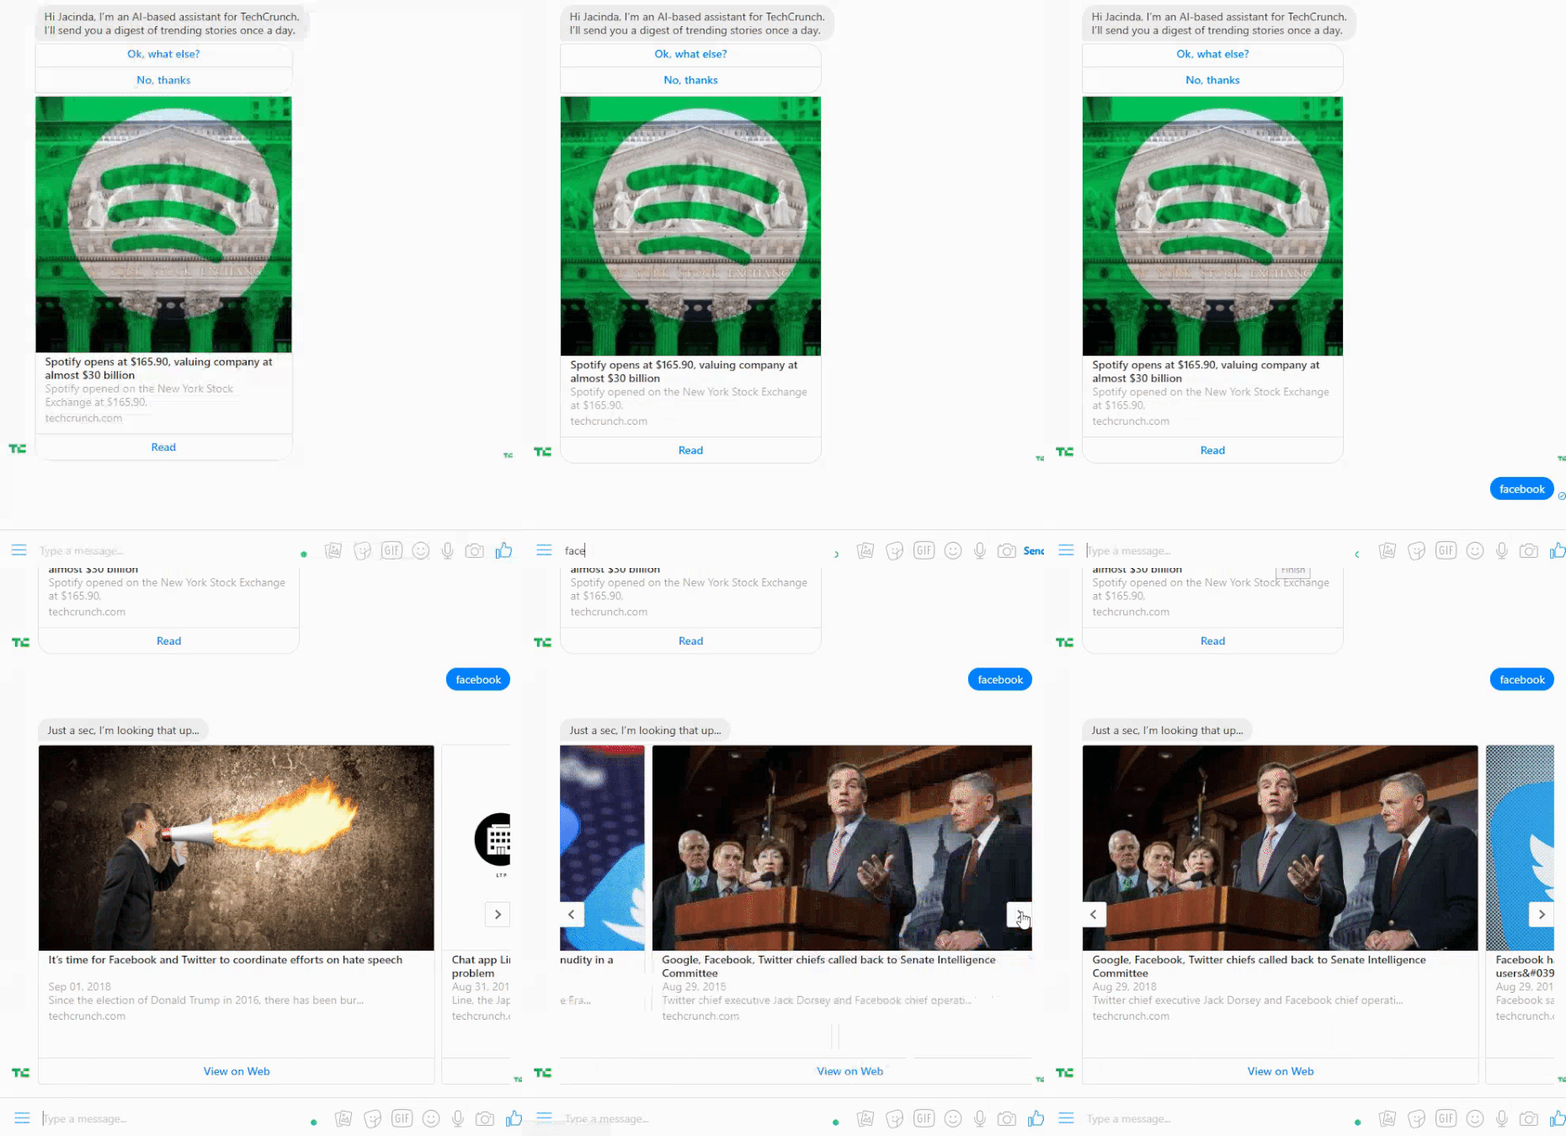
For example, here’s what happens when I ask TechCrunch about Facebook via messenger:
Lead Generation
In addition to content delivery, messenger marketing can also be used for lead generation.
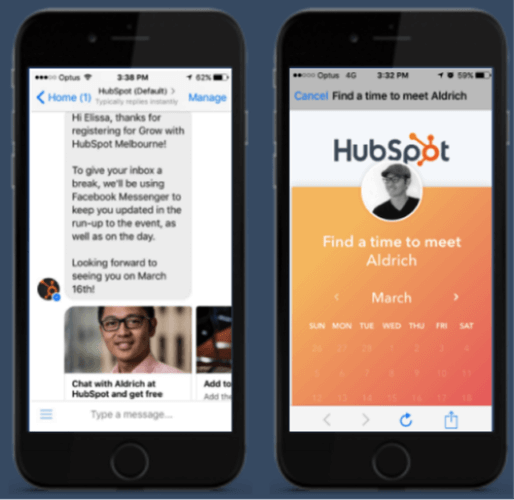
For one of their events, HubSpot asking attendees to confirm attendance inside messenger and then sent automated messages to those confirmed on behalf of their local sales rep. The message included a HubSpot tool that allowed users to link to the rep’s calendar in case they wanted to set up an onsite meeting.
Customer Support and Feedback
Aside from being accessible to customers at a moment’s notice, there are other ways to use messenger for customer support and feedback.
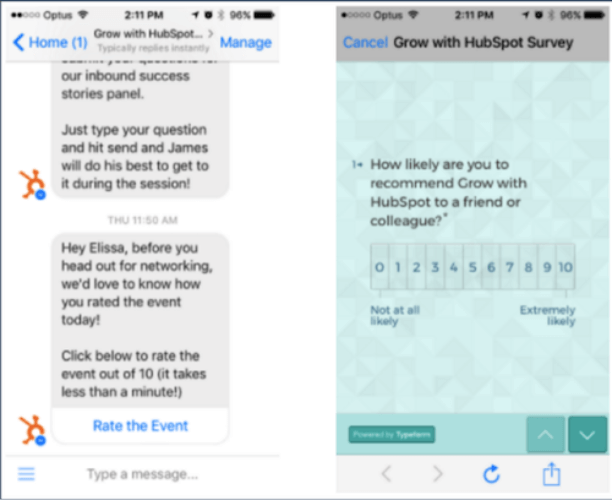
HubSpot was able to get a higher feedback rate from messenger users versus email users when asking for feedback after an event, despite the messaging being the same for both sets of users.
You can use a chatbot tool like ChatFuel, ManyChat, or Botsify to create your own chatbot. But what if you just want to send people to messenger during business hours so you can talk to them without a bot?
You can use OptinMonster to create a popup on your site that drives traffic to Facebook messenger. Here’s how to do it…
Facebook Messenger Marketing Without a Bot
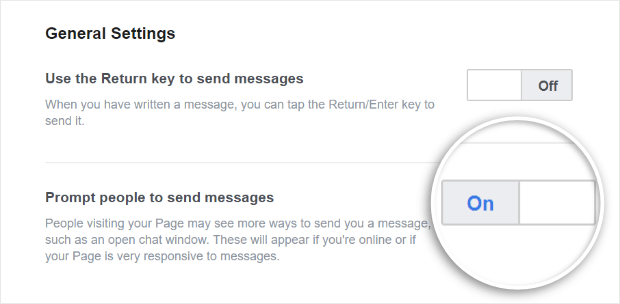
To begin, you’ll need to make sure that your Facebook page is set up to automatically show the chat screen when a user visits your business’s Facebook page.
To do that, log in to Facebook and go to your business page. Then, go to Settings » Messaging » General Settings and toggle Prompt people to send messages to the On position.
Create Your Campaign
Now that Facebook is ready, we need to create a link on your website that will drive website traffic to Facebook messenger. We’ll create this campaign in OptinMonster, so if you don’t already have one, you’ll need to sign up for an OptinMonster account.
Once you have your OptinMonster account, log in and click the green Create Campaign button to create a new campaign.
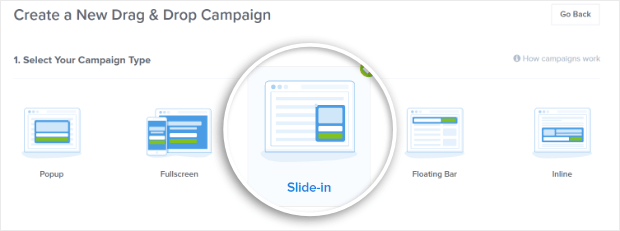
Next, select the campaign type you want to use. We’re using the slide-in template.
Now we’re going to choose our campaign template. Everything is customizable, but the templates provide a nice starting point. We’re going with the Drop template. To select the template, hover the mouse over the desired template and click on the blue Use Template button.
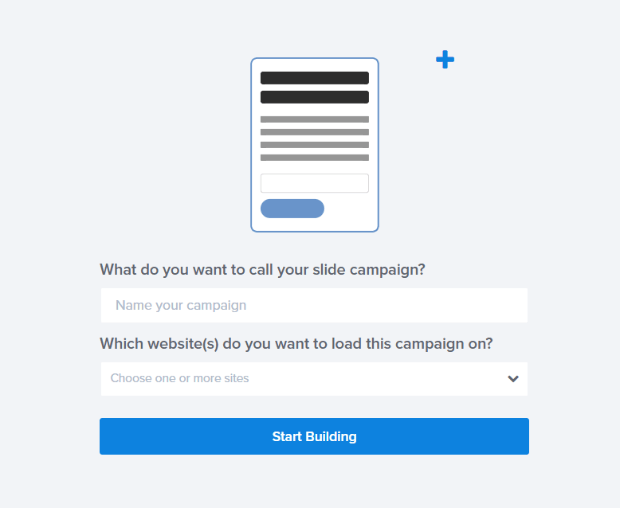
Select a name for your campaign, the website you want to add it to and click the blue Start Building button.
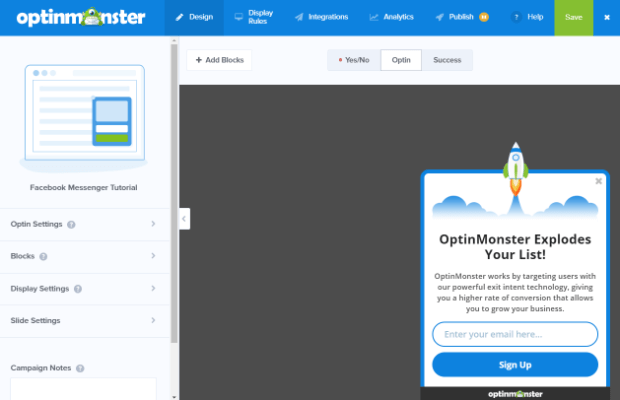
You’ll be brought into the campaign builder where you can see a live preview of the default campaign using the Drop template.
Edit Your Campaign
Our drag and drop editor makes it really easy to edit all aspects of your campaign quickly.
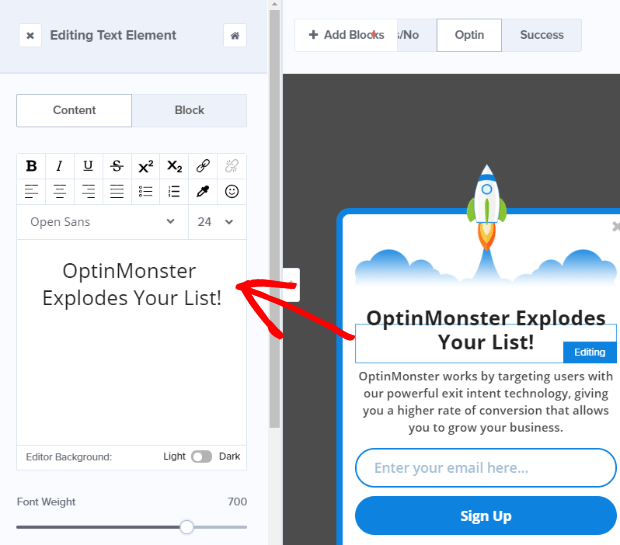
To edit the headline, simply click on the headline in the live preview and the editing tools will come up on the left side of the campaign builder.
Ready to go? Let’s get rid that email sign up.
Since we want to drive website traffic to Facebook Messenger, we’re going to remove the email signup field and instead add a button that, when clicked, will take site visitors directly to our Facebook page.
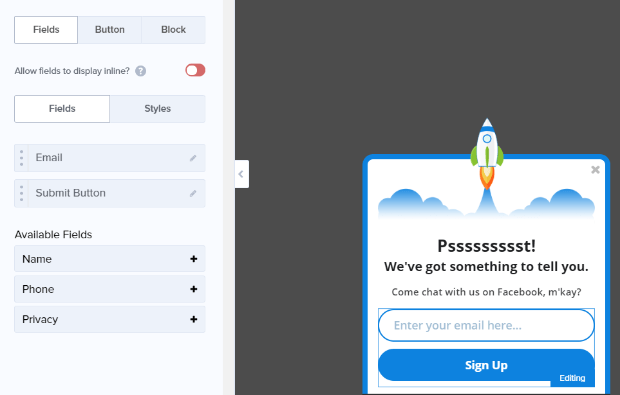
Just like with text fields, to edit any other field we click on it in the live preview to bring up the editing tools on the left.
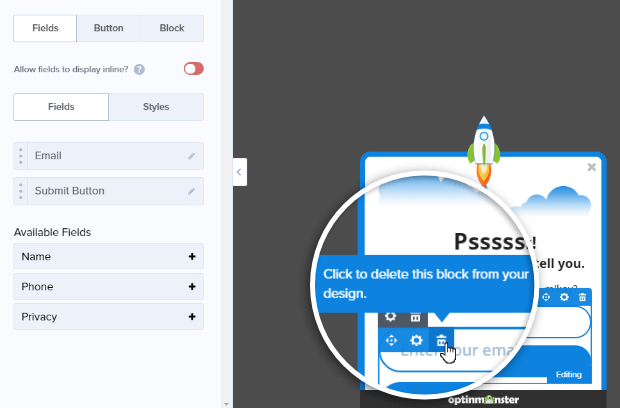
Let’s first delete the email field by hovering over the field. To delete the email element click on the small trash can in the blue section that appears on the left side of the field, as shown below.
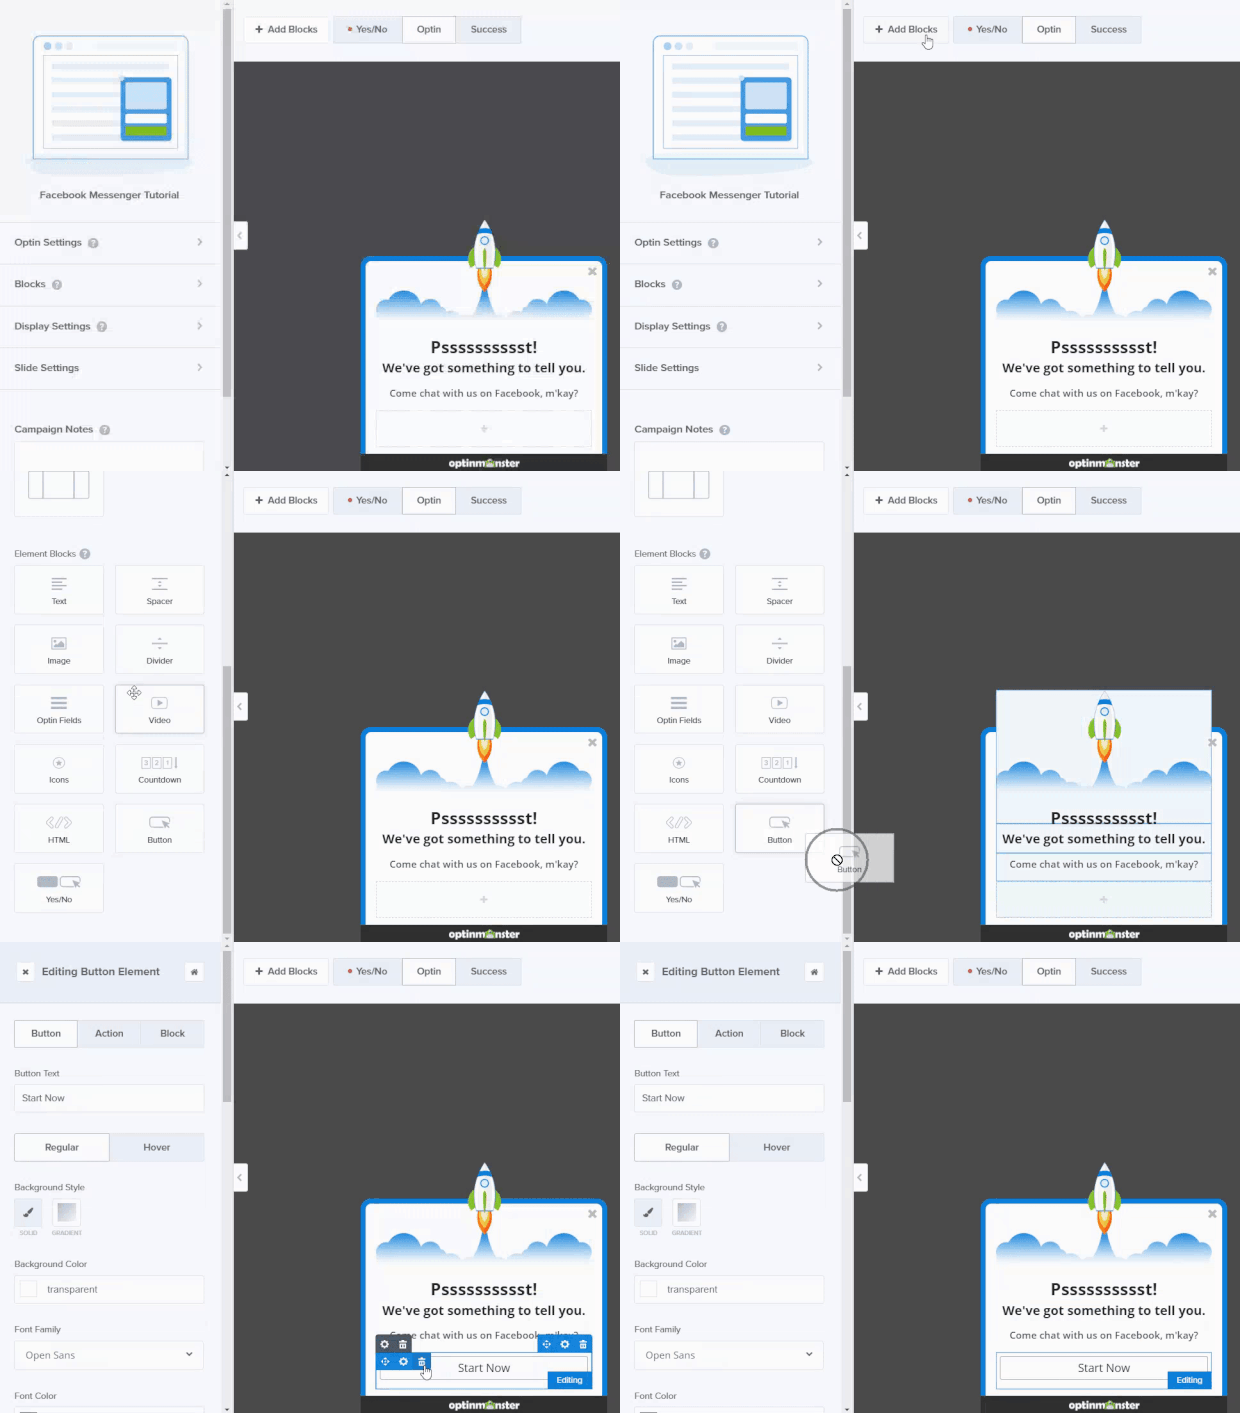
Now we’re going to need to add a Button element into the space where we just deleted the email element.
Go ahead and customize the button you just added using the same editing method you’ve already used on the headline and body text.
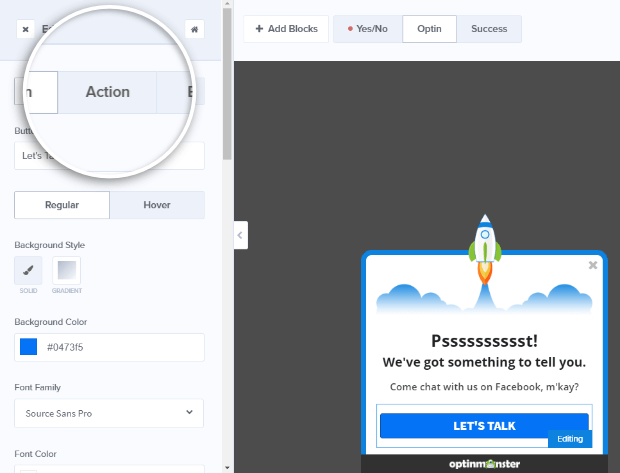
The final bit of editing we need to do with the button is to set up the button action. To do that, click on the Action tab in the editing tools.
There are several element actions that you can use in your campaigns. To find out more about the different actions available take a look at our documentation.
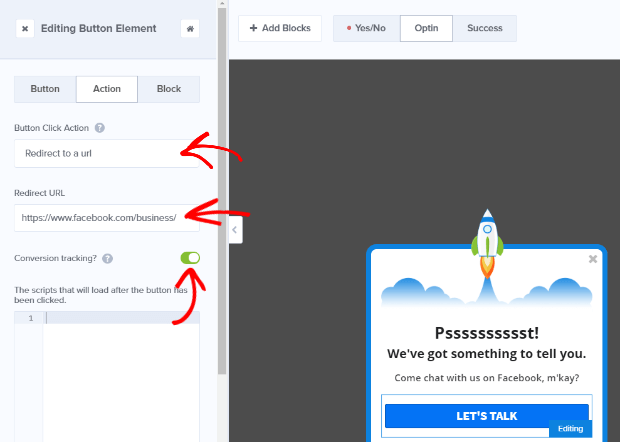
For our campaign, we’re going to set up the Button Click Action to Redirect to a url. Then, in the Redirect URL field enter the URL for your business’s Facebook page. And, you might as well go ahead and toggle the conversion tracking to the on position while you’re at it.
Now when visitors to your site click the Let’s Talk button on this slide-in, they’ll be sent to your Facebook business page that has been set up to automatically prompt visitors to message you!
If you wanted to go directly to the messenger and bypass the Facebook page altogether, you would just need to use your m.me link as the redirect URL. Your m.me link looks like this:
http://m.me/<PAGE>
Where PAGE is the handle of your Facebook business page.
Save your campaign by clicking on the green Save button in the top right corner. Save your campaigns often.
Set Up Display Rules
Do you only want to show the messenger option to certain website visitors, on specific pages, or only at certain times? Setting up display rules can help you do that.
Let’s say that you want to set up display rules to show the messenger option only to users who’ve been inactive on your site for at least 5 minutes during your normal business hours when someone is actually available to chat with them.
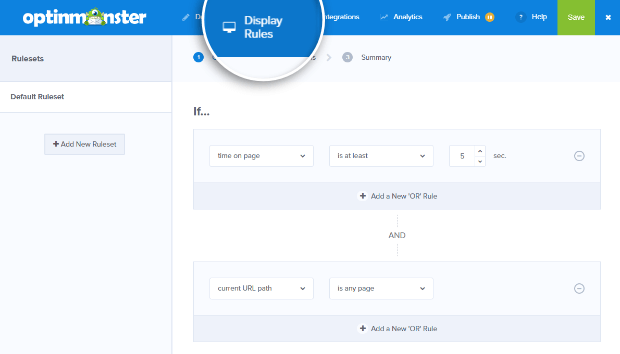
To do that, start by clicking on the Display Rules tab.
Our first condition that we want to meet is that our visitors are inactive for at least 5 minutes, so we’ll use the dropdowns to set the first condition to If visitor inactive time is at least 300 sec.
Next, we want to set this to only appear during our business hours so we’re not sending visitors to Facebook Messenger when nobody’s actually there to chat with them.
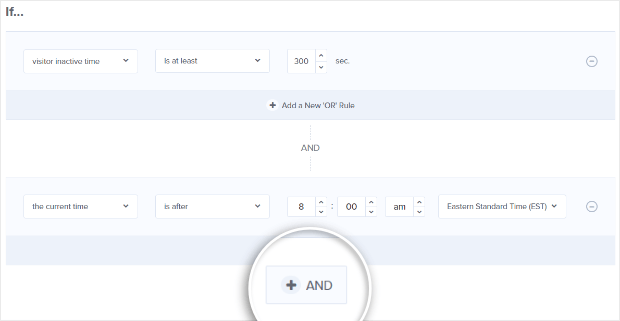
To do that, we’ll change the other default rule to the current time is after and then enter whatever your opening hours are and select your time zone from the dropdown.
We’ll need to add another rule for your closing hours. Since all of the rules need to be true, we’ll need to use the +AND to add our rule:
For this rule, the current time is before whatever your closing time is. Then, you’ll select your time zone from the dropdown just like before. Click Next Step when you’re done.
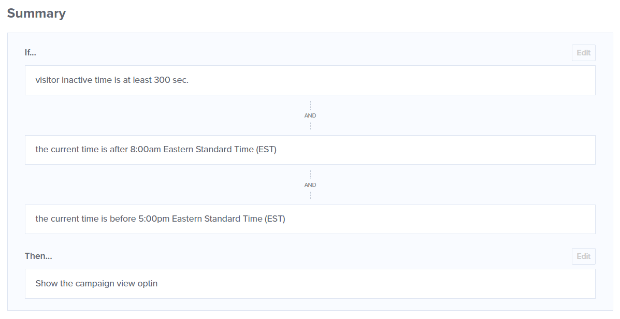
We don’t have anything to do on the Action page because we’ve only set up an Optin view, so we’ll go ahead and click Next Step to move on to our Display Rules Summary.
This is where you can verify that your rules are correct. Pay particular attention to your AND versus OR rules. Remember that AND means that everything has to meet the requirement, but with OR it’s okay if some things don’t.
Our rules look good, so let’s publish our campaign by clicking on the Publish tab and toggling the Status to Live. Then, click the green Save button.
Publish Your Campaign to Your Website
WordPress is by far the easiest way to get a website up and running on the Internet, which is probably why so many people use it. It’s also really easy to get a campaign published to your WordPress site.
To start, make sure you have the OptinMonster plugin installed. If not, follow our simple instructions to install the plugin.
Once you have the plugin installed and activated, you’ll see the OptinMonster link on your WordPress menu:
Clicking that will bring you to a list of your published OptinMonster campaigns. If you don’t see the campaign you’re looking for, just click the Refresh Campaigns button.
To enable your OptinMonster campaign on your WordPress site, all you need to do is click Go Live for the campaign you want to add.
And you’re done. Easy, right?
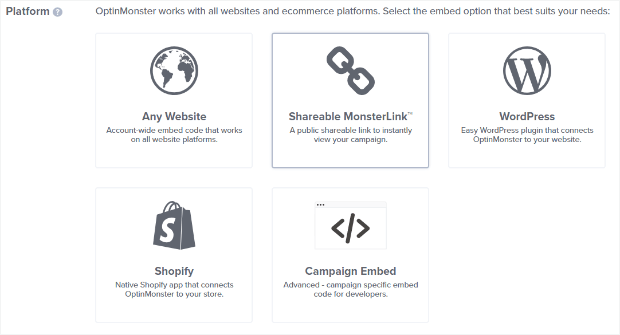
We also make it super easy to publish to sites that aren’t on WordPress, too. In fact, you can embed your campaign on any website, and if you have a Shopify site, we have a native Shopify app that connects beautifully.
Are you looking for more ways to connect with your visitors? Why not add a “Like Us On Facebook” popup or check out what adding a Twitter or Pinterest follow button could do for you?
Or have a look at this post of email marketing vs. social media marketing statistics. There’s a reason that email’s still the number one channel that consumers use to communicate with brands online, but think of the power of email and social media working together!
And if you’re using ManyChat, you may want to check out the following resource: How to Add ManyChat to WooCommerce.
Hey! You signed up for the OptinMonster account earlier, right? If not, go do it now so you don’t miss out on even more cool stuff.













Add a Comment