OptinMonster’s Revenue Attribution feature allows you to directly view the amount of revenue an individual campaign has contributed from your eCommerce sales.
In this article, you’ll learn how to use Revenue Attribution in OptinMonster.
Before You Start
Here are some things to know before you begin:
- The OptinMonster embed code must be present on the Thank You or Order Success page of your eCommerce store for Revenue Attribution to work.
- Depending on the eCommerce platform you are using, some aspects of implementing Revenue Attribution may be more complex. For this reason, we are not able to provide support for configuring the Javascript or cURL code for your eCommerce platform at this time.
Enable Revenue Attribution
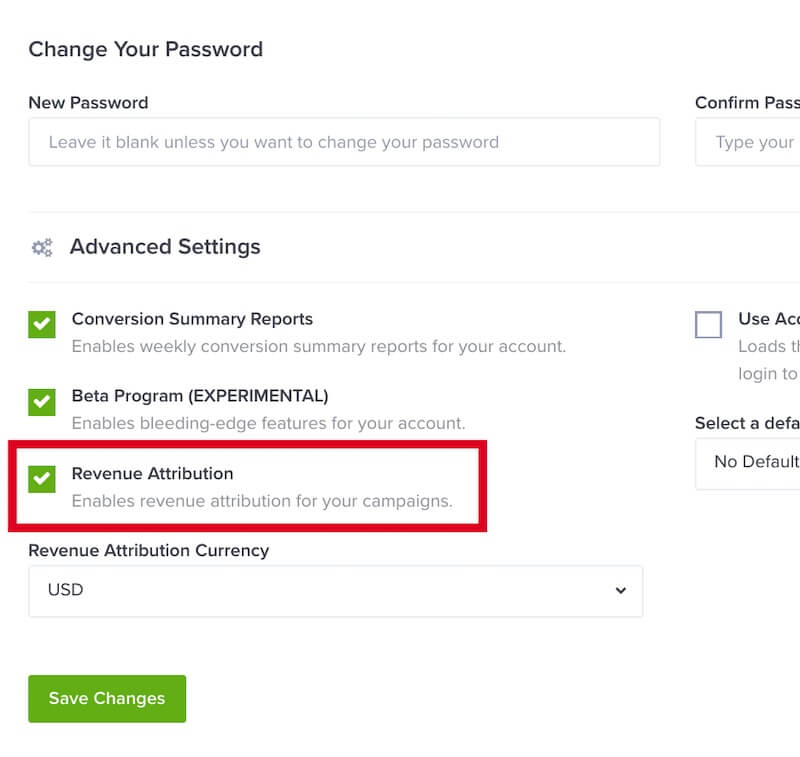
To get started, you’ll want to enable Revenue Attribution in your OptinMonster account, following these steps:
- From the Campaign screen, navigate to the My Account page.
- On the My Account page, scroll down to the Advanced Settings section and enable the Revenue Attribution option.
- (Optional) You can choose which Currency to display Revenue Attribution data in.
- When you’re finished, select the Save Changes button.
Embed OptinMonster
You’ll want to be certain you add the OptinMonster embed code to the Thank You or Order Success page of your eCommerce store so Revenue Attribution can work properly.
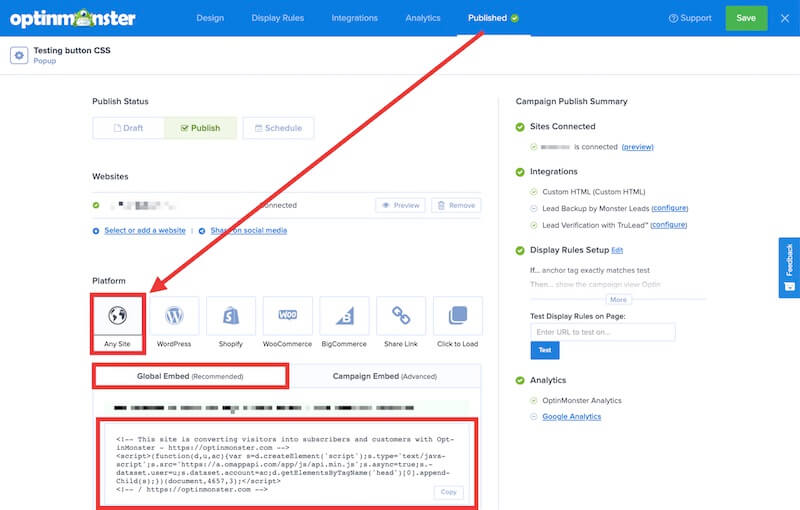
Copy Embed Code
The embed code can be found from the Publish screen of the campaign builder when editing any campaign in your account, like this:
WordPress
If you are using the OptinMonster WordPress plugin the embed code will already be added for you and no further steps are necessary.
Shopify
You can add the OptinMonster embed code to the Thank You or Order Success page in Shopify following their guide here.
All Other Platforms
We have general guides for most other website platforms to help you get started.
If your eCommerce site is a Single Page Application (SPA) please refer to our guide here for implementing the OptinMonster embed code.
Implement Attribution Code
Depending on the platform your site is built on you may need to add some additional code to the Thank You or Order Success page. This code will communicate to OptinMonster specific data about the purchase that took place so it can be attributed to your campaigns correctly.
Please follow the details provided below for your specific eCommerce platform.
WordPress
If you are using the OptinMonster WordPress plugin, Revenue Attribution automatically supports and works with WooCommerce and Easy Digital Downloads. There is no additional configuration required.
If you are not using the OptinMonster WordPress plugin or a different eCommerce plugin than indicated above, please follow our Javascript method below.
Shopify
When using Shopify you can use the following script, added to the Order Status page in Shopify following their guide here.
The code above uses liquid tags to auto-populate the parameter values where possible. Some parameters may require you to pass in your own values to utilize.
Required Parameters
type– value can be'sale','trial', or'lead'. Shopify does not provide liquid tags to identify different types of sales so you may need to use your own script here if you wish to set a value other than'sale'.value– the numeric value of the order, do not include currency symbolscurrency– currency the order was taken in, must be a valid currency
Optional Parameters
transaction_id– the order ID / transaction ID for the order. We encourage passing this because we check against it to ensure we aren’t storing any duplicate data.test–trueorfalse; defaults tofalseif not specified. If it is set totrue, nothing will be stored, and we will respond with the sanitized data we would have stored.
Javascript
For eCommerce sites built on other platforms that allow you to add Javascript, you can pass the required transaction data to OptinMonster using the following code:
You’ll need to update the code to pass in your own values for each required parameter, and any optional parameters you wish to use.
Required Parameters
type– value can be'sale','trial', or'lead'value– the numeric value of the order, do not include currency symbolscurrency– currency the order was taken in, must be a valid currency
Optional Parameters
transaction_id– the order ID / transaction ID for the order. We encourage passing this because we check against it to ensure we aren’t storing any duplicate data.test–trueorfalse; defaults tofalseif not specified. If it is set totrue, nothing will be stored, and we will respond with the sanitized data we would have stored.
cURL
For eCommerce sites built using PHP, Ruby, and similar you can use our cURL option provided here:
You’ll need to update the code to pass in your own values for each required parameter, and any optional parameters you wish to use.
Required Parameters
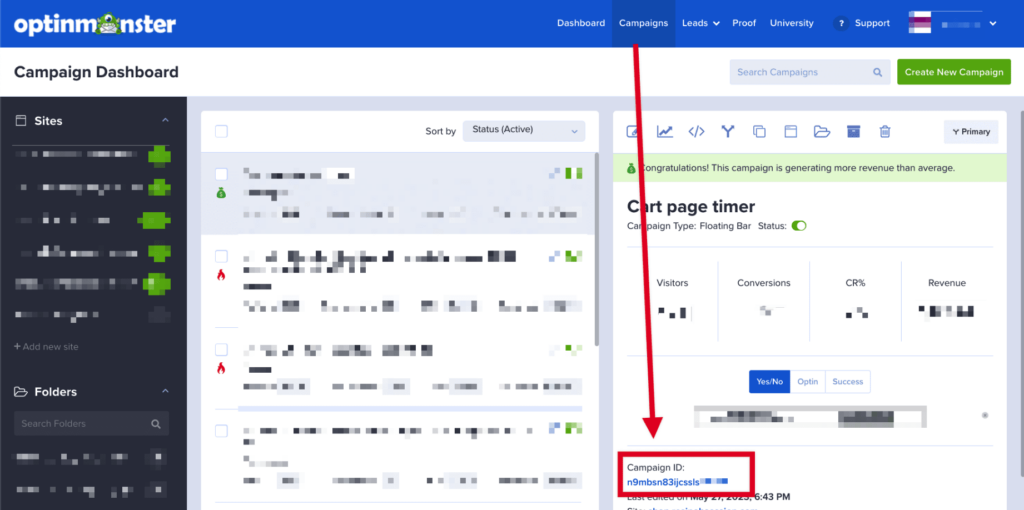
type– value can be'sale','trial', or'lead'value– the numeric value of the order, do not include currency symbolscurrency– currency the order was taken in, must be a valid currencycampaigns– this parameter is required since OptinMonster works on the client-side, however, this is a server-side request. The value for each campaign ID specified can be'click'or'view'to identify the type of revenue (click-through or view-through). The campaign ID can be copied from the Campaigns screen like this.
Optional Parameters
transaction_id– the order ID / transaction ID for the order. We encourage passing this because we check against it to ensure we aren’t storing any duplicate data.device– value can be'mobile','tablet', or'desktop'; defaults to'desktop'if not specified.test–trueorfalse; defaults tofalseif not specified. If it is set totrue, nothing will be stored, and we will respond with the sanitized data we would have stored.
View Reports
Analytics Screen (Detailed)
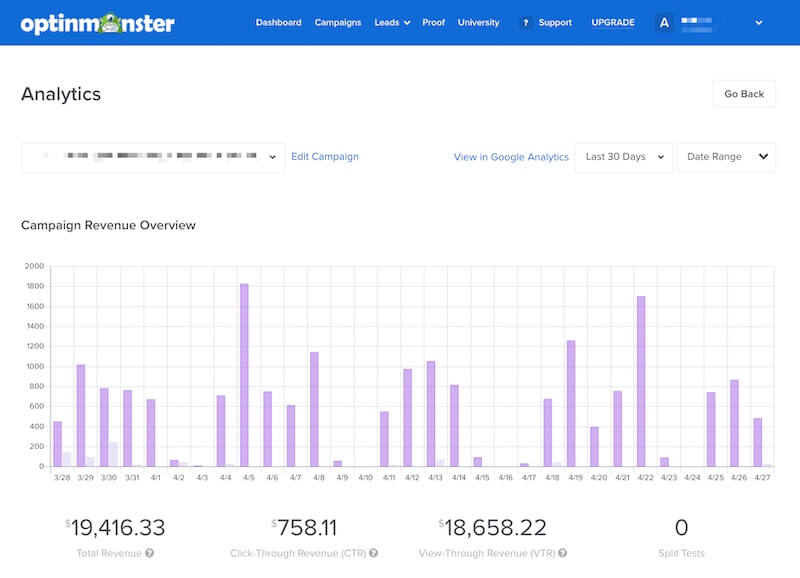
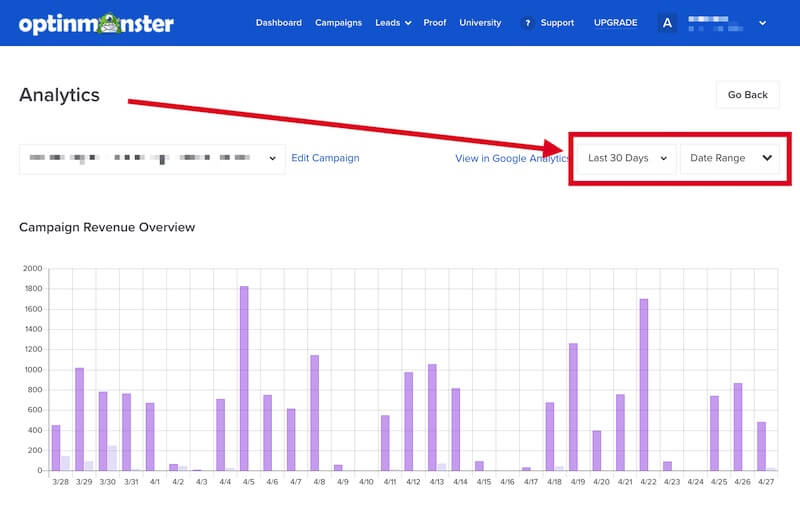
For the most detailed view, you’ll want to open the individual Analytics screen for a campaign to evaluate the Revenue Attribution data that is associated with it.
- From the Campaigns screen, locate the campaign you wish to evaluate and select the Analytics icon from the campaign preview pane.
- The Analytics screen will appear with a chart of the campaign’s Revenue Attribution at the top.
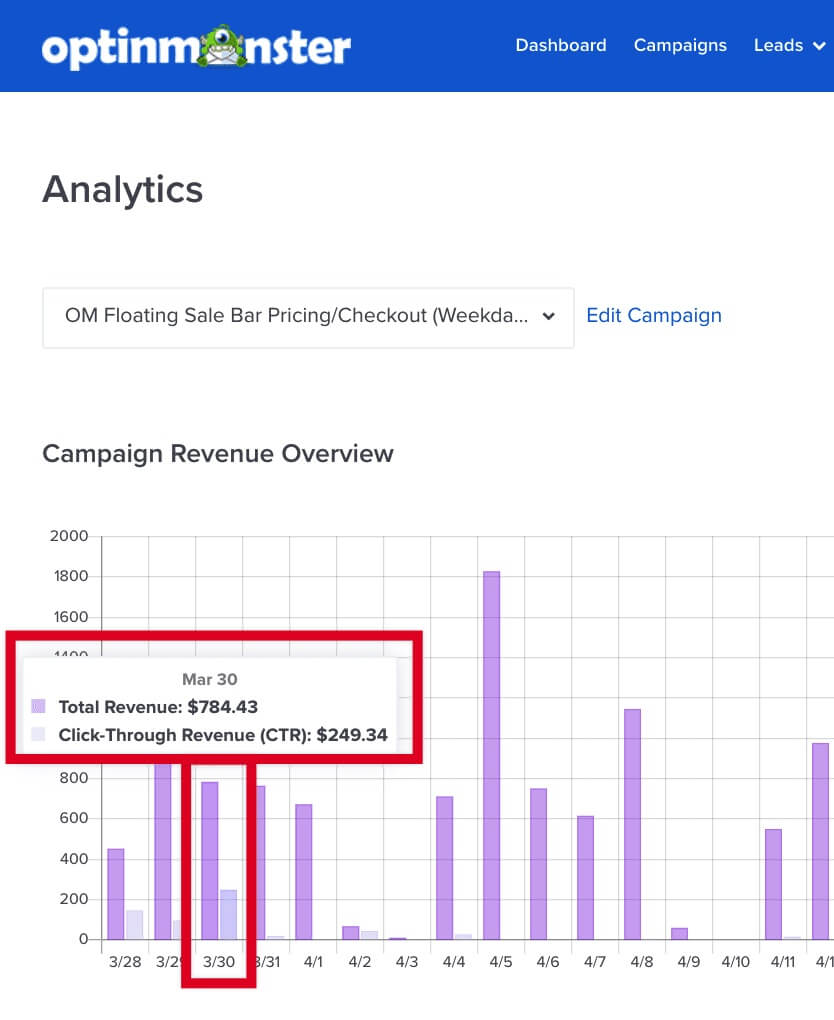
- Hover over a given day in the graph for a breakdown of the click-view and view-through revenue.
- You can also filter specific date ranges.
Campaigns Screen
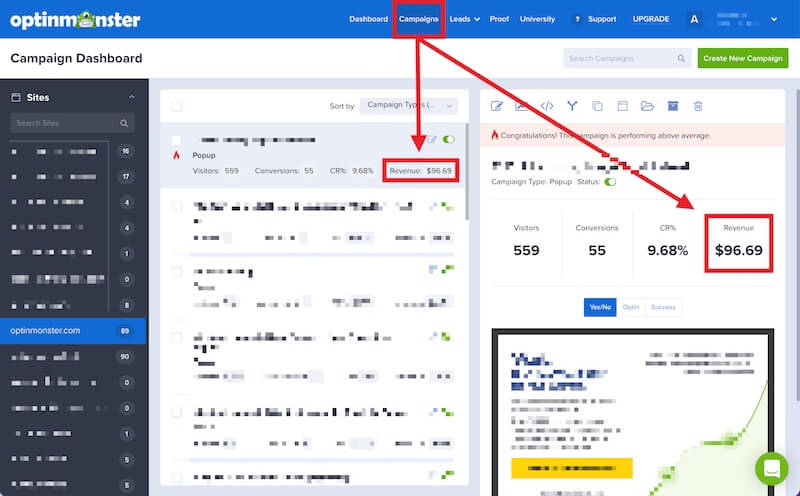
You can get a summary view of a campaign’s Revenue Attribution from the Campaigns screen in your account.
All analytics data, including revenue, is for a rolling 30-day period.
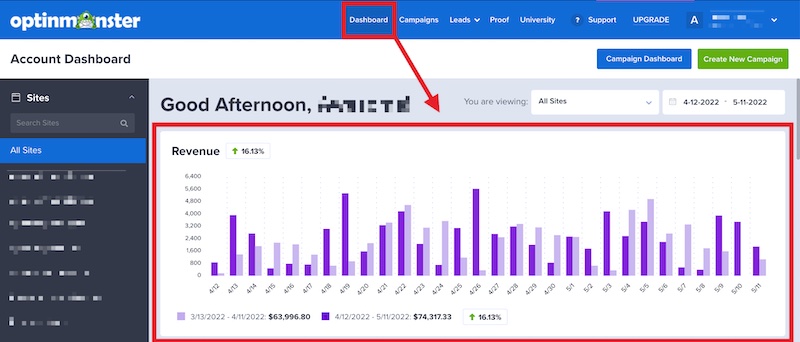
Dashboard Screen
The Dashboard screen allows you to easily view data across all sites, or individual sites, in your account including revenue generated.
FAQs
What’s the difference between click-through and view-through?
Click-through indicates the customer took action within a campaign (e.g. converted).
View-through indicates the customer viewed the campaign but did not take action before completing the purchase.
You may also find this article helpful to learn more about click-through vs. view-through revenue attribution.
I’ve been using Google Analytics to track revenue with OptinMonster, will this change how I evaluate campaign performance?
Our native Revenue Attribution data will be more accurate than Google Analytics.
However, the way we pass data to Google Analytics has not changed so you can continue running reports in Google Analytics if you wish to continue to do so.
Can I exclude campaigns from Revenue Attribution?
Yes, you can exclude specific individual campaigns using Javascript. Add the following script directly to your website and update it to indicate the specific campaign to be excluded from Revenue Attribution:
You can locate the campaign ID from the Campaigns screen of your account, like this:
Regarding duration; the campaign is recorded as a cookie on the visitor’s browser and its expiration date is set to a year. Learn more about the cookies that OptinMonster uses.
Troubleshooting
I’ve enabled Revenue Attribution but it isn’t working.
Be certain the OptinMonster embed code is present on the Thank You or Order Success page of your eCommerce site. This is necessary before Revenue Attribution can work.
Learn more about how to add the OptinMonster embed code to your site with these guides.
I’ve made a test purchase but the full amount of the sale is not being attributed to my campaigns.
We divide the value of a sale between all the campaigns the sale is attributed to. As a result, seeing a fraction value is actually correct when there are multiple campaigns involved.


