OptinMonster makes it easy to use Shortcodes from your WordPress plugins or theme with our templated campaigns.
In this article, you’ll learn how to add WordPress shortcodes to OptinMonster campaigns..
Before You Start
Here are some things to know before you begin:
- This article assumes you’ve already installed the OptinMonster WordPress plugin.
Add Shortcode
You can use shortcodes in your OptinMonster campaign to further customize the appearance, content, and functionality.
To add a shortcode to your OptinMonster campaign, follow these steps:
- Copy your shortcode from its source.
- Then, go to your OptinMonster campaign in the OptinMonster builder.
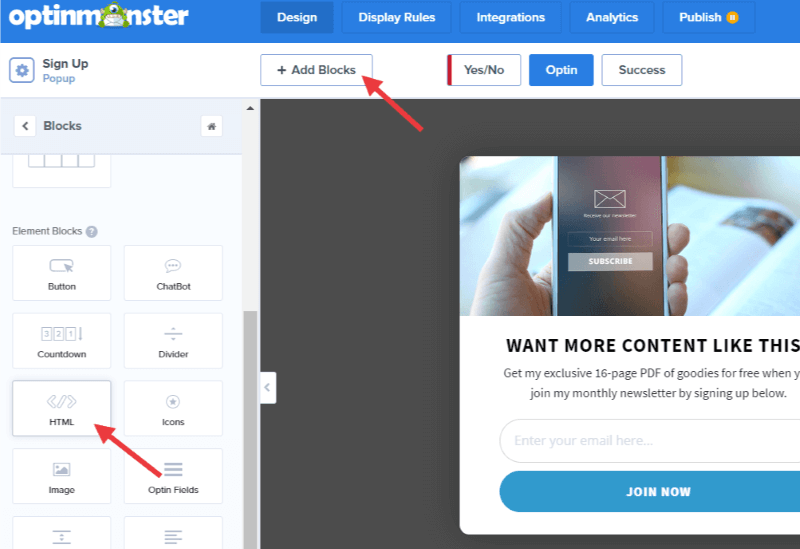
- Select the Add Blocks button then click and drag an HTML element into your campaign.
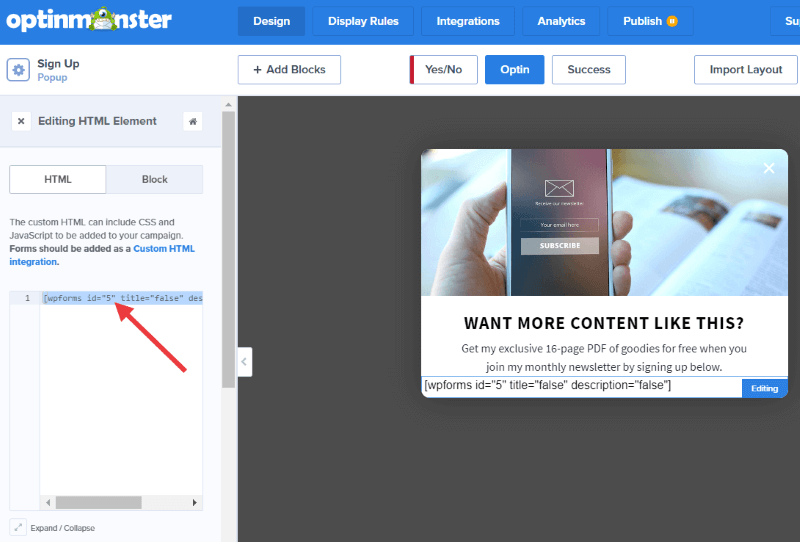
- Paste the shortcode you previously copied into the HTML editor box.
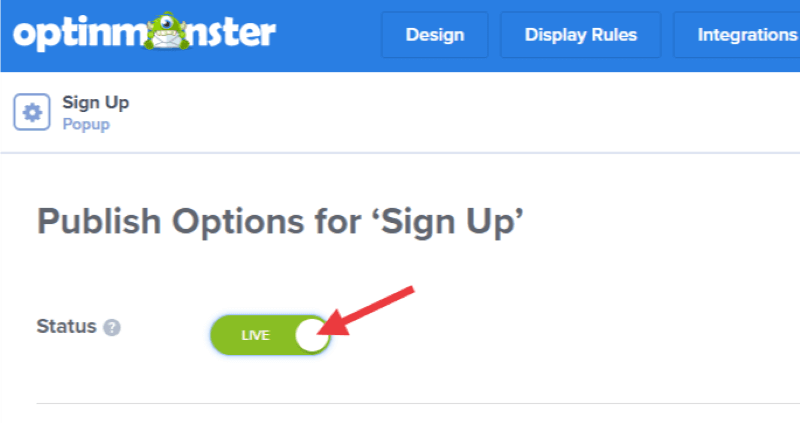
Note: The Campaign Builder will not show you a live preview of the parsed shortcode. Don’t worry! It will still appear correctly on your site. - Once you are satisfied with your campaign’s appearance and settings, set the campaign Status to Live and then Save your campaign.
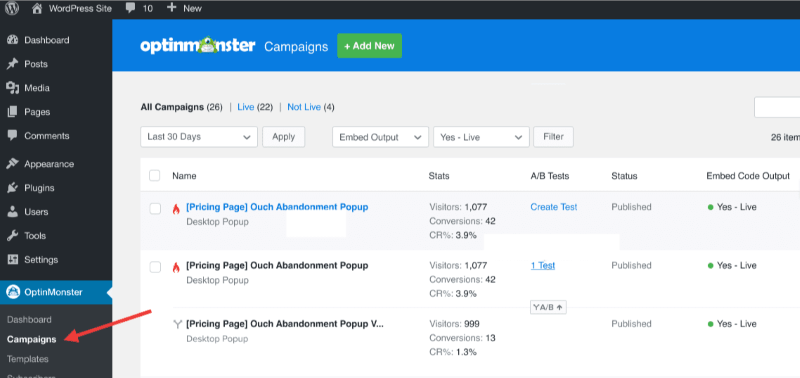
- Next, navigate to the Campaigns list in the OptinMonster plugin, from the admin of your WordPress site.
- Your campaigns and their Publish statuses will automatically sync to the OptinMonster plugin. Confirm or update your campaign’s status as needed.
- The campaign should now appear on your site for you to test.
If you’re serious about jumpstarting your website business growth, then get started with OptinMonster today!
Our conversion experts will design 1 free campaign for you to get maximum results – absolutely FREE! Click here to get started →
Troubleshooting
Will my shortcode work if I’m manually embedding the campaign or using Google Tag Manager?
No, shortcodes added to your OptinMonster campaign will only work if you’re using the OptinMonster plugin to embed your campaigns.
Do I need to use both the WordPress Plugin and the Display Rules?
Learn how our WordPress Plugin and Display Rules work together.


