OptinMonster makes it easy to trigger a campaign to popup with the click of a link or button on your site. Create a 2-step optin campaign from any link on your site using our MonsterLink™ feature.
In this article, you’ll learn how to create a MonsterLink™ to show a campaign with the click of a button or link.
- MonsterLink™ cannot be configured for Inline type campaigns.
- A MonsterLink™ will ignore all other Display Rules configured and always show the campaign when the MonsterLink™ is selected.
- A MonsterLink™ is one of our most effective campaign triggers, easily increasing conversions by 2x or more.
Configure MonsterLink™
When you create a campaign in OptinMonster you can rapidly increase conversions by triggering it to appear using a MonsterLink™.
To create a MonsterLink™, follow these steps:
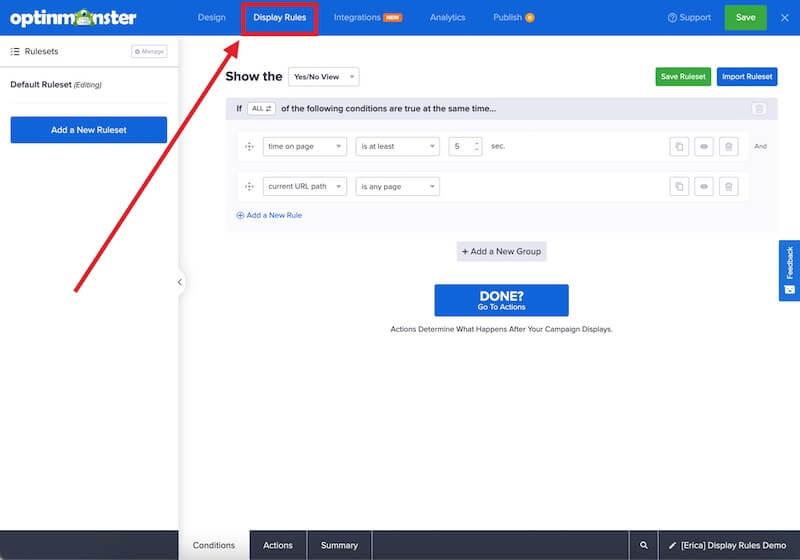
- Navigate to the Display Rules view in the campaign builder.
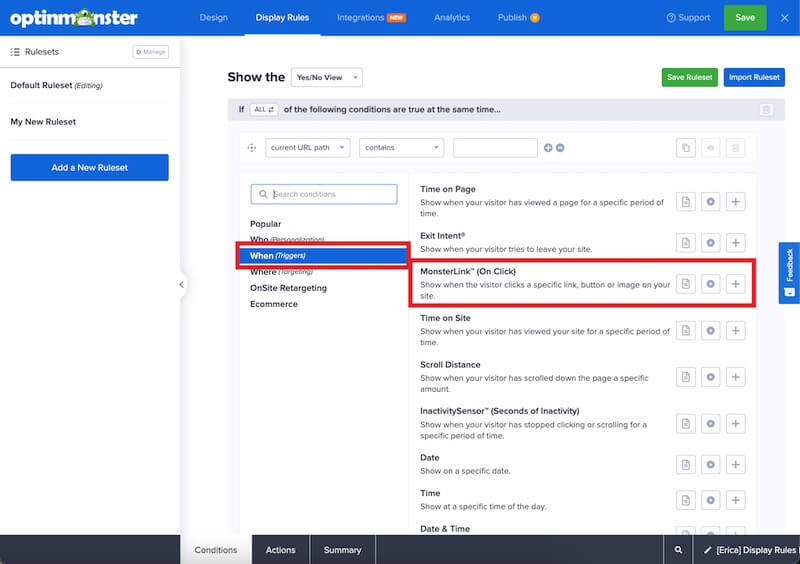
- Next, when adding or editing a rule select When (Triggers) from the left-hand list and select the MonsterLink™ option.
- You’ll be provided with a sample HTML link you can click to copy.
- When you’re finished, Save the campaign.
Add MonsterLink™
Once you’ve created a MonsterLink™, you’ll want to add it to your website.
You can find the MonsterLink™ code to add to your site from:
- Within the Display Rules screen next to the MonsterLink™ rule you configured in the previous section of this article.
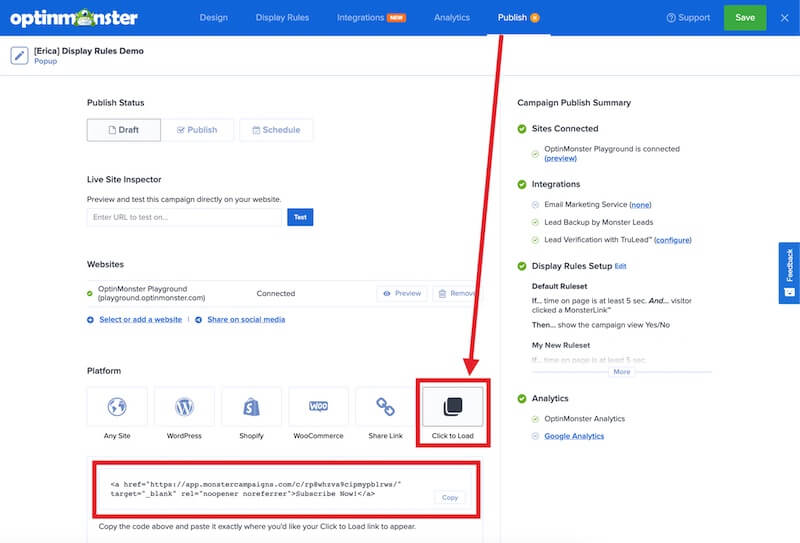
- Alternatively, from the Publish screen in the campaign builder within the Click to Load tab.
Place the MonsterLink™ code within your site content where you wish to have it appear.
WordPress Required Step
If you are using the WordPress OptinMonster WordPress plugin, please follow these steps to ensure you can add your MonsterLink™ anywhere on your site:
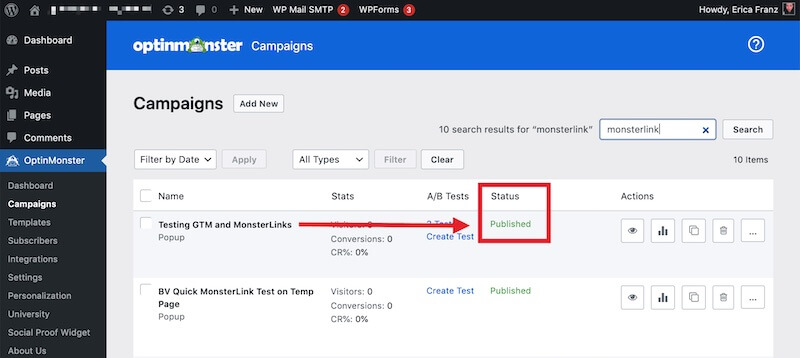
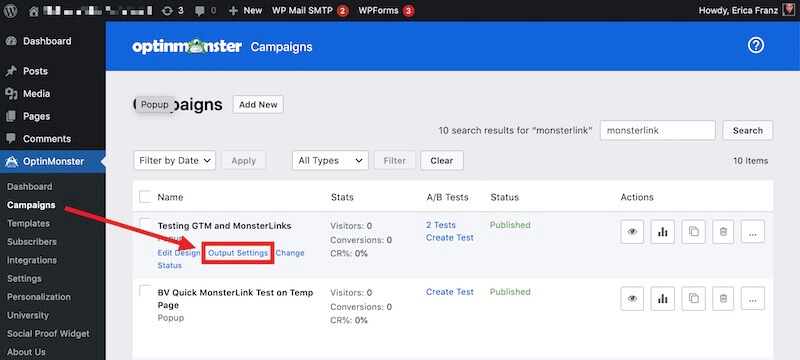
- Navigate to the WordPress Admin Dashboard > OptinMonster screen and confirm the campaign you’ve configured to appear by MonsterLink™ is set to Published status.
- Within the Output Settings for the same campaign, ensure all Advanced Output Settings are disabled.
Example Configuration
You can add a MonsterLink™ as a text link, button link, or even a clickable image. The following are examples of each to help you get started.
Text MonsterLink™
This text MonsterLink™ is an example of adding the MonsterLink™ as text on your page and uses the default MonsterLink™ code.
<a href="https://app.monstercampaigns.com/c/aclizd4ba0gfjv9u1hhu/" target="_blank">Subscribe Now!</a>
Button MonsterLink™
Very similar implementation to the text link, but this time you use it to make a button. The default button design depends on your CSS on your site.
<a href="https://app.monstercampaigns.com/c/aclizd4ba0gfjv9u1hhu/" target="_blank" class="button">Subscribe Now!</a>
button as a class while others use alternative naming conventions. Refer to your theme’s documentation for information about button classes.Image MonsterLink™
In this example, we’ll place an image inside of our MonsterLink™ instead of text to trigger the campaign to appear when the image is selected.
<a href="https://app.monstercampaigns.com/c/aclizd4ba0gfjv9u1hhu/" target="_blank"><img src="http://www.example.com/image.jpg" alt="Call to action text in case your image doesn't load." height="" width="" /></a>
Show a Different Campaign on Mobile
In this example, we’ll show one campaign on Desktop / Tablet devices and a different campaign on Mobile devices using the data-mobile-slug attribute.
<a href="https://app.monstercampaigns.com/c/aclizd4ba0gfjv9u1hhu/" data-mobile-slug="dbceszydjgz4zygaaq3y" target="_blank">Subscribe Now!</a>
Dynamic MonsterLinks
Need to add the same MonsterLink to several areas of a page? You can dynamically add MonsterLinks targeting a specific ID, Class, or other selector in the HTML.
To dynamically add MonsterLinks to your page, follow these steps:
- Below we provide two examples of Javascript to accomplish your goal. Choose the most appropriate example for how you wish to target the link(s) on your site.
- Update the code to indicate the specific link element you wish to set as a MonsterLink AND add your campaign’s MonsterLink URL.
- Next, add the Javascript directly to your website to all pages where it should add dynamic MonsterLinks.
If you’re serious about jumpstarting your website business growth, then get started with OptinMonster today!
Our conversion experts will design 1 free campaign for you to get maximum results – absolutely FREE! Click here to get started →
FAQs
Can I split-test a MonsterLink™?
Yes, you can Split-Test a MonsterLink™.
Be sure to copy the MonsterLink™ for the primary campaign in your split-test.
If you change which campaign is the primary in your split-test be sure to update the MonsterLink™ on your site to use the new primary.
Can I have one campaign for desktop users and another campaign for mobile/tablet users on the same MonsterLink™?
Yes! To do this you’ll use the data-mobile-slug attribute to add the campaign you wish to show on Mobile devices. Like this:
<a href="https://app.monstercampaigns.com/c/aclizd4ba0gfjv9u1hhu/" data-mobile-slug="dbceszydjgz4zygaaq3y" target="_blank">Subscribe Now!</a>
Can all campaign types be made into a MonsterLink™?
All popup-type campaigns can be made into a MonsterLink™, e.g. Lightbox, Fullscreen, Floating Bar, and Slide-in.
Inline campaigns which don’t pop up but rather show in the page’s content cannot be made into a MonsterLink™.
Can I create a landing page where people can signup for my Campaign?
Yes! This can be done using our Shareable MonsterLink™ feature.
Troubleshooting
In WordPress, why does the MonsterLink™ show up as code on the page?
Be sure to add your MonsterLink™ using the text editor and not the visual editor.
If you’re using Gutenburg, you’ll want to add a Custom HTML block.

