Are you leveraging the full power of OptinMonster’s success themes? We’ve had a lot of questions about how our success themes work, and what you can do with them. So, I thought I’d answer those questions in this post.
In the new version of OptinMonster, we added 3 different views for each campaign (Yes / No view, Optin View, and the Success view).
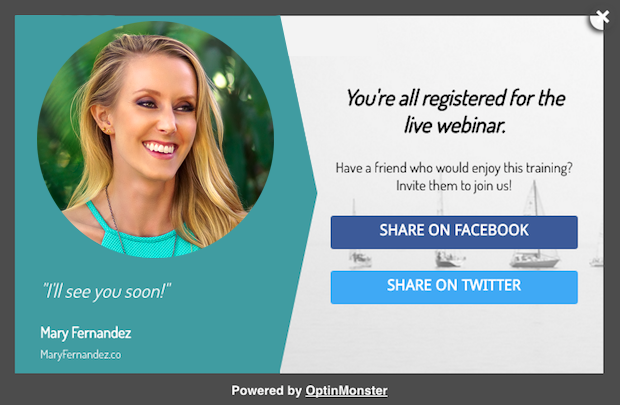
The success view is shown to a user after they have successfully opted in to your email list through an OptinMonster form.
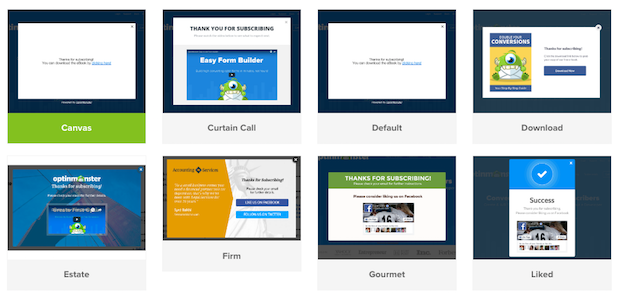
While each individual OptinMonster template comes with a success theme, we have also created several unique success themes for you to choose from.
Each of these themes are designed to encourage your new subscriber to take the next step in your funnel.
Aside from the success themes, we also have a variety of success actions that you can add.
You can redirect the user to a different page once they completed your form.
You can also add retargeting pixels or other tracking pixels (without the need for a separate thank you page).
The number of ways that you can leverage OptinMonster’s success themes are virtually limitless! To get you started, here are 7 great examples that I know you’ll love…
1. Prompt Users to Download Immediately
Do you want to reward new subscribers with instant gratification? With OptinMonster’s Download success theme, you can deliver a lead magnet right after someone enters their email.
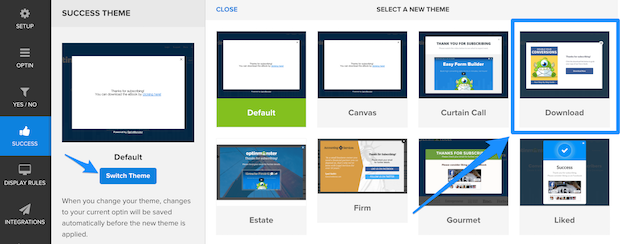
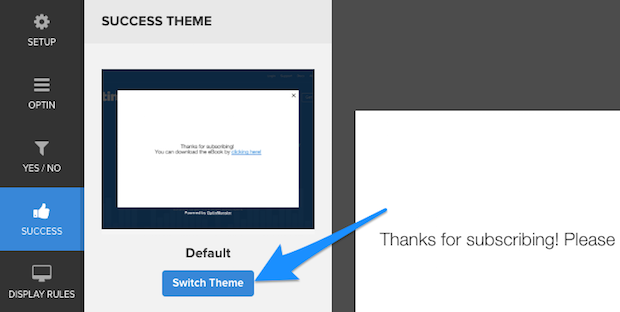
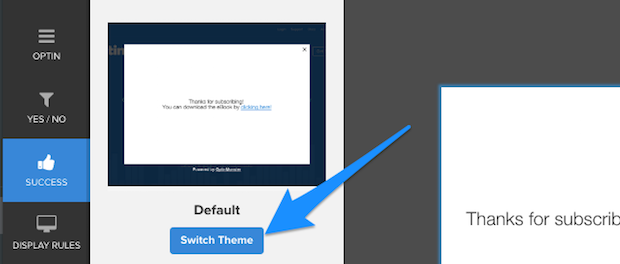
First, go to the edit screen for your optin form and select the Success tab.
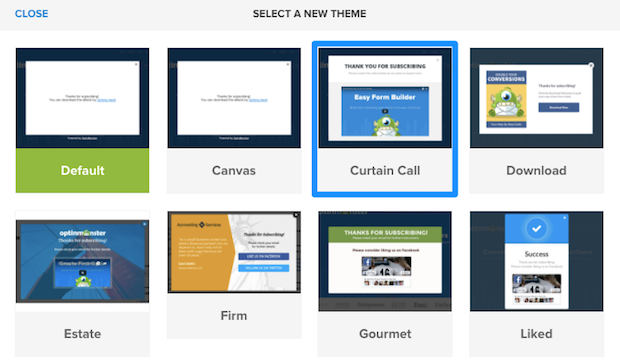
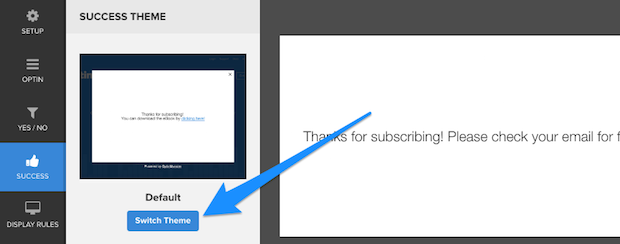
Then, click on the blue Switch Theme button and choose the Download theme.
(Download theme is available for lightbox optin types. If you are using a floating bar, after post/in-line, mobile, or fullscreen optin, then choose the Metro success theme instead.)
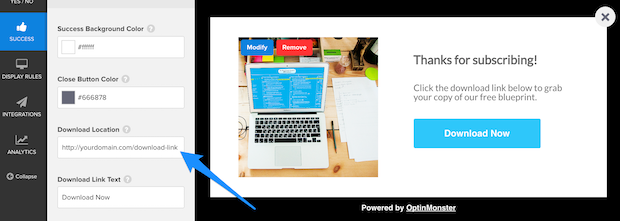
Go ahead and modify the copy, colors, images, etc. for your success message.
Then, scroll down to the Download Location field and enter the URL for your lead magnet download.
That’s it! Now your users can download their lead magnet without having to wait for it to arrive in their email.
(Note: we recommend that you also deliver your download link by email in addition to using the Download success theme. This way, your subscribers will be able to find the link again if they ever lose it.)
2. Show New Subscribers How to Whitelist You
Do you want to show new subscribers how to whitelist you so that you can improve your email open rates?
OptinMonster has two success themes that make this super easy: Curtain Call and Estate.
First, record a quick video of your screen explaining how someone can whitelist your email address. Then upload it to your website, or a video sharing platform such as YouTube, Vimeo or Wistia.
Next, go to the Success tab for your optin form and click on the “Switch Theme” button.
From there, go ahead and select either the Curtain Call or the Estate theme. (We’ll pick the Curtain Call theme.)
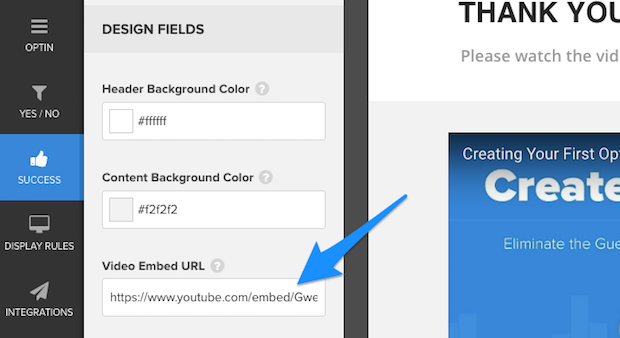
Now scroll down to the Design Fields section. Paste the embed link to your video under the Video Embed URL field.
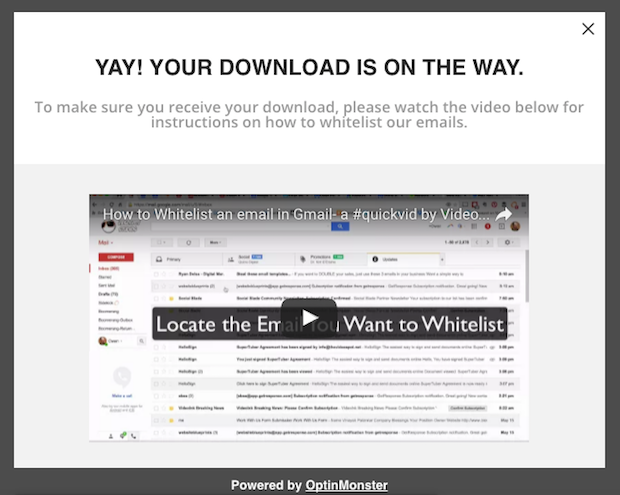
Now your success message will look something like this.
That’s it! Now your optin form will display your whitelisting instructions right after someone opts in.
3. Ask Users to Share Your Lead Magnet
Do you want new subscribers to spread the word about your lead magnet? With OptinMonster’s Firm success theme, you can ask them to share immediately after they opt in.
First, go to the Success tab for your optin form and hit the “Switch Theme” button.
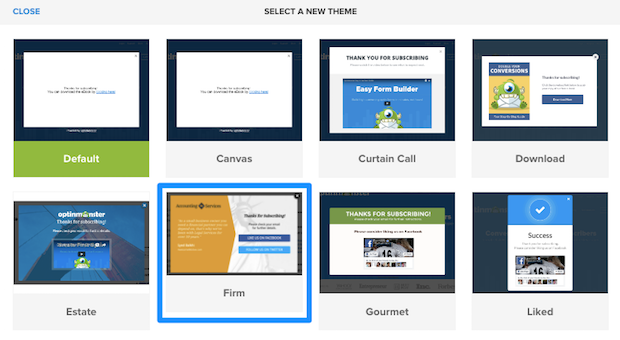
Next, select the Firm theme.
Go ahead and edit the success message to look the way you want with your own copy, colors, fonts, etc.
Once it looks good, you’ll need to set the Facebook and Twitter buttons to share your lead magnet.
To do this, you’ll need to generate sharing links for your lead magnet. Share Link Generator is a great free tool for this purpose. Just paste the link to your lead magnet page, and it will generate a Facebook and Twitter share URL.
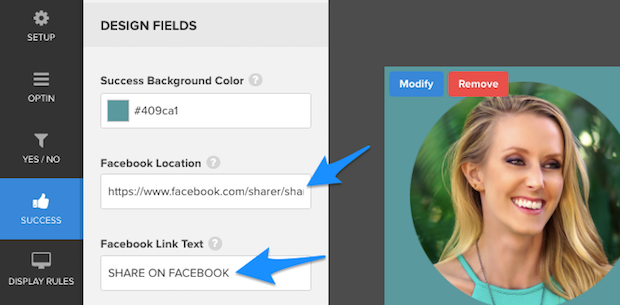
Next, go to the Design Fields for your Facebook button. Paste the Facebook share URL into the Facebook Location field, and change the Facebook Link Text to “Share on Facebook”.
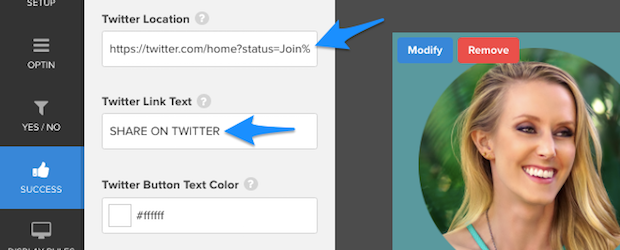
Now do the same thing to customize your Twitter button.
That’s it! Now your popup will encourage new subscribers to share your lead magnet on Facebook and Twitter.
4. Ask Users to Like You on Facebook
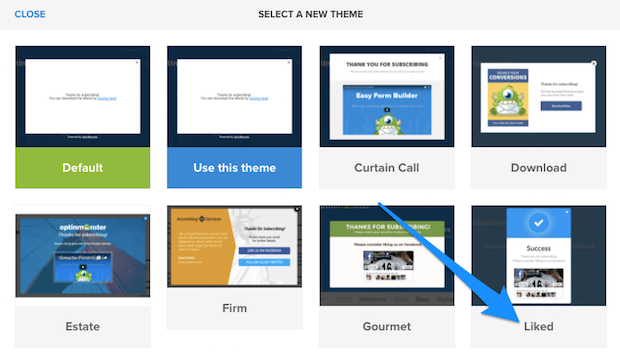
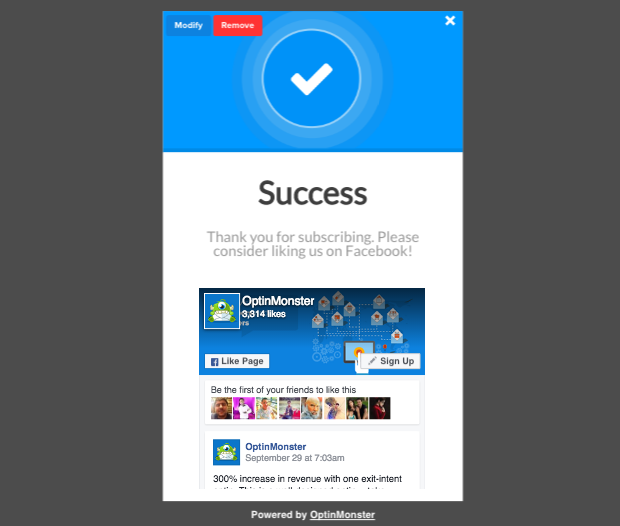
Want to boost your Facebook likes? With OptinMonster’s Liked and Gourmet success themes, you can ask subscribers to like your Facebook page.
Right after the optin is the perfect time to ask for Facebook likes, since these are the people who are the most interested in your brand.
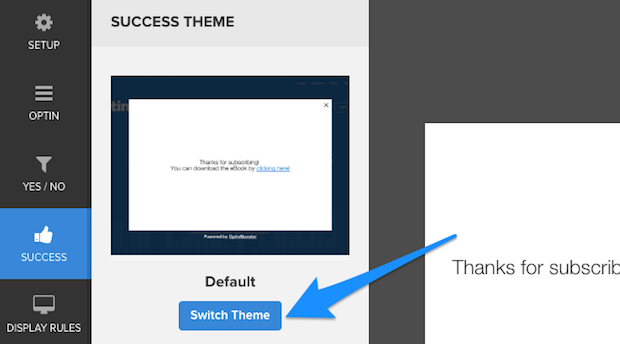
First, edit one of your optin forms. Then click on the Success tab, and click on the blue “Switch Theme” button.
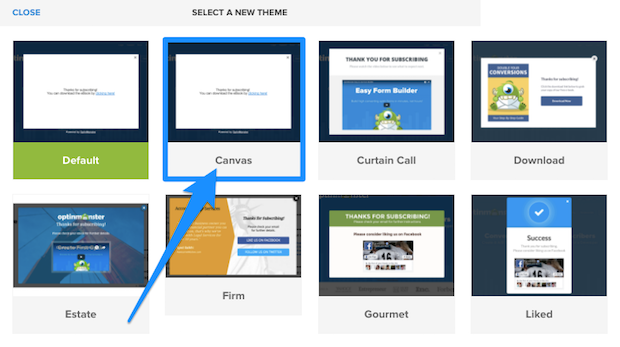
Next, select either the Liked theme or the Gourmet theme. (We’ll pick the Liked theme.)
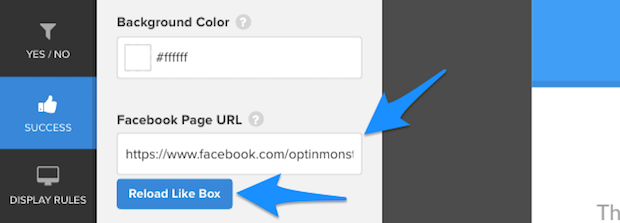
Now go ahead and add the URL for your Facebook page under the “Facebook Page URL” field. Click on the “Reload Like Box” button to update it, and then save your changes.
Now your success message will look something like this.
That’s it! Now you can start boosting Facebook likes right after someone opts into your email list.
You can even create a standalone Like us on Facebook popup with this step by step tutorial.
5. Open Your Lead Magnet in a New Tab
In some cases, you may want the lead magnet to open up in a new tab. For example, if your lead magnet is located on another platform–like Facebook, or an affiliate site–you don’t want users to leave your site completely.
To make the lead magnet open in a new tab, all you have to do is use the Canvas success theme. This is a blank theme that allows you to insert any custom HTML that you want.
First, go to the Success tab and click on the Switch Theme button.
Then, select Canvas.
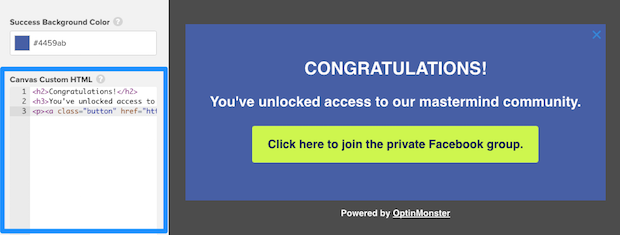
Now, you will be able to add any HTML that you want into the Canvas Custom HTML field.
Here’s an example:
<h2>Congratulations!</h2>
<h3>You've unlocked access to our mastermind community.</h3>
<p><a class="button" href="http://www.faceboook.com/groups/ourmastermind/" target="_blank">Click here to join the private Facebook group.</a></p>
With this code, we now have a button that links to our private Facebook group. This button opens up in a new tab using the target=”_blank” code.
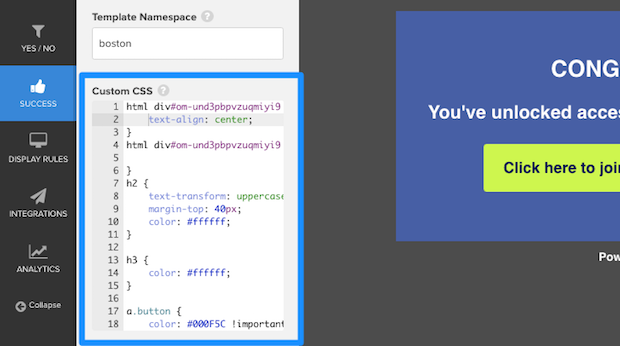
You can also style this HTML using the Custom CSS field.
Here’s how I styled the above success message, but you can use any styling you want:
html div#om-und3pbpvzuqmiyi9 {
	text-align: center;
}
h2 { text-transform: uppercase; margin-top: 40px; color: #ffffff;}
h3 { color: #ffffff;}
a.button { color: #000F5C !important; background-color: #BFFF0D !important; }
That’s it! Now your lead magnet will open up in a new tab so new subscribers won’t leave your site completely.
6. Redirect to a Custom Thank You Page
Do you have your own thank you page that you’d like to use? Or perhaps you’d like to skip the thank you message entirely, and send new subscribers straight to your lead magnet?
Although our success themes are super quick and easy to set up, sometimes you may want to direct new subscribers to another page instead.
For example, one of my lead magnets is an interactive index of guest blogging sites. I like new subscribers to start engaging with it immediately after they enter their email. So, I set up my success action to redirect subscribers to my index instead of showing the success message.
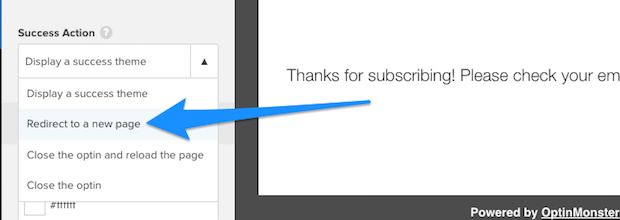
To do this, click on the Success Action dropdown menu.
Then, select “Redirect to a new page”.
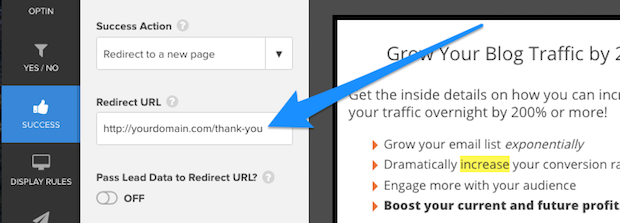
Now you can add your thank you page or lead magnet URL into the Redirect URL field.
That’s it! Now new subscribers will be redirected to your custom thank you page, your lead magnet, or any webpage you choose.
7. Track Ad Conversions with a Success Pixel
When you use paid advertising to drive traffic to your optin, you’ll want to track your cost per conversion using a success pixel.
Success pixels allow you to keep track of how much money you’re spending to acquire each new lead. This pixel usually needs to be installed on the thank you page, so your ad platform will know whenever someone successfully converts.
However, with OptinMonster, you don’t even need a thank you page in order to track your ad conversions. In fact, you can set up conversion tracking in just a few clicks.
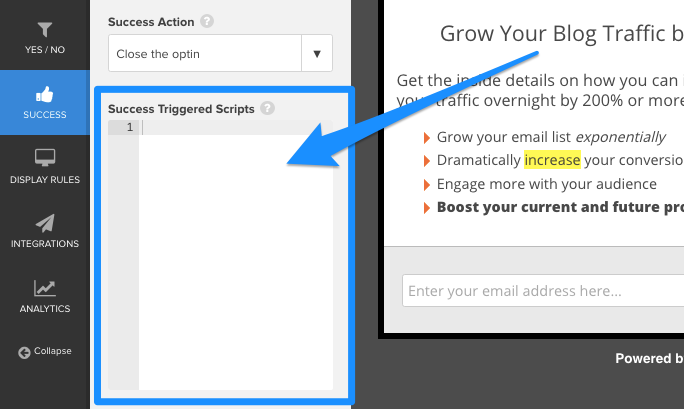
To add a success pixel to one of your optin forms, simply go to the Success tab. Then, scroll down to Success Triggered Scripts field and paste your success pixel.
That’s it! You’ve just installed a success pixel, and saved yourself a ton of time by not creating a separate thank you page.
Take Your Success Message Even Further with Canvas
Now that we’ve covered 7 ways to leverage OptinMonster’s success themes, I should note that this is only just the beginning.
You can add any call to action that you want to a success message using our powerful Canvas theme.
This theme is a blank slate for adding custom HTML code.
You can use the Canvas success theme to…
- Display a tripwire (a low-priced offer)
- Suggest related or popular posts or products
- Show a contact form or a live chat
- Offer a limited time deal
- Include a button to add your webinar or event to their calendar
- Ask them to fill out a survey
- Ask for additional information (e.g. “What are you struggling with?”)
- Display testimonials
- Ask them to join your community
- …or anything you can imagine!
This is your chance to strike while the iron is hot and move warm leads further along your sales funnel. So make good use of it!
Do you still have questions about our success themes? Let us know in the comments! Not using OptinMonster yet? Get started today and start converting abandoning visitors into subscribers.




Add a Comment