The OptinMonster branding on campaigns makes it easy to include your OptinMonster affiliate link. If you’d prefer not to show the OptinMonster Badge, you can disable it on your campaigns.
This article teaches you how to disable the OptinMonster Badge on your campaigns.
Before You Start
- Disabling branding is available with a Pro or higher subscription.
Disable For Individual Campaigns
To disable branding on your campaigns, follow these steps:
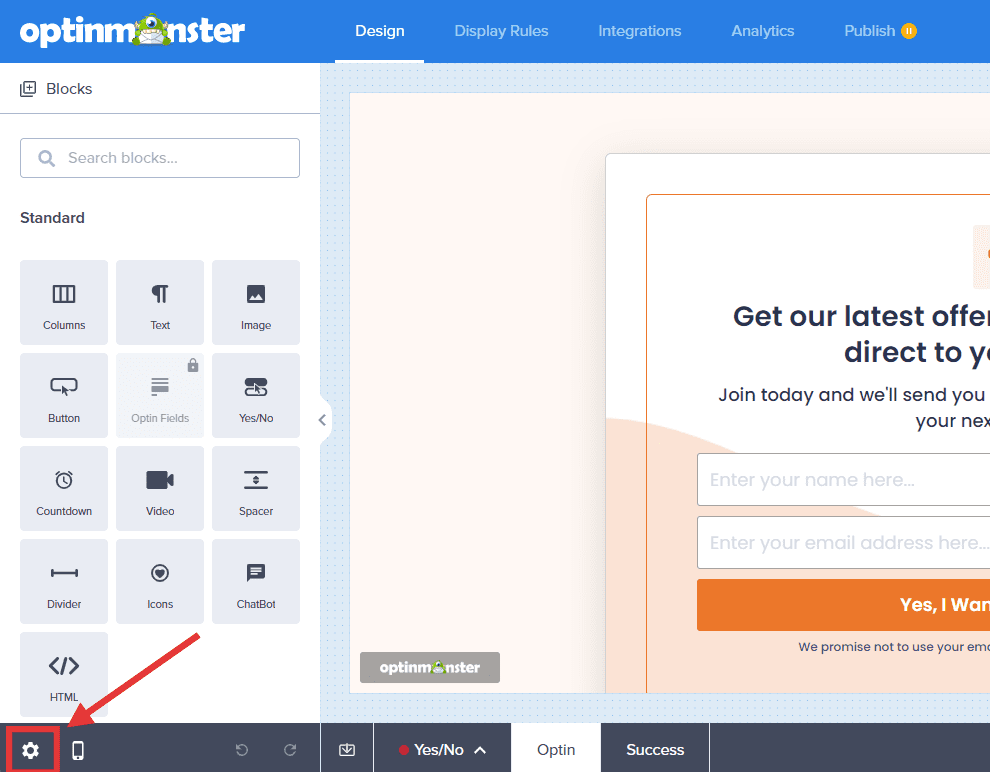
- In the Design view of the campaign builder, click the Settings gear icon in the bottom left corner.
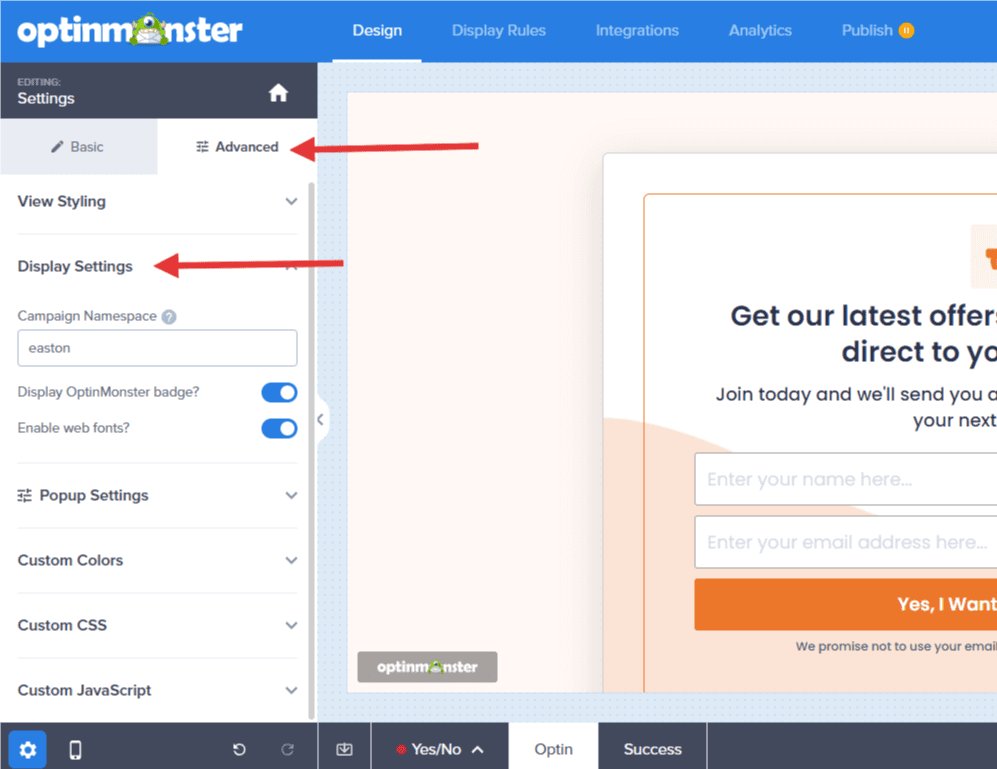
- Next, select the Advanced tab in the sidebar and expand the Display Settings option. You can also reach this menu by clicking on the OptinMonster Badge itself.
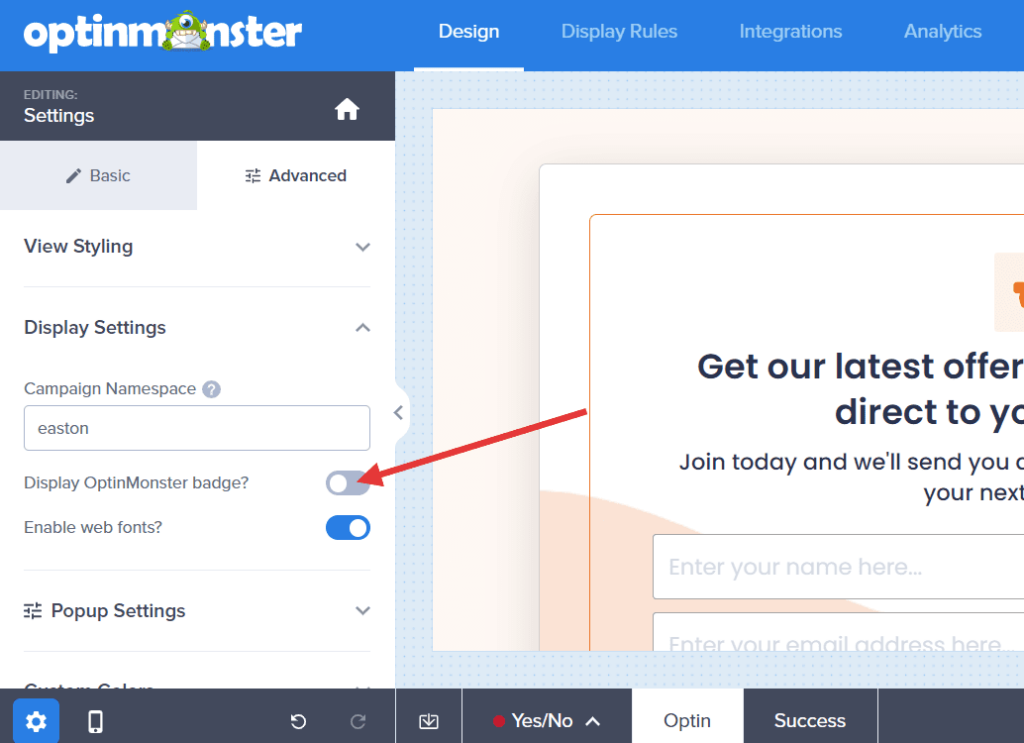
- Click the toggle next to Display OptinMonster badge? to disable OptinMonster branding.
- When you’re finished, click Save.
Disable Account-Wide
Alternatively, you can disable the OptinMonster Badge for all campaigns in your account. To disable the Badge account-wide, follow these steps:
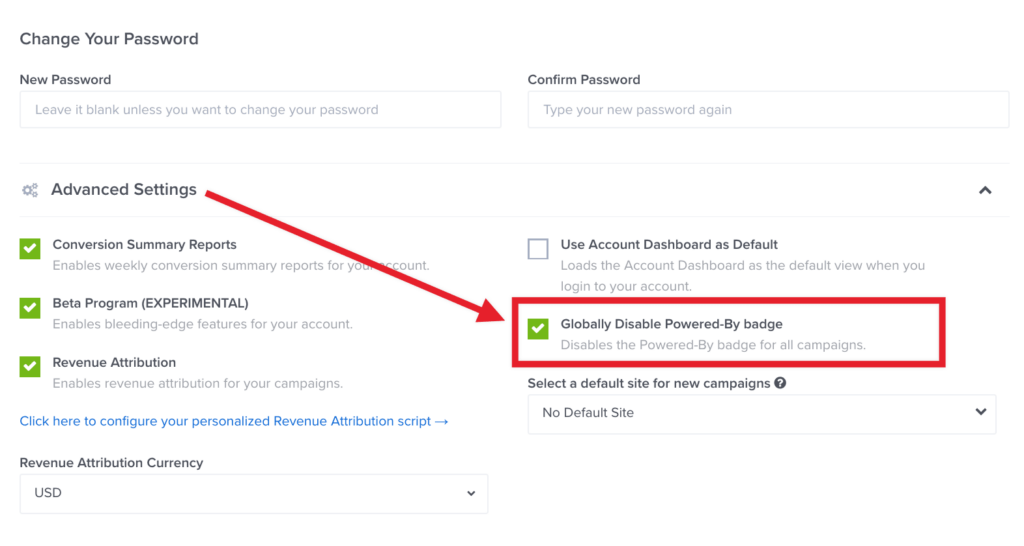
- In the OptinMonster app, navigate to your Account page.
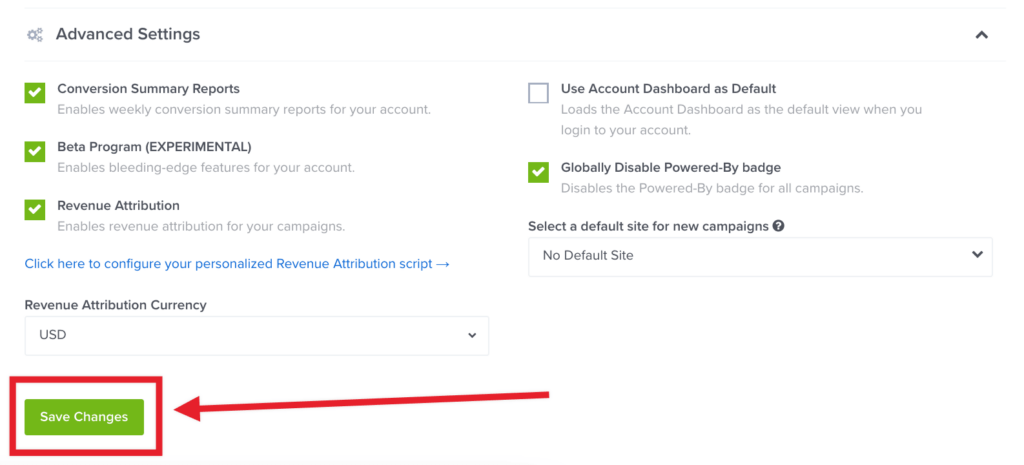
- Scroll down to the bottom of the page and, within the Advanced Settings panel, enable the Globally Disable Powered-By badge option.
- When you’re finished, Save the changes.
FAQs
How do I add my Affiliate link to the OptinMonster branding on my campaigns?
If you’re an OptinMonster Affiliate, you can add your affiliate link to the OptinMonster Badge to earn affiliate credits.
How do I become an Affiliate?
Learn more about our Affiliate Program here.
If you’re serious about jumpstarting your website business growth, get started with OptinMonster today!
Our conversion experts will design one free campaign for you to get maximum results – absolutely FREE! Click here to get started →

