Want to know how to create an NPS survey in WordPress?
A net promoter score (NPS) survey helps you understand how loyal your customers are to your company. It’s an important metric for keeping your customers happy and your business healthy.
In this article, we’ll show you how to create an NPS survey on your WordPress site.
What Is An NPS Survey?
NPS stands for Net Promoter Score. It’s widely considered the gold standard metric of customer feedback, and asks one simple question:
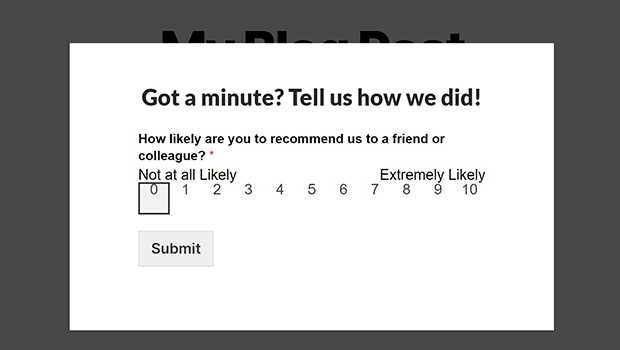
“How likely are you to recommend this company/product/service to a friend or colleague?”
Customers pick an answer from a 10-point Likert scale, with 0 being the least likely and 10 being the most likely.
NPS scores are categorized like this:
- 9-10: Promoters who will likely keep buying and referring others to your business
- 7-8: Passives who are happy enough but unlikely to share and possibly vulnerable to competitors
- 0-6: Detractors who are unhappy and may speak negatively about your business
To calculate the Net Promoter Score, you subtract the percentage who are Detractors from the percentage who are Promoters. Passives have less effect on your NPS score.
For example, if 50% of your customers are Promoters and 20% are Detractors, your NPS score would be 30. Typical NPS scores vary across industries.
There’s an important difference between liking a product enough to buy and use it, and liking it enough to share it with others. In some ways, Net Promoter Score surveys measure what kind of social proof you as the business owner can expect from that particular customer.
Types of NPS Surveys
There are 2 main types of NPS surveys: relational and transactional.
Relational NPS surveys are conducted on a regular basis among your existing or potential customers. This provides long-term data on overall customer loyalty.
Transactional NPS surveys are sent after a customer interacts with your company. That could be making a purchase, talking to customer service staff, or installing your product. Transactional NPS surveys provide detailed feedback about customer satisfaction on each step of the customer journey.
You can conduct NPS surveys about practically anything, such as specific products, different brick and mortar locations, pages on your website, staff members, marketing channels, and more.
NPS Survey Questions
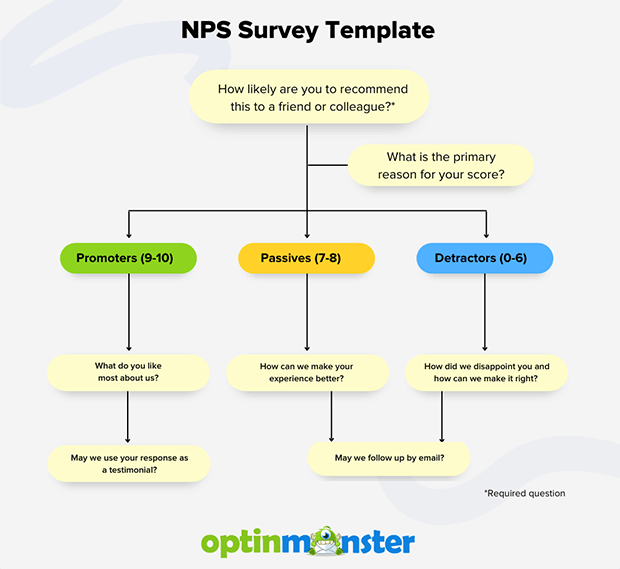
The core question of an NPS survey is simple: “How likely are you to recommend this to a friend or colleague?”
For more detail, you can follow up with a question about why they scored the way they did. You can also use conditional logic to ask specific follow-up questions for each group:
- Promoters: What do you like most about us?
- Passives: How can we make your experience better?
- Detractors: How did we disappoint you and what can we do to make things right?
If you want to gather more customer experience data, you can ask for permission to follow up by phone or email.
Keep your NPS survey as short as possible. Only the core question should be required. All other questions should be optional.
If you’re a visual learner, here’s an NPS survey template showing which questions to ask and when:
Now let’s see how to create an NPS survey in WordPress.
How to Create an NPS Survey on Your WordPress Website (5 Step Guide)
The easiest way to create an NPS survey in WordPress is to use a WordPress survey plugin. We like WPForms.
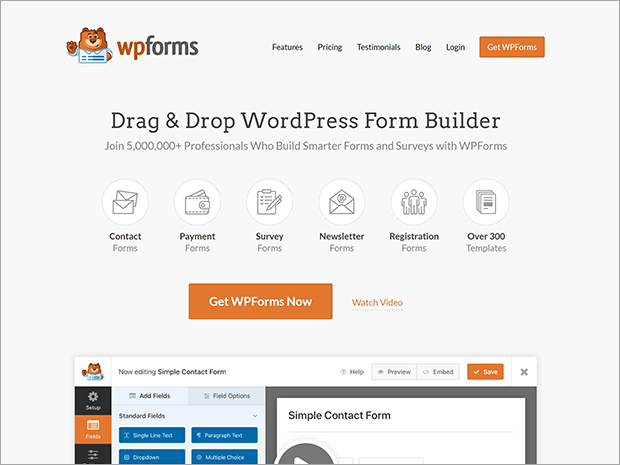
WPForms is the best drag and drop form builder for WordPress. You can use WPForms to create contact forms, surveys, polls, and so much more.
WPForms is an affordable and beginner-friendly forms plugin for small businesses. It also has plenty of integrations with other tools you’re using in your business.
With WPForms, you’ll have your NPS survey ready in minutes. Here’s how to do it.
Step 1: Create Your Survey
First, you need to purchase a WPForms plan. You’ll need the Surveys & Polls addon, which is available on the WPForms Pro plan or higher.
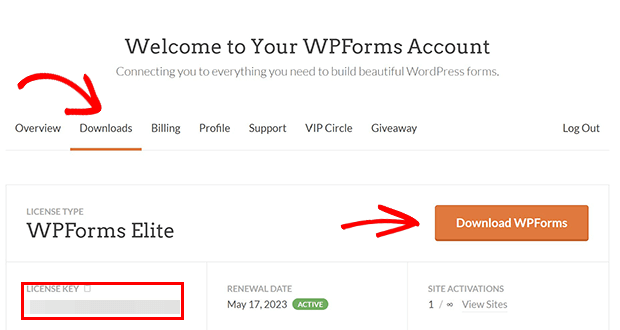
Once you’ve got your WPForms account, you need to copy your license key and download the plugin file. You can do both of those in the Downloads section of your WPForms account.
Next, go to your WordPress dashboard. Go to Plugins » Add New.
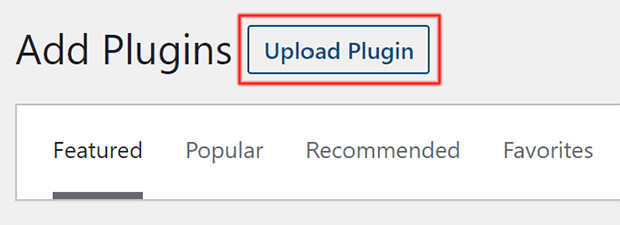
From there, click the Upload Plugin button at the top of the page.
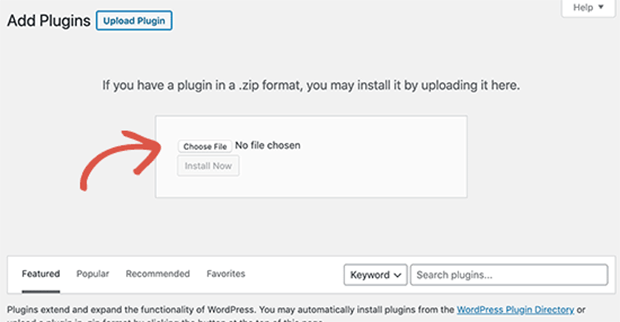
Now, click on the Choose File button and find the WPForms plugin file you downloaded earlier.
Once you do that, click Install Now. WordPress will upload the plugin file and install it for you. Finally you’ll need to click Activate Plugin.
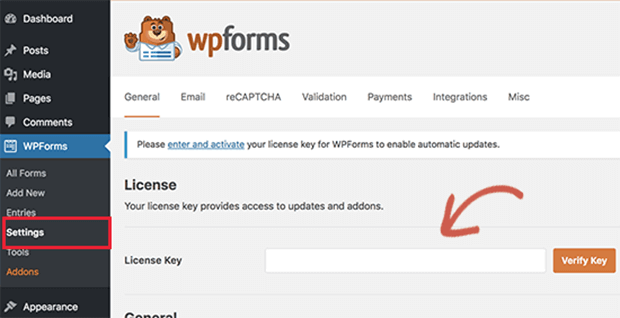
Once you do this, you’ll need to go to WPForms » Settings. Enter your license key under the General tab.
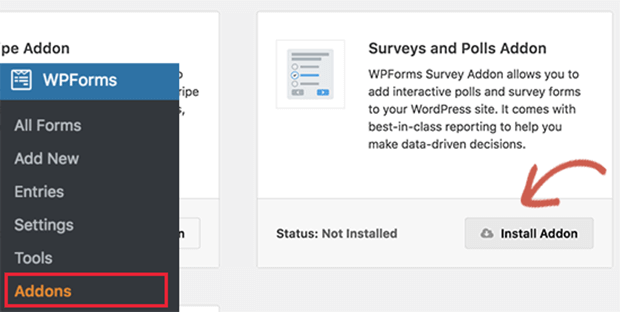
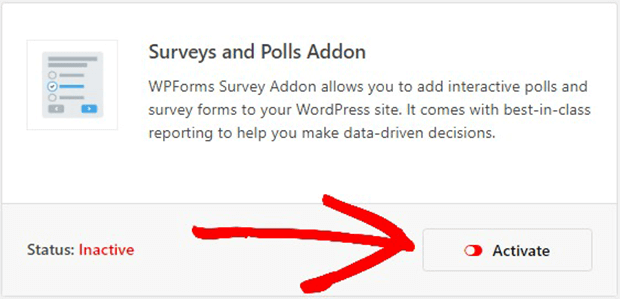
After you enter your license key, go to WPForms » Addons. Find the Surveys and Polls Addon and click Install Addon.
Finally, click Activate.
Now you’re ready to create an NPS survey.
Go to WPforms » Add New to create a new form.
On the setup screen, give your form a name and find the NPS Survey Enhanced Form template. This template will do almost all of the work for you!
The template will start with the following fields:
- Net Promoter Score core question (Likert scale)
- Reason for score (paragraph text)
- Testimonial permission (checkbox)
- Email address
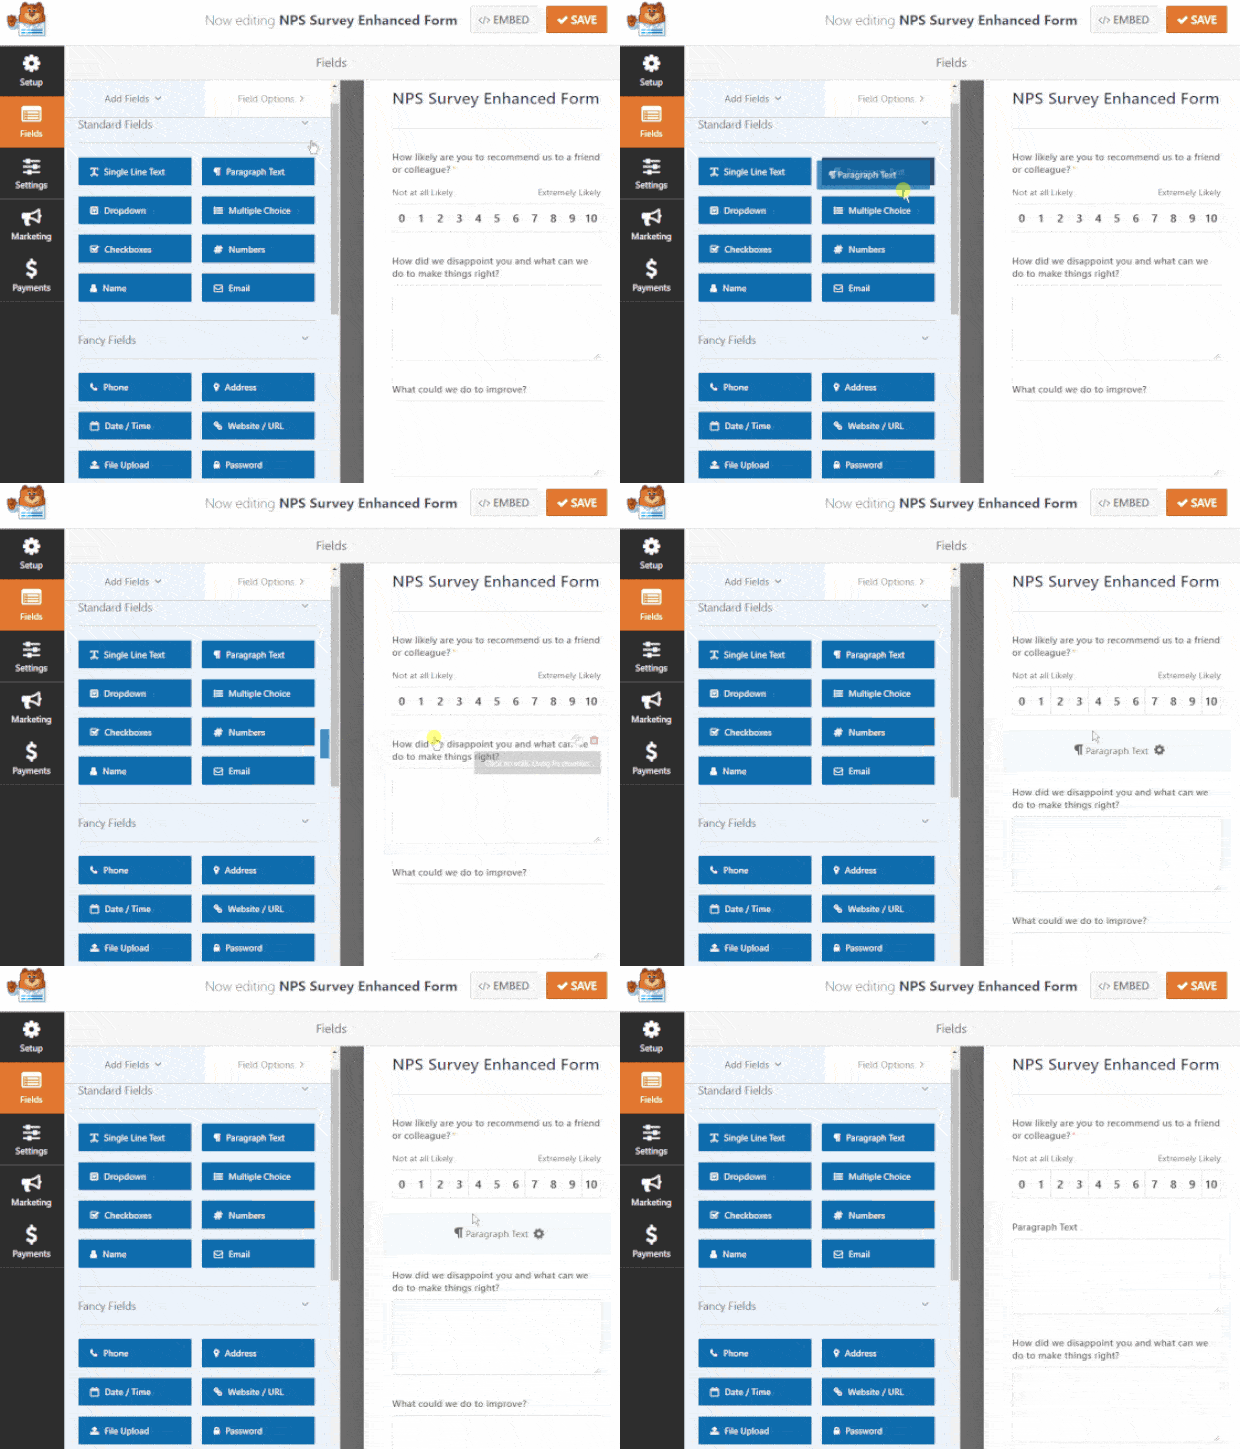
You can add fields by dragging them from the Fields panel on the left into the form panel on the right. Or you can delete fields you don’t want.
To change the form fields, click on the field and change what you need in the Field Options panel on the left. You can also drag the fields around to rearrange them.
Step 2: Set Up Conditional Logic
Personalization is a highly effective way to increase your conversion rates. It wouldn’t make sense to ask someone who gave a low NPS score what they love most about the product or company. So let’s use conditional logic to display the appropriate followup question based on the NPS score.
The enhanced NPS survey form comes with conditional logic built in.
If someone answers the NPS field as a promoter (8+), they’ll see a text box asking, What do you like most about us?
Passive answers (7-8) will get a text box asking, What could we do to improve?
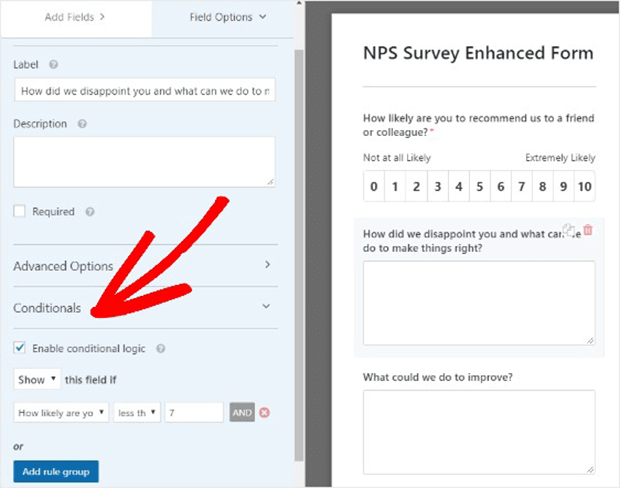
And detractors (0-6) will get a text box that says, How did we disappoint you and what can we do to make things right?
Feel free to change these questions to what makes most sense for your business and matches your brand voice. To do that, click on the field you want to edit and select Conditionals in the Field Options panel on the left.
Step 3: Configure Form Confirmations
The next thing you need to do is configure the form confirmation. This is an important part of creating a positive user experience. No one wants to take the time to fill out even a short survey and be unsure whether the form has been received. With WPForms, it’s easy to instantly let visitors know that you’ve received their form.
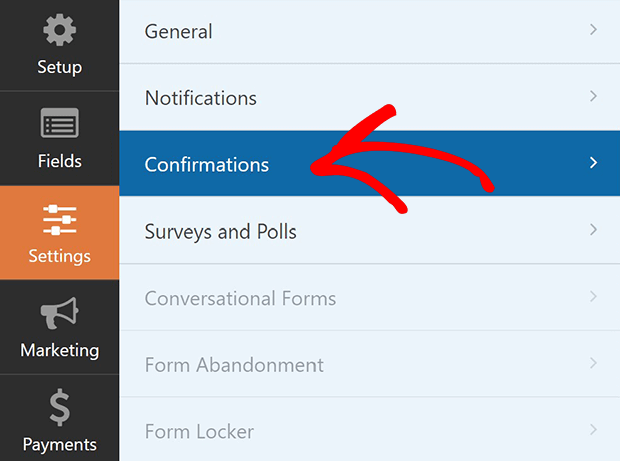
To edit your form notifications, go to Settings » Confirmation from within the form editor.
You can choose from 3 types of confirmations in the dropdown menu:
- Message: This displays a simple text message on the page once the form has been submitted successfully. You can also include a preview of their form after the confirmation message.
- Show Page: This takes site visitors to a specific page on your WordPress website. You can create a special thank you landing page and use this confirmation to send visitors there.
- Go to URL (Redirect): This takes visitors to a different website. Consider letting them know beforehand that this will happen.
Step 4: Configure Form Notifications (Optional)
You’re probably eager to know when someone fills out your NPS survey. Notifications can let you or a team member know when new form submissions come in.
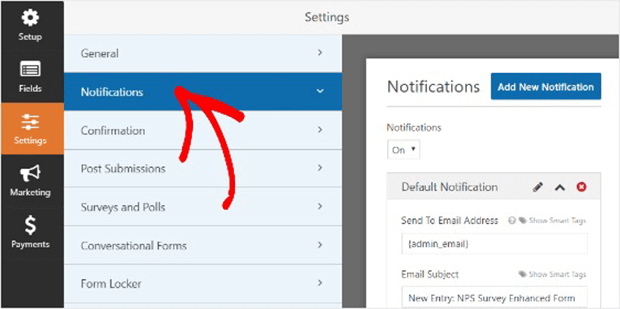
To edit form notifications, select Settings » Notifications.
You can turn notifications on or off. Unless you disable notifications, the admin email for your WordPress site will get the notification.
You can also add another email address to the Send to Email Address field.
If you use smart tags, you can also send an email to your visitor letting them know their form has been received. This is another customer experience detail to pay attention to. But please note that unless you explicitly ask permission to do so, you cannot add them to your email marketing list.
Read more about how to set up form notifications in WordPress.
Step 5: Add Your NPS Survey To WordPress
Now it’s time to add your NPS survey to WordPress.
With WPForms, you can add your survey just about anywhere using a block, shortcode, or widget.
Let’s take a look at the block embed option first.
Create a new post or page in WordPress, or open an existing one.
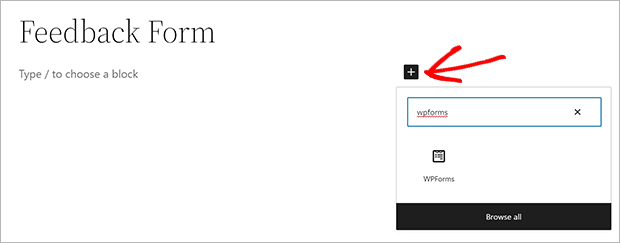
Then, click the black square with the plus sign to add a block. Search for WPForms and click on the WPForms block.
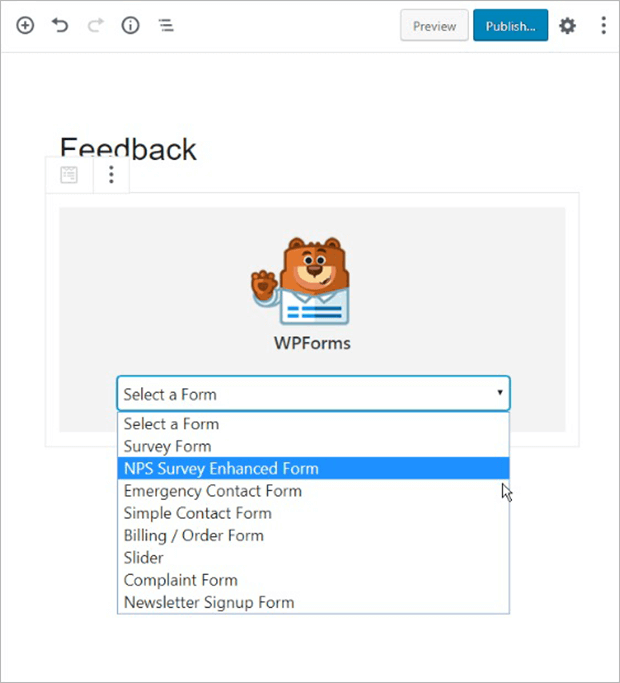
The WPForms block will appear. Select your NPS survey form from the dropdown.
That’s it! You can add anything else you need to the page or post and then click Publish in the upper right corner.
To use a shortcode, go to WPForms » All Forms. Look for the shortcode for the form you want to add. Simply copy and paste this wherever you want to add the form.
Finally, you can use widgets to add your NPS survey to your sidebar or footer.
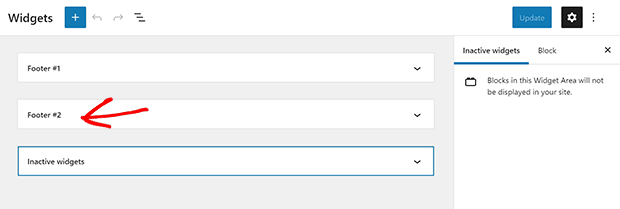
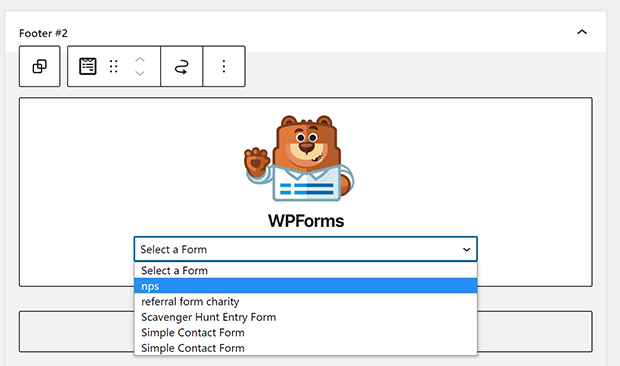
Go to Appearance » Widgets. You’ll see the different widget areas available in your theme. Click on the widget area where you’d like to add your NPS survey.
Next, click on the plus symbol to add a block. Find the WPForms widget and click on it. Choose your NPS survey from the dropdown menu.
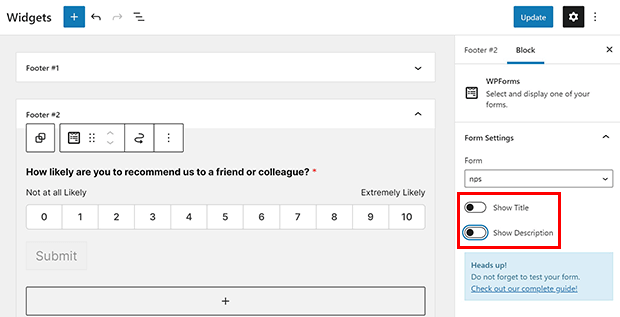
You can choose whether to display the title or description of the widget. Most of the time it’s probably okay to leave these out.
How to See Your NPS Score
As you get NPS surveys back, WPForms will automatically calculate your NPS score.
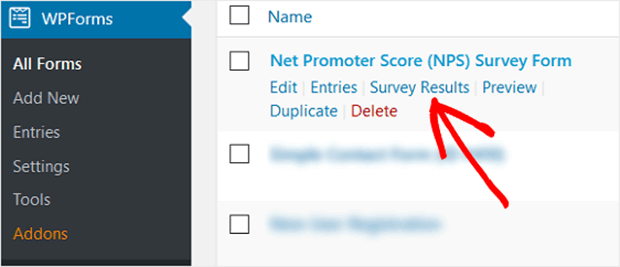
To see your NPS score, go to WPForms » All Forms. Next, hover over the form name to see the extra menu items. Click on Survey Results.
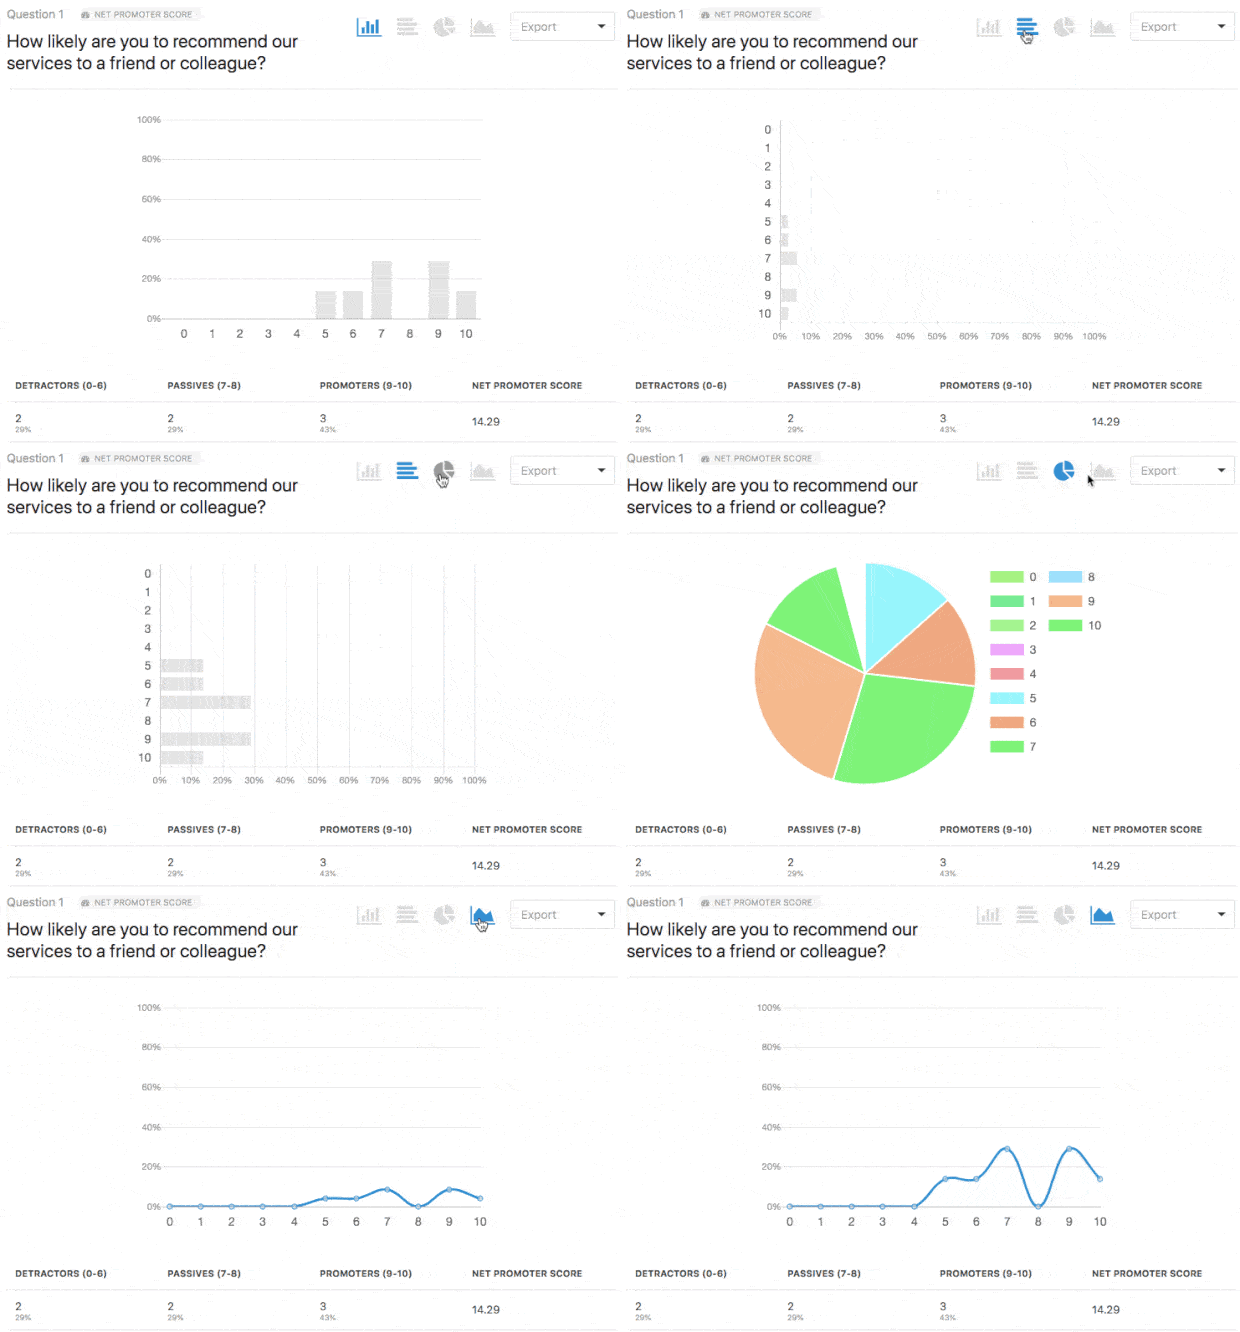
You’ll be able to see your overall NPS score, as well as the number of promoters, passives, and detractors.
How and When to Send NPS Surveys
You can send relational NPS surveys periodically to customers through your email marketing service. You can also post the survey link on social media and on popup campaigns on your website.
Transactional NPS surveys should go out after customer interactions, so email is usually a more reliable and targeted way to send those. You can also include links to your NPS survey in help tickets or live chat conversations.
To get more responses, you can add your NPS survey to an OptinMonster popup campaign using a shortcode.
OptinMonster is the best popup builder for showing your survey to the right people at the right time.
It’s easy to add your NPS survey shortcode to an OptinMonster campaign. Your survey will retain the style settings from WPForms even in the OptinMonster campaign.
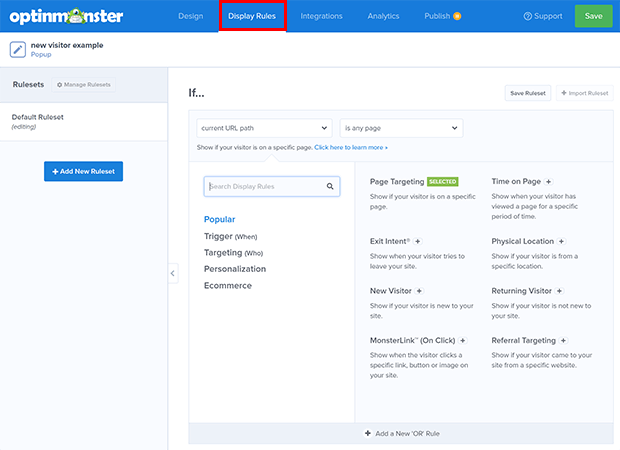
You can then use OptinMonster’s targeting rules to show the survey to past visitors, existing subscribers, new customers, and other precise segments of your audience. With Exit-Intent® Technology and MonsterEffects™, you can attract and convert more visitors to fill out your NPS survey.
Congratulations! Now you know how to create an NPS survey in WordPress.
Bonus tool: You can also use the powerful UserFeedback plugin from MonsterInsights to create user-friendly NPS surveys.
Once you’ve created your survey, you can add it to any page or post on your website using a shortcode or widget. The plugin also provides analytics and reporting features to help you understand your NPS scores and take action based on the feedback you receive.
Did you know you can use NPS scores to segment your email list and send personalized content accordingly? Learn more and check out our list of 50 ways to segment your email list.
You can also learn more about the best WordPress survey plugins available today.
Ready to gather NPS data the easy way? Get started with WPForms today!
If you like this article, please follow us on Facebook and Twitter for more free articles.







Add a Comment