Are you confused by all the reports available in Shopify Analytics?
There’s tons of data available in Shopify Analytics that can help you make strategic decisions for your business. But first you have to understand the reports you’re reading.
In this article, we’ll go over the basics of Shopify’s marketing reports so you can understand how visitors get to your store and how they become customers.
Here’s a table of contents to help you find your way around:
- What Do Shopify Analytics Reports Show?
- Types Of Shopify Marketing Reports
- Where to Find Shopify Analytics
- How Do I Track A Marketing Campaign On Shopify?
- How to Add Revenue Attribution to Shopify
- Is Shopify Analytics Free?
What Do Shopify Analytics Reports Show?
Shopify Analytics reports show your store’s recent activity, including visitors, store speed, and, of course, sales.
All Shopify plans can see the Analytics page, which shows at a glance key data about sales, orders, and visitor activity.
If your Shopify account is on the Basic Shopify plan or higher, you also have access to:
- Acquisition reports about your visitors, where they’re located, and how they found your shop
- Inventory reports tracking quantity and percentage of inventory sold per day
- Behavior reports that help you understand your customers’ shopping behavior
- Marketing reports that show you how well your marketing efforts are converting
Those on the Shopify plan or higher can also see advanced reports about orders, sales, retail sales, profit, and customers.
For this article, we’re going to focus on the marketing reports because understanding is the first step to increasing your Shopify conversion rates.
Types Of Shopify Marketing Reports
Shopify’s marketing reports are meant to help you understand which of your marketing channels bring in the most customers and the highest value customers.
There are 5 Shopify marketing reports:
- Sales attributed to marketing
- Conversion by first interaction
- Conversion by last interaction
- Attribution model comparison
- Sessions attributed to marketing
The sessions attributed to marketing report is available on Basic Shopify plans or higher. The other reports are only available to those on the Shopify plan or higher.
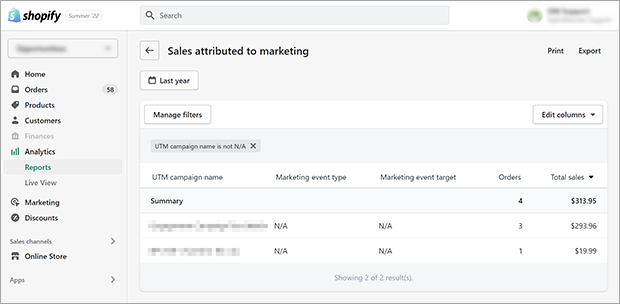
Of these 5, we think sales attributed to marketing is the most important. After all, the point of your Shopify store is to make money. So you must understand how much revenue your marketing is generating, especially if you’re using paid marketing like ads or sponsored content.
The other reports are still important, of course. Conversion by first interaction shows you what gets customers into the sales funnel. Conversion by last interaction shows you what ultimately convinces them to buy.
For example, let’s say a visitor finds your website through organic search. They visit your Shopify store and don’t buy anything yet, but they pick up a retargeting pixel. Later that week they see a retargeted Facebook ad for your business. They click through that ad and make a purchase.
The first interaction report would credit that sale to the search engine. The last interaction report would credit that sale to the Facebook ad. Attribution model comparison lets you compare a channel’s conversion rates by first vs last interaction.
Sessions attributed to marketing shows you how much of your store traffic is the result of marketing. This report is necessary but not sufficient to determine how effective your marketing is. If you only pay attention to how much traffic you have and not how much is converting to actual sales, you may be misled about how well your marketing is working.
Where to Find Shopify Analytics
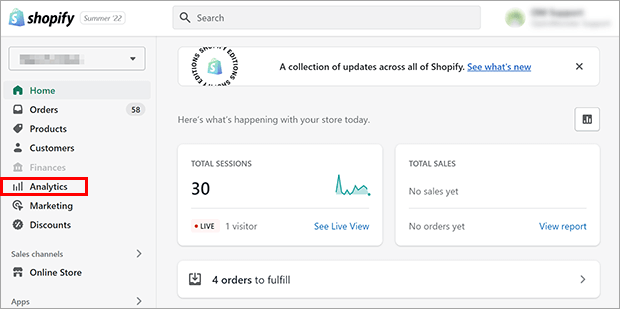
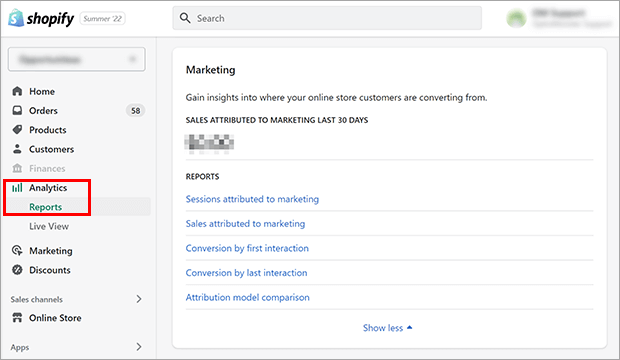
To access your Shopify Analytics reports, click on Analytics from your Shopify admin dashboard.
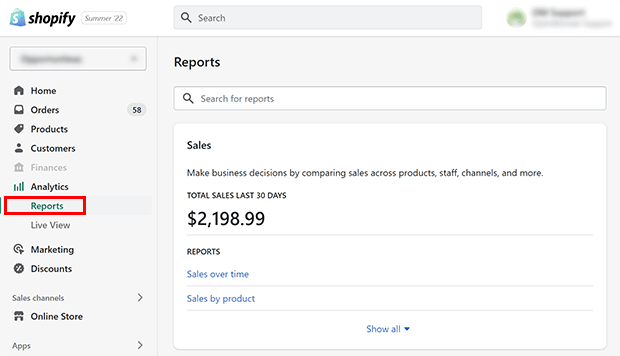
From the menu that appears, click on Reports.
Scroll until you reach the Marketing section, or use the search box to find the report you want.
Click on the report you want to see.
How Do I Track A Marketing Campaign On Shopify?
It’s very important to understand how much of your marketing campaigns are and channels are contributing to your revenue. Unfortunately, the marketing reports in Shopify Analytics have some limitations.
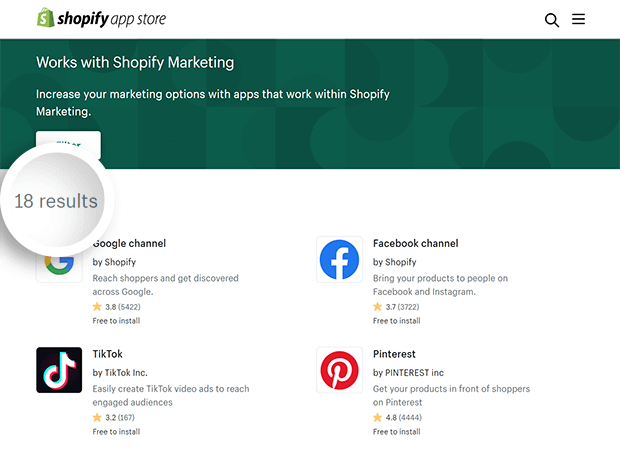
Shopify reports can only track sales that come through marketing apps from Shopify’s Marketing section.
While there are plenty of Shopify apps to increase sales, most of them don’t work within Shopify Marketing. Therefore, sales through those apps won’t show up in the Shopify marketing reports.
Another option is to use Urchin Tracking Module (UTM) parameters to track your campaigns. But doing that for every single campaign can be a major hassle.
Furthermore, you must pay at least $79/month for a Shopify plan or higher if you want to see how much money each of your marketing channels is earning. If you have the Shopify Basic plan, you can only see Sessions attributed to marketing. The Shopify Lite plan doesn’t have any marketing reports at all.
If you want a way to attribute revenue with marketing on any Shopify plan, consider OptinMonster instead.
OptinMonster is the best conversion optimization toolkit for Shopify to grow your email list, get more leads, and increase sales. With its drag and drop builder and advanced targeting rules, you can easily create beautiful marketing campaigns and show them to the right customers at the right time.
Best of all, you can automatically attribute revenue to all of the campaigns a customer interacts with.
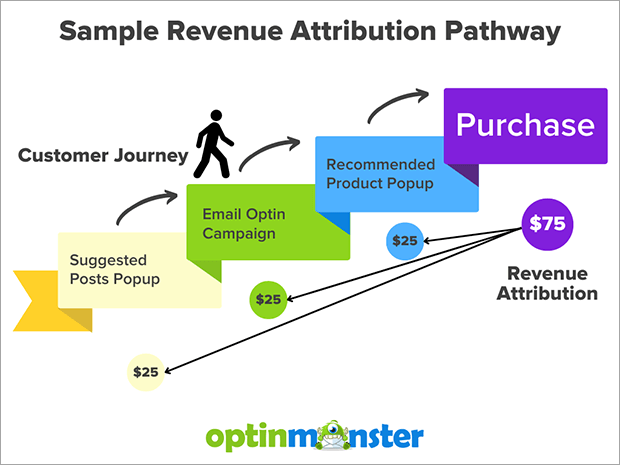
Unlike the built-in Shopify analytics reports, OptinMonster uses a linear attribution model. That means any campaign a customer converts before their purchase gets an equal share of the attributed revenue. This lets you see all the touchpoints that contributed to the buyer journey, not just the first or last click.
Revenue Attribution is available on all OptinMonster plans. OptinMonster itself can be used on any Shopify plan. (Plus WordPress, WooCommerce, BigCommerce, and many other eCommerce platforms, for that matter!)
So if you’re using Shopify Lite or Shopify Basic, OptinMonster is a lower-cost way to see your revenue attribution reports if you don’t need the other bells and whistles on the higher-priced Shopify plans.
How to Add Revenue Attribution to Shopify
Step 1: Create a Campaign
First, sign up for an OptinMonster account. Revenue Attribution is available on all paid OptinMonster plans, so pick the one that suits your needs best.
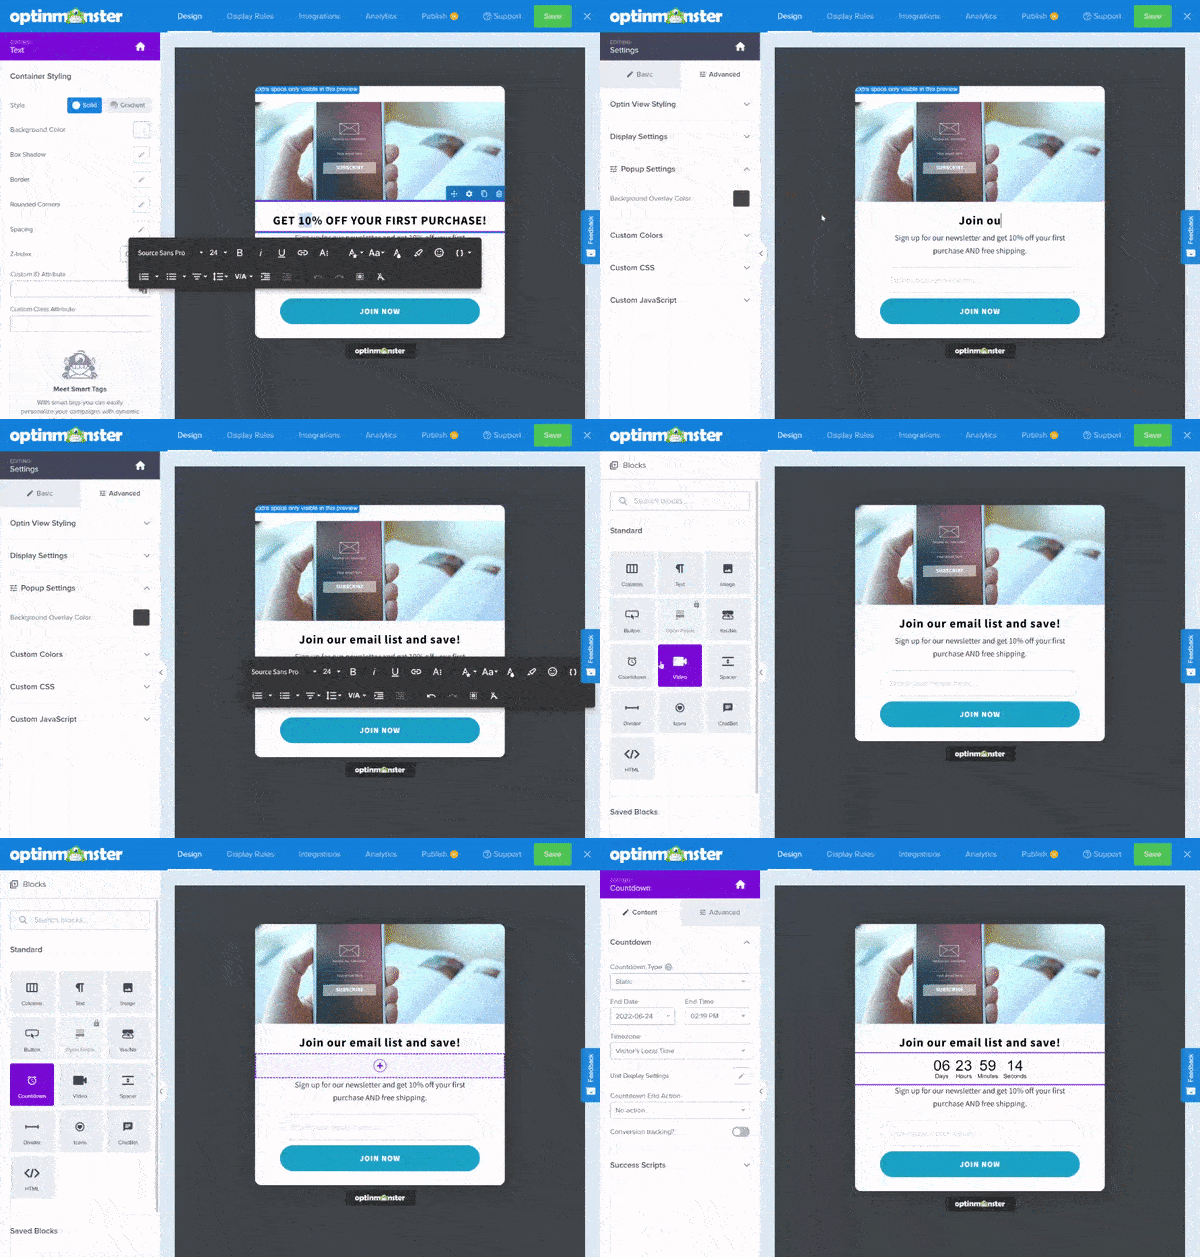
Next, create your first campaign following these instructions. Your campaign can promote anything: specific products, your email list, your social media feeds, and more. If you need inspiration, check out these eCommerce popup examples.
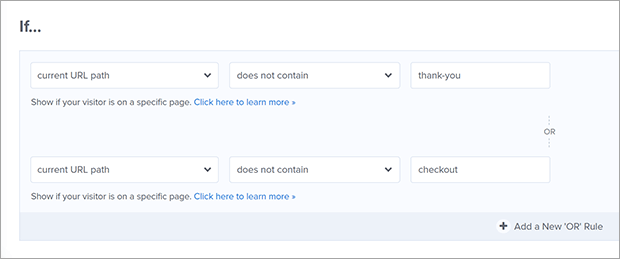
You can display this campaign anywhere on your Shopify site. However, you’ll want to disable it for the order status page and other checkout-related pages. You don’t want to show pre-sale campaigns to someone who has just finished or is in the process of buying something.
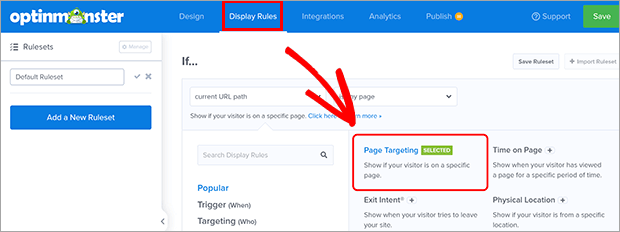
To hide the campaign on specific pages, use OptinMonster’s Page-Level Targeting in the Display Rules.
You’ll want to exclude your order status and checkout pages. Check Shopify for the URLs for these pages.
Step 2: Enable Revenue Attribution
Once you’ve finished your campaign, go to the My Account page.
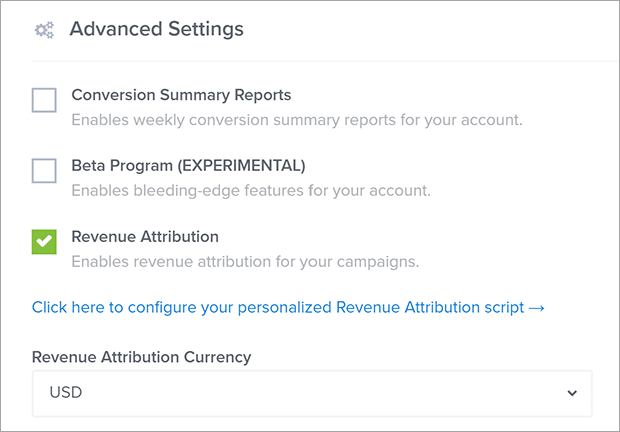
Scroll down until you see Advanced Settings. Then enable the Revenue Attribution option.
If you’d like, choose which currency to display revenue attribution in. When you’re done, click Save Changes.
Step 3: Add Embed Code to Shopify
Now, you need to add OptinMonster’s Embed code to Shopify.
The easiest way to do this is to install the OptinMonster Shopify app.
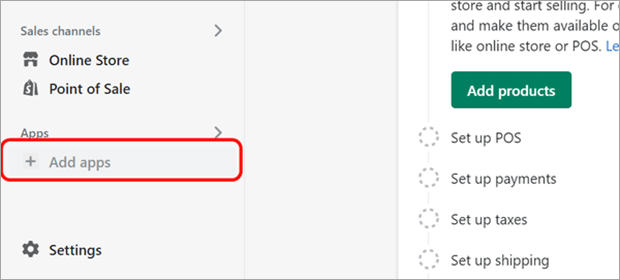
From your Shopify dashboard, click on the Add apps link.
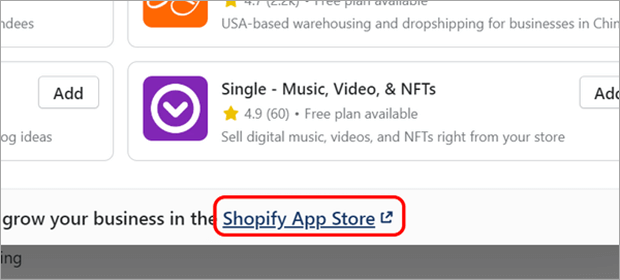
Click on Shopify App Store and search for OptinMonster.
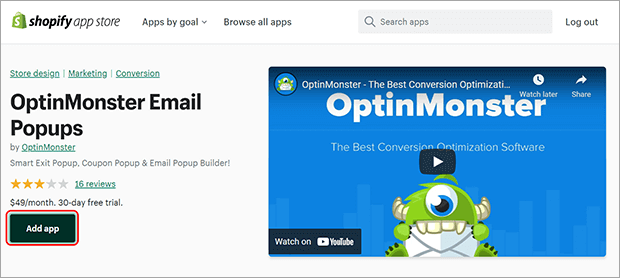
Click on the OptinMonster tile and follow the instructions to install the OptinMonster app.
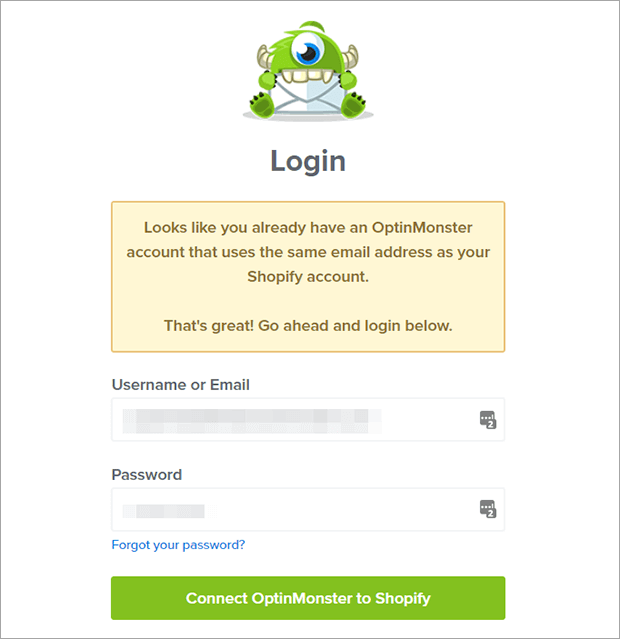
When the login screen comes up, log into your OptinMonster account to connect it to your Shopify store.
Now your embed code is automatically added to your Shopify store! You can go ahead to step 4.
If you wish to add the embed code without the OptinMonster Shopify app, here’s what to do.
From the campaign builder, navigate to Publish. Change the status to Publish or Schedule.
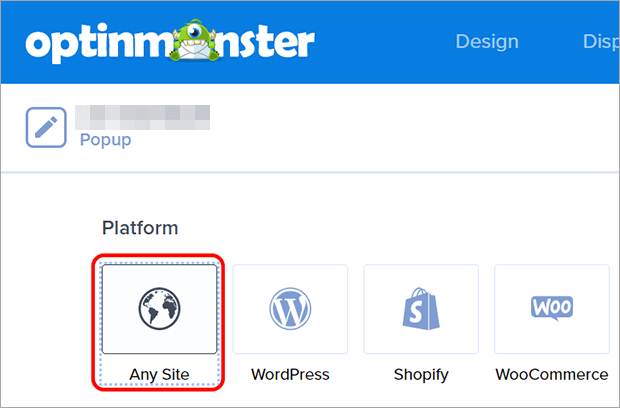
Click on Any Site under Platform.
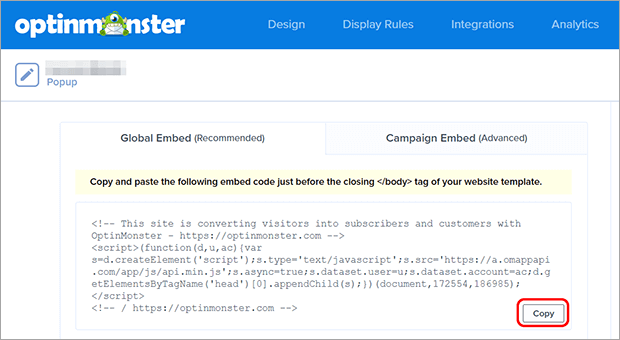
Copy the embed code.
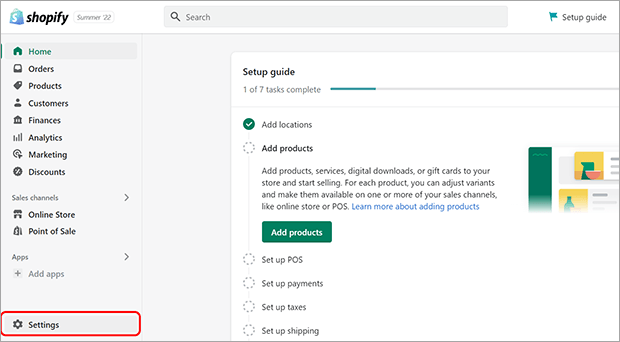
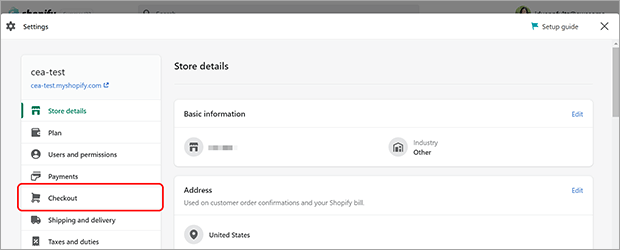
From your Shopify dashboard, click on Settings.
From the Settings menu, click on Checkout.
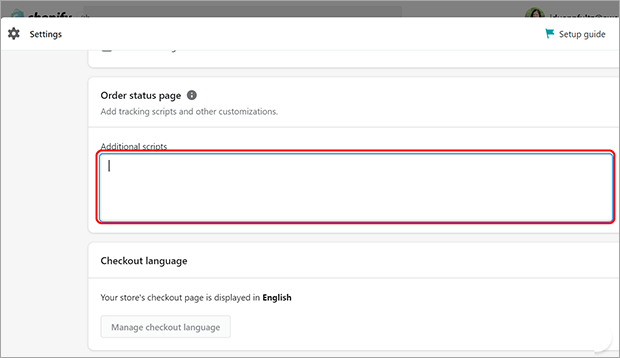
Under Order status page, find the Additional scripts box. Paste your OptinMonster embed code into this box.
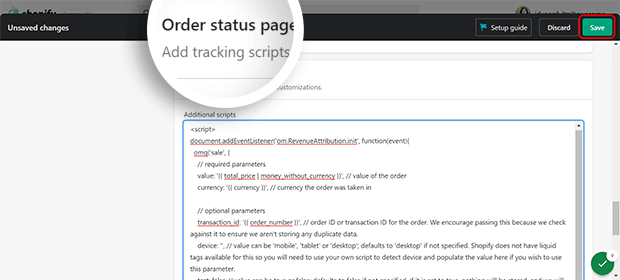
Click Save.
Step 4: Add Attribution Code to Shopify
Finally, you need to add OptinMonster’s attribution code to Shopify.
Copy the following code:
From your Shopify dashboard, go to Settings » Checkout.
Under Order status page, find the Additional scripts box. Paste your OptinMonster attribution code into this box. It can go right after the embed code if you added that to Shopify manually.
Click Save and your Revenue Attribution is ready to go!
Is Shopify Analytics Free?
Shopify Analytics are included in some form on all paid Shopify plans. Here are the Shopify marketing reports included for each plan:
- Shopify Lite plan ($9/month): Finances report only
- Shopify Basic/Starter plan ($29/month): Sessions attributed to marketing
- Shopify, Advanced Shopify, and Shopify Plus plans ($79/month and up): Sessions attributed to marketing, sales attributed to marketing, conversion by first interaction, conversion by last interaction, attribution model comparison
If you’re on the Shopify Lite or Shopify Basic plan and want to see which sales are attributed to which marketing campaigns, you can use OptinMonster.
All OptinMonster plans have the Revenue Attribution feature. OptinMonster plans start at $9/month, plus you get a powerful lead generation and list building tool along with it!
There you have it, a basic overview of Shopify Analytics marketing reports.
Evaluating your marketing campaigns on a regular basis is essential for growing your business. If a strategy or campaign is working well, look for ways to scale. If something’s not performing well, find ways to improve or other strategies to try.
Now that you know how to read your marketing reports, check out our list of Shopify apps to grow your sales instantly.
If you like this article, please follow us on Facebook and Twitter for more free articles.






Add a Comment