Do you need to learn how to add an email optin to WordPress?
An email optin campaign is an easy and efficient way to grow your email list and start converting your site’s visitors to leads.
But how can you make one for yourself, especially when you don’t have tons of time to spend on your website?
In today’s tutorial, we’ll show you how to add an email optin to your WordPress site in under 5 minutes.
First, let’s go over what an email optin is and why it should be one of your marketing pillars.
What Is an Email Optin?
“Email optins” are a marketing technique where you get visitors to provide their email addresses so they can get on your email list.
This is a great way to ensure that your email marketing efforts are going to people that have an active interest in your site or business.
By sending emails to these types of leads, it’s less likely that your emails will be flagged as SPAM and more likely that they’ll be opened and read.
And most companies have their own methods for collecting emails.
Have you ever been asked for your email while checking out at your favorite department store? That’s a type of face-to-face email optin campaign.
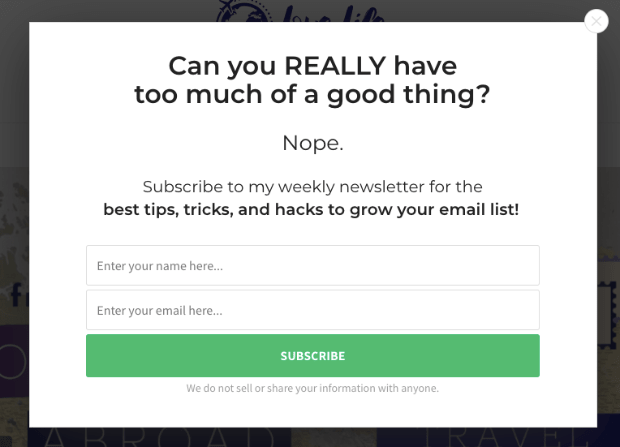
Online, they show up as popups, floating bars, slide-in scroll boxes, and more.
You’ve likely seen email optin popups in use before. Here’s an example:
With that in mind, you’re probably wondering, “How do I create an email optin for my website?”
Let’s walk through the step-by-step process of how to add email optin to WordPress.
How to Add Email Optin to WordPress
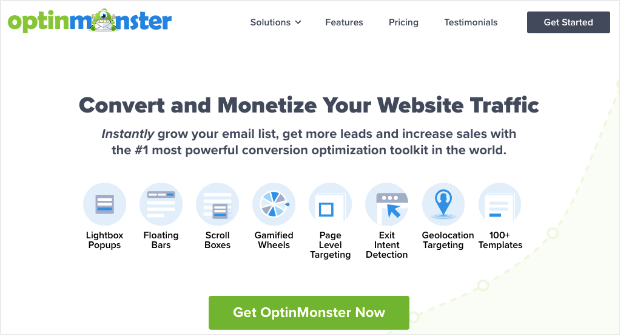
The best way to add email optin to WordPress is by using OptinMonster:
OptinMonster is the best tool to create email optins and other campaigns for your WordPress site.
With over 50 pre-built templates right at your fingertips, you can get a campaign from the drawing board to live on your site in under 5 minutes.
And as you’ll see, creating your campaigns is SUPER simple.
In fact, OptinMonster is how Medstar Media was able to increase clients’ conversions by 500%.
It’s also how American Bird Conservancy saw a more than 1,000% increase in leads collected.
You can get the same MASSIVE results by clicking below and starting your 100% risk-free OptinMonster account today:
Now that you’re ready to follow along, let’s take a look at how you can get an email optin on your site now.
Step 1: Pick a Campaign and Template
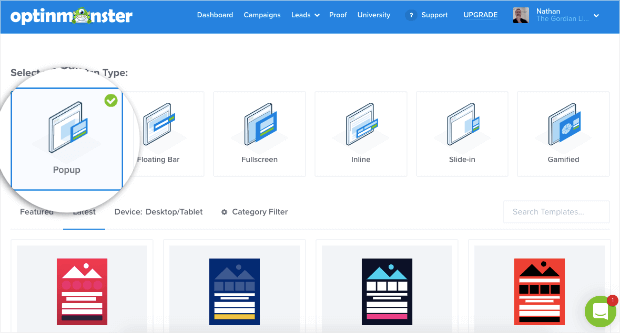
First, let’s look at all of the different campaign types included with OptinMonster.
This tool gives you 9 types of email campaign to choose from, including:
- Popup
- Floating Bar
- Fullscreen
- Inline
- Slide-In
- Gamified
- And more…
For today’s tutorial, we’ll create a popup campaign:
And don’t worry, you don’t need to be a graphic designer or artist to make it look beautiful and professional.
So whether it is a promotion for a holiday, offering a free giveaway, or whatever you want to accomplish, OptinMonster has the template and design for you. If design definitely isn’t your thing, don’t worry.
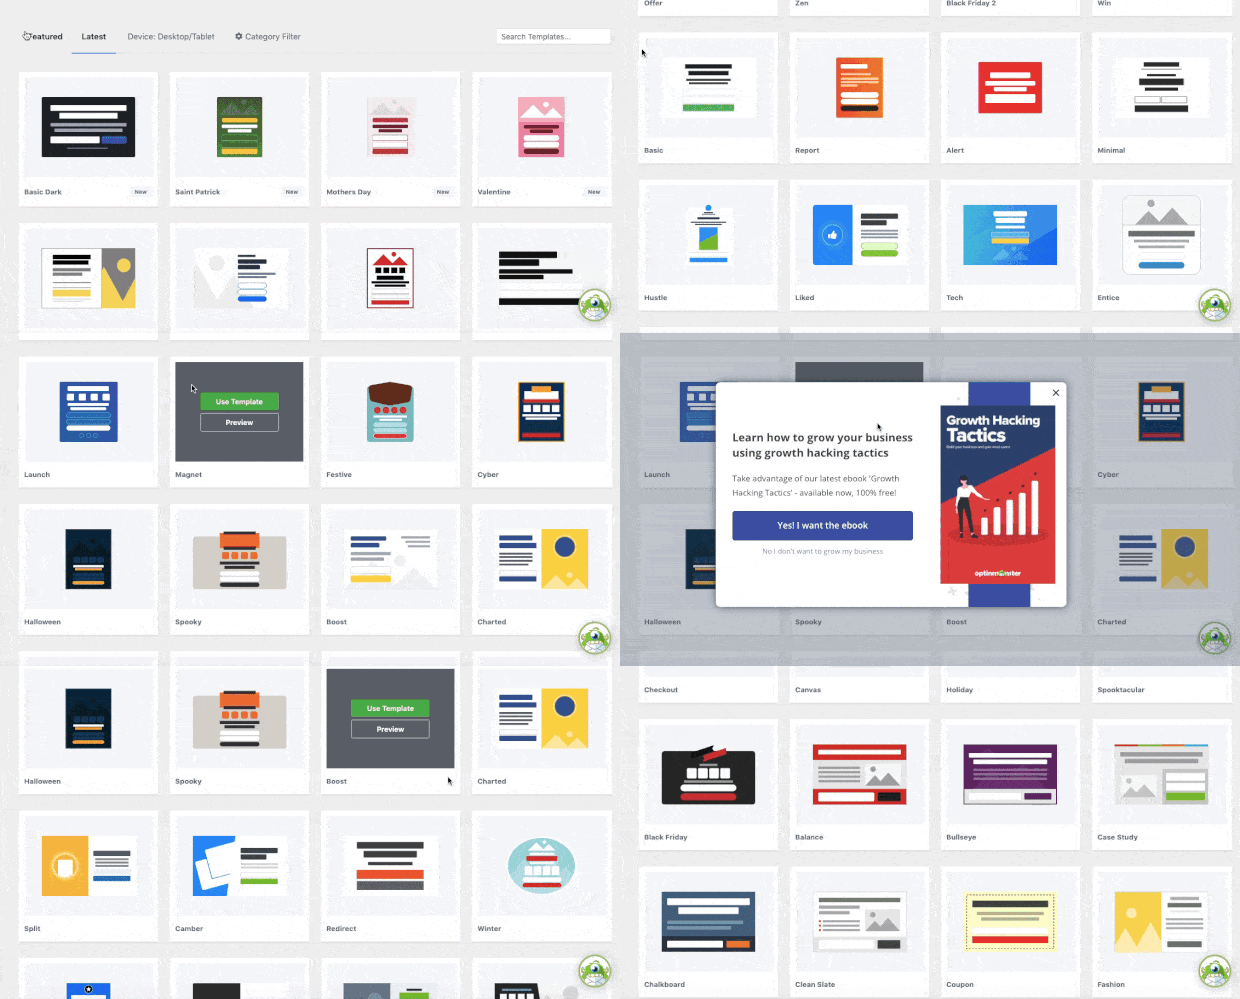
OptinMonster also has 50+ pre-built templates to choose from:
These templates were designed so that, if you’d like, you can use them just as they are.
For those that want to flex that design muscle, the builder will make that fast and easy for you, too.
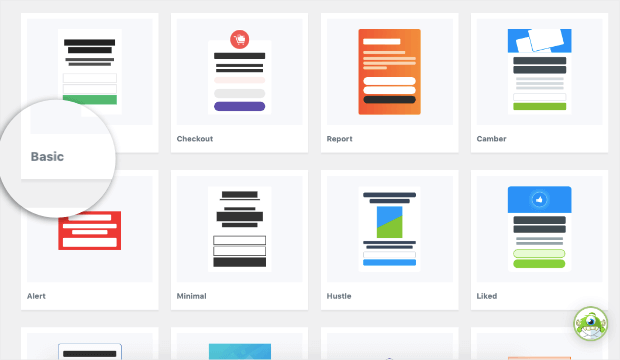
Today, let’s go with the Basic template:
The Basic template is a stripped-down design that really doesn’t need many changes to be effective. Though, it does have a lot of room if you want to experiment with the OptinMonster builder.
In other words, it’s the perfect option for your first campaign.
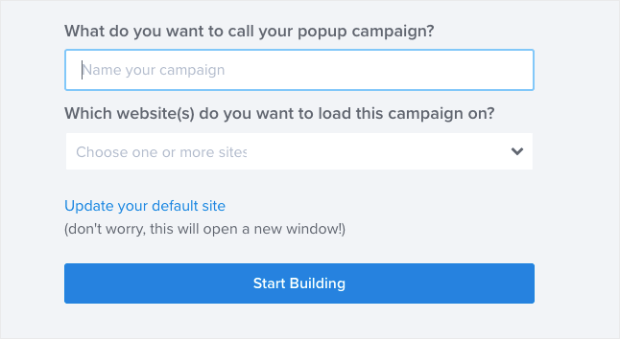
Once you pick your template and design, it’s time to name your campaign and click Start Building:
In the next step, we will go over how to customize your email optin if you’d like.
Step 2: Customize Your Campaign
Now it’s time to customize the design of your email optin campaign. As we already discussed, this could be published just as it is with minor modifications needed.
We highly recommend that you spend a couple of minutes changing the wording and font to fit your brand and tailor the message to your visitors for ultimate results.
The good news is that OptinMonster is a drag and drop editor that makes any changes to the campaign incredibly easy.
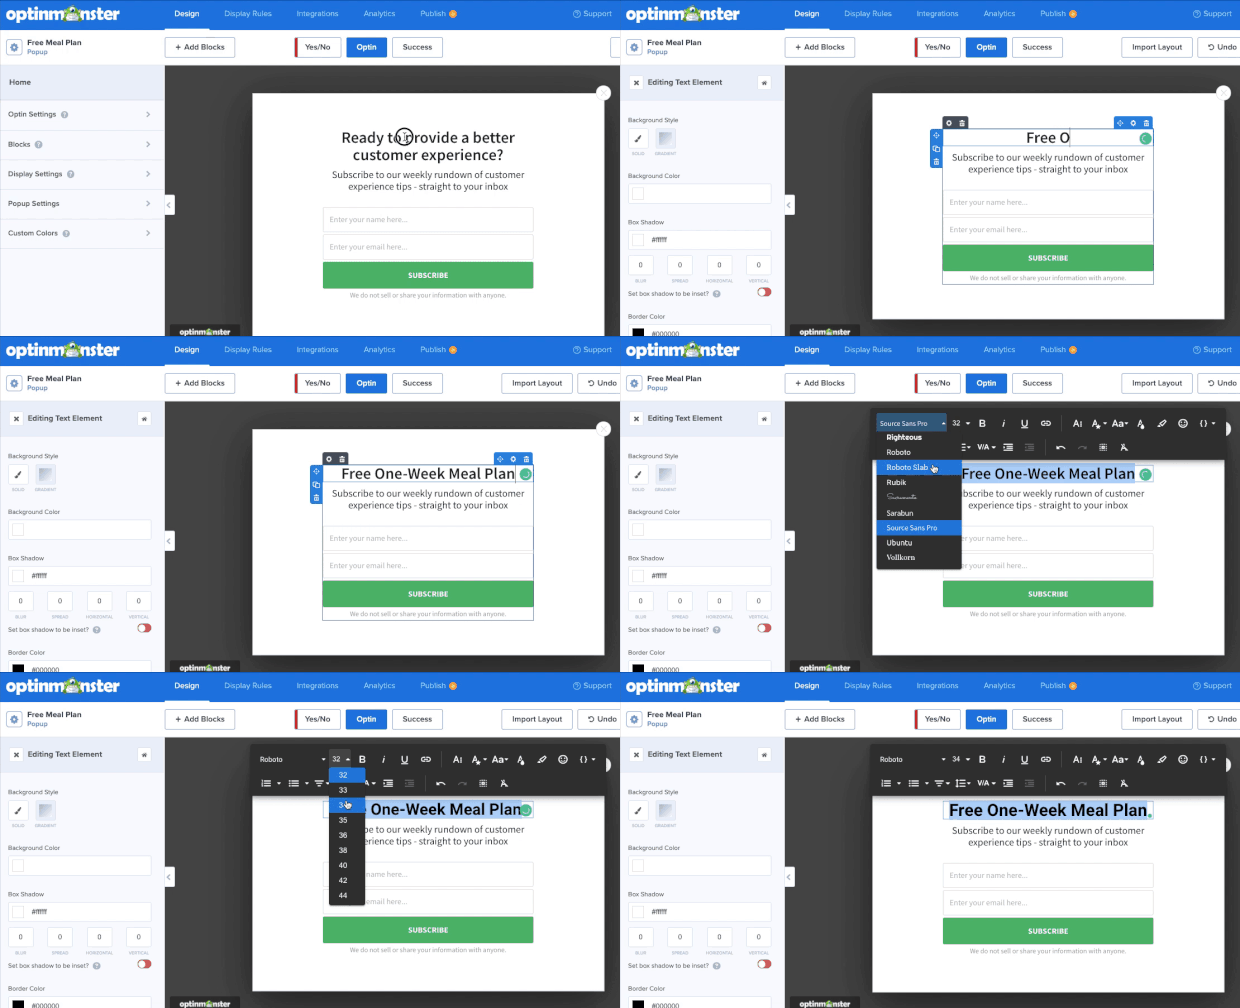
It’s as simple as clicking on what needs changed, then making the edits directly in the builder. For example, let’s change some text.
To do so, simply highlight the text you want to modify and make the changes directly in the builder:
Changing and adding other elements and functions on your email optin is just as easy.
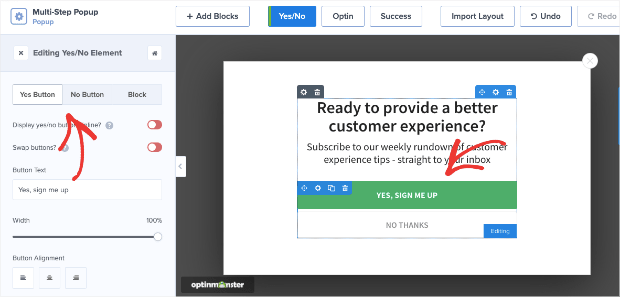
Again, all you have to do is click on or select whatever element needs changing. Then, you will see a menu on the left side of the builder that lets you edit that element.
Let’s change the call to action (CTA) button. We would simply click on it and make the modifications in the menu off to the left side of the screen:
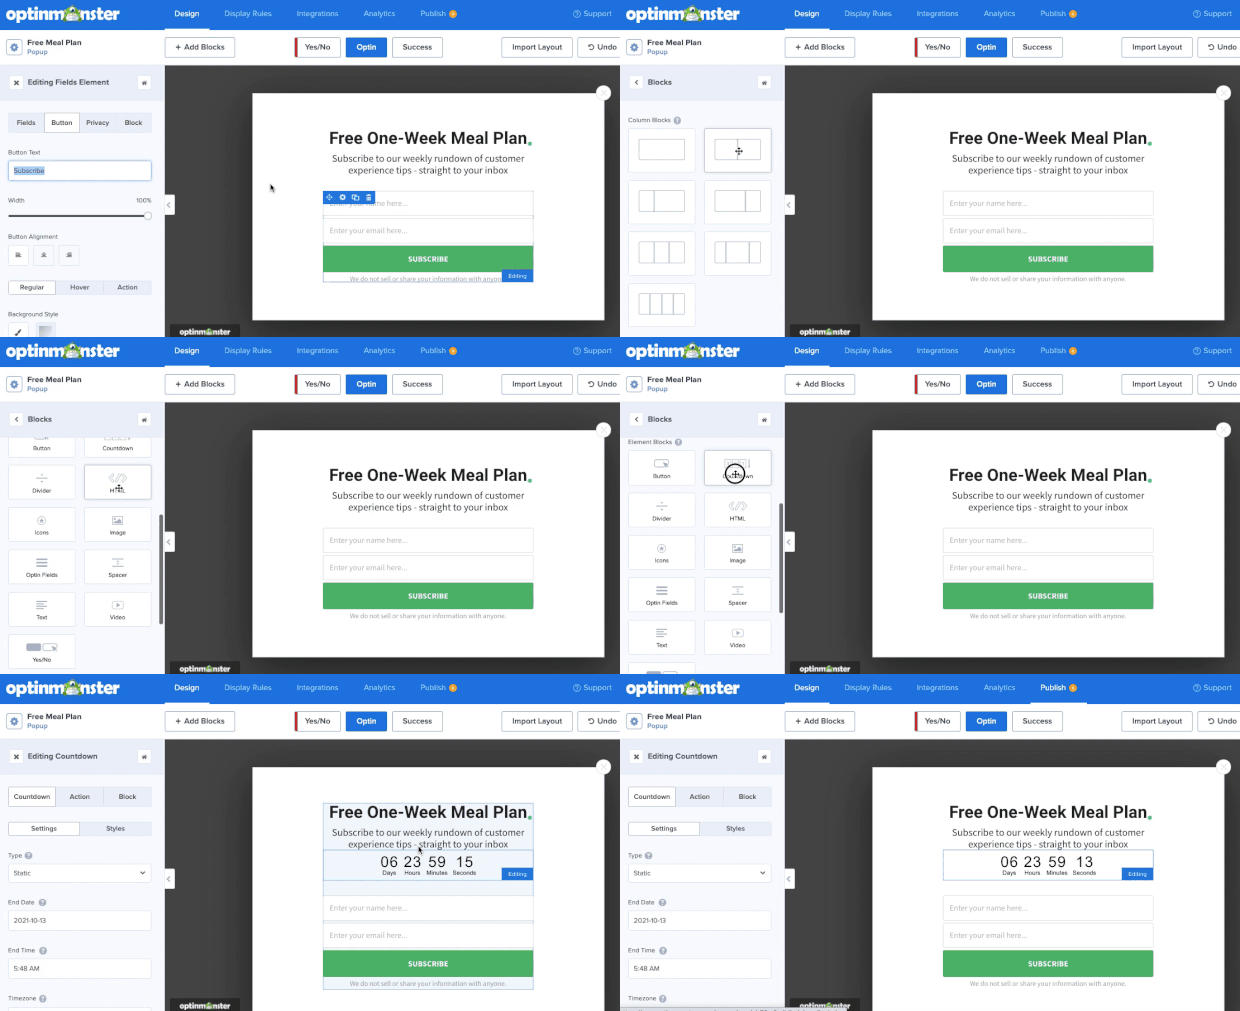
But what if you want to want to add something else to the template? OptinMonster lets you do that with a simple drag and drop. You can add elements like:
- Images
- Videos
- Icons
- Countdown times
- Chatbots
- And more…
These come in something called Blocks. To add a new block, click on + Add Blocks at the top of the builder.
As you can see, the menu on the left has changed and lists all of the boxes you can add to your optin appear. Go ahead and scroll through to find the element you need. Then, just drag and drop it where you’d like it:
The nice thing about blocks is that they will fit neatly into pre-configured areas on the template.
That saves you both time and stress in knowing that it looks great and you don’t need to be a professional coder or designer to create eye-catching campaigns FAST.
You can use these tools to modify your entire campaign.
Remember, you’ll also want to modify your Thank You page for when people actually subscribe. This is a good chance to start the relationship on the right foot, so a personalized “thank you” message is always a safe bet.
Once your campaign is ready, you’ll be able to determine when, where, and to whom it displays.
Let’s get that configured next.
Step 3: Set Up Display Rules
When coming up with your email optin campaign, you probably have a specific audience in mind that you want to target.
How can you get your email optin in front of those people?
OptinMonster comes with powerful display rules that let you target your perfect audience in the perfect place at the perfect time.
This is a critical step in learning how to add email optin to WordPress sites. After all, if your campaign isn’t set up right, you could lose out on valuable leads.
For today’s tutorial, we will be setting up a MonsterLink™ to launch this campaign.
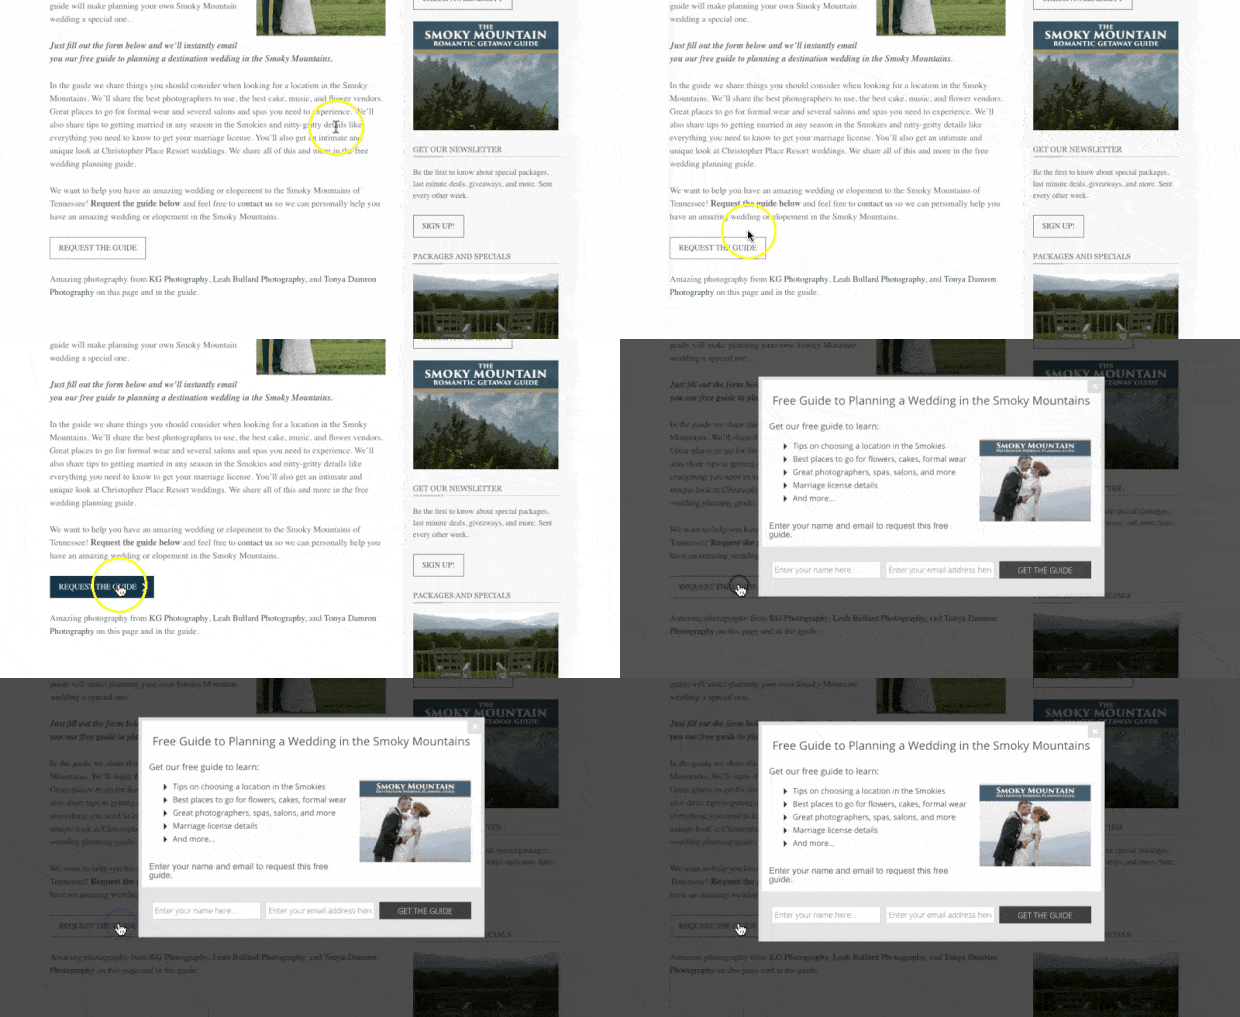
MonsterLinks™ is a 2-step optin technology that has been proven to boost conversions by over 785%.
Here’s what a MonsterLink™ looks like in action:
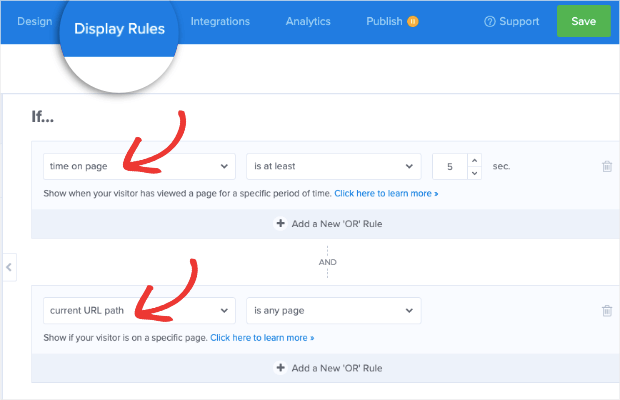
To create your MonsterLink™, click on the Display Rules tab at the top of the builder.
Under the Conditions panel, 2 rules will appear by default:
- Time on page is 5 seconds
- Current URL path is any page
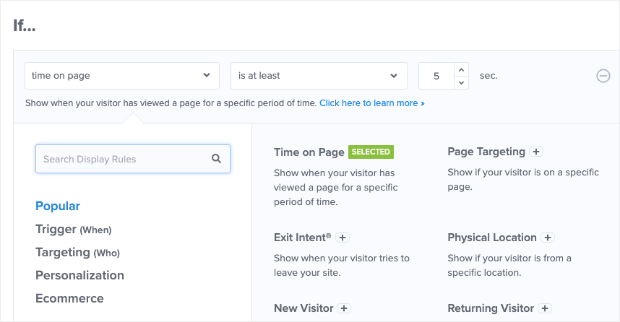
Click on Time on Page to pull up the display rules menu:
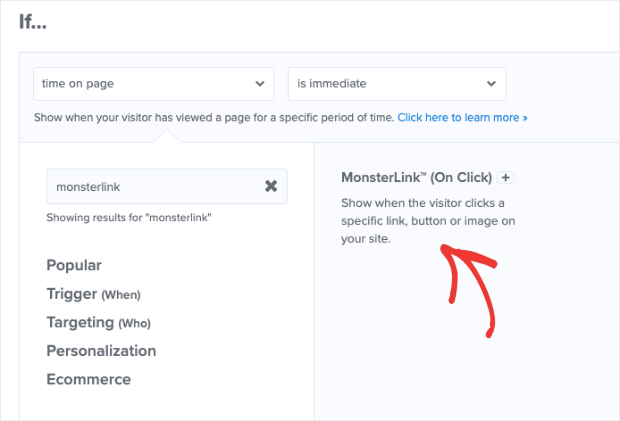
Find and click MonsterLink™:
It’s time to add your MonsterLink™ to your WordPress site.
First, click on the green button that says “Copy MonsterLink™ Code.”
The link is in raw HTML code and will look a little something like this:
<a href=”https://app.monstercampaigns.com/c/kbuldwxvlgmbnymoekkl/” target=”_blank” rel=”noopener noreferrer”>Subscribe Now!</a>
If you are using a modern editor, you’ll only need the URL (the snippet that begins with “https://”):
https://app.monstercampaigns.com/c/kbuldwxvlgmbnymoekkl/
Once you have that, you’ll need to copy and paste that URL the same way you’d attach ANY website to an anchor text or CTA button.
If you need a more detailed walkthrough or some more help, this article will give you more direction on how to use a MonsterLink™.
Now that your optin campaign is ready to launch, we have just one more step to cover before we publish it.
First, we need to tell OptinMonster what to do with those emails it will be collecting from your visitors.
Step 4: Integrate Your ESP
So, what do you do with all of those leads that your email optin campaign collects?
Some people use a third-party Email Service Provider (ESP). If you need help deciding on a provider, check out this helpful resource: The Best Email Service Providers for Small Business.
That said, OptinMonster does have a default option that saves your list called Monster Leads. This will independently store all of your new leads, which you can later import into an email list if you’d like.
For purposes of this email optin for WordPress tutorial, we will just assume you already have an email provider and will teach you to sync it with OptinMonster.
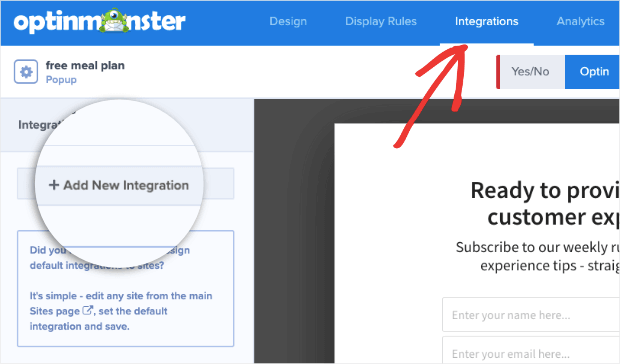
Click on the Integrations tab at the top of the builder.
Then, select + Add New Integration:
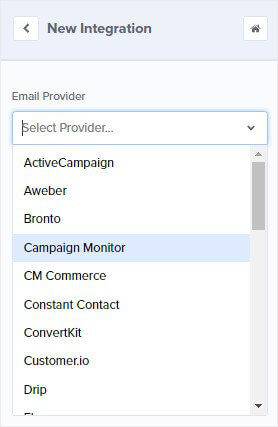
Scroll down until you find your ESP:
OptinMonster will then walk you through how to get your email provider and your email optin campaign connected.
For most providers, all you have to do is copy and paste your API key.
If any other steps are needed, OptinMonster will let you know.
You probably noticed that there are a lot of providers listed in that dropdown menu. But, what happens if your provider isn’t there?
Don’t worry: this article will walk you through how to sync OptinMonster to ANY email provider.
Now, we are ready to launch your campaign.
Step 5: Publish Your Campaign
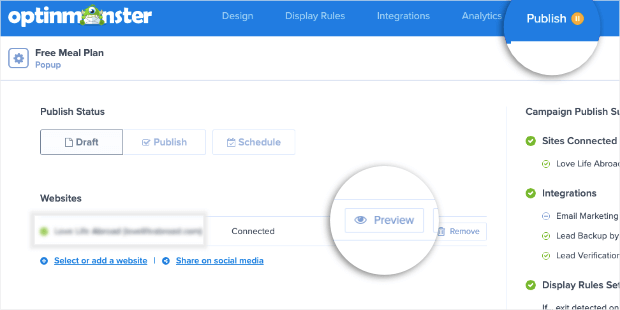
Scroll back up to the top of the editor and click Publish.
Be sure to preview your campaign to make sure it looks how you want it to. Also, take a few seconds to review the Campaign Publish Settings.
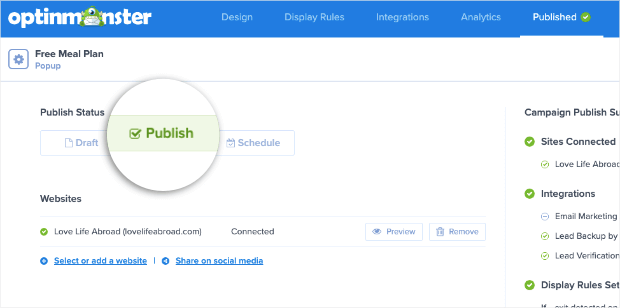
Once you are satisfied with how your email optin looks, go ahead and flip the Publish Status from Draft to Publish:
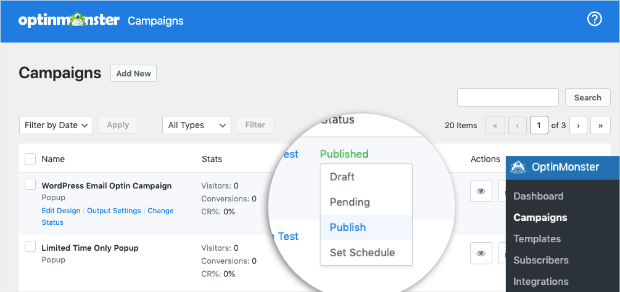
We highly recommend that WordPress users verify their campaign’s status in OptinMonster » Campaigns.
Then, check that the campaign status has switched from Pending to Publish:
Congratulations! You have published your first email optin campaign and now know how to add email optin to WordPress!
Now that you know how to create email optins, get ready to see that leads list a popup subscription button, be prepared to see that leads list explode.
Click below to get started with your 100% risk-free account today:
We hope that you found this tutorial helpful. If you did, you’ll want to check out these other resources:
- How to Create an Email Marketing Funnel in 3 EASY Steps
- Email Popup Examples (& Best Practices) to Explode Your List
- What Is Email Automation? (+31 Tools to Transform Your Business)
These articles will give you the tools you need to take your email marketing efforts to the next level.




Add a Comment