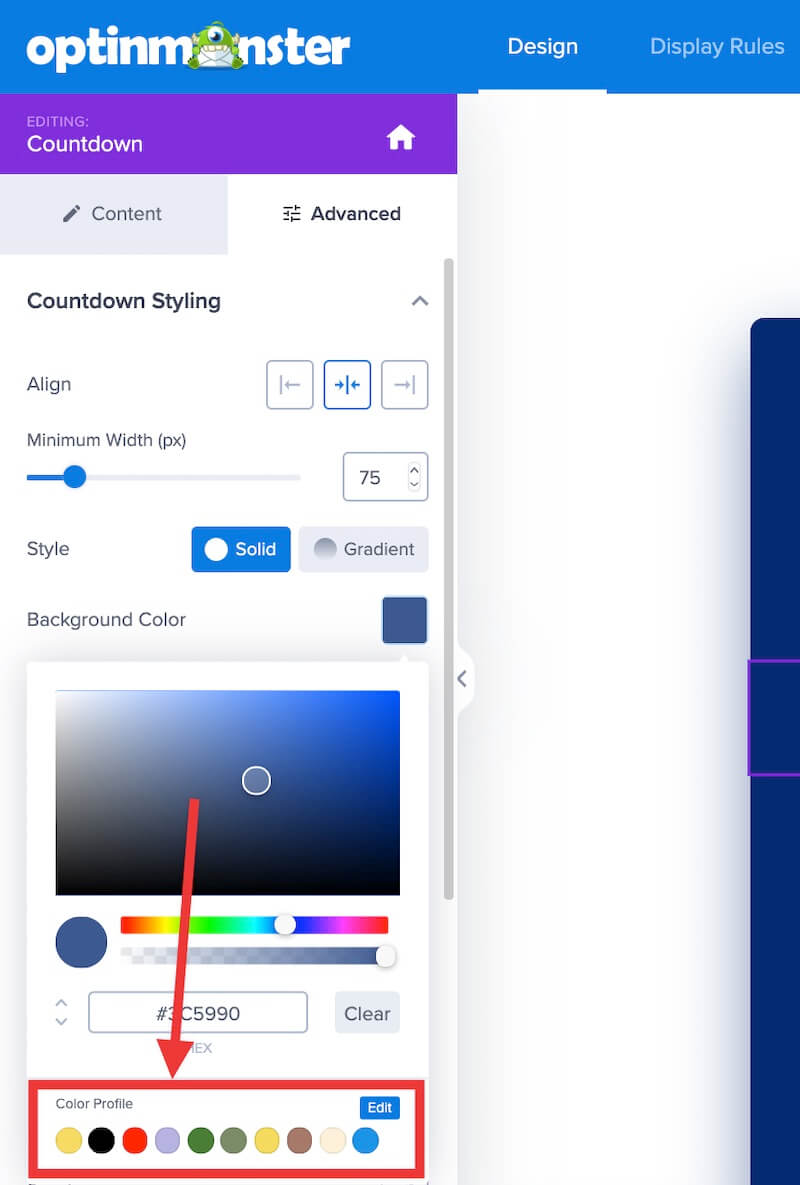
OptinMonster makes it easy to customize the design of your campaigns to match the branding of your site. This includes the ability to create and manage color profiles when editing campaigns.
In this article, you’ll learn how to create and use color profiles in OptinMonster.
Create Color Profile
To create a new color profile, follow these steps:
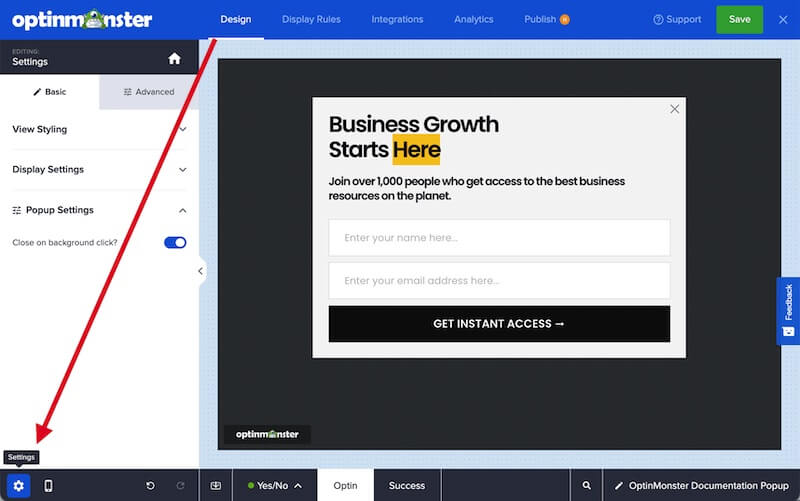
- In the Design view of the campaign builder, select the Settings icon.
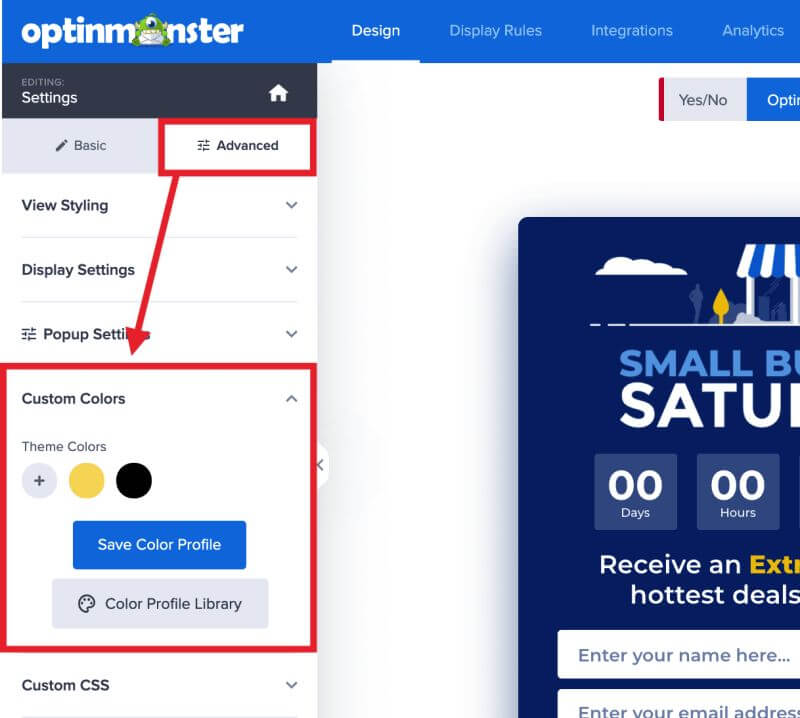
- Next, select the Advanced tab in the sidebar panel and click to expand the Custom Colors section.
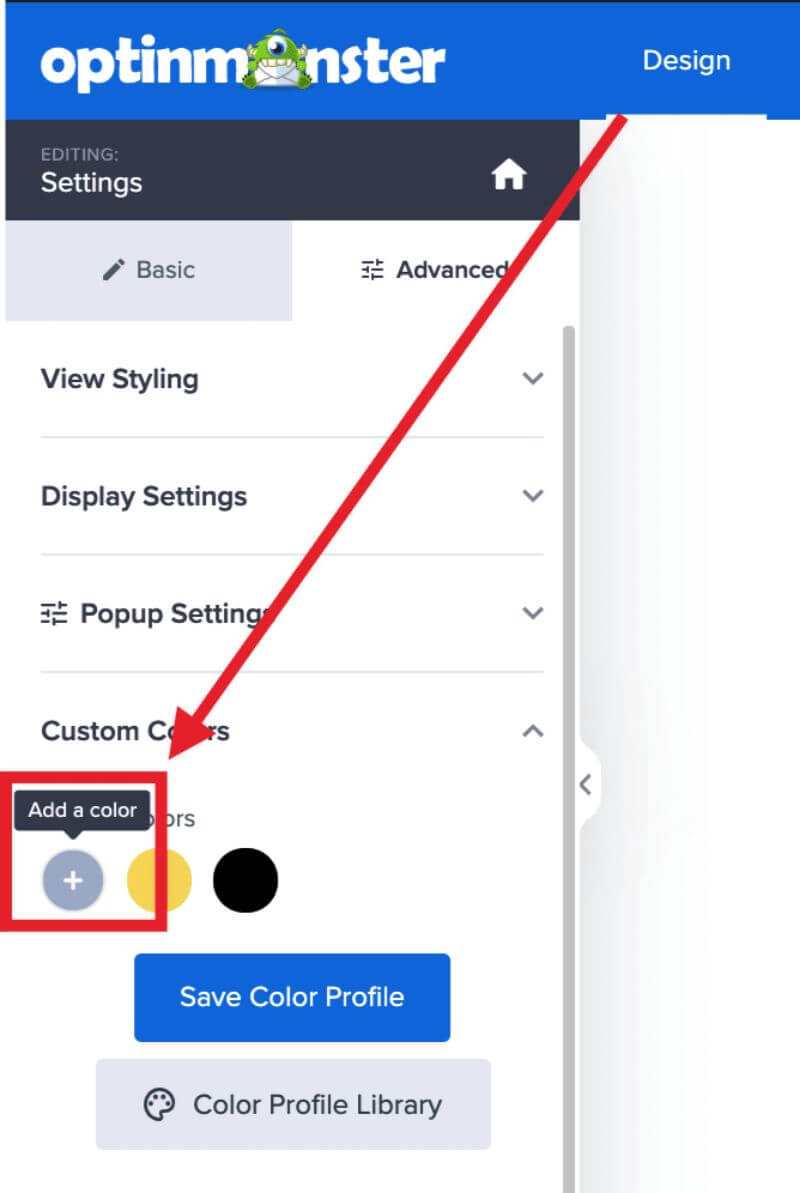
- Select the Plus (+) icon to add a new color.
- A new color swatch will be added automatically. You can edit the color by selecting it.
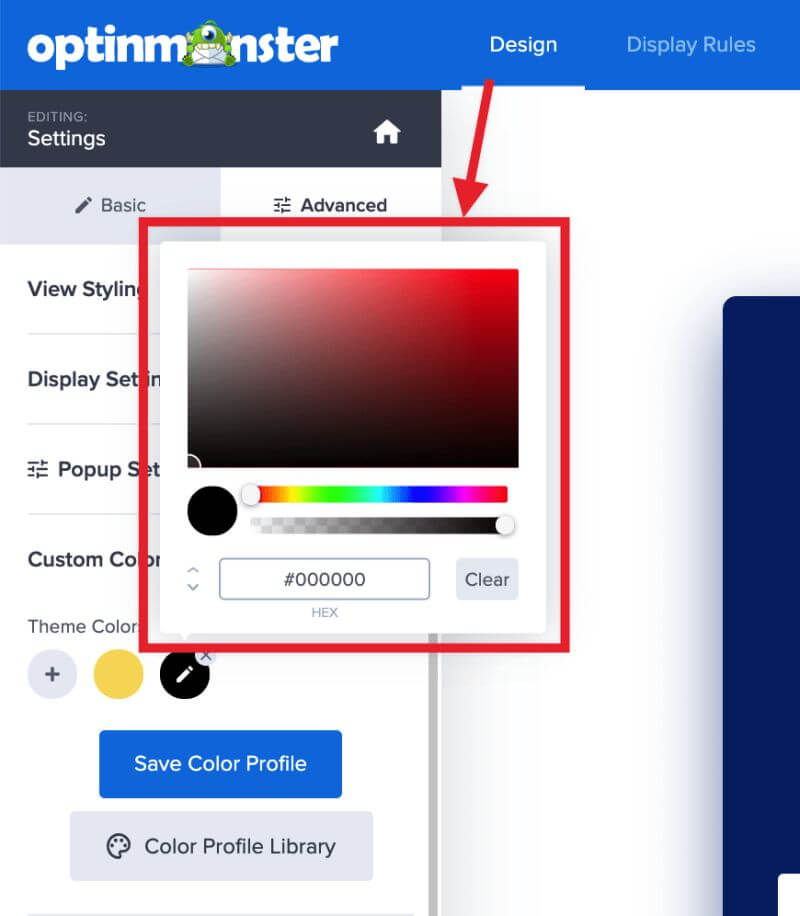
- The color picker will appear for you to customize the color swatch.
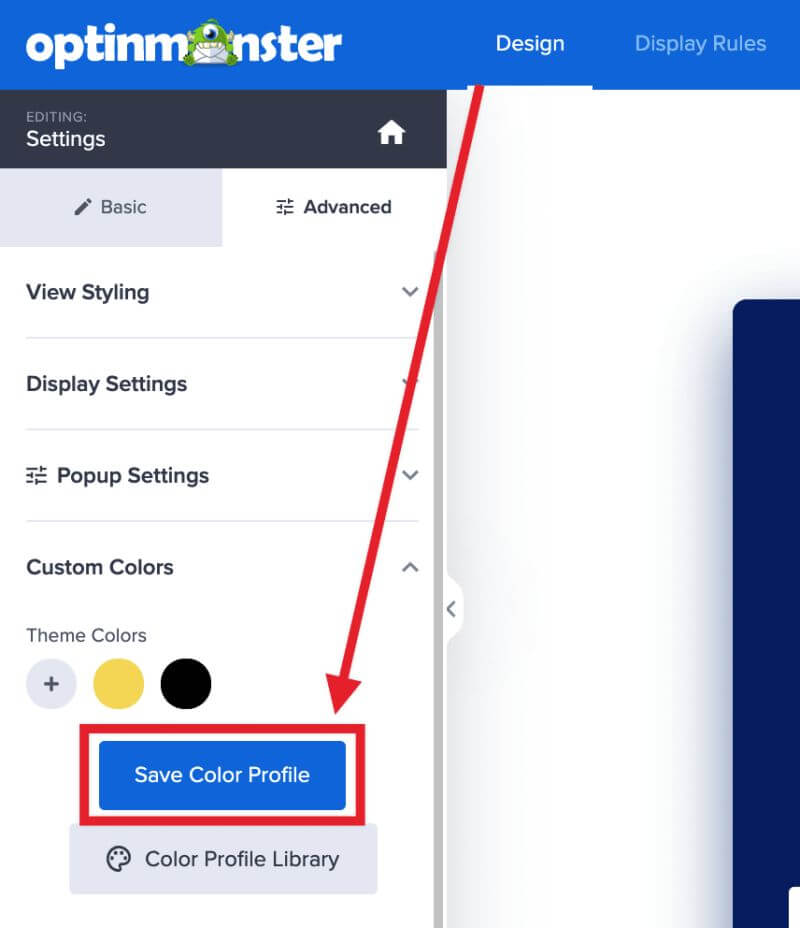
- Once you’ve finished configuring the color profile, you can save it for later use in other campaigns by selecting the Save Color Profile button.
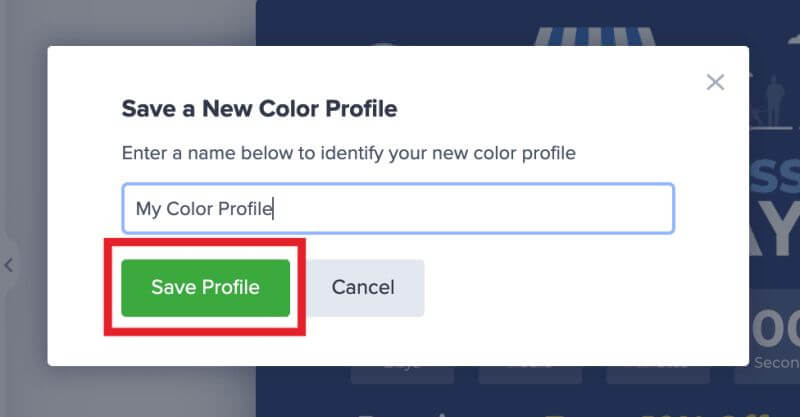
- A popup modal will appear, enter a unique name for your Color Profile then select the Save Color Profile button.
- You can now use this saved Color Profile in other campaigns following the next section of this guide.
Use Color Profile
To use an existing color profile in a new campaign, follow these steps:
- In the Design view of the campaign builder, select the Settings icon.
- Next, select the Advanced tab in the sidebar panel and click to expand the Custom Colors section.
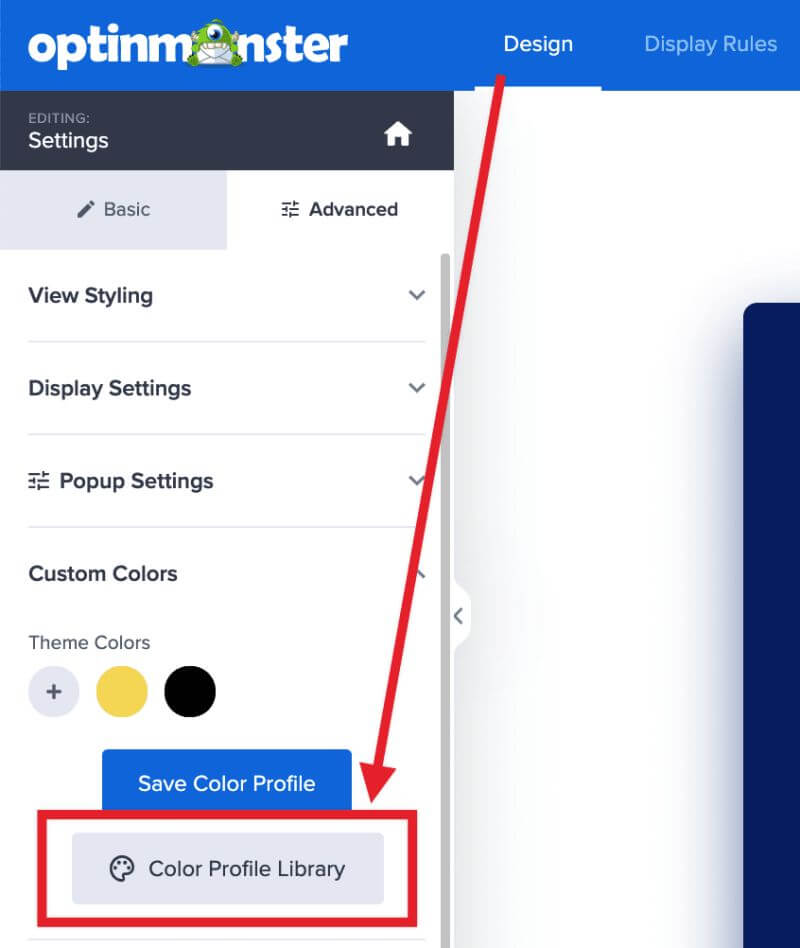
- To load a pre-saved Color Profile into your campaign, select the Color Profile Library button.
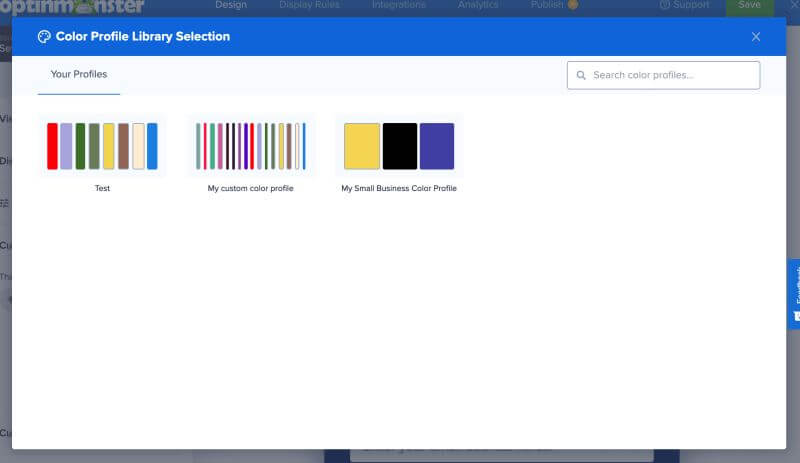
- A modal will open containing all of your account’s saved Color Profiles. You can search for and select the Color Profile you wish to use.
- The swatches from the saved Color Profile will be loaded into the builder for you to use when setting any color using the color picker.

