Are you looking to increase your average order value by offering bundled products?
Bundling is a smart strategy to cross-sell products to increase sales and revenue. You can make it easier for customers to find complimentary products, like toothpaste that a customer will need when they buy a toothbrush.
There are tons of opportunities to increase average order value (AOV) when you offer combined products. But you’ll need a tool to manage product listings, discounts, and shipping.
From this tutorial, you’ll learn how to bundle products in WooCommerce and also how to target customers with these deals to maximize sales and AOV.
Let’s get started.
The BEST Way to Bundle Products in WooCommerce
Bundling products and offering combo deals will encourage shoppers to buy more products in a single order. This has an instant positive impact on your AOV.
The easier you make it for shoppers to find what they’re looking for, the higher your chances of making a sale.
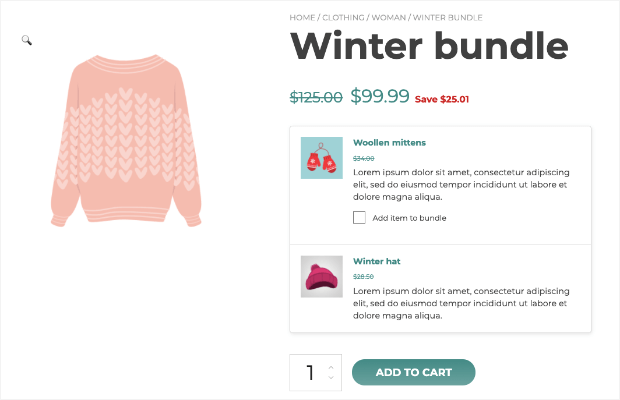
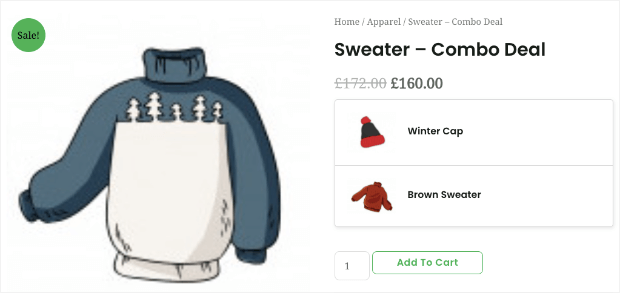
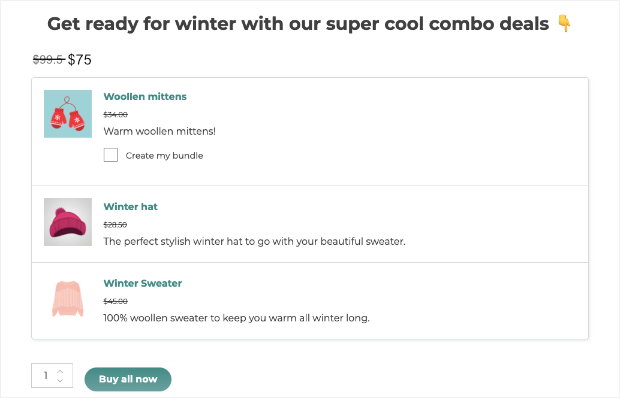
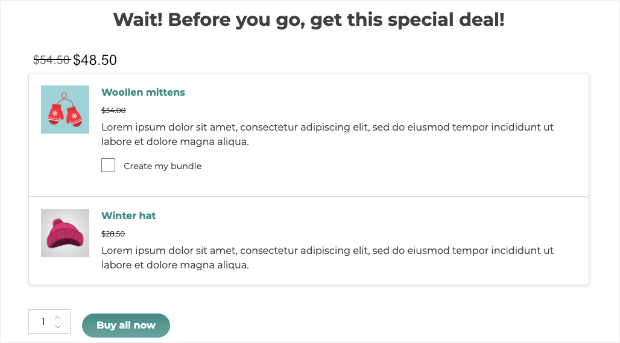
Here’s an example of what a “product bundle” might look like from your WooCommerce store:
The best way to add bundled offers to your site is by using 2 powerful tools:
The YITH WooCommerce Product Bundles plugin lets you create and display bundle product offers for your online store.
You can add unlimited products to the bundle and choose whether to show/hide the product and its details. You can even create a custom description for the product when it’s showcased in a bundle.
This helps increase AOV but it’s limited in terms of maximizing sales. For instance, it doesn’t let you control who sees your combo offer and where it’s displayed.
This means the same bundle offer appears to all customers viewing the product page. This isn’t ideal if you want to get more customers to take the offer.
Instead, you’ll want to display bundled offers dynamically based on the user’s interest and behavior.
This is where OptinMonster comes in:
OptinMonster is a premium WordPress plugin that lets you target customers at the right time and place with offers to maximize AOV and sales.
OptinMonster lets you turn your embedded bundle offer into attention-grabbing popups, inline forms, floating bars, slide-ins, and more.
There are 50+ beautiful templates that you can customize using the drag and drop builder.
Then you can add targeting rules to show your offer at the perfect time when a customer is most likely to respond to the deal. Here are some of the most popular rules:
- Geolocation: Engage with shoppers based on their geographical area or country
- Exit Intent®: Recover abandoning visitors with a combo offer
- Product in Cart: Display offers only when a specific product has been added to cart
- Referral Detection: Show combo deals based on which source or channel a user has come through
- OnSite Retargeting®: Offer special deals to returning customers
- On-Click: Make the offer appear when a user clicks a button, link, or image on your site
These are just to name a few, but there’s a long list of powerful rules you can explore inside the OptinMonster dashboard.
Just take a look at how Skates.co.uk increased daily sales by £2000 with geotargeting, for example.
In a nutshell, with OptinMonster, you’ll get precise control over who sees your bundled product offers, when they see them, and where.
Want to get started with OptinMonster right away? Sign up for your 100% risk-free account below:
Now that you know the 2 tools you’ll need, you can follow the steps below to create stunning high-converting bundle product offers for your shop.
Creating a Product Bundle Offer
To get started, you’ll need to create an account with these tools:
Once you’ve done that, you can get started with creating the bundle product offers on your site.
Step 1: Creating a Product Bundle
When you sign up for YITH WooCommerce Product Bundles plugin, you’ll get a plugin file to download along with a license key.
In your WordPress dashboard, head over to the Plugins » Add New » Upload page and upload the plugin here.
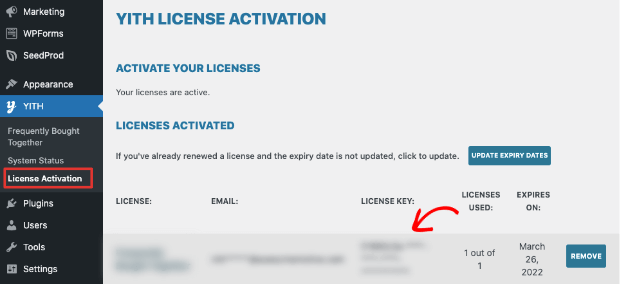
Then activate it and head over to the YITH » License Activation page and enter the license key.
In case you don’t have your license key, you’ll find it under the My Account » License & Downloads section in your YITH account.
Now, the YITH plugin automatically integrates with WooCommerce. This means you can open up a product page and you’ll see the ‘Product Bundle’ option available inside.
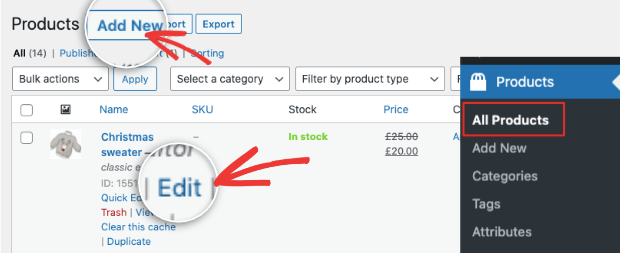
So from your WordPress menu, open the Products » All Products page. Edit the product where you want to add the bundle offer.
If you want to create an entirely new product page to showcase the bundle offer, you can Add New product page instead.
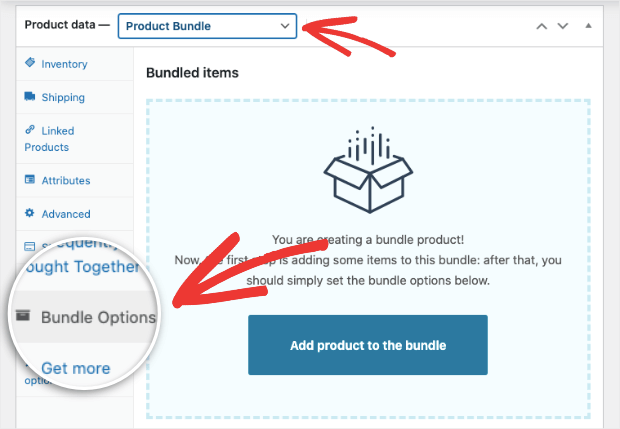
On the product edit screen, scroll down to the Product Data section. From the drop-down menu, select ‘Product Bundle’.
Now you’ll see ‘Bundle Options’ appear in the left menu inside the Product Data section.
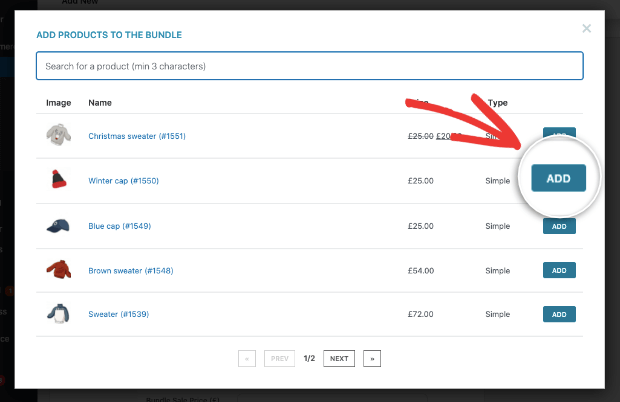
When you click on the ‘Add product to the bundle’ button, a popup will appear with all your products. You can search for the product you want and then add it to the bundle deal.
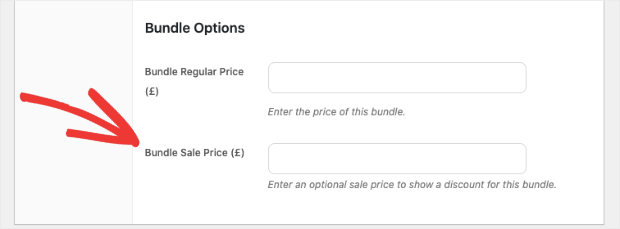
Below this, you’ll get more options to add a regular price and a bundle sale price if you want to offer a discount on the combination.
Once you’ve added these details, you can preview your product page and see that the products appear as a bundle.
Now you’re ready for the next step.
Step 2: Customizing Bundle Campaigns
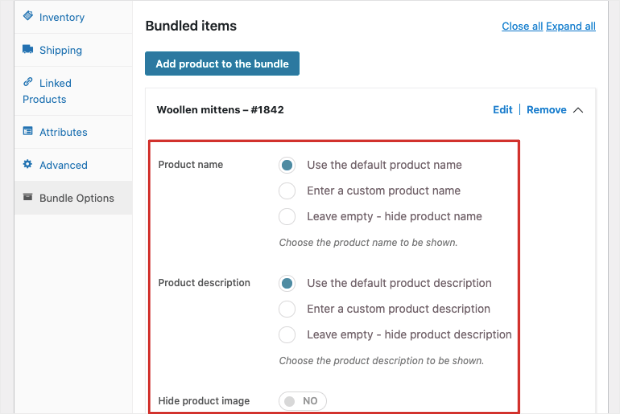
YITH lets you control the way your product bundle appears to customers. You can enter a custom product name and description, and show/hide images in bundle deals.
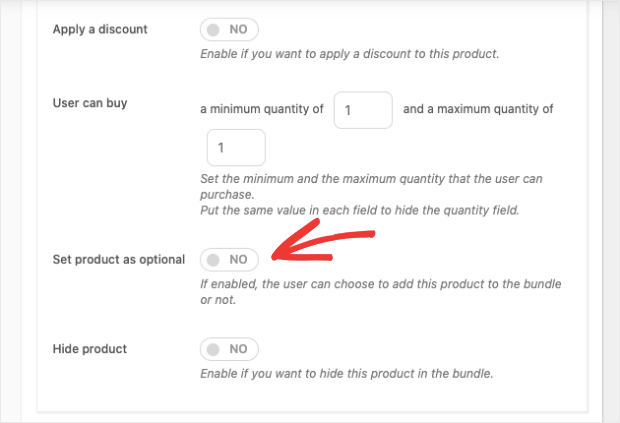
Plus, you can make it optional for the buyer to add the product to the bundle or not.
You’ll also be able to create rules such as the minimum number of products the shopper needs to add to their cart in order to get the bundle discount.
Once you’ve made your changes, Save or Update your product page.
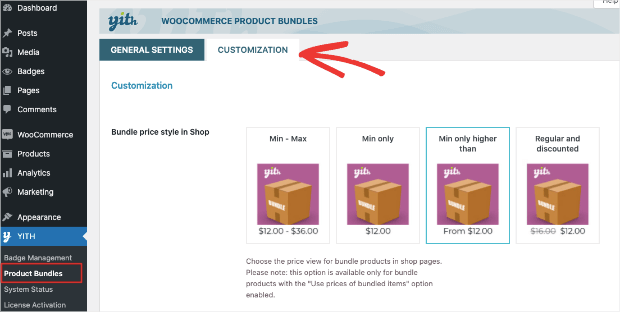
Next, head over to the YITH » Product Bundles page. Here you’ll get more options to configure universal settings for all your product bundles. If you switch to the Customization tab, you can change the bundle style.
You’ll also see options to add:
- Bundle title
- Add to cart label
- Add item to bundle label
- Add item to bundle for %
With that, your bundle deal will appear on the product page. So now shoppers will see more products that they can add to their cart.
While this is a good step forward to increasing AOV, it’s still limited in maximizing sales.
We’ll show you how to target your customers at the right time and place so you can sell the maximum number of products to your customers while they’re shopping on your site.
Step 3: Creating a Targeted Bundle Product Offer
Setting up targeted offers is really simple, and we’ll show you how to do it in less than 5 minutes using OptinMonster.
First, you’ll need to install and activate the OptinMonster plugin on your WordPress site.
If you need more help, see our guide on how to install OptinMonster.
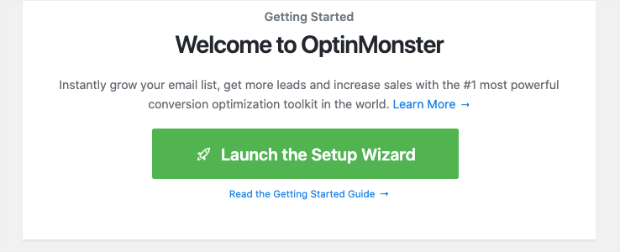
Then you can access OptinMonster from your WordPress dashboard menu where you’ll be prompted to launch the setup wizard.
Simply follow the instructions to connect your OptinMonster account.
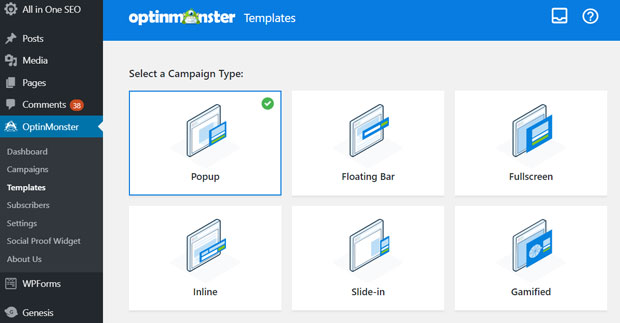
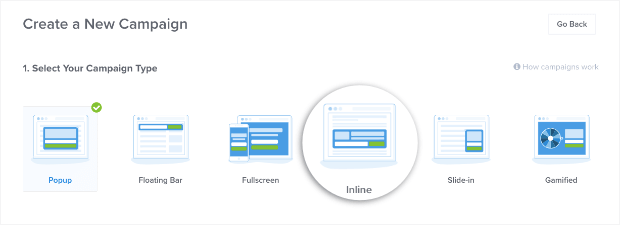
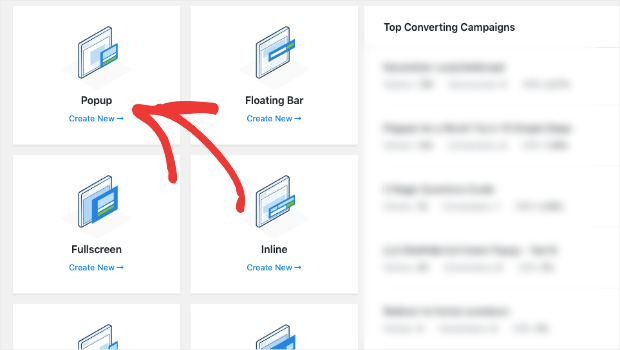
When you’ve completed the setup, head back to the OptinMonster page on your WordPress dashboard. You’ll see a number of campaign options to create a popup, floating bar, fullscreen mat, slide-in, or inline campaign.
In this tutorial, we’ll show you how to set up 2 different campaigns:
1. Creating a Bundle Product Offer Inline Campaign
With an inline campaign, you can add your bundle product offer inside pages and posts. For example, if a customer is reading a blog related to the product, you can display the campaign in between the content like this:
Step 1: Create a New Inline Campaign
To create a campaign like the one above, in your WordPress dashboard, select the Inline campaign type.
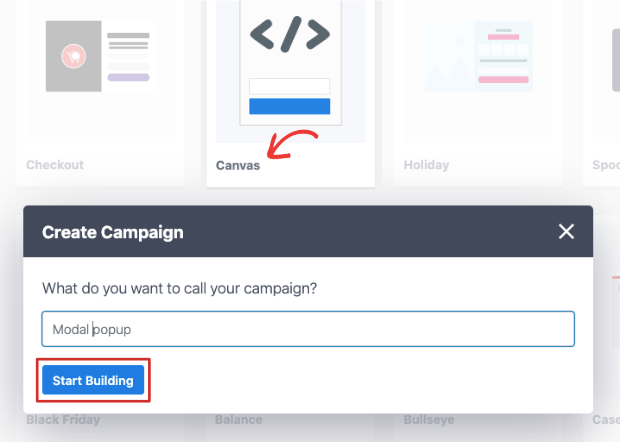
Next, you’ll see all the available templates from OptinMonster. You can explore these templates to find the one you like the best. Today we’ll use the Canvas template that lets you start from scratch.
When you select a template, OptinMonster will ask you to enter a name for your campaign so that you can easily identify it later.
Once you hit the ‘Start Building’ button, the drag and drop campaign builder will open where you can customize the template.
Step 2: Design Inline Product Bundle Offer Campaign
OptinMonster comes with a drag and drop builder that makes it easy for anyone to customize their campaigns.
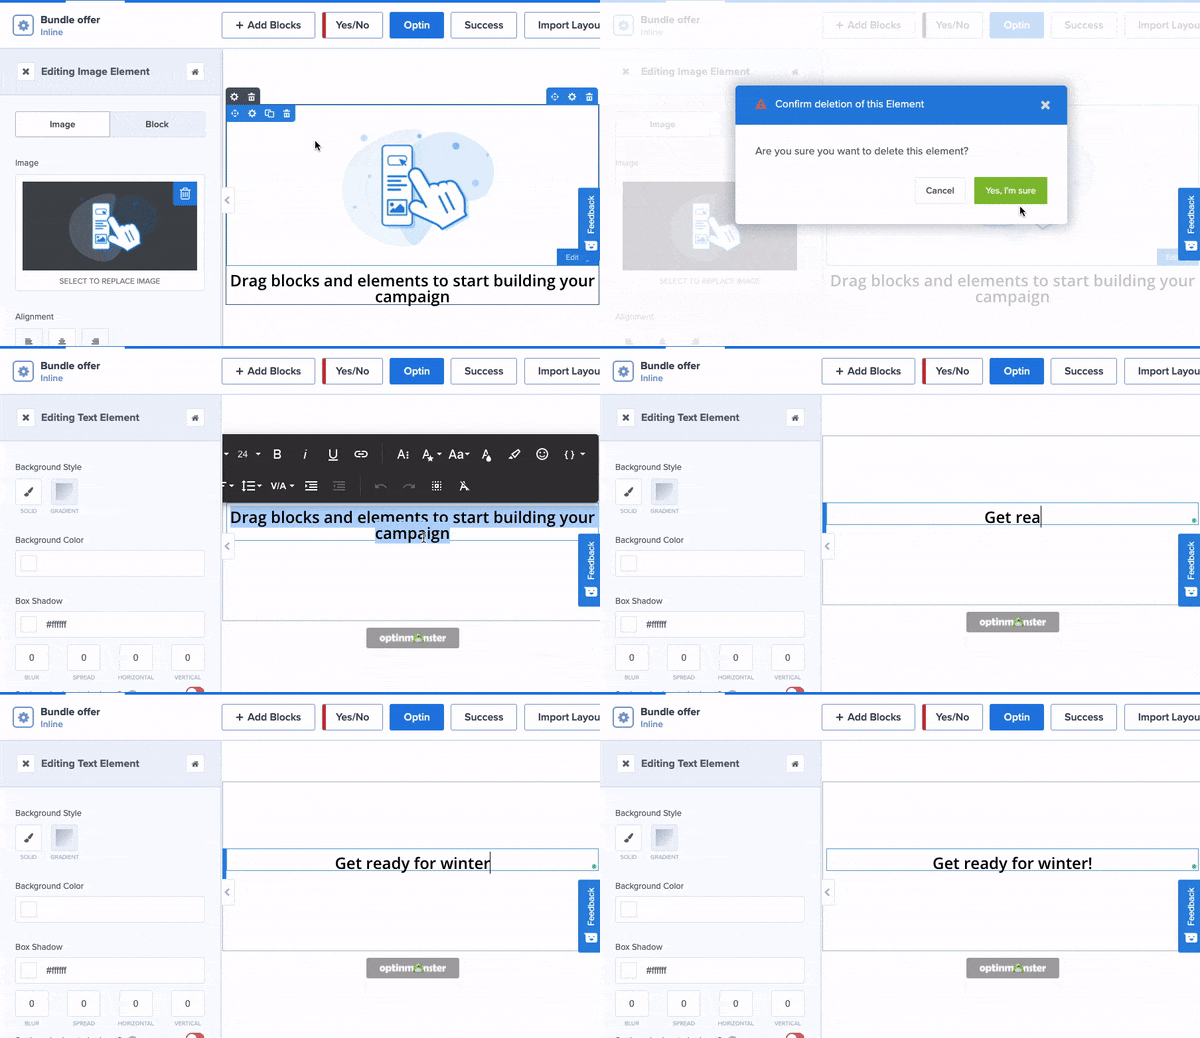
To edit any element, simply select it, and you’ll see options to delete it, move it around, and duplicate it on the left-hand side.
You can start by deleting the image in this template and then adding in your own text to match your offer:
If you want to change the text style such as the font and size, select the text and you’ll see an editor bar appear.
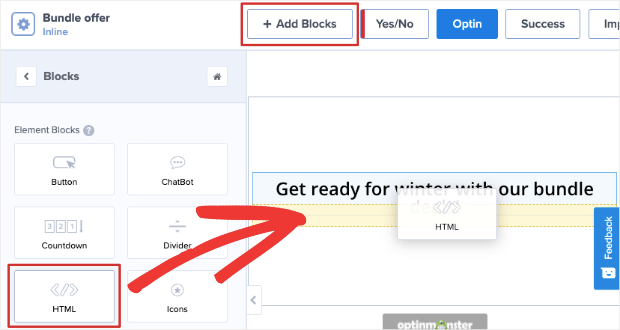
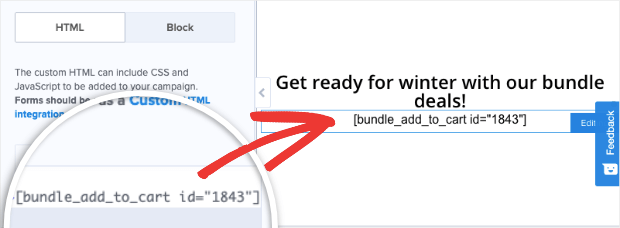
Now to embed the product bundle in the form, select the Add Blocks button and then drag and drop the HTML block into your template.
Inside the HTML block, you’ll need to paste the shortcode for your product ID. In this tutorial, our product ID’s shortcode is: [bundle_add_to_cart id="123"]
Remember to replace the number with the product bundle ID that you want to showcase. You can find this ID under your product listing in the Products » All Products page.
Keep in mind that you’ll only see the shortcode here. We’ll show you how to see a preview of your form with the embedded product later.
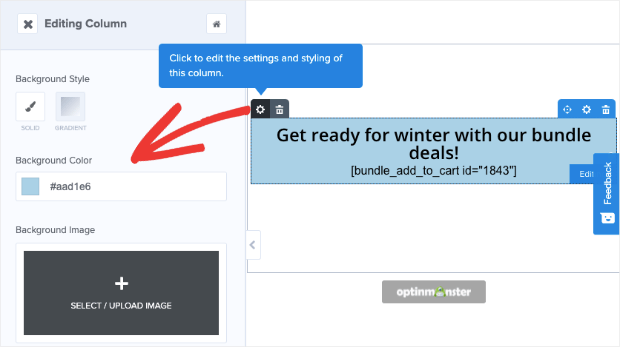
You can customize your campaign further by adding more blocks such as images and icons. When you select any block in the campaign you’ll get more options to change the color, margin, padding, border, and more.
Now your bundled products inline form is ready to be added to your site. We recommend hitting the Save button to store your progress before moving on to the next step.
Step 3: Style the Inline Campaign
OptinMonster campaigns are designed to look great as they are! That said, when you use custom shortcodes, we recommend adding a snippet of Javascript to make sure your campaign looks nice.
If you haven’t used coding before, don’t worry. It’s just a simple copy and paste.
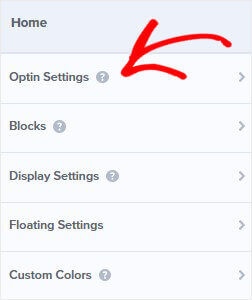
From the OptinMonster’s builder menu on the left, go back to the Home menu and select the Optin Settings tab.
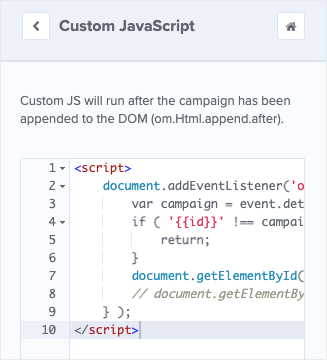
Then open the Custom Javascript page and you’ll see an empty field to paste your own code.
We’ve already create a Javascript snippet for you. Simply copy the code below and paste it inside the ‘script’ tags:
This code will make the campaign look nicer when it’s live. If you’re savvy with Javascript and CSS, you can style the inline campaign even more.
Step 4: Publish Inline Campaign
Now your campaign is ready to be added to any page or post where you want to target specific readers and shoppers.
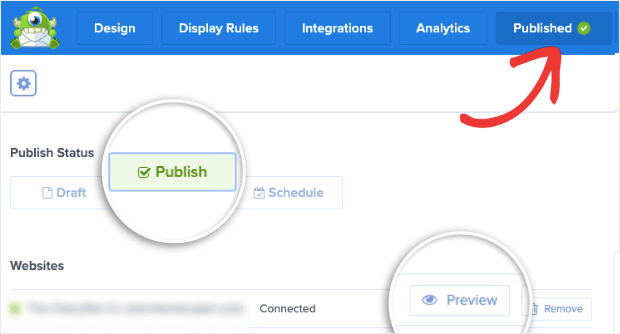
First, switch over to the Publish tab.
Usually, you can use the preview button to see a sample of the campaign, but as we mentioned earlier, this isn’t available for inline campaigns. You’ll be able to preview it only when you embed it in a post or page on your site.
So you can go ahead and set the status of the campaign to ‘Publish‘ like so:
Next, on your WordPress dashboard, access OptinMonster » Campaigns page. Make sure the status here is set to ‘Published‘.
With that, your campaign is activated. Now, you can embed the inline frequently bought together offer on your website.
Step 5: Embed Inline Campaign in Pages and Posts
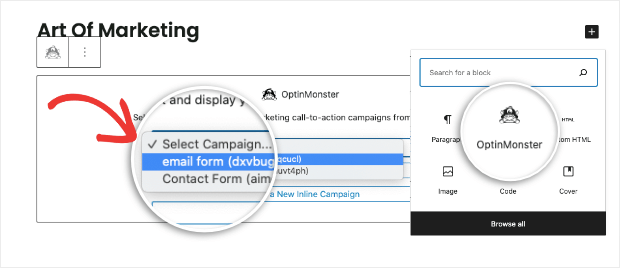
OptinMonster makes everything easier, including embedding the campaign on your site. When you’re editing a WordPress post or page in the Gutenberg editor, you can select the OptinMonster block and choose your campaign:
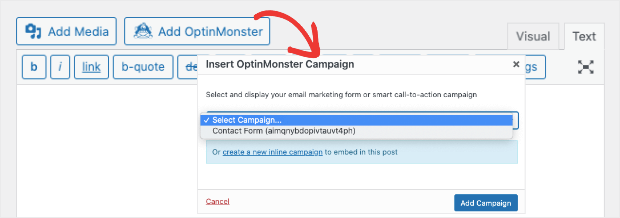
If you’re still using the Classic editor, there’s an OptinMonster button inside that editor as well.
You can select your campaign, and the form will automatically be added to your page or post.
You’ll find the OptinMonster block in all popular builders like Elementor and Beaver Builder.
All that’s left to do is publish the page or post, and the bundled product offer will appear on your site.
With that, you’ve learned how to create a product bundle campaign that you can embed anywhere on your site so you can target shoppers while they are reading your content.
Next, we’ll show you how to target customers with popups that appear at just the right time to entice shoppers to check out and complete their orders.
2. Creating a Bundle Product Offer Popup
In the tutorial below, we’ll create an exit popup that appears when shoppers are abandoning their cart without checking out. We’ll offer them a discount on a bundle deal to give them an incentive to complete their purchase.
Step 1: Create a Popup Campaign
Inside the OptinMonster dashboard, select the Popup campaign to get started.
This will open up a page with all of OptinMonster’s stunning templates. You can explore the templates by previewing them to find one that matches your marketing goals.
Since we’re going to embed a product bundle, we’ll use the Canvas template that lets you start from scratch.
When you select the template, OptinMonster lets you add a name for your popup campaign. This is for internal use so you can identify the campaign easily. Then hit the ‘Start Building‘ button to customize your popup.
Step 2: Design the Product Bundle Popup Campaign
OptinMonster’s builder is incredibly easy for anyone to use. To get started, delete the image in this template and then add in your own text to match your offer:
When you select the text, you’ll see a text editor menu that lets you change the font style, size, and more.
Now to embed the product bundle in the form, select the Add Blocks button and then drag and drop the HTML block into your template.
Inside the HTML block, you’ll need to paste this shortcode with the product ID – [bundle_add_to_cart id="123"]
Remember to replace the number with the product ID that you want to showcase. You can find this ID under your product listing on the Products » All Products page.
You can use the OptinMonster builder to add images, color, backgrounds, and more. We covered how to customize and style an OptinMonster campaign in detail earlier.
When your campaign design is ready, you can add targeting rules to optimize your campaign responses.
Step 3: Set Up Display Rules
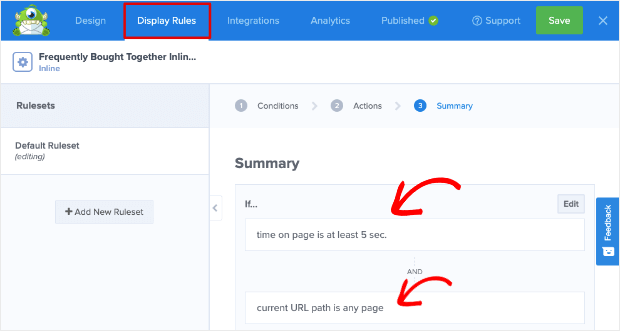
Inside the OptinMonster campaign builder, open the Display Rules tab.
By default, OptinMonster displays the popup to a visitor who spends at least 5 seconds on any page.
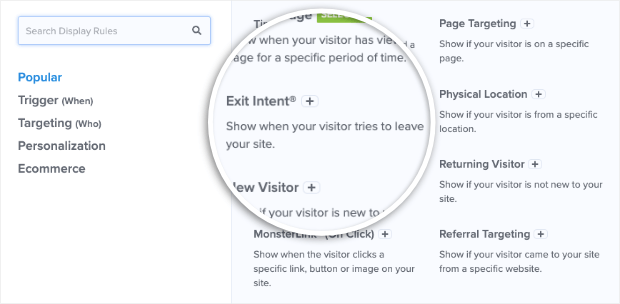
Edit this rule, and you’ll see a long list of campaign triggers and targeting options. Since there are so many, they’re neatly categorized into different sections so you can find what you need easily.
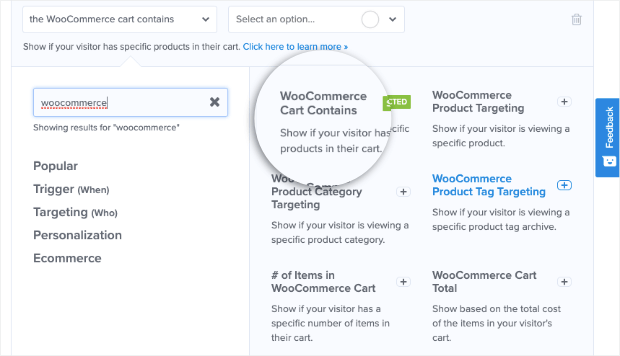
You can even integrate OptinMonster with WooCommerce to add product and cart rules.
Here are a few rules we recommend to increase AOV and conversions on your site:
- Page Targeting – Engage with shoppers that are browsing a specific page
- Product Targeting – Show only when a shopper is viewing a specific product
- Cart Contains – Encourage shoppers to checkout when they add a specific product to their cart
- Number of Items in Cart – Create special offers for a customer that add a specific number of products to their cart
- Product Tag Targeting – Add offers to a specific product tag archive
- Product Category Targeting – Show offers on specific product category pages
For the popup we’re creating today, we’ll display the bundle deal if a customer has added a specific product to cart and is leaving without checking out.
First, select the WooCommerce Cart Contains rule.
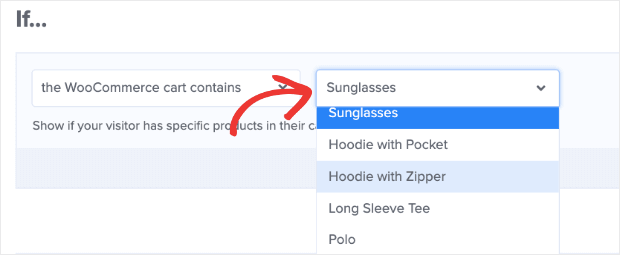
Once you select the rule, you’ll get an option to select the specific product you want to target.
Next, edit the second rule and add an Exit-Intent® rule. This will detect when a shopper is about to close their browser or switch to a different tab.
Adding rules is really as simple as that.
With these 2 rules, your popup will appear when a customer adds a specific product to their cart and is about to leave your website.
You can add more rules if you like to zero in on your target audience.
Now your popup campaign is ready to go live on your site.
Step 4: Publish the Product Bundle Popup
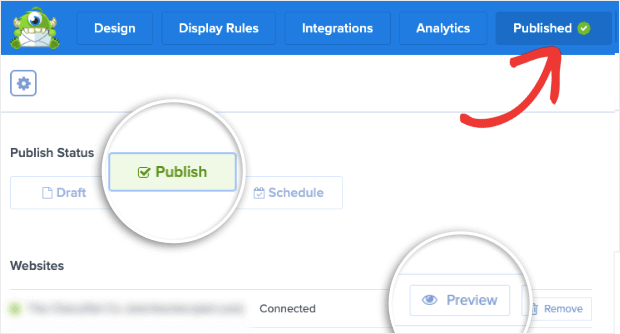
Open the Publish tab in the campaign builder and you’ll see an option to preview your popup.
Since you’ve added a shortcode, you may not see the product bundle appear in the sample campaign.
Change the status of the campaign to ‘Publish’ to make your popup live.
Next, you need to open the OptinMonster » Campaigns page in your WordPress dashboard. Make sure the status here is set to ‘Published’.
Now when you visit your site, you’ll see the popup appear according to the campaign rules you created.
In case you still see the shortcode, you simply need to clear your cache and refresh both your campaign dashboards in your OptinMonster account and inside the WordPress admin. This will make sure the latest changes are reflected in your popup.
That’s the end of our tutorial. With these product bundle campaigns live on your site, you’re all set to increase AOV and sales.
If you haven’t signed up for OptinMonster, what are you waiting for? Get your 100% risk-free OptinMonster account below:
We hoped you found this tutorial helpful. You may also want to see our tutorial on how to create a frequently bought together offer to increase AOV further.
For more ways to boost conversions and sales, check out these posts:
- Boost eCommerce Conversions With Downselling
- Best WordPress eCommerce Plugins to Build & Grow Your Business
- Increase Your Mobile Conversion Rate (11 Proven Methods)
These posts will give you more tools and resources to grow your online store faster.







Add a Comment