Are you looking for ways to integrate your Shopify store with your Mailchimp account?
Mailchimp is one of the most popular email service providers (ESPs) that lets you send automated campaigns at an affordable price.
However, they recently discontinued their Shopify integration so you’ll need to find other ways to connect your accounts.
In this guide, you’ll learn the easiest and best way to connect your Shopify store to your Mailchimp account. This method is not only fast but it also lets you grow your email list, improves engagement, and boosts sales.
Before we dive in though, let’s see why we chose our method and how it compares to other options out there.
The BEST Way to Sync Shopify to Mailchimp
There are a few apps available in the Shopify app store that let you connect your store to a Mailchimp account.
For instance, there’s ShopSync that lets you integrate the 2 platforms, and it will even import all your store info into your Mailchimp accounts (such as customers, orders, and products).
But there’s a huge downside to this kind of connection.
If an existing email subscriber buys something from your store, Shopify adds them as a ‘transactional only’ customer.
This means going forward, these subscribers will receive only transactional emails such as order confirmations and delivery updates.
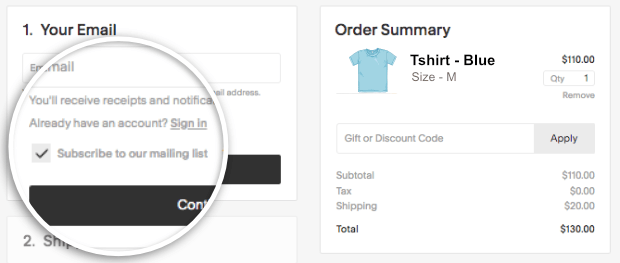
Plus, if a returning customer does not opt into marketing emails each time they purchase something, Shopify will automatically tag them as ‘transactional’ and unsubscribe them from marketing emails.
What this means for you is a pile of administrative work where you’ll need to manually re-add contacts to your marketing email list.
Aside from that, these apps don’t have features like sign-up forms and lead generation campaigns to get more email subscribers and target customers to increase sales.
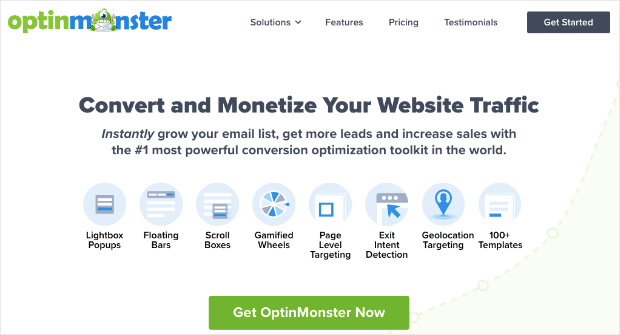
Our OptinMonster app overcomes these challenges and is packed with powerful lead generation features.
OptinMonster is hands down the #1 lead generation tool for Shopify.
It lets you connect to Mailchimp in just a few clicks. The seamless integration happens behind the scenes without any technical work on your end.
Once you’ve connected OptinMonster to Mailchimp, it will automatically send all leads collected on your Shopify site to your Mailchimp contact list.
You can then trigger automated emails to new subscribers to welcome them to your brand.
Also, OptinMonster lets you tag your subscribers so that they’re segmented right from the start.
This means you can organize the leads you collect based on what they signed up for, like your newsletter, webinar, or other marketing campaigns.
That means you can be sure the subscriber gets relevant emails from you.
OptinMonster also comes with a really cool lead verification addon called TruLead®.
With TruLead®, OptinMonster will automatically:
- block spam entries
- block bad bots
- auto-fix common email address spelling errors
- block free or temp email addresses
You can be sure only genuine email addresses are sent to your Mailchimp contact list.
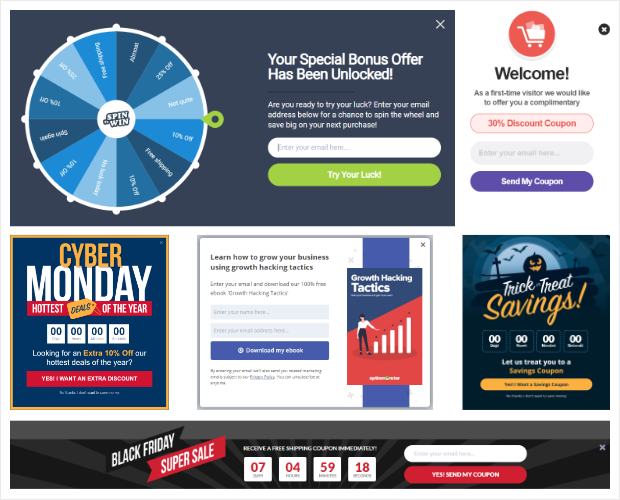
Now here’s where OptinMonster’s features get really interesting: to maximize leads from your Shopify store, OptinMonster lets you create all kinds of campaigns like popups, floating bars, slide-ins, fullscreen mats, inline forms, gamified wheels, and more.
You can choose from 50+ beautiful premade templates to match your marketing goals like holiday sales, lead magnet offers, and limited-period discounts.
OptinMonster comes with a beginner-friendly drag and drop builder that lets you customize your designs in a matter of minutes.
But the best part about OptinMonster is its powerful targeting features to show your campaigns at the right time, in the right places, and to just the right people.
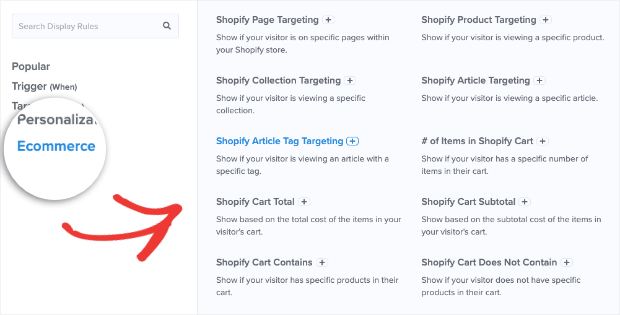
There are targeting rules that are designed just for Shopify stores, too. This means you can target customers based on:
- what actions they take on your site
- where they are located
- what products they show interest in
- which page they’re viewing
- whether they are a new or returning visitor
…and much more.
So, for example, using OptinMonster’s Exit-Intent® technology, you can detect when visitors are about to leave your site and show them a campaign to try to convert them before they leave.
Exit-Intent is proven to be so powerful that Crossrope exploded their list 900% each month!
Ready to seamlessly connect your Shopify store to Mailchimp? Sign up for your 100% risk-free OptinMonster account below:
Now we’ll show you just how easy it is to connect Shopify and Mailchimp using OptinMonster. We’ll also explore OptinMonster’s powerful features, so you can make the most of the app and skyrocket your leads and sales.
Connecting Shopify to Mailchimp
Step 1: Install and Activate OptinMonster
To get started, you’ll want to sign up for an OptinMonster account.
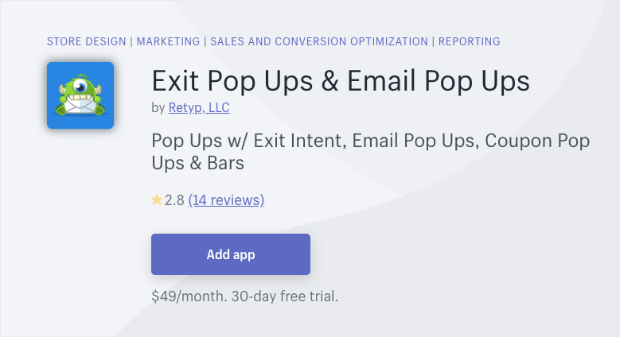
Next, install the OptinMonster app on your site from the Shopify app store.
Make sure you’re signed in to your Optinmonster account in the same browser window while installing the app. OptinMonster will auto-detect your account and sync it to your store.
For more help on using the OptinMonster app for Shopify, follow our guide: How to Integrate OptinMonster with Shopify.
Now you’re ready to hook up OptinMonster to Mailchimp.
Step 2: Sync OptinMonster to Mailchimp
Once you’re signed up, you’ll have access to the OptinMonster dashboard. Here, you’ll see options to create a new campaign, view your existing campaigns, and more.
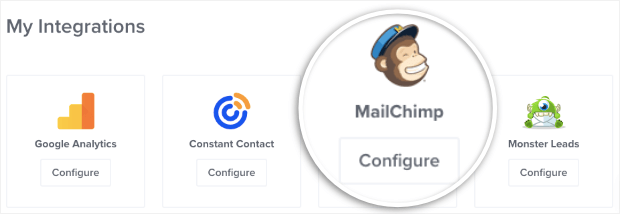
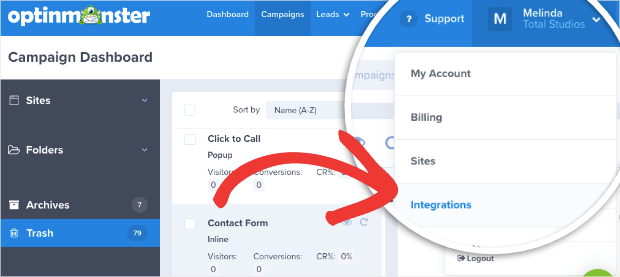
Navigate to your account name at the top-right corner of the screen, open the dropdown menu, and select the Integrations tab.
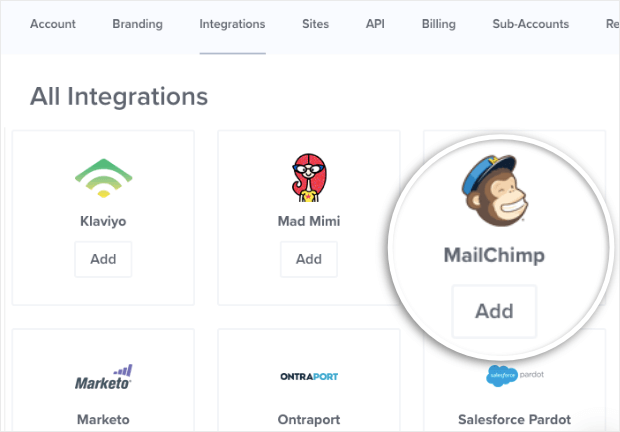
You’ll see options to integrate with Google Analytics, popular email service providers, and other marketing platforms.
Find Mailchimp and click the ‘Add‘ button to select it.
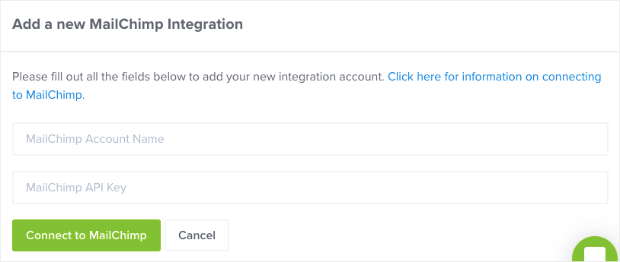
You’ll see a popup to add an account name and API key.
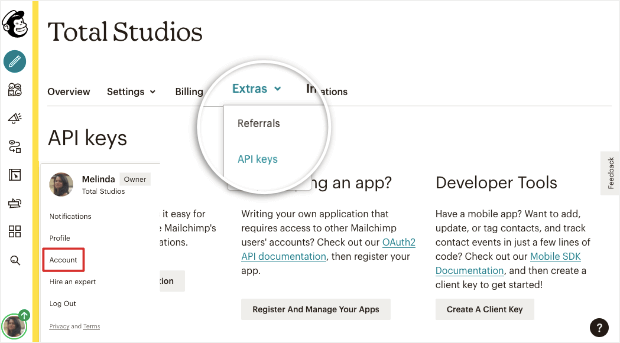
The account name is only for internal purposes so that you can recognize the connection. If you don’t have your Mailchimp API key, you can find it in your Mailchimp account.
Open your profile icon at the bottom left corner of the screen.
Select the Account » Extras » API keys tab.
You can generate a new API key here and copy/paste it into the OptinMonster integration page.
Once you fill up both the fields, click on the ‘Connect to Mailchimp‘ button.
That’s it! Your Shopify store is successfully connected to Mailchimp now.
With this integration, all leads collected from your store will be added to your Mailchimp contact list.
Next, we’ll show you how to use this integration to grow your subscriber list and improve sales and conversions. We’ll also show you how to segment your leads and add them to relevant contact lists.
Using OptinMonster to Explode Your List
Step 1: Creating a New OptinMonster Campaign
In the OptinMonster dashboard, click on the ‘Create New Campaign‘ button.
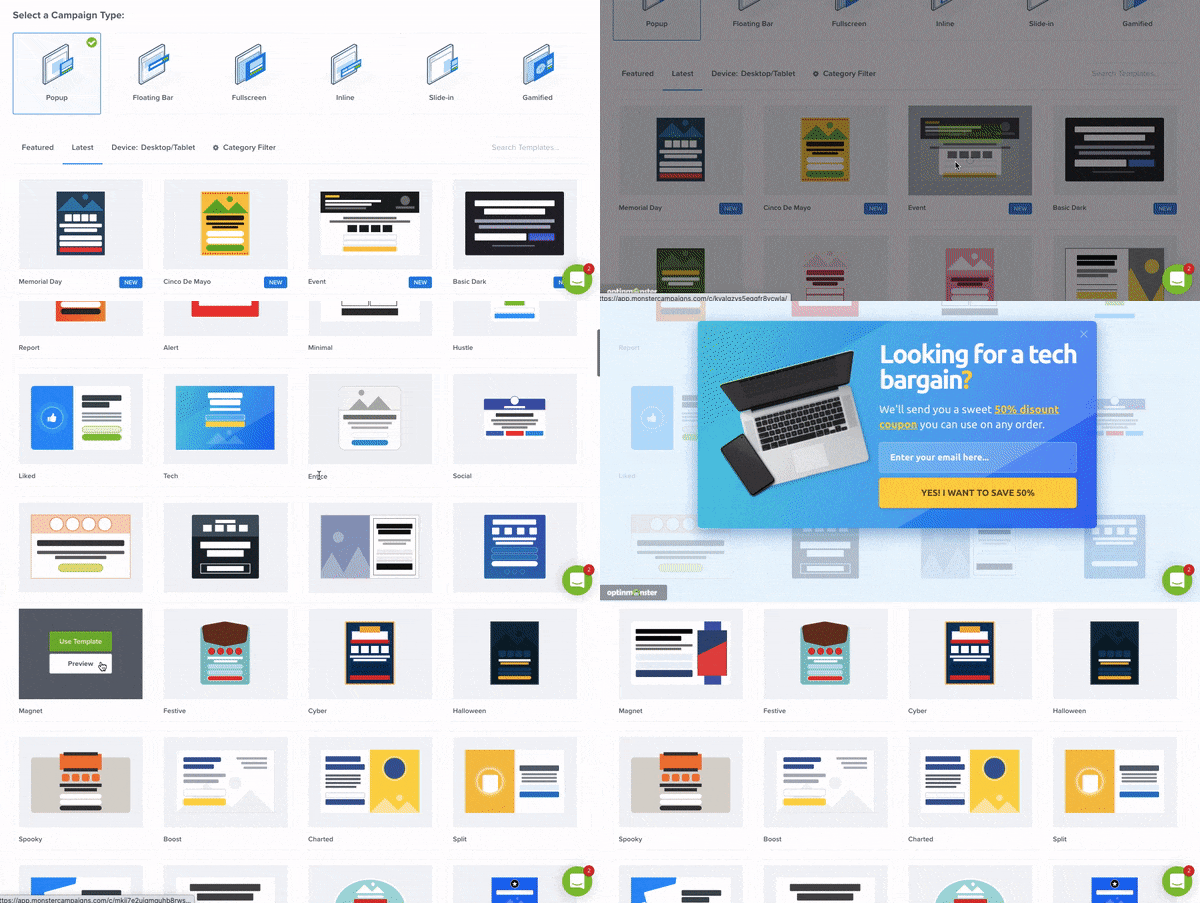
This will open up a page where you can select a campaign type and template.
OptinMonster lets you create lightbox popups, floating bars, inline forms, slide-ins, gamified wheels, and more.
Once you select your campaign type, you can explore the templates below. Hover over any template and you’ll see options to preview it or select it.
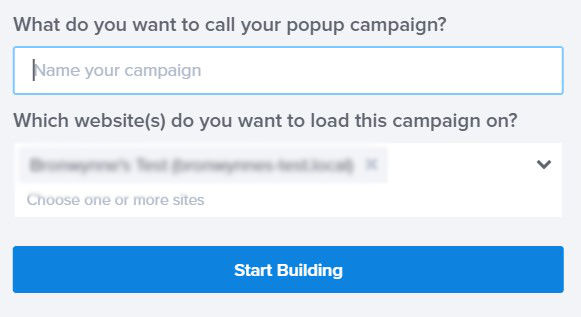
When you select a template, OptinMonster will ask you to name your campaign, so you can easily find it among all the campaigns you create.
Click on the ‘Start Building‘ button to enter the OptinMonster campaign builder where you can customize your design.
Step 2: Customizing the OptinMonster Campaign
OptinMonster’s templates are ready to use out of the box. However, you may want to change the text, colors, and add your own image/logo to match your brand and marketing goals.
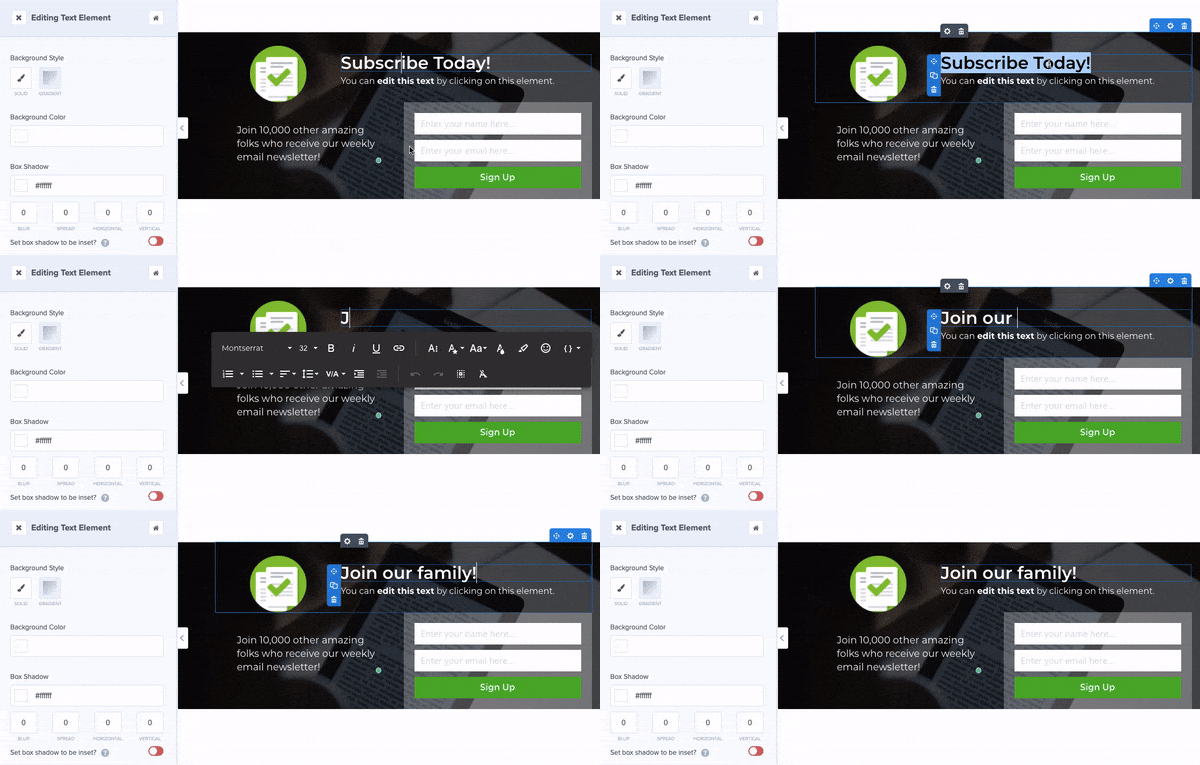
OptinMonster makes it incredibly easy to customize the template. The campaign is made up of blocks, so you can select any block to edit it.
For instance, if you want to change the text, simply select it and type in your own. And when you select all the text, you’ll see a text editor with options to change the font family, font size, color, alignment, and much more.
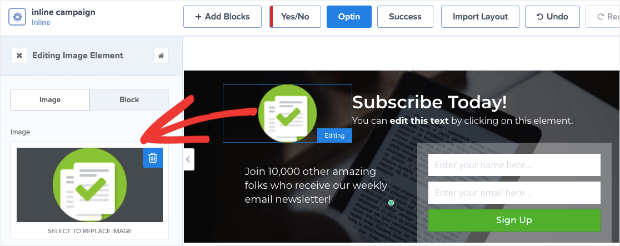
Next, to add your own image or logo, you can select the existing image and upload your own.
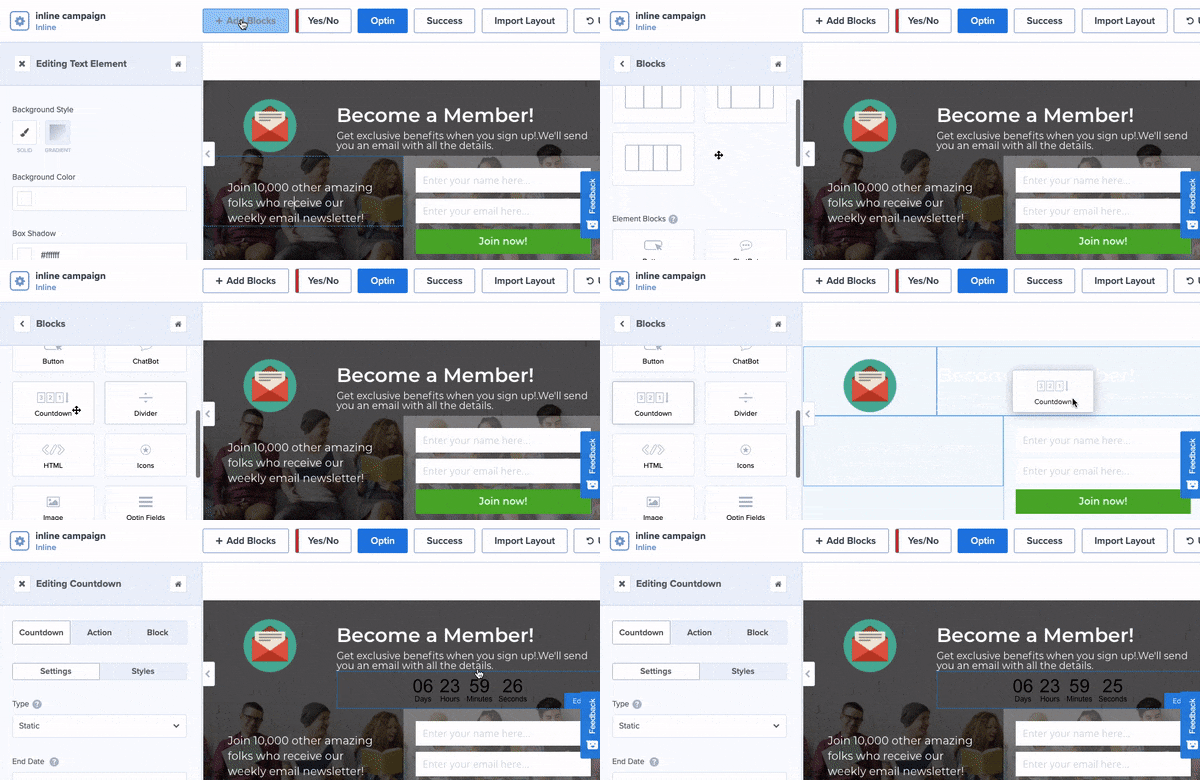
And if you want to add more elements to your campaign, you can use the ‘Add Blocks‘ button to see the options available in the left menu.
Then simply drag and drop the block you want into the campaign.
In this way, you can edit every aspect of your campaign. For more help on the OptinMonster campaign builder, we have a detailed guide that you can follow: Creating Your First Campaign.
Once you use OptinMonster, you’ll learn that it gives you far better control over your lead generation forms compared to Mailchimp’s form builder.
Next, we’ll show you how to set up display rules to target customers with relevant campaigns. This will help maximize the number of email subscribers you get.
Step 3: Setting Up Display Rules
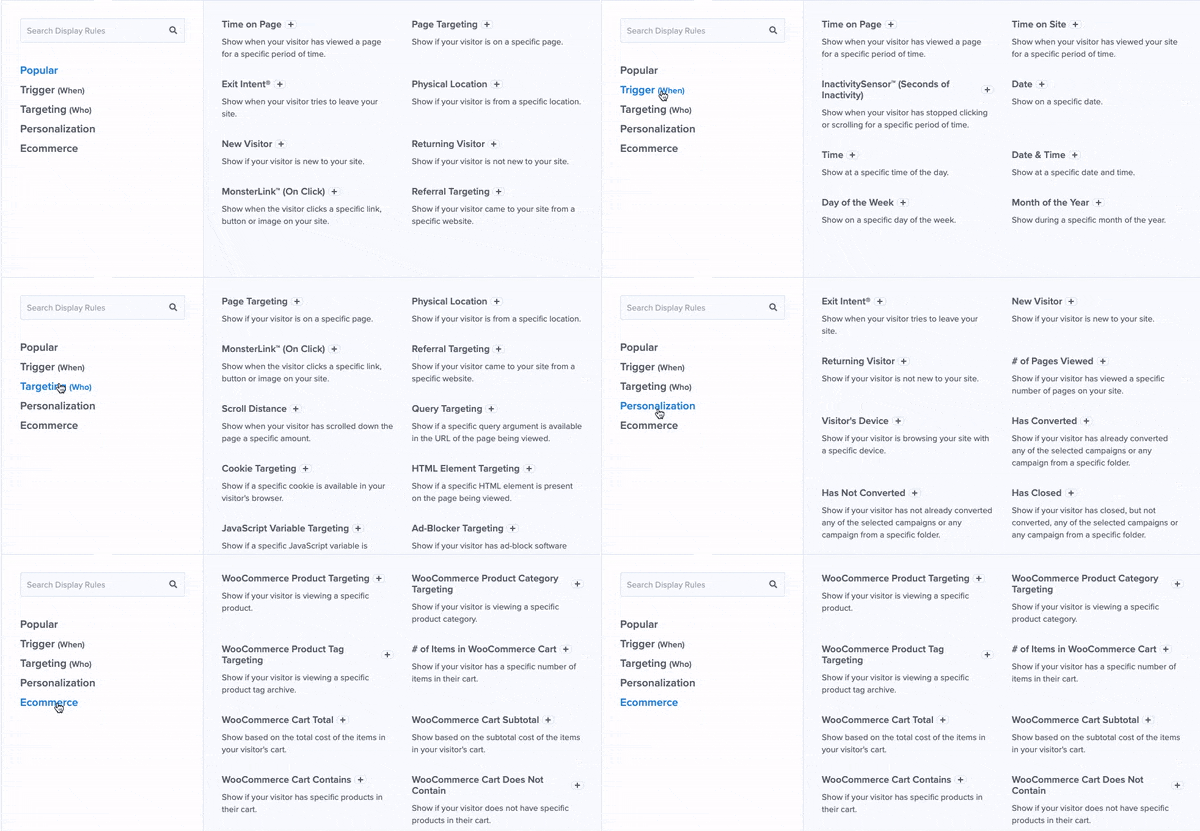
OptinMonster’s advanced targeting rules let you display your campaign to the right customers to optimize conversion rates. You can set up these targeting rules under the ‘Display Rules‘ tab in the campaign builder.
Here are OptinMonster’s most popular targeting rules:
- Exit Intent® Technology: Recover people who are actively leaving your website.
- OnSite Follow Ups®: Show new campaigns to returning visitors and existing subscribers
- Geolocation: Display campaigns based on your user’s physical location to further personalize your messaging.
- Product/Page Targeting: Connect with customers based on the product/page they’re interested in.
- Cart Contains: Show offers based on what products are added to cart.
- Cart Totals: Show campaigns if cart total reaches a pre-configured amount.
These are just a few of the advanced targeting rules OptinMonster has to help you grow your leads.
Next, you can add the Mailchimp integration and segment your subscribers that sign up through this campaign.
Step 4: Adding Mailchimp Integration
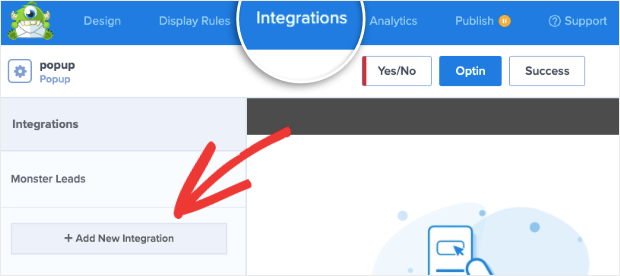
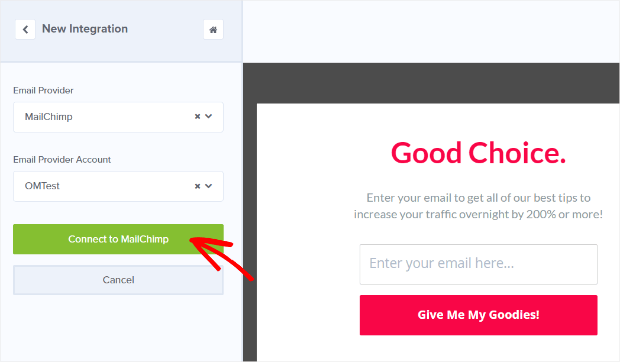
Switch to the Integrations tab and you’ll see an option to ‘Add New Integration.’
When you click on this button, it will let you select your email service provider (ESP). Using the drop-down menu, choose ‘MailChimp‘ and then select the account you set up earlier.
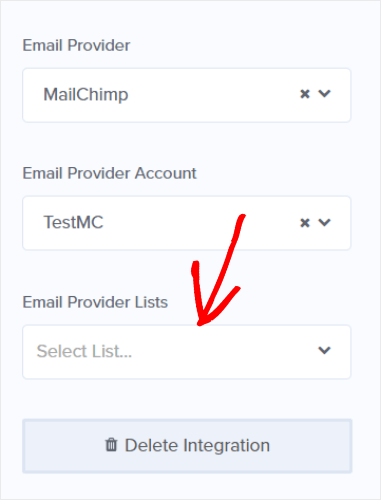
When you click the ‘Connect to Mailchimp’ button, you’ll see a new field appear to select an Email Providers List.
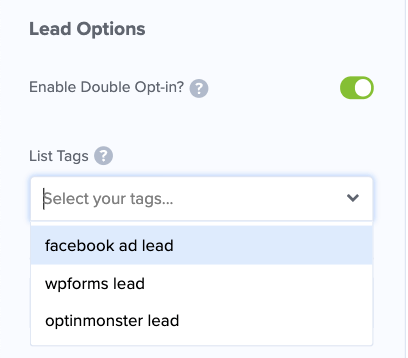
OptinMonster fetches the audience lists you’ve created in Mailchimp and lets you select them here. After selecting a list, you’ll see more options to select a Mailchimp tag to further organize your subscribers.
For example, you can create a tag in Mailchimp called ‘Newsletter‘ and then select that same tag here. All the leads collected through this campaign will be added to the Newsletter list.
Then when you send out your weekly newsletter, it’ll go only to those who have signed up for your newsletter. This helps reduce unsubscribe rates, spam flags, and keeps your list clean.
For more help on segmenting your Mailchimp list, follow this detailed guide: How to Add Mailchimp Tags to a Signup Form (2 Methods).
Step 5: Publishing OptinMonster Campaigns
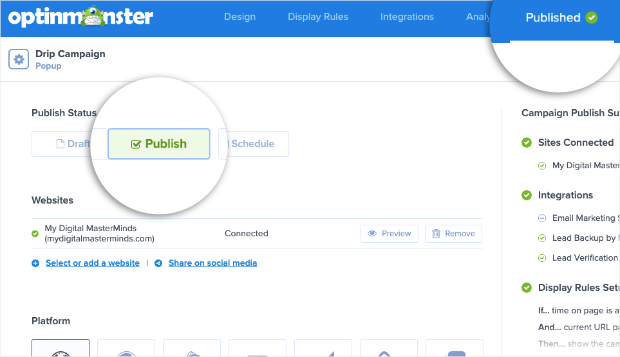
Now your campaign is ready to go live on your Shopify site. To do that, open the Publish tab.
Here, you’ll see an option to preview a sample of your campaign. Then you can set the status to ‘Publish’.
That’s it. When you visit your Shopify store, you’ll see the campaign appear according to the display rules you set.
With that, your Shopify store is connected to Mailchimp.
You can go ahead and create stunning marketing campaigns for your store to offer discounts, recover abandoning customers, collect leads, and more!
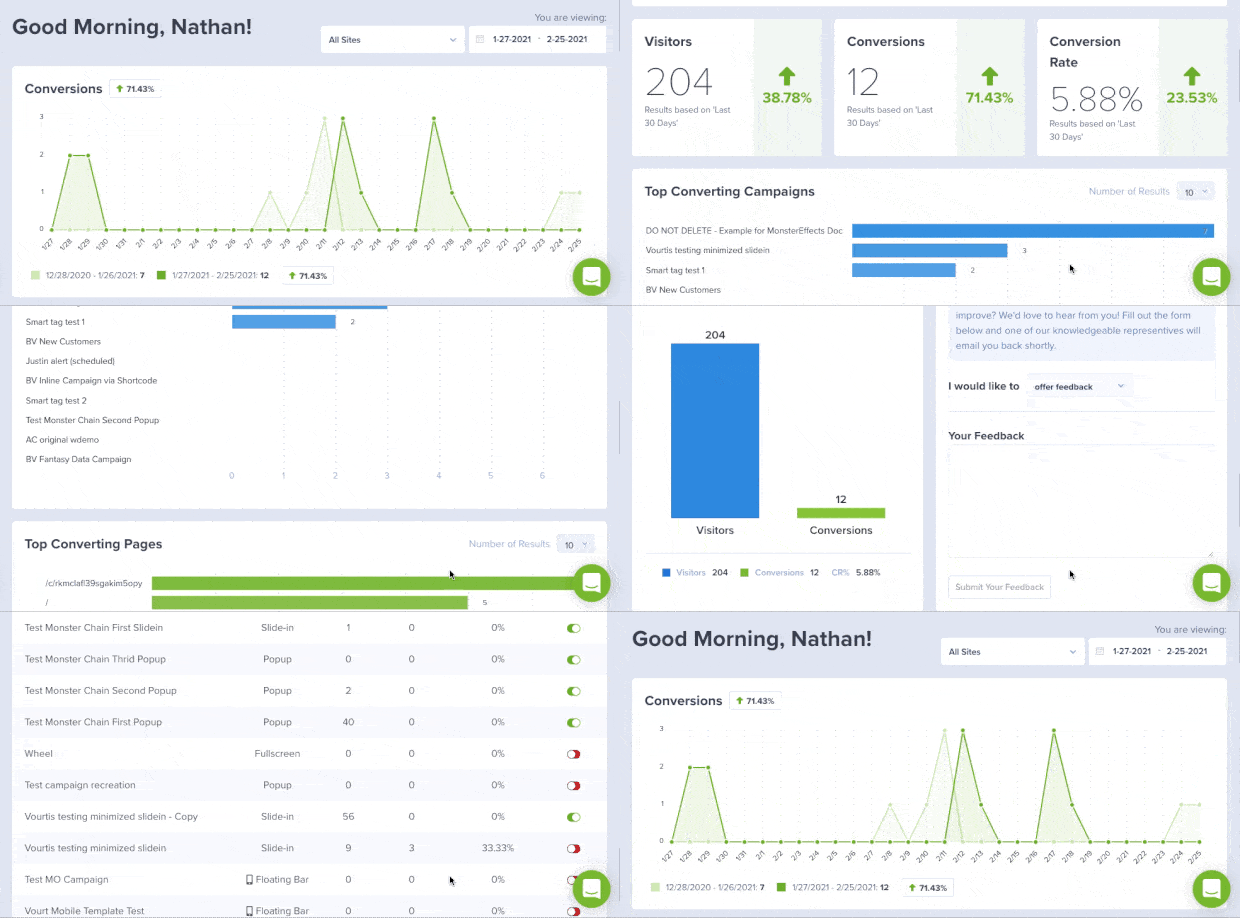
And if you want to see how well your campaigns are performing, you can view all your campaign analytics right inside your OptinMonster dashboard.
You can even connect OptinMonster to Google Analytics to see how much money your campaigns make for you.
If you haven’t signed up for OptinMonster yet, what are you waiting for? Get your 100% risk-free OptinMonster account now by clicking below:
If you’re looking for more tools to integrate your website with Mailchimp, check out these Mailchimp Integration Plugins.
And for more ways to grow your Shopify store using email marketing, check out these resources:
These posts will help you improve your email marketing efforts and grow your Mailchimp subscriber base.






Add a Comment