Do you want to add a Constant Contact form to your website to grow your email list?
Email forms help you gain subscribers, so you can connect over email to inform them about new launches, promotions, sales, or new content.
By using a Constant Contact email form, you can easily collect and manage contacts and send emails from a single place.
In this post, we’re going to show you the easiest way to create a Constant Contact email form.
Creating a Constant Contact Email Form
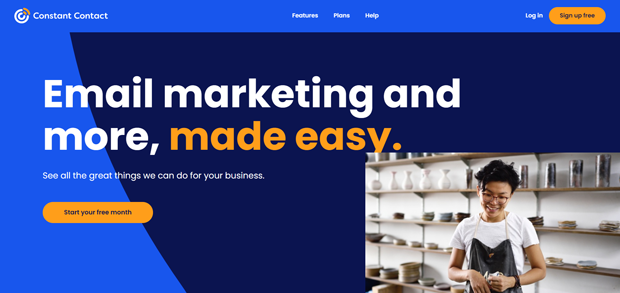
Constant Contact is a popular email service provider (ESP) that helps you grow your email list, connect with subscribers, and easily manage your contacts.
Constant Contact has one of the highest deliverability rates on the market, so you can be sure your business emails and broadcasts are delivered to subscribers.
If you don’t have an account with them yet, sign up for your risk-free Constant Contact account today. They offer a 1-month free trial, so you can test the software before you decide if it’s the right tool for you.
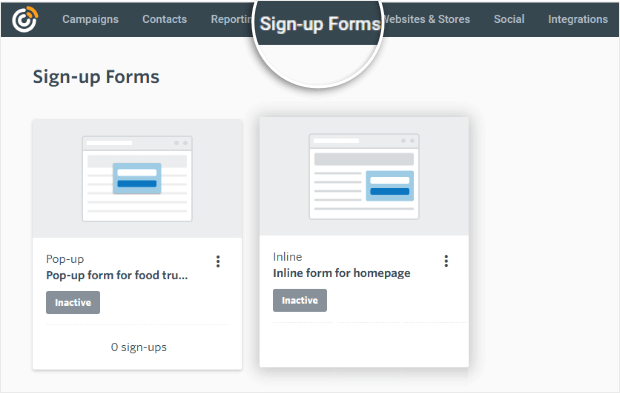
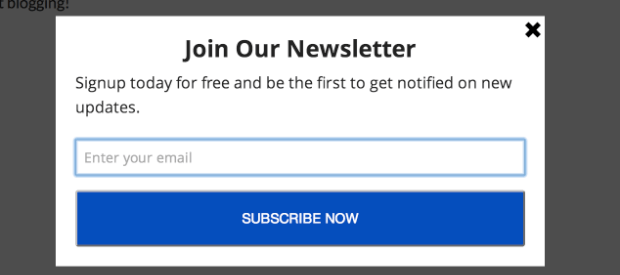
Once you’re signed up, in the Constant Contact dashboard, open the Sign-up Forms page, and you’ll see options to create signup popups and inline forms.
These options let you create simple email forms that you can add to your website. The downside is there aren’t many options to customize the form.
If you want to style the form, you’ll need to use CSS depending on your website’s theme and layout. That means if you aren’t tech-savvy, chances are you’ll be stuck with a very basic templated form.
Plus, there are no targeting rules, which means the same form will appear to every visitor.
If you’re serious about growing your email list, this isn’t enough.
Ideally, you’d want to display forms based on the visitor’s interests, activity, and location. With personalized forms, you’ll be able to encourage more visitors to sign up.
Today, we’re going to show you how to create engaging email capture forms for your site to maximize subscribers.
And to do that, we’ll be using OptinMonster.
OptinMonster is the most powerful lead generation tool on the market. It comes with beautiful templates and an easy campaign builder to create high-converting email capture forms in a matter of minutes.
It doesn’t require any coding or design skills at all. Plus, the tool integrates with Constant Contact, so all your subscribers will automatically be added to your Constant Contact account.
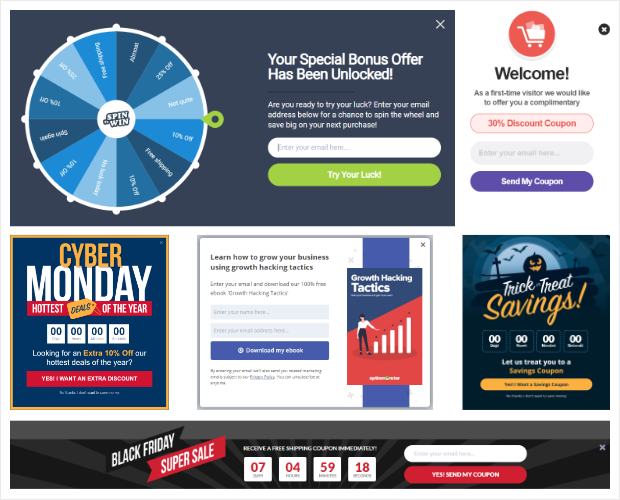
With OptinMonster, you can build all sorts of campaigns like popups, inline forms, slide-ins, floating bars, and much more. That means you’ll have plenty of options to capture emails from your website.
Plus, OptinMonster comes with really powerful targeting rules, so you can display email forms to the right people, in the right places, and at just the right time in their customer journey.
Take OptinMonster’s Exit-Intent® rule, for example. It detects when a visitor is about to leave your site and triggers a popup.
With targeting rules, you can display email forms to visitors based on the page their viewing, where they’re coming from, or actions they take on your site.
Here are a few more highlights our customers love about OptinMonster:
- Works with any website, including eCommerce, business, and blog sites
- Responsive designs that look good on all devices
- Beginner-friendly campaign builder
- Centralized dashboard to manage all campaigns
- Analytics and insights to get the stats that matter
- Traffic redirection to send visitors to important pages on your site
Want to see how OptinMonster works for customers? Take a look at how Lilach Bullock converts 57% of visitors using OptinMonster’s inline campaigns.
Ready to create a stunning Constant Contact email form using OptinMonster? Click below to start your 100% risk-free OptinMonster account:
Now let’s take a look at how to create a Constant Contact email form with OptinMonster.
Creating a Constant Contact Email Form
In this tutorial, we’ll show you how to create an OptinMonster email form. Then, we’ll connect it to Constant Connect, so all your leads are automatically added to your email account.
Here’s a sample of the campaign we’ll be creating today:
There are 3 things we’ll focus on in this campaign:
- Offering a free eBook as a lead magnet to make it worthwhile for a visitor to subscribe.
- Adding an optin form and a stunning call-to-action (CTA) button so visitors can leave their email info.
- Inserting a countdown timer to add a sense of urgency to maximize conversions.
While we’re creating this campaign, keep in mind that OptinMonster has 50+ templates, and you can even start from scratch to create your own campaign design.
Ready to get started? Let’s dive into the tutorial.
Step 1: Signing up for OptinMonster
OptinMonster works with any website, and it’s incredibly easy to set up.
If you’re using WordPress, you can install the OptinMonster plugin on your site.
For all other websites, follow this guide to add OptinMonster to any site.
Once you sign into the OptinMonster dashboard, you can build your email form campaign.
Step 2: Creating an Email Form with OptinMonster
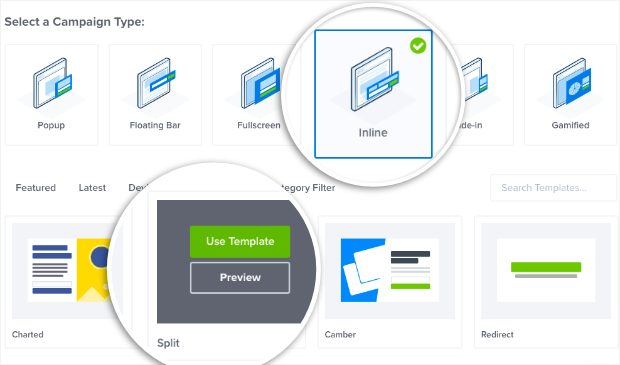
In the OptinMonster dashboard, click on the Create New Campaign button to get started.
This will open up a page of campaign types and templates. To create an email form that you can embed anywhere on your site, you’ll want to use the Inline campaign.
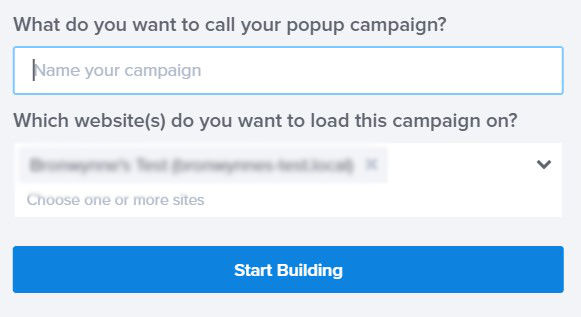
To explore the templates here, hover over them to get the preview option. When you select a template, you’ll need to enter a name for the campaign so you can find it later in the list of campaigns you create.
Then click on the Start Building button to open the OptinMonster campaign builder, where you can customize the design and settings.
Step 3: Customizing the Email Form
OptinMonster’s campaign builder is a visual one that’s easy for anyone to use. You’ll see a preview of the template, which you can edit directly.
Let’s get started by editing the text in the template. Simply select what you want to modify and enter your own message.
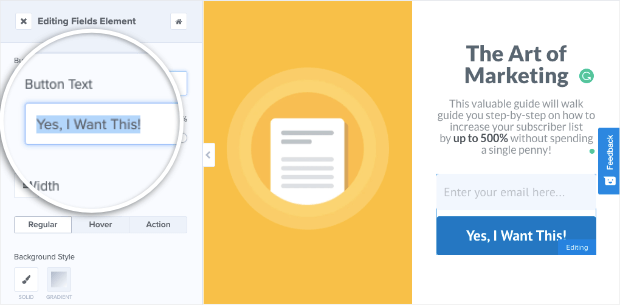
In the same way, you can select the CTA button, and you’ll see options to edit the button in the left-hand side column. You can change the text, color, size, and more.
If you want to remove any elements from the design, OptinMonster has a Delete option above every block when it’s selected.
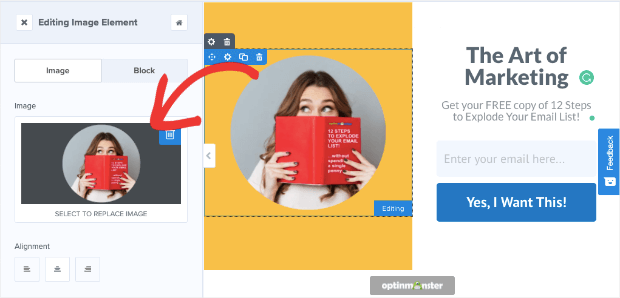
Next, you can replace the image with your own to match your brand and message. Select the image, and in the left column, you’ll see an option to upload your own image.
You may also want to change the background color. Again, when you select the block, you can use the color palette in the left-hand side menu to select the color of your choice.
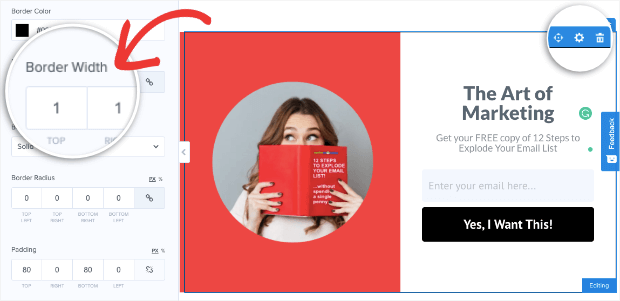
Since inline forms are usually embedded inside a page or post, you can add a border to make sure the form is separated from the rest of the content.
To do this, open the template settings and scroll down the left-hand side menu to the Border options. You can set the border width here, depending on how thick you want the border to appear.
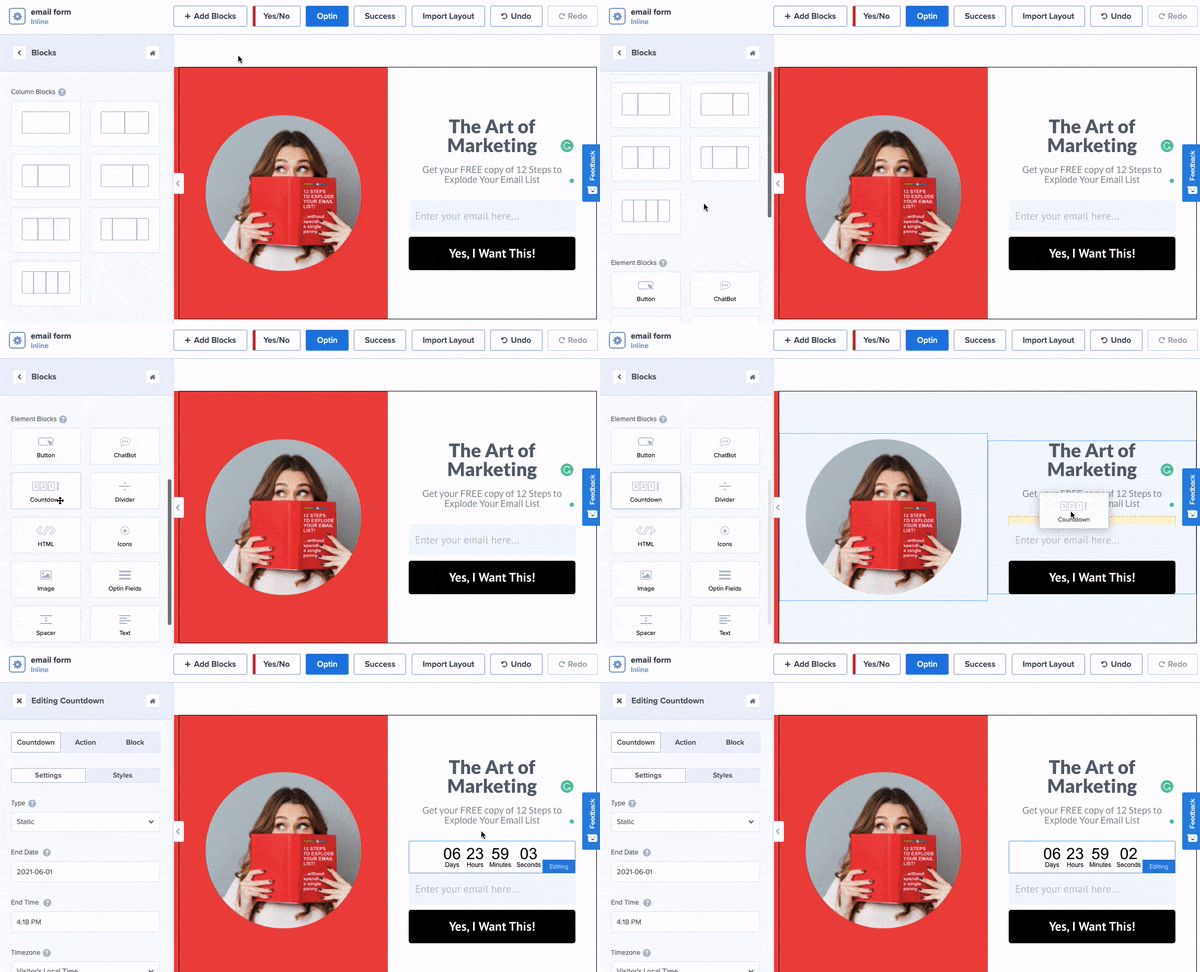
And finally, to add new blocks, OptinMonster has an ‘Add Blocks’ button at the top of the campaign builder. This will open up a menu with column blocks and element blocks that you can add to your campaign.
To create a sense of urgency, you can add the countdown timer by dragging and dropping it from the left-hand side menu, like this:
You can then set the date and time for your offer.
For more information on how to create and modify a countdown timer in your campaigns, check out this detailed post: How to Create a Countdown Timer Popup to Skyrocket Sales.
And with that, your campaign design is ready to go!
In many cases, you’d want to add some of OptinMonster’s powerful display rules to target users more closely.
This would be true if you were creating a popup, floating bar, slide-in scroll box, and so on.
But since we’re creating an inline form today, you won’t need to configure anything. That’s because your Constant Contact email form will be embedded on the pages and posts of your choosing.
Instead, we’ll go straight to connecting OptinMonster with your Constant Contact account.
Step 4: Connecting OptinMonster to Constant Contact
OptinMonster makes it incredibly easy to integrate with Constant Contact.
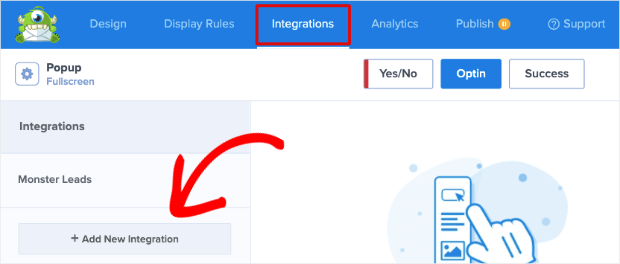
When you’re inside the OptinMonster campaign builder, open the Integrations tab, and click on the ‘Add New Integration’ button.
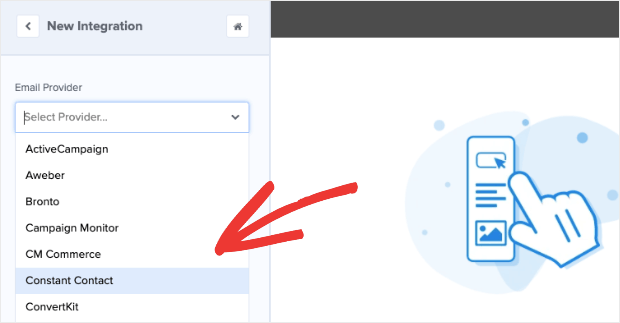
Then, using the drop-down menu, you can choose Constant Contact.
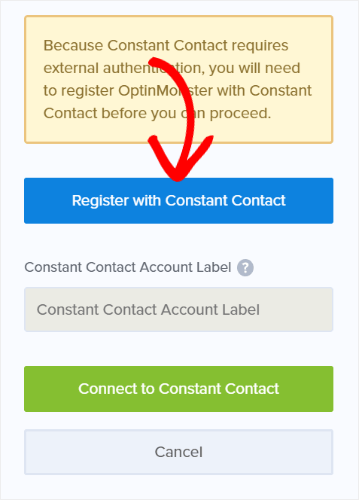
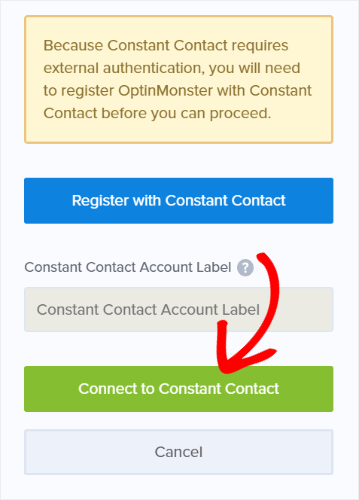
In the same menu, click on the ‘Register with Constant Contact’ button.
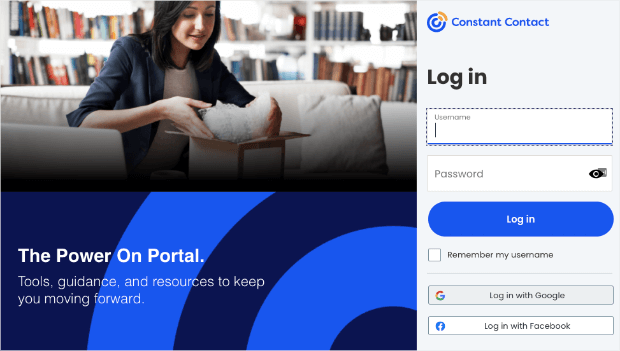
A popup will appear, asking you to sign in to your Constant Contact account.
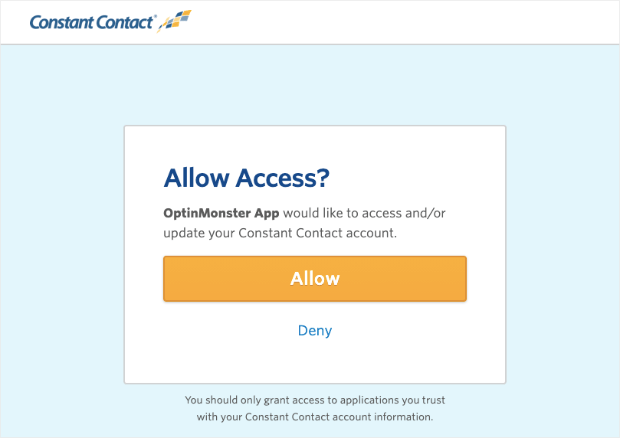
When you sign in, Constant Contact will ask if you want to let OptinMonster access your account. Click on ‘Allow.’
Now you’ll be taken back to the OptinMonster builder.
You can enter a name for this connection, so you can easily connect future campaigns using the same integration.
Then click on ‘Connect to Constant Contact’ to complete the integration.
A new field will appear called ‘Email Provider Lists.’ This is helpful if you want to segment your audience. You can choose to add subscribers of this campaign to a separate email list in Constant Contact.
So, for example, in Constant Contact, you can create a new list called ‘Newsletter Subscribers.’
Then in the Email Provider Lists field in Optinmonster, you can select this list.
Now when a visitor submits their email address through this campaign, their contact details will automatically be added to the Newsletter Subscribers list.
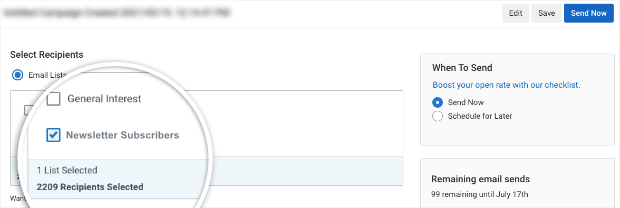
That way, when you’re scheduling or sending an email in the Constant Contact dashboard, you can select the ‘Newsletter Subscribers’ list.
Then your email will only go to those that have subscribed to newsletters through this inline form.
With this feature, you can organize your email list efficiently and optimize conversions from your email marketing strategy.
With that, your website is successfully connected to Constant Contact through OptinMonster.
Now you can go ahead and publish the Constant Contact email form on your site.
Step 5: Publish Your OptinMonster Campaign
OptinMonster makes it really easy to add the inline form to your site without any coding knowledge required.
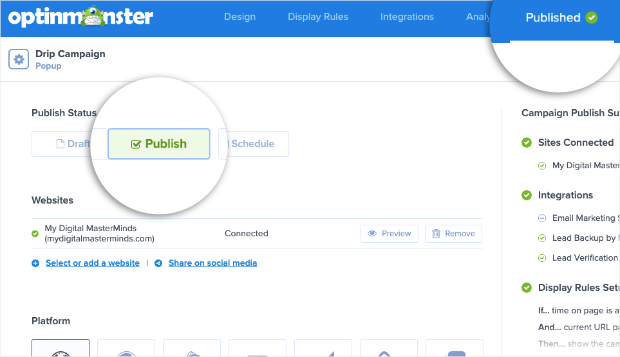
First, switch to the Publish tab in the OptinMonster campaign builder and set the status to ‘Publish’ here.
If you’re creating any other campaign such as popup, floating bar, or slide-in, OptinMonster will display the campaign based on the targeting rules you set. That means you don’t need to do anything more.
Inline campaigns are a bit different since they appear as an embedded form. You’ll need to add it inside your website’s post, page, or sidebar.
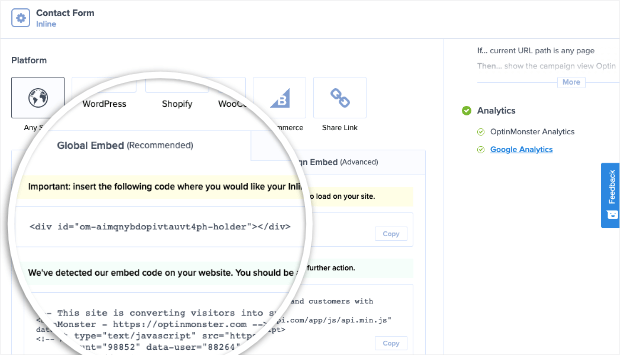
To do this, on the same page, you’ll see a campaign embed code like this:
Copy this code and paste it on your website where you want the inline form to appear.
If you’re using WordPress, you can skip the copy-paste method since OptinMonster has a built-in widget that makes it really easy to add the email form to your website.
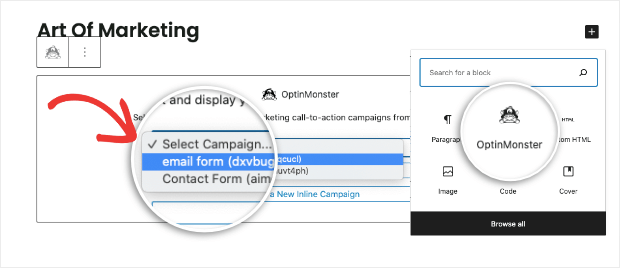
To add it to a post or page in the Gutenberg editor, you can select the OptinMonster block and choose your campaign. Then select your campaign from the drop-down menu:
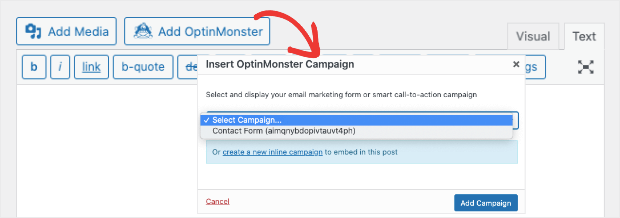
Still using the Classic editor? There’s an OptinMonster button inside that editor as well.
You can select your campaign, and the form will automatically be added to your page or post.
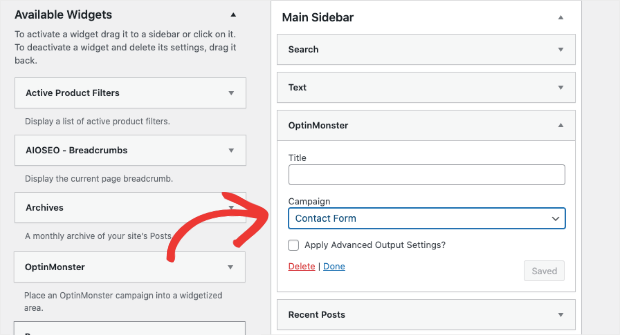
And to add the Constant Contact form to a WordPress sidebar, navigate to the Appearance » Widgets tab. Then drag and drop the OptinMonster widget into your sidebar menu and select the inline form.
Once you save and publish your page or sidebar, you’ll see the form appear on your site.
With that, you’ve learned the fastest way to add a Constant Contact email form to your website.
For more steps on adding inline campaigns to your site, check out the following detailed guide: How to Add an After Post or Inline Campaign.
Now when you create more OptinMonster campaigns, you won’t need to carry out the email integration process again. You just need to select the existing Constant Contact integration you just set up.
When a visitor subscribes to your OptinMonster campaign, their details will automatically be added to your Constant Contact list.
You can also create different audience lists to send targeted emails depending on what the subscriber signed up for.
And that’s all we have for you today. If you haven’t signed up for OptinMonster yet, what are you waiting for?
Get your 100% risk-free OptinMonster account now by clicking below:
We hope you found this tutorial helpful in creating a Constant Contact email form. For your next steps, you may want to learn how to create a Constant Contact popup to capture more email subscribers.
We also have a few other resources that you should definitely check out:
- How to Create an Effective Email Autoresponder Series
- Spam Email Signups: 3 Ways to Protect Your Email List
- 9 Best WordPress Lead Generation Plugins to Grow Your List
These posts are packed with tutorials and tools to help you explode your Constant Contact email list!











Add a Comment