Do you want to learn how to create a landing page for AdWords, but you’re not sure where to get started?
AdWords, now known as “Google Ads,” is one of the best advertising platforms at your disposal.
It allows you to reach a large audience and target keywords to direct higher-quality leads to your website.
That’s why, today, we’ll teach you how to create and optimize a landing page for AdWords.
Here’s the demo page we built in under 5 minutes for this tutorial:
By the end of this post, you’ll have everything you need to build the perfect landing page for your Google ads in no time–even if you don’t have any coding experience at all.
But before diving into the tutorial, let’s get clear on why you need a landing page for AdWords in the first place.
Do You Need a Landing Page for AdWords?
Learning how to create and optimize a landing page for AdWords can be one of the biggest advantages to getting more conversions.
That’s because, unlike most advertising platforms, Google allows you to show ads depending on the keywords someone is searching for.
This means you can target people by their “intent.”
In other words, when you know what people are typing into Google, you get a better idea of where they are in their customer journey.
And as you target keywords and phrases that are closer to the bottom of your funnel, you’ll attract quality leads who are on the verge of making a purchase.
That’s where your landing page for AdWords comes in.
By creating a landing page specifically for Google AdWords, you can personalize the user experience (UX) and expect higher conversions.
Rather than sending new leads to a generic page on your site, like your homepage, you can create a landing page that highlights your offers, has loads of social proof, and is built specifically to convert.
But the best part? With the right tools, anyone can learn how to create and optimize an AdWords landing page in a matter of minutes.
Ready to get started? Let’s dive into the tutorial.
Create a Landing Page for AdWords
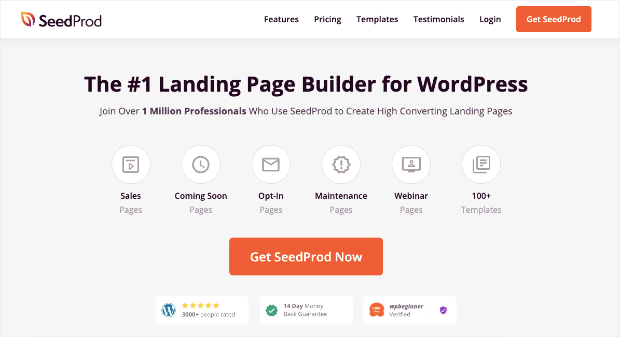
For today’s tutorial, we’ll be working with SeedProd:
SeedProd is the best landing page builder for WordPress. It allows anyone to quickly build professional and high-converting landing pages in a matter of minutes–even if you don’t have any experience with coding and design.
That’s because SeedProd comes with stunning templates that you can use to get started.
From there, you’ll be able to use an intuitive drag and drop builder to optimize your AdWords landing page.
And with integrations from your favorite 3rd-party marketing tools and eCommerce platforms, you’ll be able to build pages that grow your list, drive more sales, or reach any other marketing/sales goal you’re trying to accomplish.
As you’ll see throughout the tutorial, SeedProd makes building landing pages totally simple.
Want to see it in action for yourself? Sign up now for your 100% risk-free SeedProd account.
Once you do, you’ll be ready to follow along with the tutorial.
Step 1) Install and Activate SeedProd
When you’ve signed up for SeedProd, you’ll need 2 things:
- The plugin file to upload to your WordPress site
- Your license key to activate the plugin
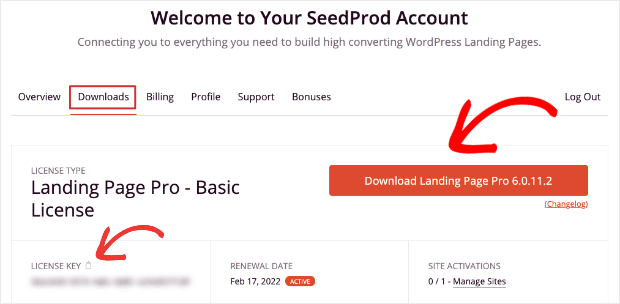
You can find both of those in your SeedProd account under Downloads:
Click Download Landing Page Pro to save the plugin file to your desktop. And copy the plugin’s license key for later.
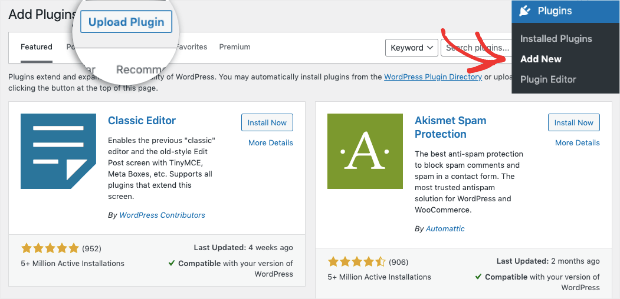
Then hop over to your WordPress dashboard and click Plugins » Add New.
At the top of the page, click Upload Plugin:
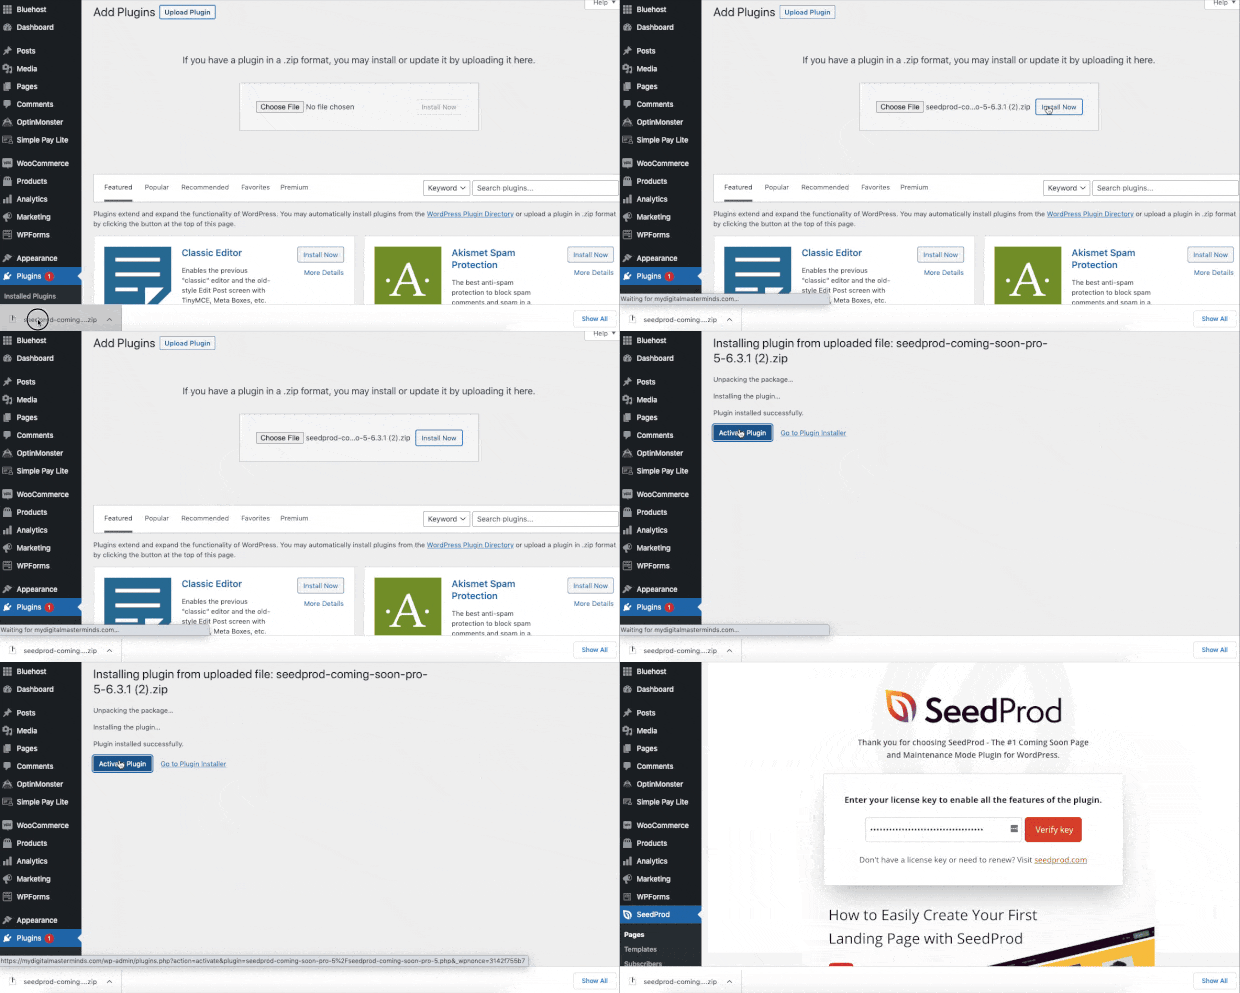
Drag and drop your SeedProd plugin where it says Choose File or manually select the SeedProd plugin from your desktop’s files.
Click Install Now:
When the file is done uploading to your WordPress site, click Activate Plugin.
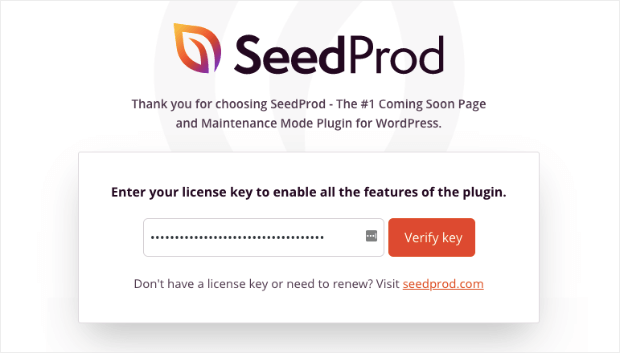
A screen will appear with your license key entered, and all you need to do is click Verify Key:
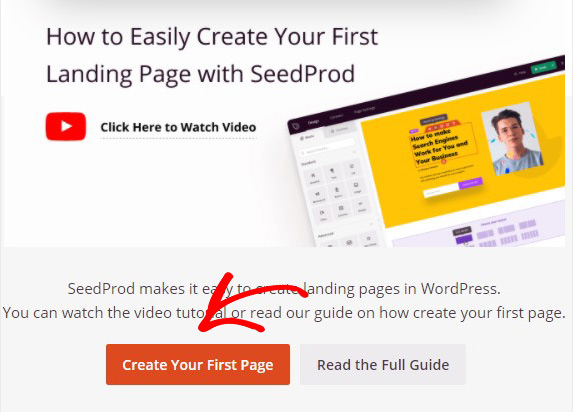
A new screen will appear where you can click Create Your First Page:
And now you’re ready to create your AdWords landing page.
Step 2) Build Your AdWords Page
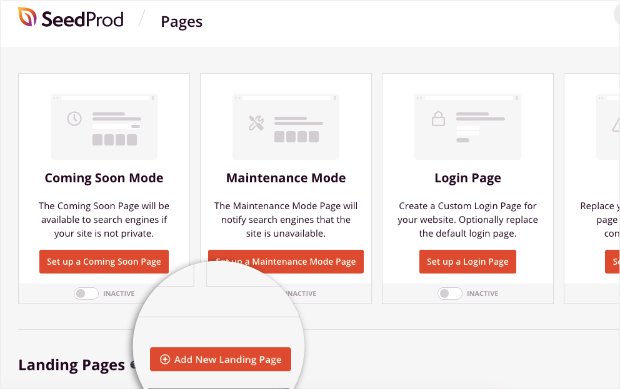
At the top of your screen, you’ll see different types of landing pages you can build, including:
- Coming Soon Mode
- Maintenance Mode
- Login Page
- And more…
Underneath that section, click Add New Landing Page:
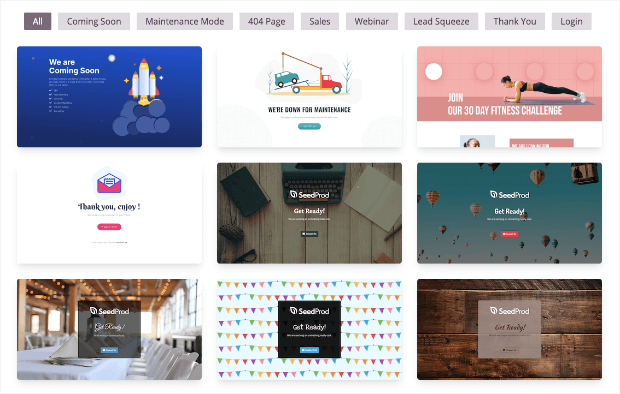
This will bring you to your template selection.
SeedProd has tons of pre-made templates that are designed to save you time, energy, and headaches in the landing page creation process:
You can even filter these templates depending on the goal of your AdWords landing page.
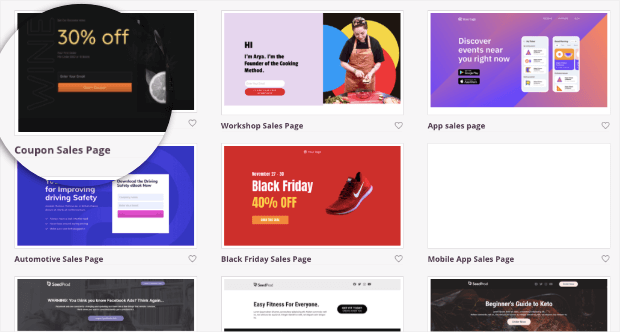
For today, we’ll go with the Coupon Sales Page template:
This is a sleek and professional landing page template that gives you a lot of possibilities for making direct sales.
You can offer a coupon, discount, or any other kind of promotion to motivate leads into taking action.
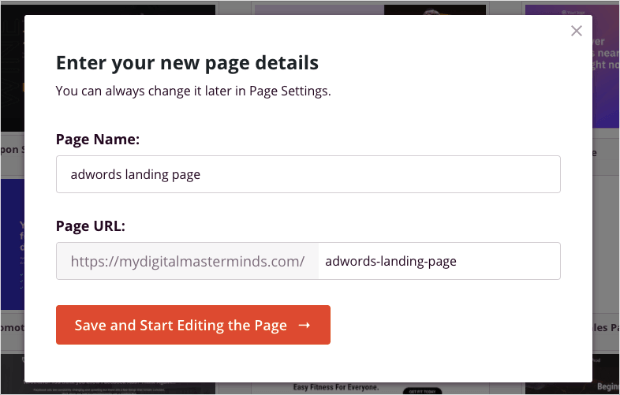
When you select the template, you’ll need to give it a name:
This will autogenerate a URL that will be used for your AdWords landing page.
3) Design Your Landing Page
The best part about SeedProd is how quickly and easily you can modify the design of your landing page.
That’s because it has a drag and drop builder that lets you add new features to your pages in seconds.
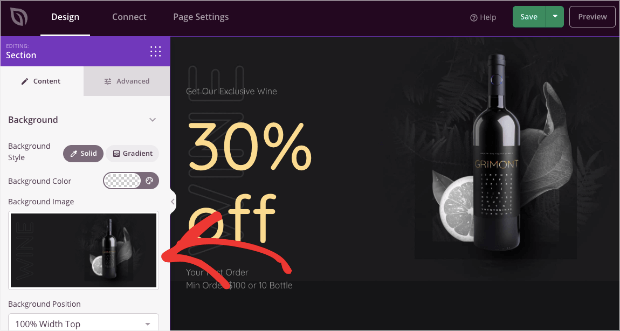
Plus, you can edit any element on your page by clicking on it to pull up the editing tools on the left-hand side menu.
If you wanted to change the background image, for example, you’d simply need to click on it to pull up the editing menu:
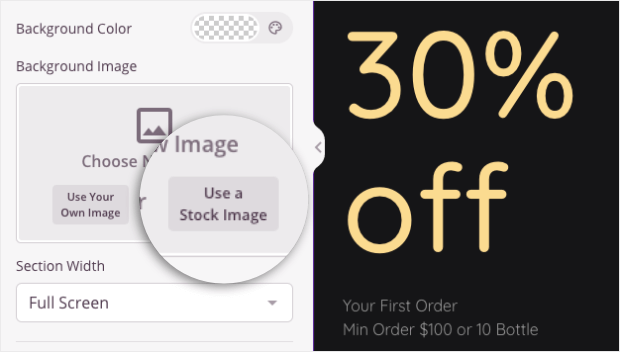
Not a professional photographer? No worries.
SeedProd connects with thousands of free and non copywritten images that you can use on your site:
This helps people just getting started create and design a professional-looking landing page in a short amount of time.
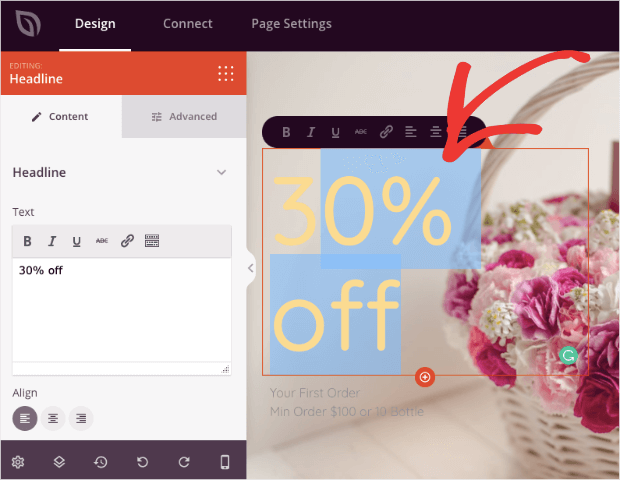
You can also use the inline text editor to modify the messaging of your landing page:
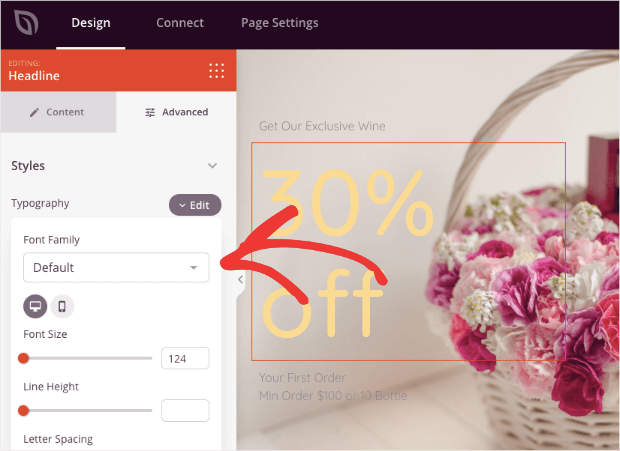
And in the left-hand side menu, you can modify other aspects of your text, such as the:
- Font family
- Font size
- Color
- Line height
- And more…
Finally, you may want to add new features to your landing page. This template’s goal was to give a coupon in exchange for people’s email addresses.
But you may want to give them an option to simply pay now and check out.
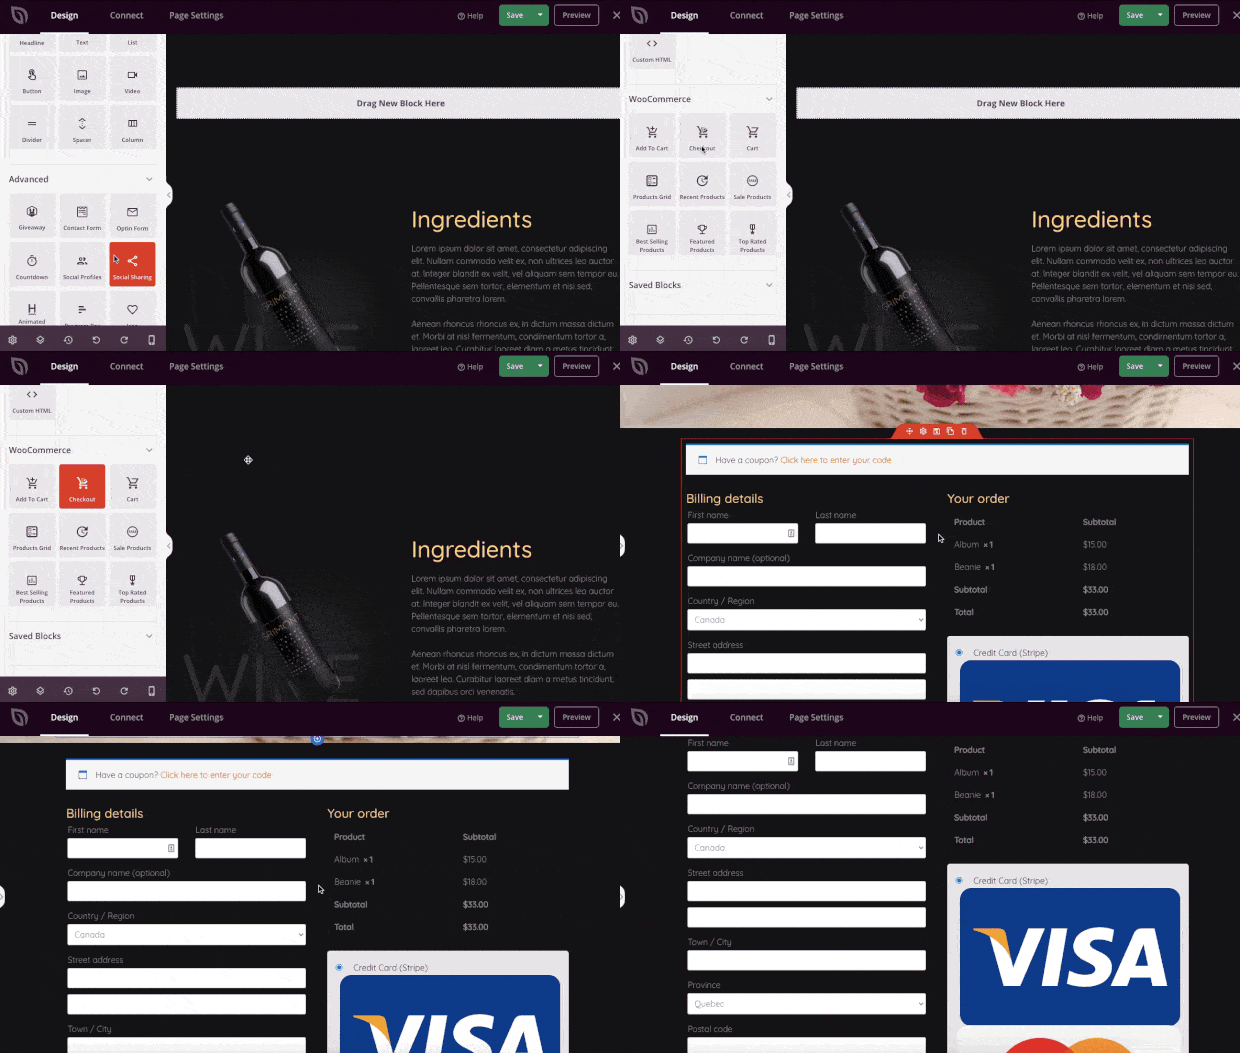
You can easily do so with SeedProd’s WooCommerce integrations. These features come in “blocks” that you can drag and drop onto your page:
You also have a ton of other features you can add that connect SeedProd to 3rd-party tools.
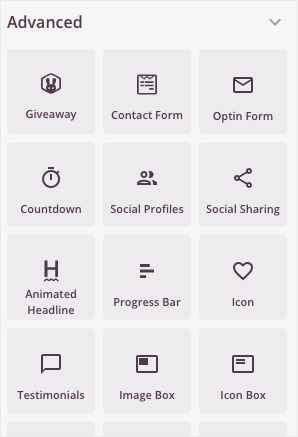
This gives you access to features like:
- Giveaways
- Optin forms
- Contact forms
- Countdown timers
- Reviews and testimonials
- Animated headlines
- And much more…
With that, you should have everything you need to design a custom landing page in minutes.
Here’s the one we built in under 5 minutes for an online gift basket shop:
If you need more help, check out this resource: How to Create a Landing Page in WordPress (+3 Examples).
That post will have everything you need to build your AdWords landing page.
But once it’s up and running, you might find that you’re still leaving conversions on the table.
If your Google ads are getting lots of clicks but no one is buying, the problem is likely the landing page.
Let’s turn our attention to 3 ways you can use to quickly optimize your AdWords landing page.
Optimize a Landing Page for AdWords
While building a landing page for AdWords is a great start, you’ll definitely want to optimize it for higher conversions.
The easiest ways to do this involve:
- Capturing emails of abandoning visitors
- Adding social proof to your site
- Tracking everything to make improvements over time
Let’s look at how you can accomplish all three and the tools you’ll need to do so.
1) Using Exit-Intent Popups
One of the best ways to optimize your AdWords landing page is to add an exit-intent popup.
An exit-intent popup is a message that appears to users as they’re actively trying to leave your site.
It’s a great way of getting the email address of abandoning users because let’s face it: not everyone will be ready to make a purchase on their first visit to your site.
But with an exit-intent popup, you can grow your email list to nurture new leads over time.
So even if people don’t buy something from your store directly from your Google ad, their “click” will still be worth something.
This is the same strategy Fastrack used to convert 53% of their abandoning visitors.
And the best tool for creating an exit-intent popup is definitely OptinMonster:
OptinMonster is a premium plugin designed to grow your list, boost conversions, and drive more sales.
With OptinMonster, anyone can create professional and high-converting optin campaigns, such as popups, floating bars, fullscreen welcome mats, gamified wheels, and much more.
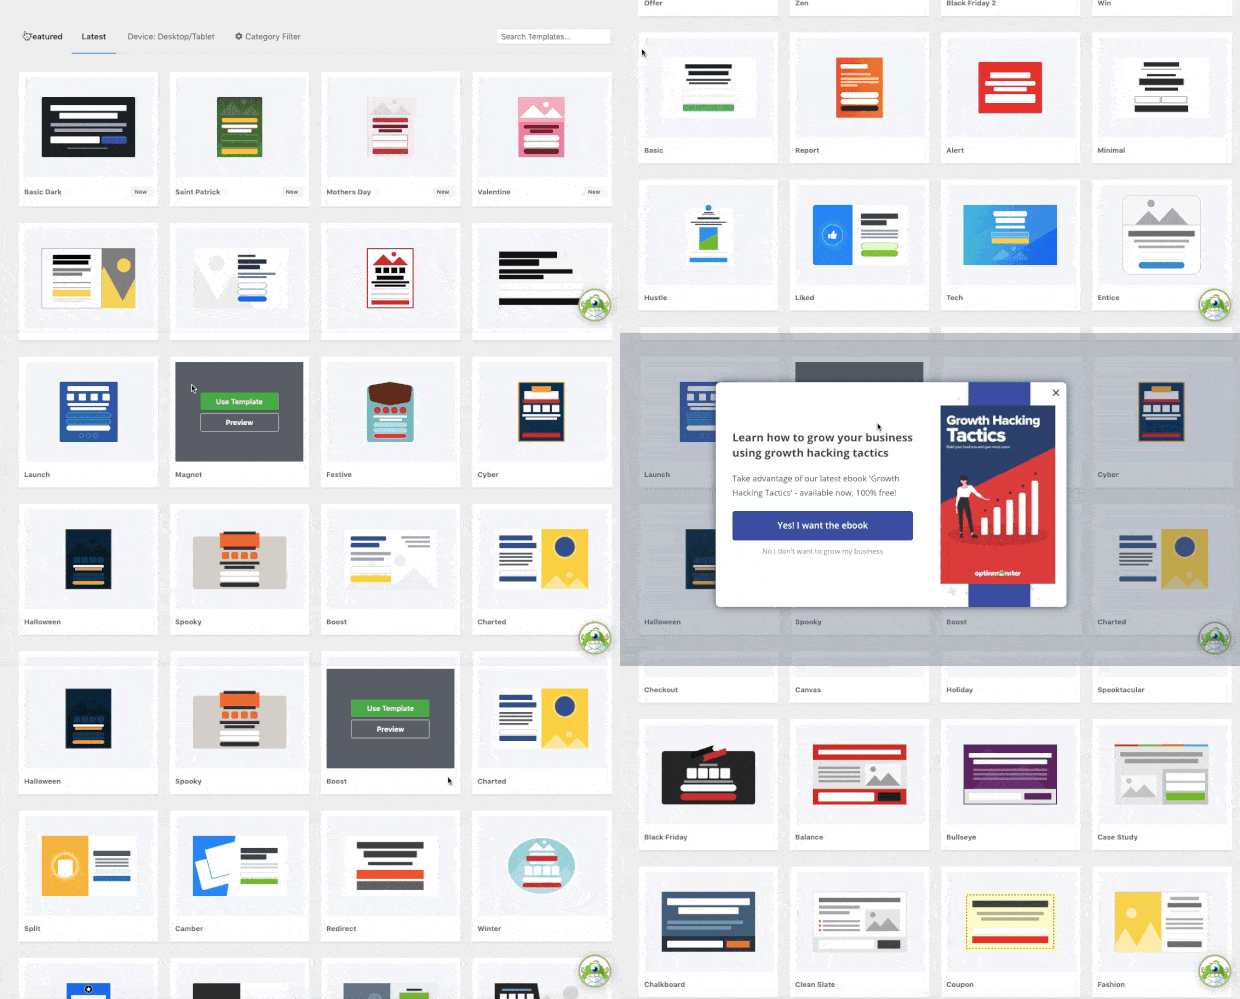
Like SeedProd, OptinMonster doesn’t require that you know any code. It comes with 50+ pre-made templates that look great across mobile, desktop, and tablet devices:
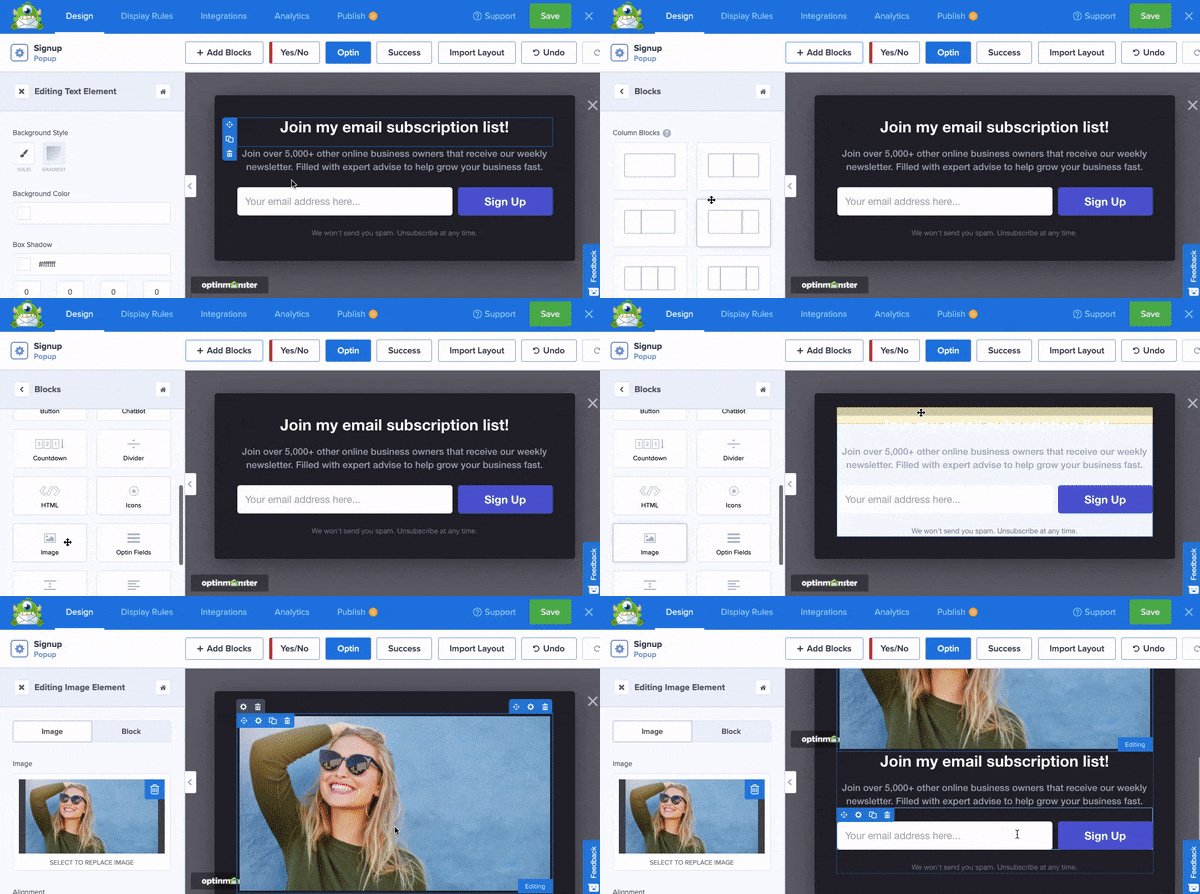
It also has a drag and drop editor that lets you add custom features or design elements to your exit-intent popup:
And with an intuitive inline text editor, you can change the messaging of your popup to connect with your audience coming from AdWords:
But the best part? None of these design elements require any coding skills or design experience.
And once you’ve created the perfect campaign, you can easily add an exit-intent rule:
This means you can build and configure your exit-intent popup in minutes, even if you aren’t “tech-savvy.”
You also have tons of options for other advanced targeting rules, such as:
- OnSite Follow Ups®: Display fresh campaigns to returning users to avoid ‘popup fatigue.’
- Geolocation: Target users based on their physical location for further personalization.
- Cart-Specific Targeting: Show campaigns based on what products people have placed in their cart, their cart’s sub-total, and more…
These features and more are what make OptinMonster such a powerful tool for increasing your store’s sales.
And with a simple exit-intent popup, you’re guaranteed to grow your email list from the traffic you’re driving from AdWords.
It’s also how Crossrope was able to EXPLODE their list by 900%.
You can have similar success by clicking below and starting your 100% risk-free OptinMonster account today:
2) Add Social Proof to Your Site
It’s no secret that social proof is one of the best ways to make new visitors feel confident in your website.
In fact, social proof can be the “make or break it” difference between a customer pulling out their credit card or leaving your site for good.
The more you can show that your site is loved and used by others, the higher you can expect your sales to be.
The best tool for adding social proof to any website is TrustPulse:
TrustPulse is hands down the best social proof software on the market. Regardless of your technical experience, you can create high-converting social proof notifications in minutes.
You’ve likely seen these notifications before. They look something like this:
These messages inspire a sense of FOMO (“fear of missing out”) in your site’s visitors.
FOMO is a phenomenon that affects all online consumers and motivates them to take action. The basic principle is simple:
When people see others enjoying benefits from a product they don’t have, it makes them want that product all the more.
By adding social proof notifications to your site with TrustPulse, you can increase sales instantly by up to 15%!
And since everything is built with drop-down menus, basic text inputs, and color wheels, it doesn’t require any coding skills to get started.
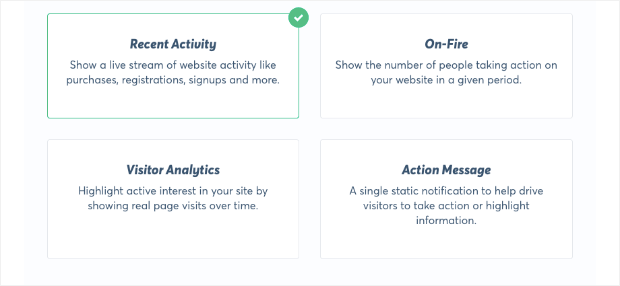
One great thing for small businesses is that you have a ton of different types of notifications you can make, including:
- Recent Sales Activity: Show a live stream of website activity like purchases, registrations, signups, and more.
- On-Fire: Show the number of people taking action on your website in a given period.
- Visitor Analytics: Highlight active interest in your site by showing real page visits over time.
- Action Messages: Display a single static notification to help drive visitors to take action or highly information.
These allow you to create social proof for your AdWords landing page even before you’ve made any sales (particularly with the Visitor Analytics and Action Message campaigns).
But the best part is that TrustPulse is by far the most powerful social proof software at the most affordable price.
For more information on how TrustPulse stacks up to the competition, check out this helpful resource: FOMO vs. UseProof vs. TrustPulse: Which Is Best for Social Proof?
Ready to see it in action for yourself? Sign up for your 100% risk-free TrustPulse account today!
3) Track Everything
This last tip should go without saying, but many marketers quickly get overwhelmed when tracking their marketing campaigns.
When they head into Google Analytics, they’re slapped with tons of information that make it difficult to understand what’s working and what’s not.
For that, we highly recommend using a tool like MonsterInsights:
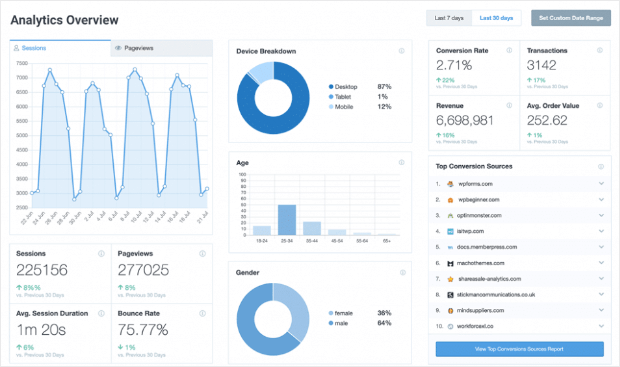
MonsterInsights is the best Google Analytics plugin for WordPress. It makes it easy to find the information you need in a format you can understand (and use).
With simplified reports, you can get the key information you need from your site’s pages. Plus, you can look at other helpful metrics like:
- Time on page
- Bounce rates
- Goal conversions
- And much more…
If there’s anything you want from Google Analytics, MonsterInisights will bring it straight to your WordPress site:
This helps you optimize your AdWords landing page to see how people interact with it.
Over time, you can test changes to learn how to increase your conversion rates and, ultimately, make more sales.
Get started with your 100% risk-free MonsterInsights account today!
And that’s all for today! This has been an overview of how to create and optimize an AdWords landing page.
We hope you enjoyed this post. If you did, you’ll definitely want to check out the following articles:
- How to Boost the ROI of PPC Campaigns With Targeted Campaigns
- What’s a Googe CTR for Google Ads (+ How to Improve Yours)
- 10 PPC Best Practices to Get the Most out of Your Marketing Budget
These articles will have even more information on how you can increase revenue with your AdWords account.









Add a Comment