Are you trying to make a Drip signup form in WordPress, but you’re not sure what the best method would be?
Drip is one of the most popular email service providers on the market, and for good reason. It’s user-friendly, affordable, and a platform that allows small businesses to scale.
The only problem? How do you grow your email list so your new leads go where they need to be?
If you’ve wondered that question before, then you’re in the right place. Because, today, we’re going to teach you step-by-step how to create a Drip signup form in WordPress.
Ready to get started? Let’s dive straight into our step-by-step guide.
Making a Drip Signup Form in WordPress
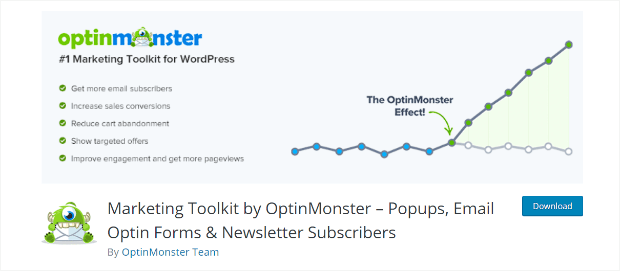
For today’s tutorial, we’ll be using OptinMonster:
OptinMonster is a premium plugin for WordPress and hands down the easiest way to create a targeted signup form for Drip.
As you’ll soon see, OptinMonster allows anyone to create stunning optin forms, such as:
- Popups
- Floating bars
- Fullscreen welcome mats
- Gamified spin-to-win wheels
- Slide-in scroll boxes
- And much more…
Not only can anyone create these campaigns in minutes (without any coding involved), but users can then display these campaigns to the right people, in the right places, and at just the right time in their customer journey.
That involves using popular targeting rules such as:
- Exit-Intent® Technology: Display campaigns as users are actively leaving your site.
- OnSite Follow Ups®: Show fresh campaigns to returning users to avoid “popup fatigue.”
- Geolocation: Target users by their physical location to personalize the user journey
These are just a few examples of how you can target your audience, though there are many others.
And once you’ve created a signup form that will bring you new leads, you can connect it to your Drip account in just a few seconds.
Plus, you can determine which tags or email list you want them to join in your Drip account.
That means you’ll be able to organize your contact lists through the OptinMonster plugin, so your leads go exactly where you need them to for the highest conversions possible.
It’s how companies like Shotkit can generate 40+ NEW leads every single day.
Or how blogger Adam Enfory added 11,000+ subscribers to his list in just 1 year.
You can achieve the same massive results by clicking below for your 100% risk-free OptinMonster account:
Now let’s dive into the tutorial.
Step 1) Download and Activate the OptinMonster Plugin
The first thing you need to do is download the OptinMonster plugin.
Fortunately, doing so could be easier. Once you’ve signed up for your OptinMonster account, head to your WordPress dashboard.
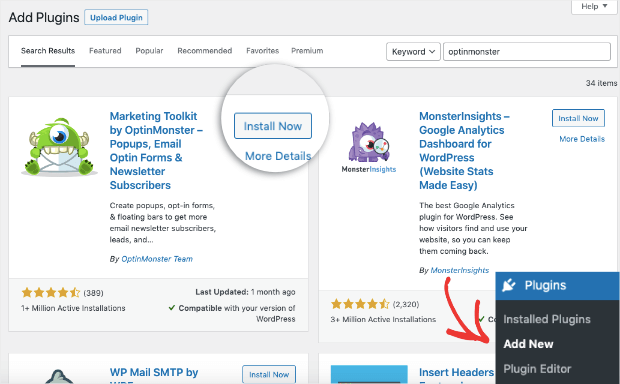
Then go to Plugins » Add New. From there, type ‘OptinMonster’ in the search bar until you find the plugin. When you do, click Install Now:
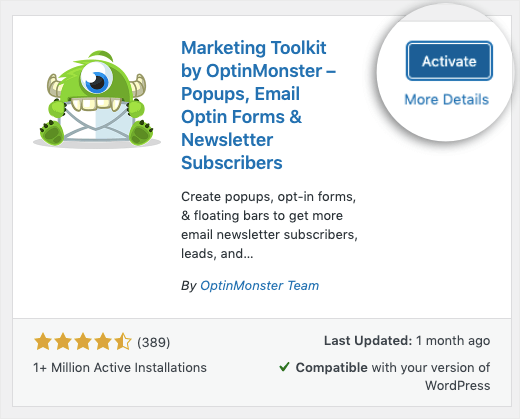
Once the plugin has been installed, click Activate:
In your WordPress admin menu, find and click OptinMonster.
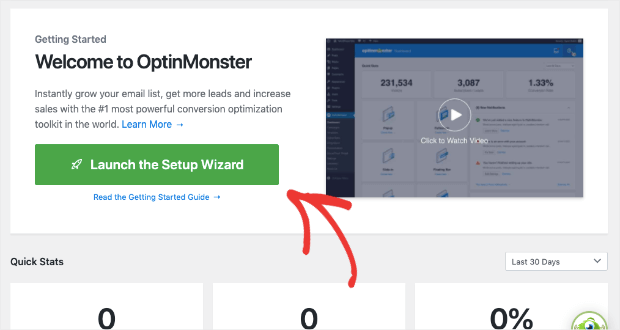
This will pull up your OptinMonster workspace. The first thing you’ll do here is click Launch the Setup Wizard:
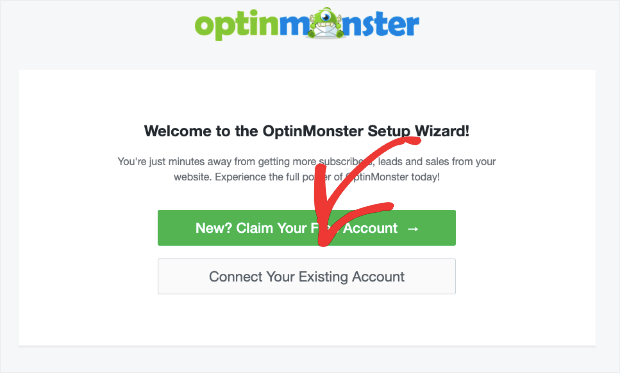
Next, click Connect Your Existing Account:
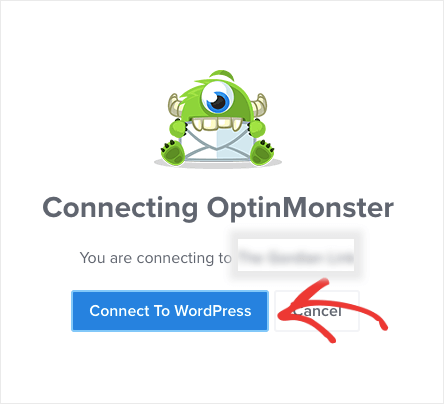
A new popup will appear asking you to Connect to WordPress. Click that button:
If this is your first time using OptinMonster, the setup wizard will prompt you with a few questions to learn more about your business.
This helps us understand how to improve the user experience (UX) and get you higher conversions.
Now your OptinMonster account is set up, connected to WordPress, and you’re ready to design your signup form for Drip.
Step 2) Create Your First Campaign
The best part about using the OptinMonster plugin is that everything can be done directly from your WordPress dashboard.
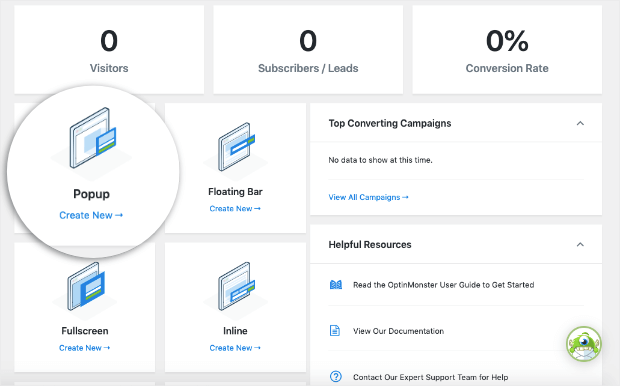
The first step is to choose the kind of campaign you’d like to design to capture your new leads. Again, OptinMonster has plenty of options that allow you to keep your lead generation strategy fresh.
You can choose from:
- Popups
- Floating bars
- Fullscreen campaigns
- Inline
- Slide-in
- Gamified
For today’s tutorial, we’ll stick with a Popup:
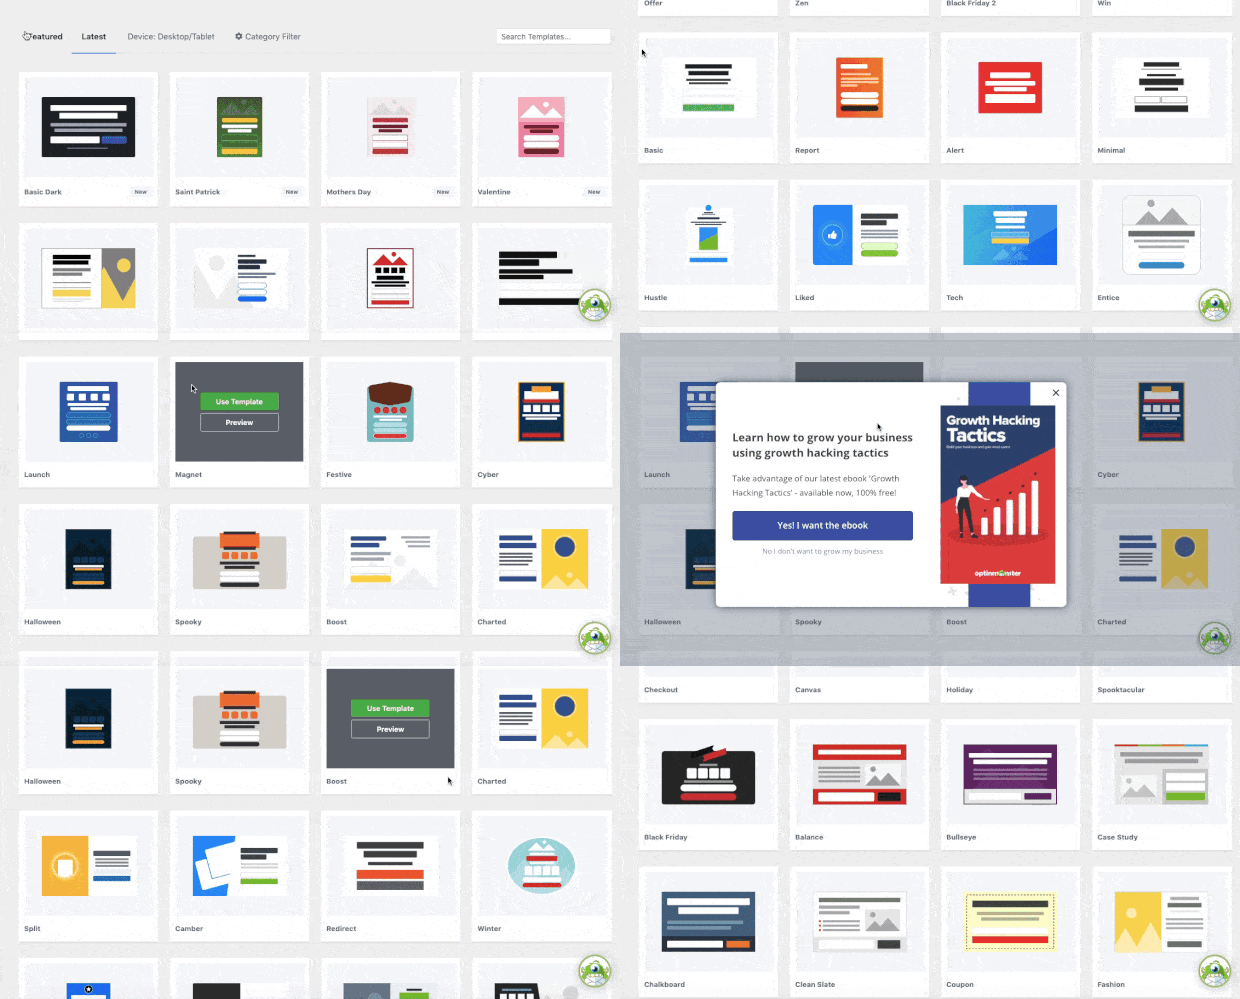
Now you’ll be able to select from any of OptinMonster’s 50+ prebuilt templates.
These templates are designed to save you time, energy, and headaches in the campaign creation process. Plus, they look great across all devices, including mobile, desktop, and tablets:
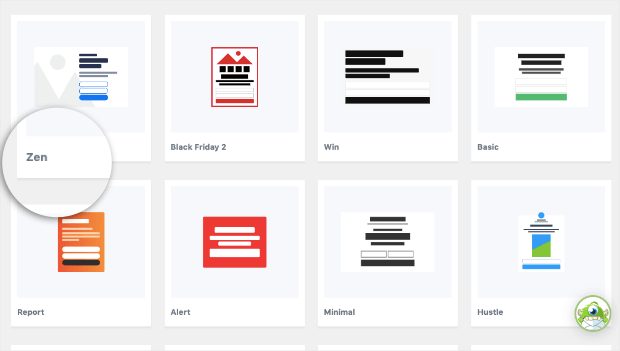
Today, we’ll select the Zen template:
This is a well-designed and multi-purposed template that works well out of the box and can be changed with minimal effort.
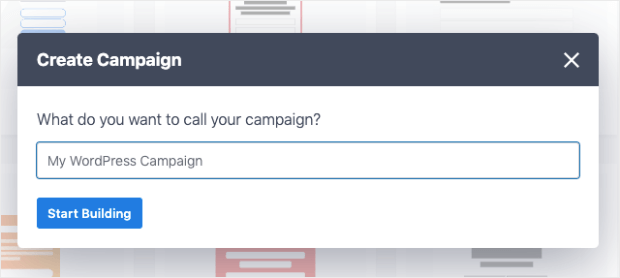
You’ll need to give your campaign a name and click Start Building:
Then the template will appear in your OptinMonster editor, and you’ll be ready to design your campaign.
Step 3) Design Your Campaign
One of the best parts about OptinMonster is how easy it is to use.
Anyone can create stunning signup forms in a matter of minutes without needing any coding or design experience.
There are a few reasons for why this is.
First, OptinMonster has a drag and drop editor that allows you to add new features to your campaign. These features include:
- Video
- Chatbots
- Images
- Custom HTML
- Countdown timers
- Dividers
- Spacers
- And much more…
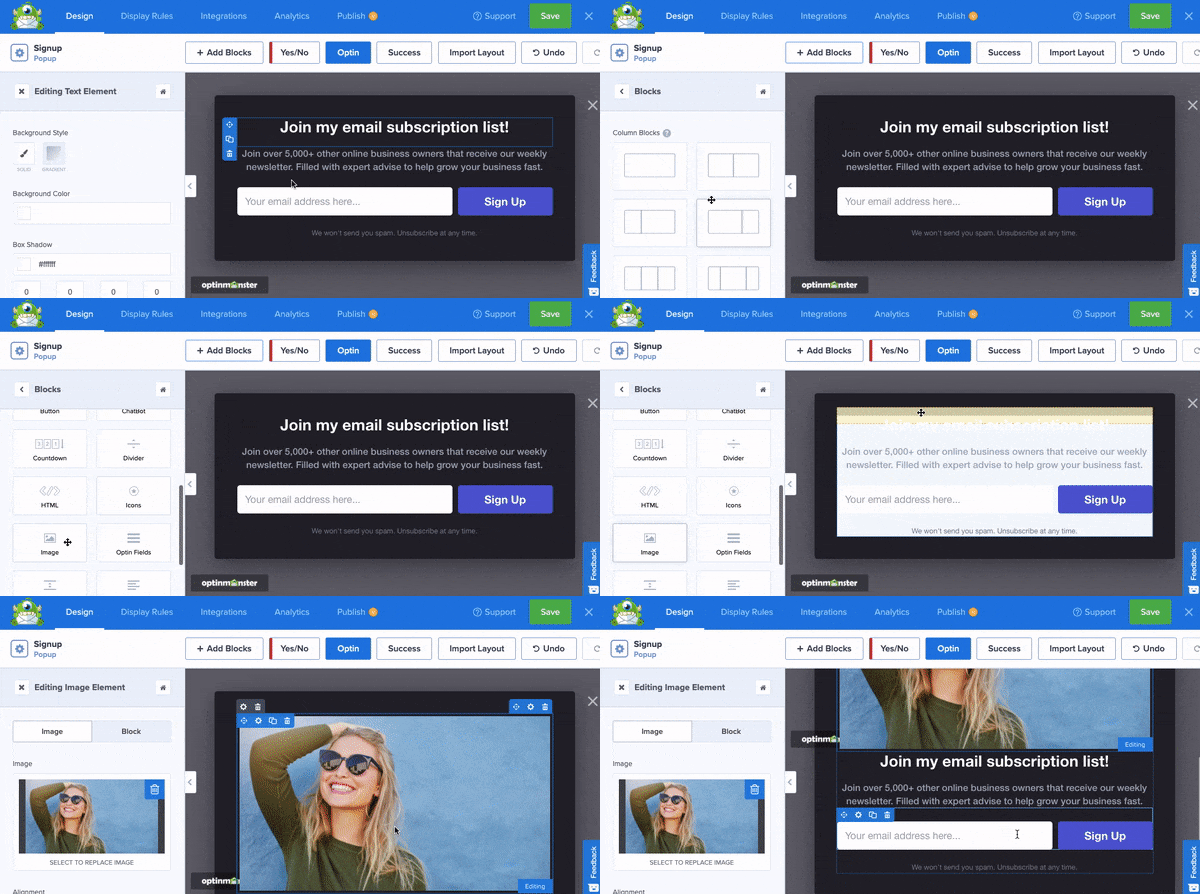
You can add any of these features to your campaign with a drag and a drop:
And since all of these features come as “blocks,” they always fall neatly into your campaign.
That way, you don’t have to be a professional designer to create stunning campaigns. Everything will always stay neat and organized as you add custom features to your signup form.
You can easily add custom fields like radio buttons, text areas, number fields, dropdowns, and more. And you can map any of these fields to your Drip popup without any custom coding.
Second, OptinMonster gives you an inline editor to change the messaging of your text.
This is important because the more personalized you can make your signup forms, the higher conversions you can expect.
You can change various aspects of your text directly in the OptinMonster editor, including:
- Font-family
- Font size
- Alignment
- Line height
- Color
- And much more…
These features allow anyone to quickly and easily design the perfect campaign for their website.
We won’t get into much detail on how to customize every aspect of your campaign in today’s tutorial.
But if you need more help, feel free to check out this detailed resource: Creating Your First Campaign With OptinMonster.
Once you’ve designed the perfect signup form for your audience, you’re only halfway done.
That’s because the next step is the most important: finding the right targeting rules.
Step 4) Add Targeting Rules to Your Drip Signup Form
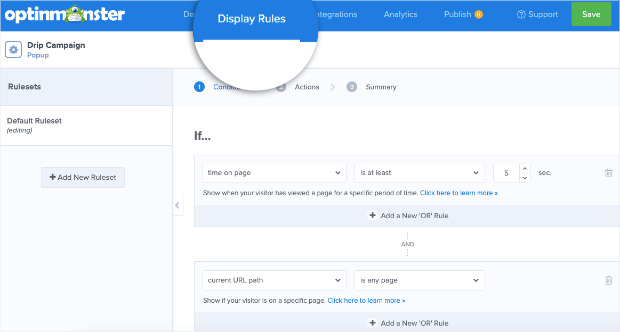
At the top of your OptinMonster editor, click Display Rules:
This gives you quick access to OptinMonster’s targeting rules.
There are too many options to cover in one tutorial, but there’s one thing you should know: you can personalize who sees your campaign, where they see it, and what makes it display.
In other words, OptinMonster makes sure that you’re able to show the right signup form, to the right people, at exactly the right time in their customer journey.
This is true regardless of your target audience, and it allows you to drastically increase your conversions.
That’s because the more personalized you make your Drip signup form, the more people will sign up for your offer.
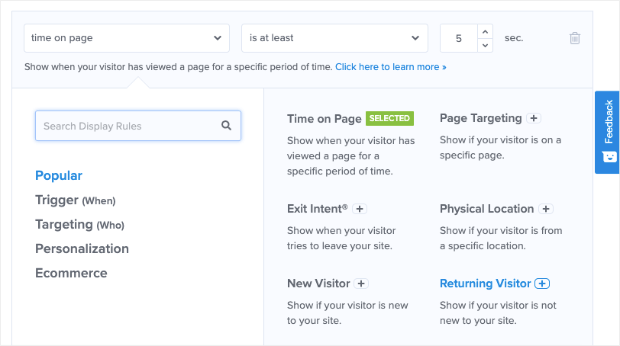
Again, we won’t get to all the targeting rules in this tutorial. But know that you can easily select the targeting rules you want from the display rules menu:
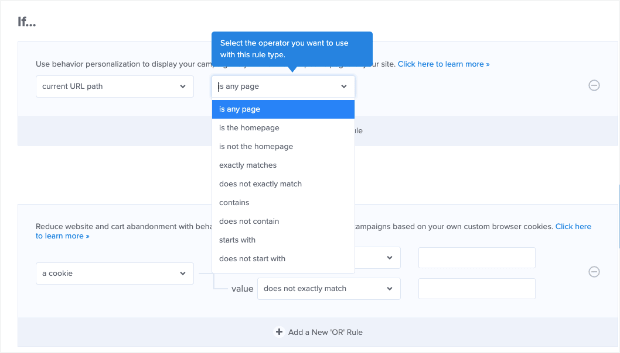
And when you want to configure your targeting rule, everything can be done with simple drop-down menus or basic text field box input:
This means that you don’t have to be a coder (or even be “tech-savvy”) to make highly targeted campaigns that convert.
Now your campaign is designed for your audience and targeted to get you the most subscribers possible.
There’s just one last step before wrapping up: connecting OptinMonster to your Drip account.
Step 5) Connecting Your Signup Form to Drip
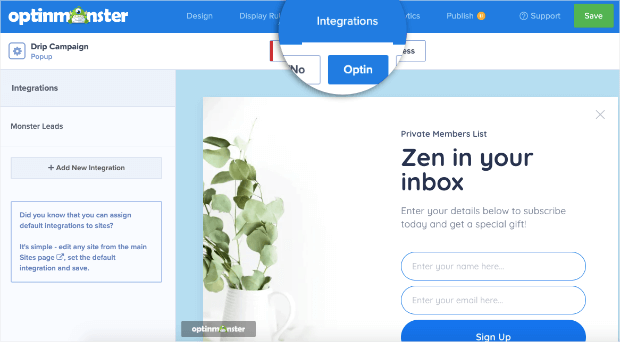
In your OptinMonster editor, click Integrations from the top menu:
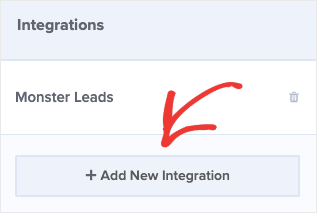
From the left-hand side menu, click + Add New Integration:
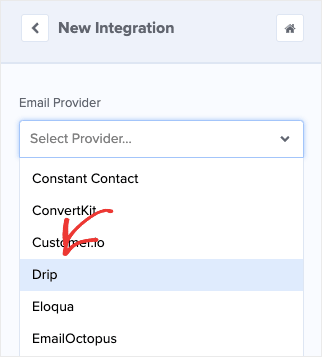
Then select Drip from the drop-down menu:
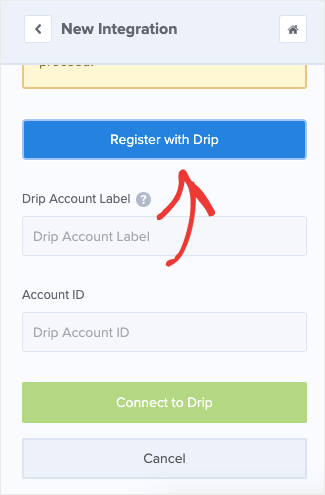
Scroll down and click Register With Drip:
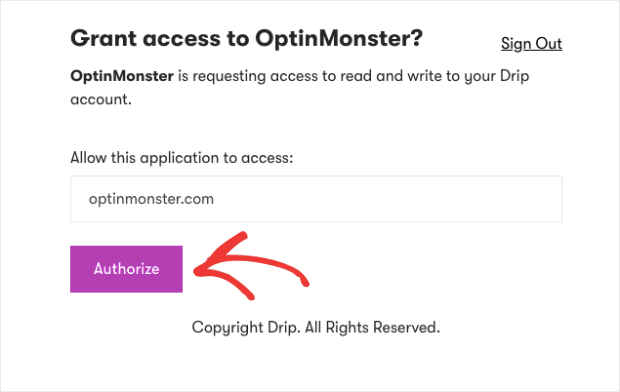
This will open a new window asking you to authorize OptinMonster to access your Drip account:
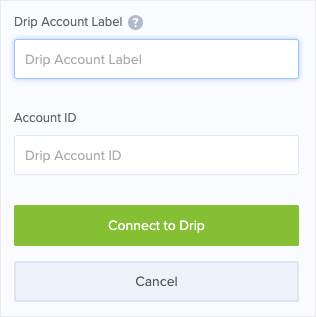
You’ll then need to add 2 things:
- Drip Account Label
- Account ID
Your Drip account label is for internal use only. In other words, this is to help keep yourself organized.
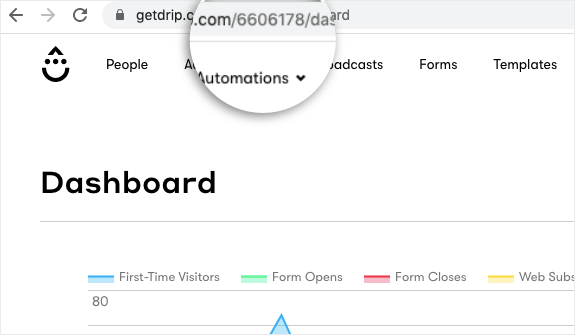
But you’ll need to find your Drip account ID. For that, you can go to your Drip account dashboard. Your ID will be the number in your dashboard’s URL:
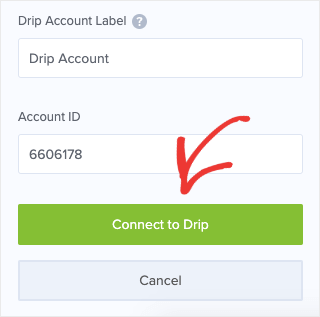
Copy and paste that into the Account ID field and click Connect to Drip:
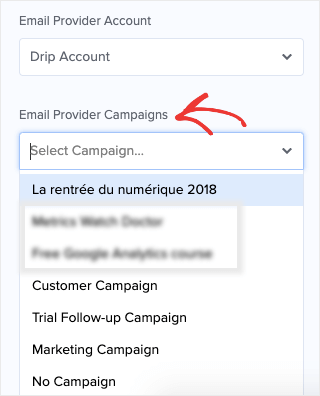
This will also allow you to select a specific campaign you want your new leads to go to or automatically apply tags to subscribers:
This is an important part of getting higher conversions. The more you can organize your list (known as “audience segmentation“), the more conversions you can expect.
Once your Drip account is connected to OptinMonster, that’s it!
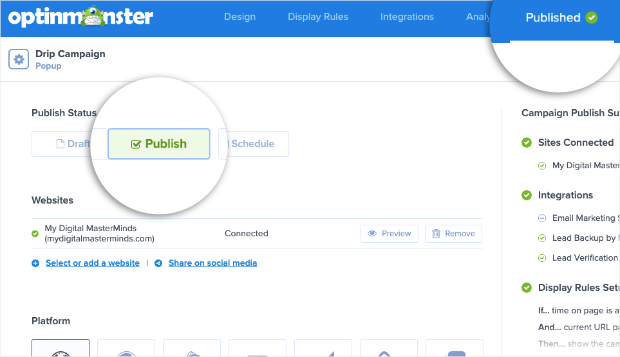
All that’s left is to go to the Publish tab at the top of your editor and switch the campaign from Draft to Published:
Now you’ve created a highly targeted Drip signup form for your website.
That’s all for today, but if you enjoyed this post, then you should definitely check out the following resources:
- Email Marketing Made Simple: A Beginner’s Guide
- How to Run a Successful Email Marketing Campaign (Step-by-Step)
- Tips for Writing Email Copy That (Actually) Converts
These articles will teach you how to drive more revenue from your email list once you’ve added new contacts to your Drip account.




Add a Comment