Lead Verification in OptinMonster allows you to intelligently filter and verify every lead captured through your campaigns. Use it for higher email open rates, increased email deliverability, eliminating low-quality leads, and improved ROI by pre-qualifying leads.
In this article, you’ll learn how to use Lead Verification in OptinMonster.
Before You Start
Here are some things to know before you begin:
- Lead Verification is a paid add-on for OptinMonster. Pricing for Lead Verification is based on the number of emails your campaigns capture each month.
- We now check for “test” or “throw away” emails like [email protected] or [email protected]. This is done by default and doesn’t need to be enabled.
Our conversion experts will design 1 free campaign for you to get maximum results – absolutely FREE! Click here to get started →
Enable Lead Verification
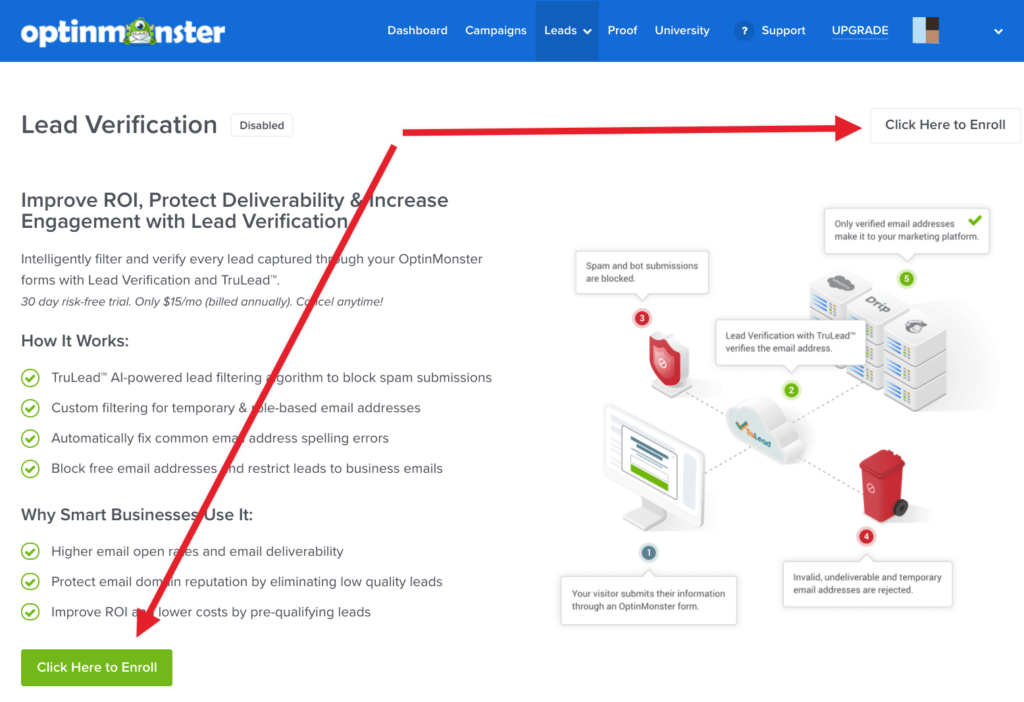
You can improve ROI, protect deliverability and increase engagement with Lead Verification.
To enable Lead Verification in OptinMonster, follow these steps:
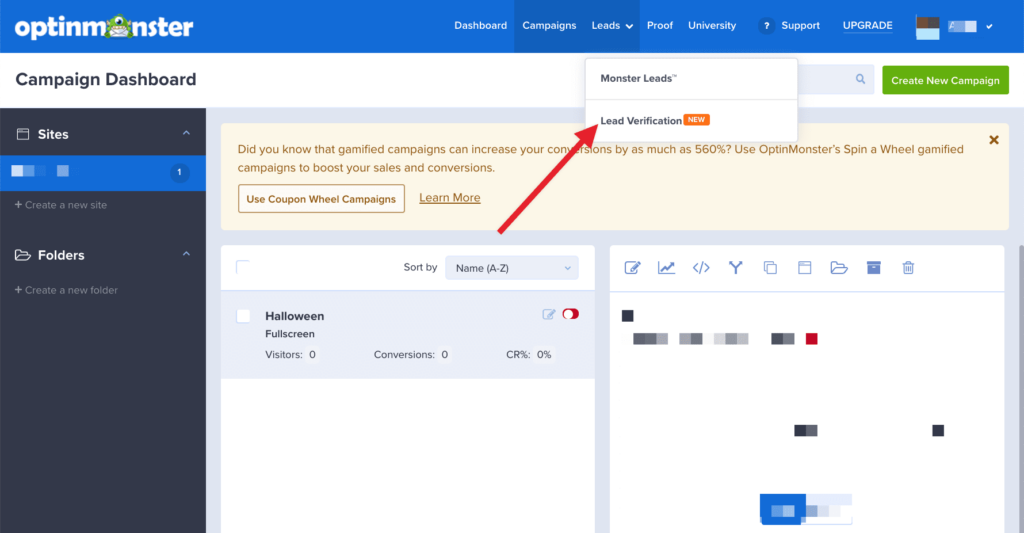
- Navigate to the Leads > Verification page.
- Select the Click Here to Enroll button.
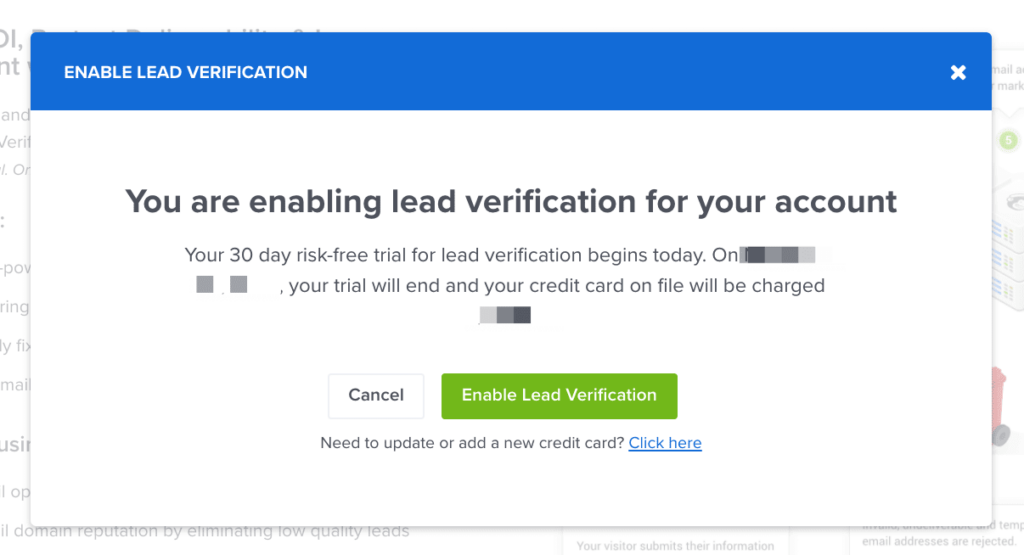
- A popup will appear with details about the cost of adding Lead Verification to your account. Select the Enable Lead Verification button to proceed.
Create Lead Verification Filter
Once you’re enrolled in Lead Verification you’ll want to create one or more Filters.
To create a Lead Verification Filter, follow these steps:
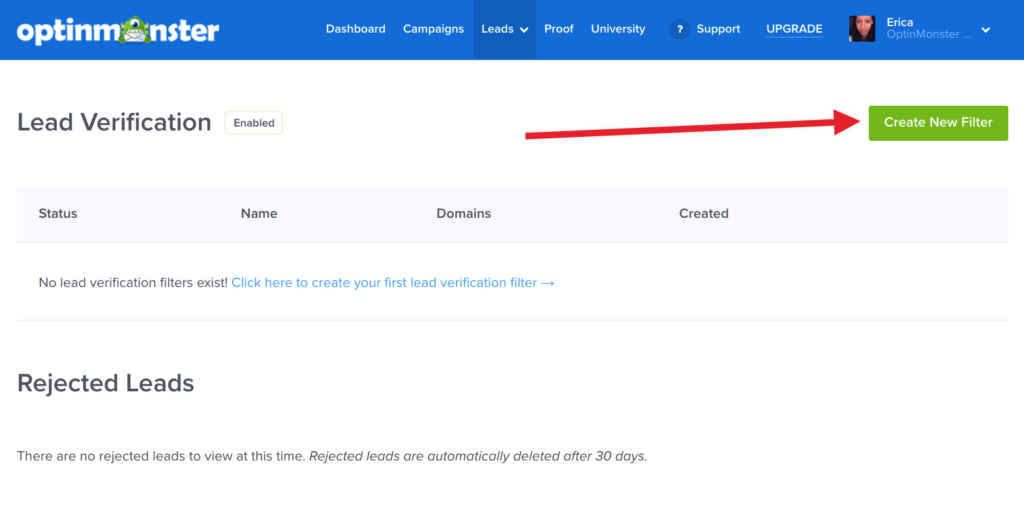
- From the Lead Verification page select the Create New Filter button.
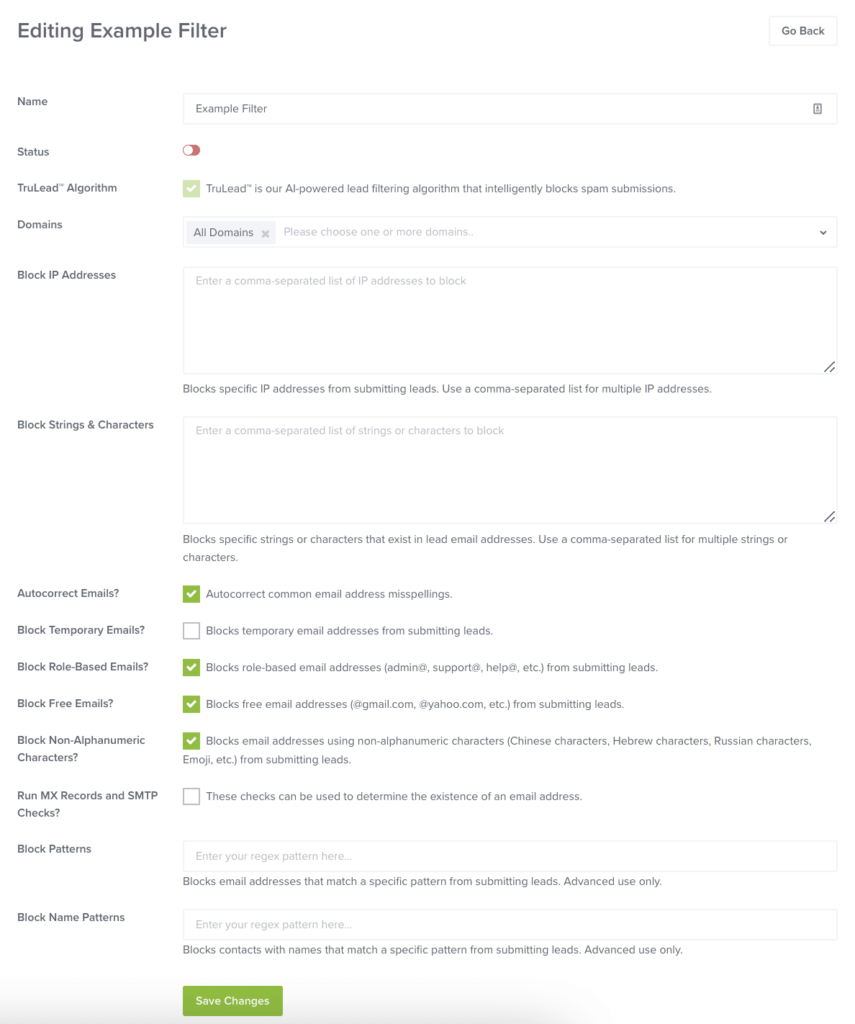
- On the next screen give your filter an easily identifiable name. You can then configure the rules you would like to use for your filter.
The options available for your Filter include:- Status (allows you to enable/disable a Filter)
- TruLead™ Algorithm
- Domains (to apply the Filter to)
- Block IP Addresses
- Block Strings & Characters
- Autocorrect Emails?
- Block Temporary Emails?
- Block Role-Based Emails?
- Block Free Emails?
- Block Non-Alphanumeric Characters?
- Run MX Records and SMTP Checks?
- Block Patterns
- Block Name Patterns
- When you’re finished configuring your Filter, select the Create Filter button to save.
Autocorrect Emails?
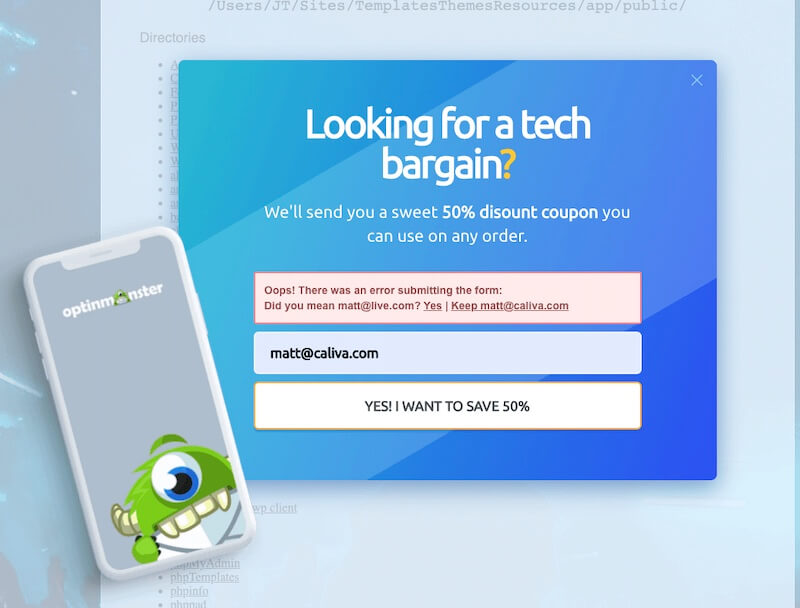
If the Autocorrect Emails? setting is enabled for your Filter visitors now have the ability to confirm or deny the autocorrect suggestions within the campaign itself.
Rejected Leads
Leads that have been rejected according to the Filter(s) you have created will appear on the Lead Verification page under the Rejected Leads section.
Rejected leads are automatically deleted after 30 days. Once deleted they cannot be recovered under any circumstances.
You’ll be able to manually Approve or Delete filtered leads from this screen.
Disable Lead Verification
If you no longer wish to subscribe to Lead Verification you can disable the feature from your account.
To disable Lead Verification, follow these steps:
- Navigate to the Account > Billing page in your OptinMonster account.
- Under the Additional Upgrades section locate the Lead Verification option.
- Select the Remove button to disable Lead Verification.
Error Codes
The following are the error codes used by TruLead and details of what will produce that response on lead submission.
SMTP / MX Records Check Fail
Error: The SMTP and/or MX Records check has failed. The email address provided seems to not exist.
Error Code: none
Context: Check for the existence of email with SMTP and MX record checks.
Unknown Failure
Error: This email address could not be verified with our platform. Please try a different email address.
Error Code: 5000
Context: If verification fails for unknown reason.
5001 Temporary Email Address
Error: Temporary email addresses are not allowed. Please try a different email address.
Error Code: 5001
Context:
- If temporary emails are blocked and this is a temporary email, throw an error.
- Block emails from known temporary email services.
5002 Role-Based Email Address
Error: Role-based email addresses (admin@, help@, support@, etc.) are not allowed. Please try a different email address.
Error Code: 5002
Context: If role-based emails are blocked and this is a role-based email, throw an error.
5003 Free Email Address
Error Code: 5003
Error: Free email addresses (@gmail.com, @yahoo.com, etc.) are not allowed. Please try a different email address.
Context: If free emails are blocked and this is a free email, throw an error.
5004 Banned IP Address
Error: Submissions are not allowed from your IP address. Please try again from a different computer or location.
Error Code: 5004
Context: If the lead is submitted from a banned IP address, throw an error.
5005 Characters or Strings in Email Address
Error: Your email address contains characters or strings that are not allowed. Please try a different email address.
Error Code: 5005
Context: If the email address contains certain characters or strings, throw an error.
5006 Email Matches A Pattern
Error: Your email address matches a pattern that is not allowed. Please try a different email address.
Error Code: 5006
Context: If the email address matches a pattern, throw an error.
5007 Name Matches A Pattern
Error: Your name matches a pattern that is not allowed. Please try a different name.
Error Code: 5007
Context: If the name address matches a pattern, throw an error.
Alphanumeric Characters
Error: Invalid format: failed alphanumeric-only check (email contains non-alphanumeric characters).
Error Code: none
Context: If only allowing alphanumeric characters.
ASCII Values Errors
Error: Invalid format: Decoding to ascii had no effect.
Error Code: none
Context: If the ascii value of the email is the same as the email address itself.
Error: Invalid format: Decoding to ascii produced invalid email result.
Error Code: none
Context: If the ascii value of the email is an invalid email result.
Test Email
Error: A test email address has been detected.
Error Code: none
Context: If a test email is detected.

