Do you want to create a popup with Contact Form 7 to let your site’s traffic get in touch with you more easily?
Having a contact form on your website is a great way to communicate with your visitors. But some people may need an extra nudge to fill out a contact form to reach out with questions, problems, or general inquiries.
That’s why creating a contact form popup can be a great way to boost user experience (UX) while simultaneously growing your email list.
So, in this post, we’re going to teach you step-by-step how to create a popup with Contact Form 7.
Before we do, though, let’s look at why you’d want to create a contact form popup in the first place.
Why Create a Popup With Contact Form 7?
When your site’s visitors have a question about your product, services, or website, you want to make sure they have an easy way of contacting you.
And while the best solution is to add a live chat feature to your website, you may not have the resources, staff, or time to effectively manage customer communication in real-time.
Another solution is to create a contact form that allows customers to send you a message to your professional inbox. But then you have another problem:
How do you get customers to fill out your contact form before heading back to Google, researching their question, and landing on a competitor’s page?
This is where a contact form popup comes in so handy.
A contact form popup is a small message that appears on your customer’s screen, prompting them to contact you with any questions or problems they may have.
This allows you to meet your audience wherever they are in their customer journey, guide them down the sales funnel and create a new long-term client.
The best part is that even if you don’t get an immediate sale, you still have a new contact for your email list. This lets you build a relationship over time and, again, get warm leads who are primed to do business with you.
But how do you create a contact form popup?
There are many ways, but the best solution is to use OptinMonster:
OptinMonster is the world’s #1 lead generation software on the market. Not only do we make it easy to build stunning and highly targeted popups in a matter of minutes, but we also make it easy to embed forms from the most popular form building plugins around.
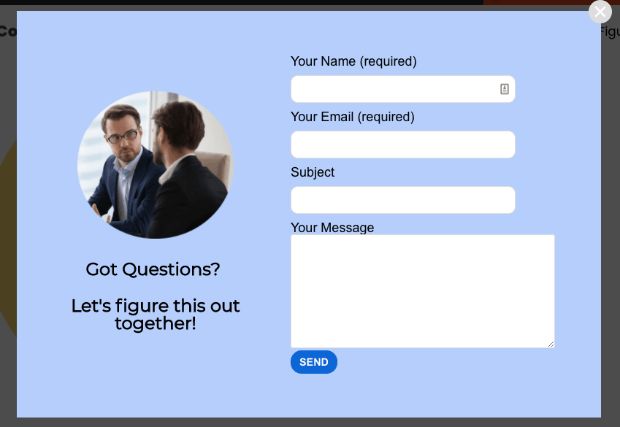
And, today, we’re going to teach you exactly how to create a popup with Contact Form 7. Here’s the demo popup we created for this tutorial:
This popup took less than 10 minutes to create and will be a great addition to any WordPress site.
Ready to get started? Let’s dive in.
How to Create a Popup With Contact Form 7
When you’ve signed up for OptinMonster, you’ll want to download and install the OptinMonster plugin for WordPress. That way, you can quickly and seamlessly connect your OptinMonster account with your website.
If you need help setting this up, we highly recommend checking out this tutorial: How to Connect OptinMonster With WordPress.
Step 1: Choose Your Campaign Type and Template
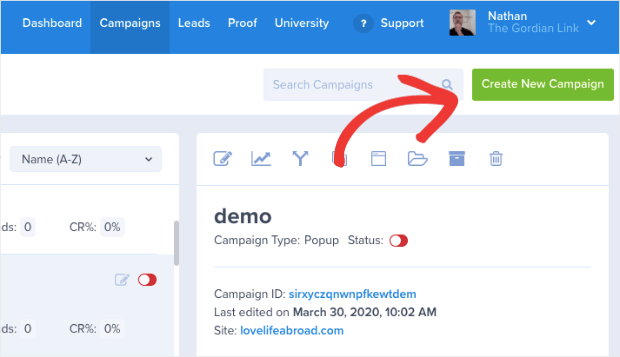
Once you’ve signed up for OptinMonster, head over to your account dashboard. In the upper right-hand corner, click Create New Campaign:
Then you’ll need to select your campaign type. While we have many options to choose from, we’ll be using a Popup for today’s tutorial:
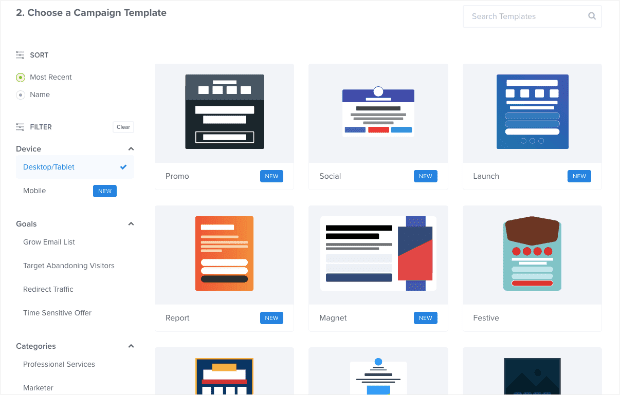
Now it’s time to choose your template:
OptinMonster has over 50 pre-built templates that you can choose from. These make it easy for you to create stunning campaigns in minutes.
And thanks to our drag and drop builder, there’s zero coding or design skills required.
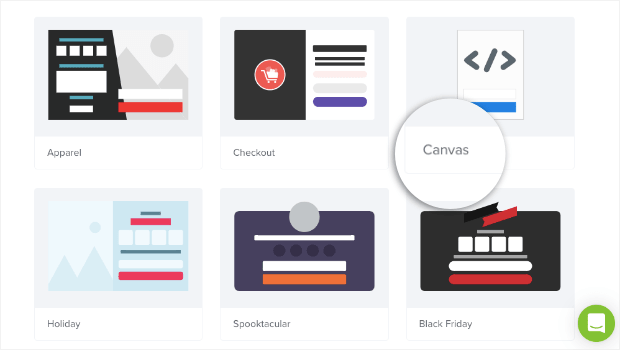
Today, though, we’re going to create a simple contact form popup with Contact Form 7. That means our best option will be a Canvas template:
This is a blank template that still uses the drag and drop builder. This is a great option because it allows you to embed your Contact Form 7’s shortcode and lets users focus exclusively on your contact form without being distracted by other elements.
In other words, when it comes to creating a contact form popup, less is usually more. But you should know that you can add a Contact Form 7 embeddable shortcode to any OptinMonster template you choose.
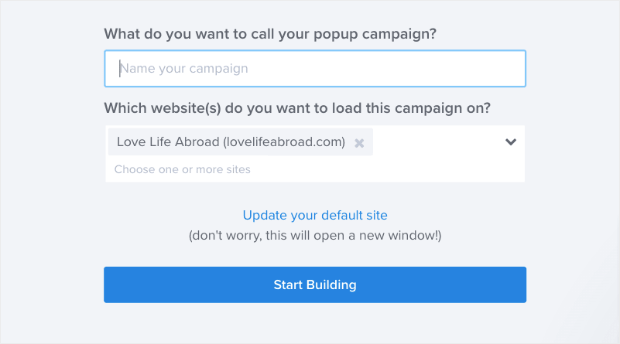
When you’ve selected the right campaign template for your site, you’ll need to name your campaign, assign it to your website, and click Start Building:
Then you’ll be ready to design your campaign.
Step 2: Embed Contact Form 7 into Your Popup
At this point, your campaign template is in your OptinMonster editor. Since we’re starting with a blank template, you’ll need to add your Contact Form 7’s shortcode to the popup.
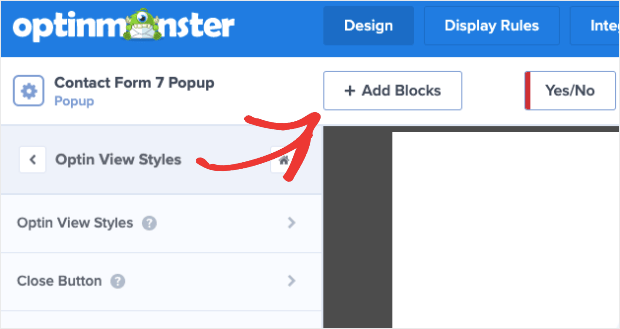
Doing so is easy. Click + Add Blocks at the top of your editor menu:
Then locate the block <HTML> and drag and drop it into your campaign template:
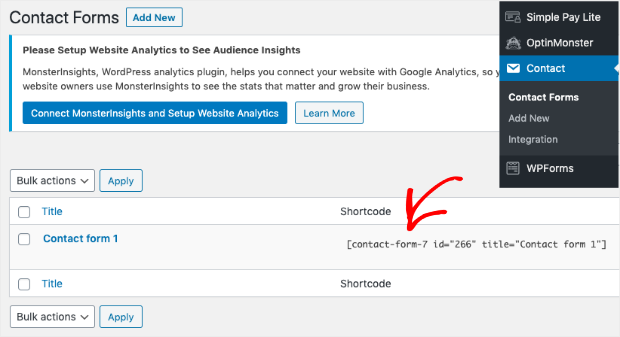
Next, head over to your WordPress dashboard to grab your Contact Form 7’s embeddable shortcode. Click the Contact Form 7 plugin (labeled Contact) in WordPress to pull up your list of forms.
Then copy the shortcode next to the contact form you want to use:
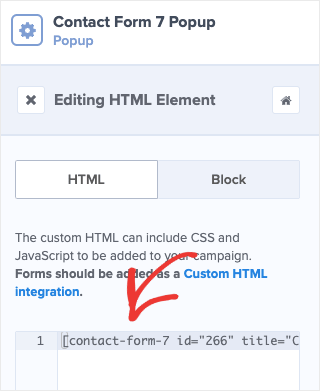
Head back to your OptinMonster editor and click on the HTML block you just added to your template. This will pull up the editing tools on the left-hand side. Paste the Contact Form 7 shortcode into the HTML block:
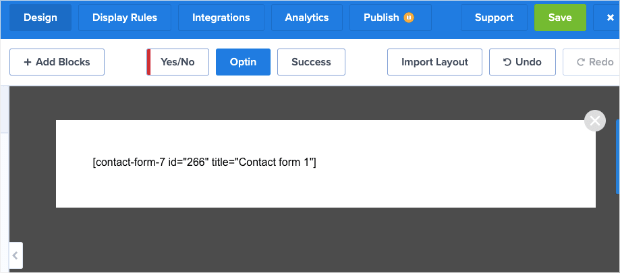
Note that the shortcode will appear in your editor, not the contact form:
This is normal, and the contact form will appear when the campaign is live on your site.
You can make other modifications to your campaign, such as adding text, images, changing the background colors, and more.
We won’t go into detail on how you can modify these aspects of your campaign’s design in this post. Frankly, there are too many customization options to cover here.
If you need some help designing your contact form popup, we recommend checking out this post on how to create your first campaign with OptinMonster.
This resource will walk you through how you can modify different block elements in your campaign if you choose to use them.
Here’s the Contact Form 7 popup we designed for today’s demo:
It’s simple, sleek, and highly effective.
One thing that you may want to do, however, is add some CSS to your contact form in the popup. This can make the form more visually appealing in your popup.
If you don’t know CSS, no worries. Here’s the code we used in today’s demo to style our form:
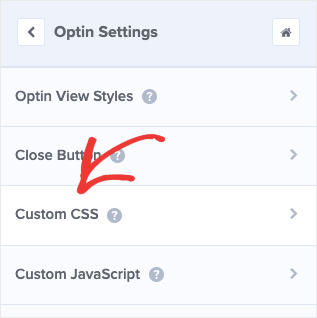
You can insert this with OptinMonster’s custom CSS feature. From your home editing menu, click Optin Settings » Custom CSS:
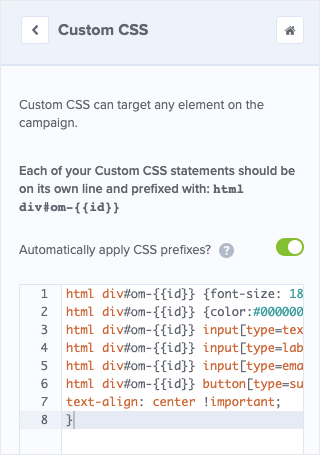
Then copy and paste the CSS code from above to style your form:
Again, this is simple CSS that will make a basic contact form look more visually appealing. You can add custom CSS if you have more specific needs.
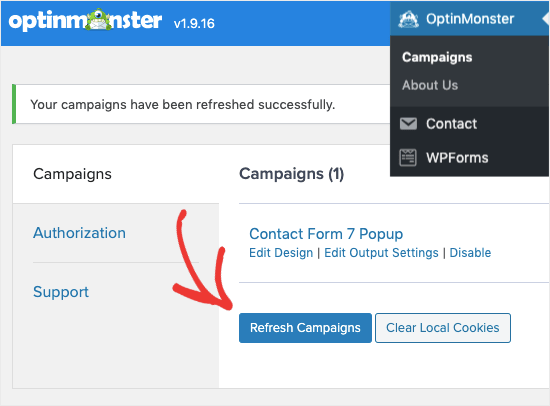
You should also know that any time you change or add an HTML block, you’ll need to refresh your campaigns in the OptinMonster plugin.
To do so, head to your WordPress dashboard and click OptinMonster » Campaigns. Then click Refresh Campaigns:
Once you’ve tested your campaign and you’re satisfied with the design, it’ll be time to modify your display rules.
Step 3: Set Your Display Rules
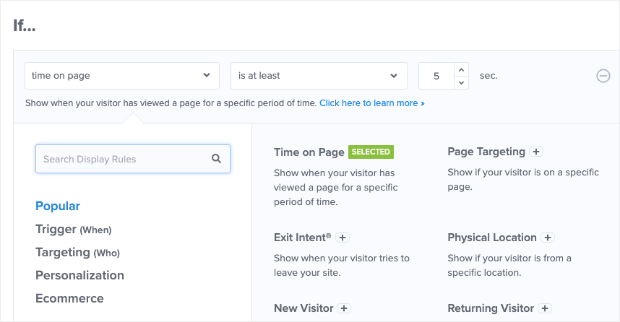
By default, OptinMonster has two display rules for each campaign:
- Time on page is 5 seconds
- The popup will appear on any page of your site
We recommend customizing these rules for your audience, especially because this is a contact form popup. That means you want to target people who are considering your product or likely have questions about your services.
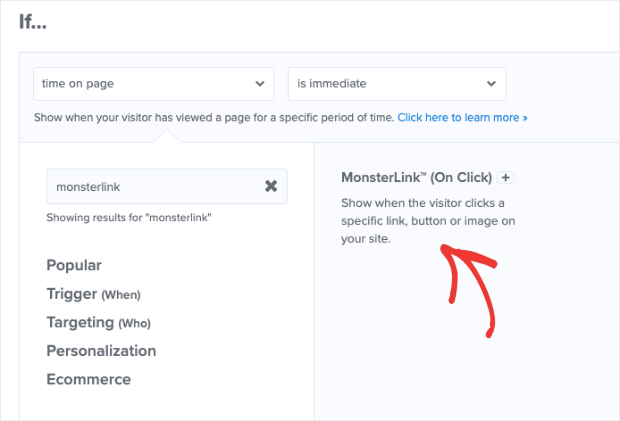
While we have many targets and triggers that you can choose from, one that we recommend for a contact form popup is using MonsterLinks™.
MonsterLinks™ make your contact form popup appear when users click a button or a link on your page. That means if they have a question or problem, your visitors can simply click on a button and have a new window appear with the contact form.
This is better for the overall user experience because you aren’t redirecting people to another page. Instead, you’re allowing your visitors to drive the conversation in a totally frictionless way.
Here’s how you set this up. First, go to Display Rules at the top of your OptinMonster editor:
Then click on the first default rule to pull up your display rule options:
In the search bar, look for MonsterLinks™. When it appears in the menu, click on the rule:
Then click on Copy MonsterLink™ Code:
You now have an embeddable link to your contact form popup. It comes in the HTML form like so:
<a href=”https://app.monstercampaigns.com/c/nujmnl2abxowuv1faou6/” target=”_blank” rel=”noopener noreferrer”>Subscribe Now!</a>
But for many page builders used with WordPress, you don’t need the HTML to embed a link to a button or text. Instead, you only need the URL. You can simply copy the URL from the code snippet above (the URL starts with https://):
https://app.monstercampaigns.com/c/nujmnl2abxowuv1faou6/
Now you can embed this link on any button or text on your site just like you would with any other URL.
All that’s left is to publish your campaign.
Step 4: Publish Your Contact Form Popup
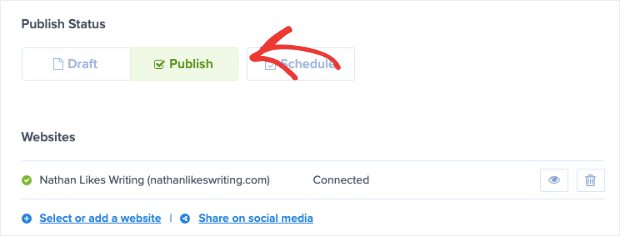
The last step is to publish your campaign. To do so, click on Publish at the top of your editor menu:
Then switch the campaign’s status from Draft to Publish:
And that’s it!
Your contact form popup is ready to go so long as your site is connected. Again, if you haven’t installed the OptinMonster plugin for your WordPress site and need to do so, you can head back to the start of the tutorial to learn how.
We hope you found this tutorial helpful. If so, you may want to check out the following resources:
- How to Create a Popup Form With CSS and JavaScript
- How to Create a Lead Capture Form That Converts
- How to Create a WordPress Survey Popup
These articles will have everything you need to create stunning forms that grow your business.
Ready to get started? Sign up for OptinMonster today!









Add a Comment