Do you want to create a custom CSS and Javascript popup form but not sure of the best way to go about it?
When done correctly, popups can be an excellent addition to your site. They can help you welcome new visitors, grow your email list, and boost sales.
But when done incorrectly, they can be a major turn-off to your site’s visitors.
That’s why, in today’s tutorial, we’re going to show you two methods for creating a popup on your website the right way.
Create High-Converting Popups Now!
Before we dive into the tutorial, though, let’s check out some of the reasons why you’d want to use popups on your site in the first place.
Why Use Popups on Your Site
Popups are a funny thing. Over the years, they’ve developed a reputation for being an annoying addition to websites that harm user experience (UX).
And yet, when it comes to getting users to take action on your website, one thing is clear:
Popups work.
So why do some popups hurt UX while others engage users and boost conversion rates? In our experience, that comes down to two factors. Successful popups tend to be:
- Visually appealing
- Personalized to the user
When you show a generic, ugly popup across your site that isn’t personalized for your site’s visitors, you’re definitely going to annoy people.
But when you show a stunning popup that connects with users where they are in their customer journey, you’ll see conversion rates skyrocket.
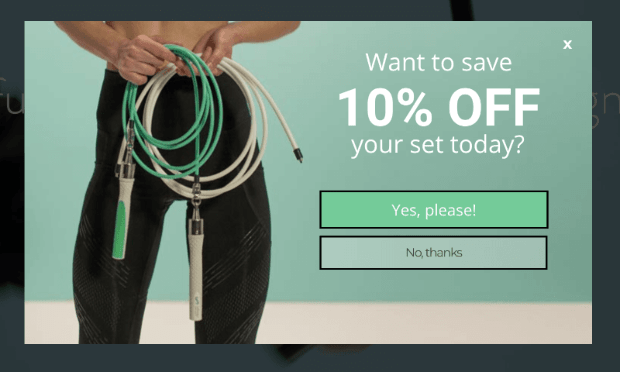
Take this simple popup from Crossrope for example:
This popup offers customers a discount while they’re looking at various products on the website. It’s also visually appealing and matches the site design.
As a result, Crossrope was able to grow its email list by 900% and recover 7.65% of abandoning shoppers.
Again, when done right, popups work.
That’s why OptinMonster strives to give online business owners the tools to create highly-targeted popups the right way:
OptinMonster is the world’s #1 lead generation software. That means we’re the best at getting people to take the actions you want them to.
We do that by empowering business owners to create “optin campaigns” targeted to their specific audience.
Optin campaigns are messages that appear on your site in the form of a popup, fullscreen campaign, floating bar, and more.
These campaigns have a call-to-action (CTA) that motivate users to do something. With OptinMonster, you can build stunning popups in minutes that require zero coding skills.
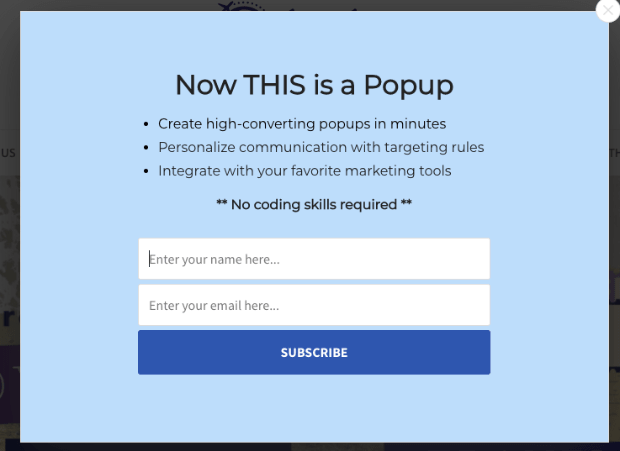
Here’s one of the popups we’ll build in today’s tutorial using OptinMonster:
This popup took us less than 5 minutes to build, create targeting rules, and integrate with an email service provider.
For more information, check out this helpful resource: Is OptinMonster Worth It? An Extensive Review.
Create High-Converting Popups Now!
Now, let’s look at two ways you can build a custom JavaScript popup for any website.
How to Create a CSS and JavaScript Popup
In this article, we’re going to use two methods:
- Creating a “no-code” popup for any website in 3-5 minutes
- Coding a “CSS and JavaScript” popup from scratch
Let’s get started.
Method 1: Create a High-Conversion “No-Code” Popup
Let’s start creating a popup with OptinMonster. It’s much more straightforward and can be done for any website in minutes with zero coding skills required.
Plus, OptinMonster gives you instant access to tons of targeting rules that help you personalize your messages to customers and meet them along their customer journey.
That means higher conversions and more sales for you.
Getting started is easy once you sign up for your risk-free OptinMonster account.
Step 1: Select Your Campaign Type and Template
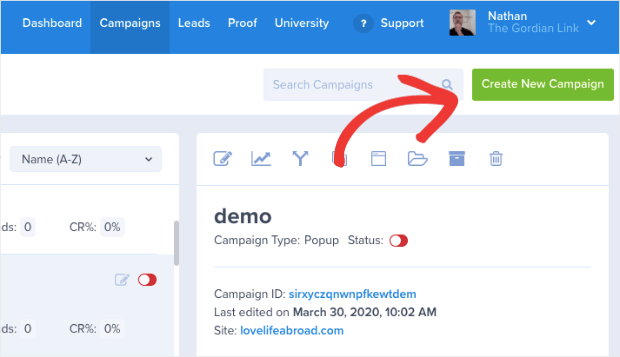
In your OptinMonster dashboard, go to the upper right-hand corner and click Create New Campaign:
Then select your campaign type. OptinMonster has different optin campaigns to choose from, such as:
- Popup
- Floating Bar
- Fullscreen
- Slide-in Scroll Box
- And many more
For today’s example, we’ll choose a Popup:
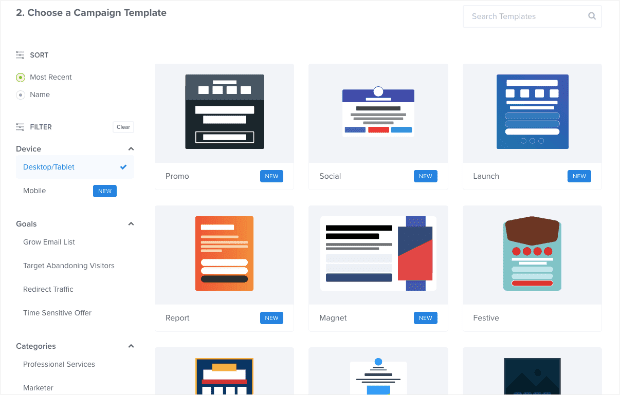
Now you can select your template. We have over 50 pre-built templates to choose from, all of which look stunning across desktop, tablet, and mobile:
But what if you want to build your template from scratch, so it’s 100% unique to your brand? That’s not a problem at all.
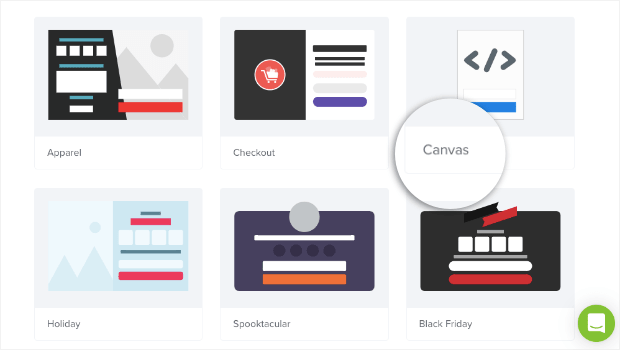
Simply select our Canvas template:
This will allow you to build your popup from a blank template. But the good news is that you still won’t need any coding skills to create a beautiful campaign.
Everything can be modified with a drag and a drop.
For today’s tutorial, we’ll choose a Basic template:
This is an excellent choice for beginners as it’s minimalistic in design but leaves plenty of room for compelling copy that converts.
When you’re done with that, it’s time to design your popup campaign.
Step 2: Design Your Popup
As we said earlier, modifying your OptinMonster campaigns is easy in our editor. We won’t get into all the ways you can customize your campaigns in this tutorial.
There are simply too many design options to cover in this post. For today, all you need to know is that our campaigns are made up of element blocks or “blocks” for short.
This includes things like text blocks, image blocks, video blocks, and more.
And modifying any of these blocks is super simple.
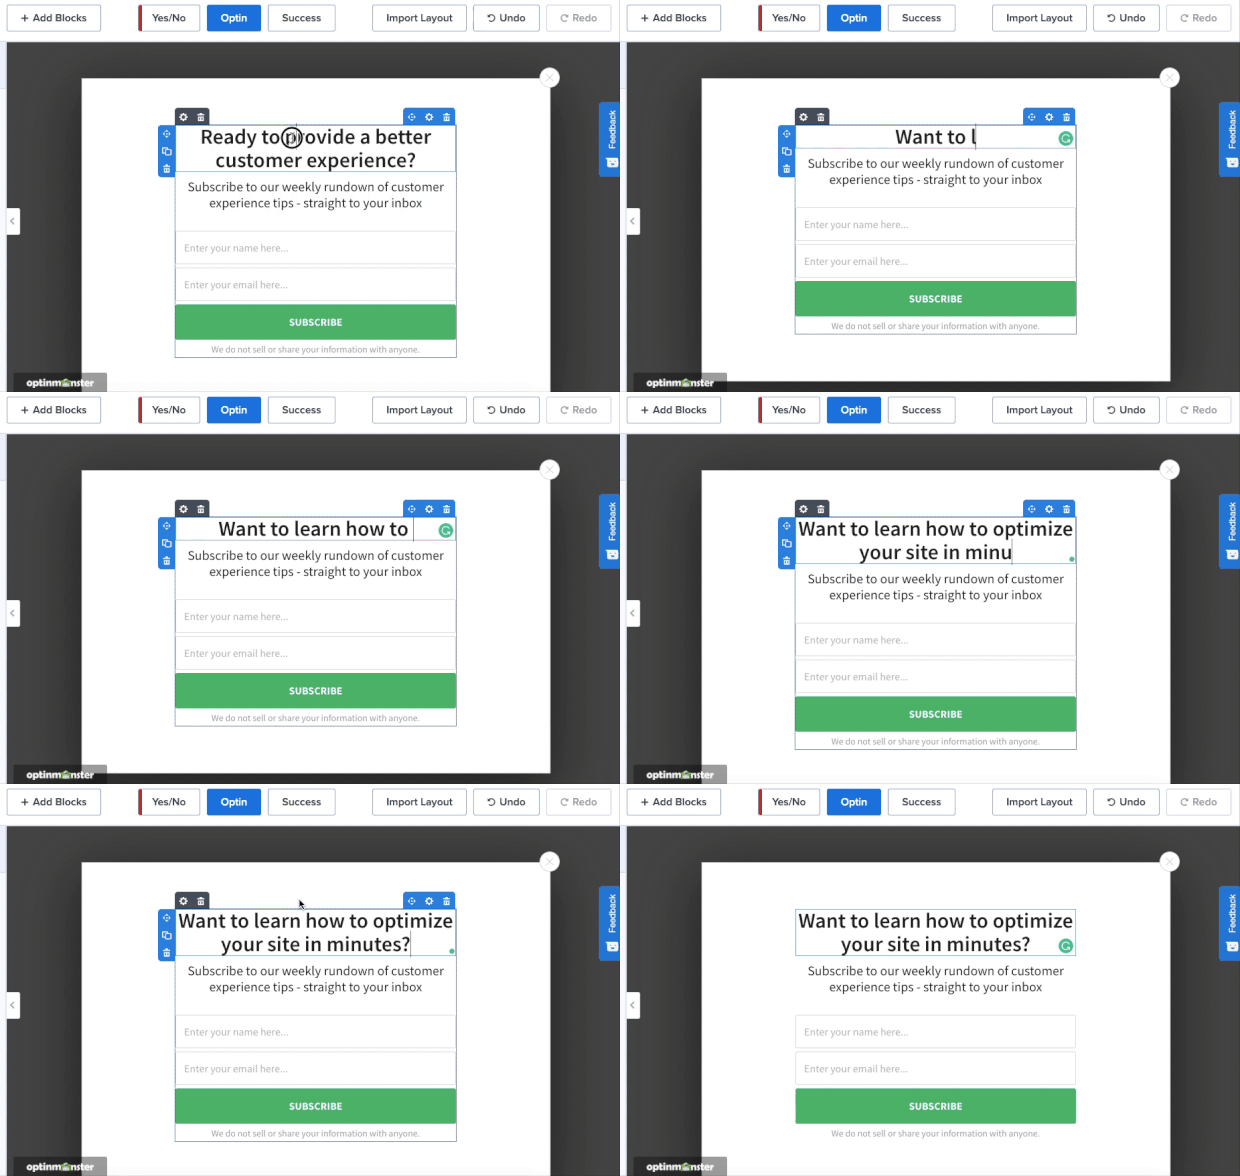
To change your text block, for example, you can use our inline text editor. That means you just click on the text you want to change and type directly in the OptinMonster editor:
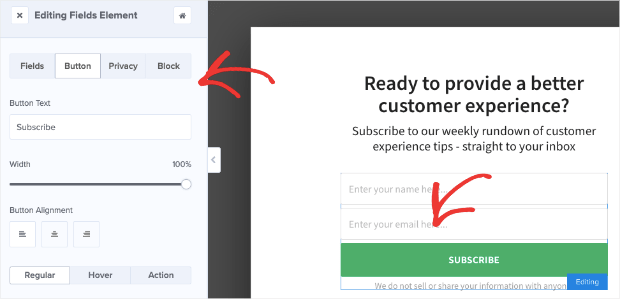
To change other block elements, click on them in your editor, and the editing tools will appear on the left-hand side:
Here’s the best part, though: you can still add custom HTML, CSS, or JavaScript to any of the campaigns.
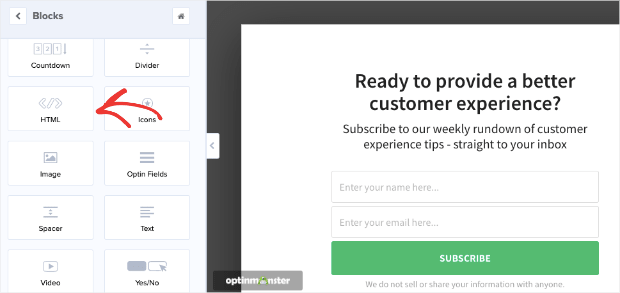
To add HTML, you’d simply drag and drop the HTML block into your popup:
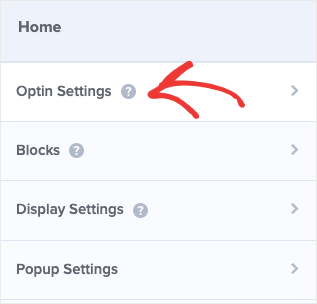
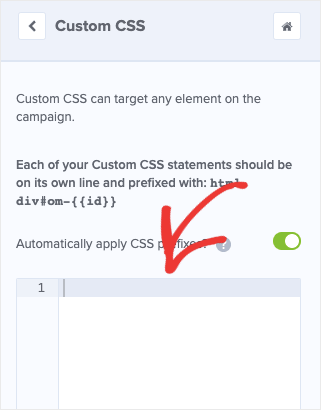
Or you can add CSS and JavaScript to your popup by clicking Optin Settings from the home menu on the left:
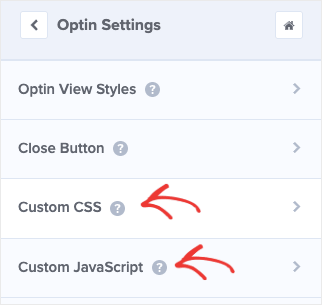
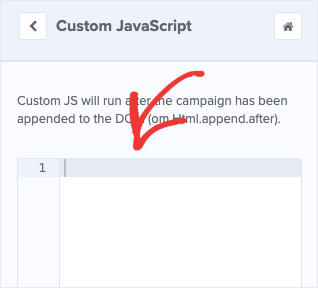
Then you can click on the CSS or JavaScript tabs to add code to either element:
Then add the CSS code in the field box:
And you can do the same with your custom JavaScript:
This is important because it means that you can totally customize your OptinMonster campaigns with HTML, CSS, and JavaScript if you choose.
In method #2 from this article, you need to know CSS and JavaScript to make a functional popup.
But with OptinMonster, you have the option to rely on our templates and editor OR use custom code to build your popup.
It’s this kind of freedom that allows clients with any technical background to build the perfect campaign for their brand and goals. Here’s the popup we built for today’s tutorial in under 5 minutes:
For more inspiration, check out this article on 37 types of popups to use on your website.
Once you’ve designed the right popup for your site, it’s time to set a few display rules.
Step 3: Create Your Display Rules
One of the problems with coding your own JavaScript plugin is that it’s very difficult to set up rules that can target the right customers at the right time in their customer journey.
With OptinMonster, however, it’s insanely simple.
We have two types of display rules that allow you to personalize your campaign to specific segments of your audience:
- Triggers
- Targets
Triggers rely on user behavior to determine whether or not a user will see your campaign.
This can include showing a popup as users are leaving their browser page (with Exit-Intent® Technology), when they scroll down a certain percentage, how long they spend on a specific page, and many more.
Targets are a little different. These use characteristics of your customer profile to make your campaign appear.
This would be like which region your visitor is coming from (with Geo-Location), which device they’re using, how they’ve interacted with your site in the past, and much more.
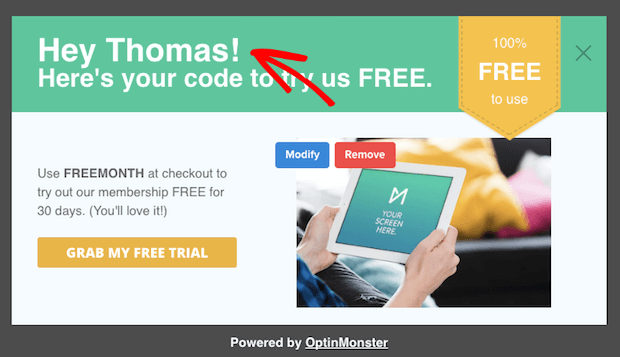
Plus, you can customize your optin campaigns using features like Smart Tags to make a dynamic popup that refers to your visitor’s name or location. That would look something like this:
And with our OnSite Follow Up Campaigns®, you can build drip campaigns. That means you can display popups depending on how your users have interacted with the campaigns they’ve already seen.
Ok. So all these features are pretty cool. But what do they do for you at a practical level?
OptinMonster’s targeting and trigger rules allow you to quickly and easily personalize how you communicate with your audience. And the more personal you can get, the higher conversion rates you can expect.
That means more growth for your business in a fraction of the time.
In fact, these personalization techniques are how Expat.com was able to grow their contact list with over 30,000 new members each month.
You can have similar success by targeting your popups to the right audience without writing a single line of code.
Step 4: Integrate With Your Email Service Provider
Another problem you may have with coding a JavaScript popup form is integrating it with other software.
This is particularly true if you want your popup to capture emails.
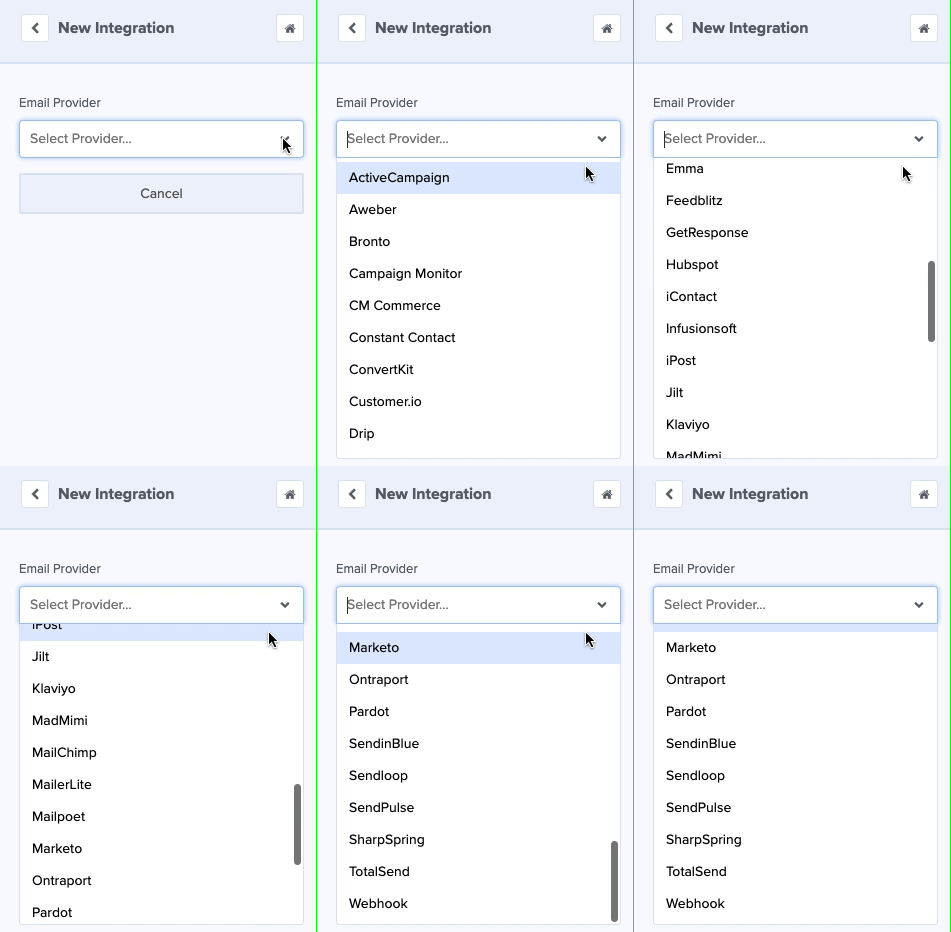
OptinMonster has over 30 native integrations with the most popular email service providers on the market. Plus, each of these integrations can be found in an easy-to-use drop-down menu:
And if your email service provider isn’t there, you can still integrate it with OptinMonster.
That means if you’re using email marketing to communicate with your audience and boost sales, OptinMonster can grow list and seamlessly add contacts to your list.
Plus, you can segment your new leads directly from your OptinMonster account.
In other words, you can use OptinMonster to put your email marketing strategy on auto-pilot. That saves you more time and energy to focus on other areas of your business growth.
Step 5: Publish Your Popup
And that’s it! All that’s left is to review and publish your campaign. You can do this easily with the flip of a toggle switch:
And once your post is live, you’ll get powerful analytics to track your conversion rates.
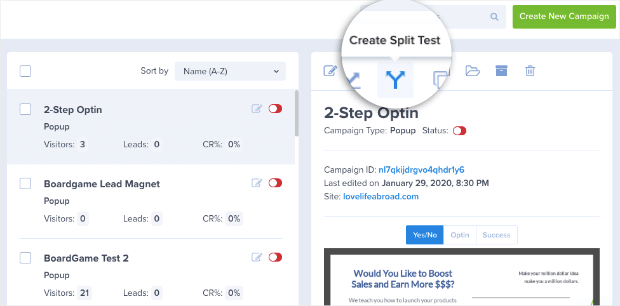
If you think you can get even more out of your campaign, OptinMonster lets you split test everything with the click of a button:
Through our analytics reports and split testing options, you can rest assured that you’re not leaving any conversions on the table.
Method 2: Code Your CSS and JavaScript Popup
For this tutorial, we’ll create a very simple popup that appears when your users click a button. It requires 3 things:
- HTML: Stands for “HyperText Markup Language” and is one of the foundational building blocks for building web pages. It essentially tells your browser how to structure the content of your web page.
- CSS: Stands for “Cascading Style Sheet” and is the programming language you use to add style to your web pages. This includes visual aspects like font, color, page layouts, and so on.
- JavaScript: A programming language that’s mostly used to make web pages interactive.
Since there are so many ways you can build a website (including creating one from scratch), we won’t be adding this code to any specific website building platform.
Instead, we’ll go over the raw HTML, CSS, and JavaScript code.
Let’s dive in!
Note: The following popup is based on code created by Darshan Rajadhyaksha. You can check out his CodePen profile here.
Step 1: Add the HTML
To create your popup button and content, you’ll first start with the HTML. You can use the following code:
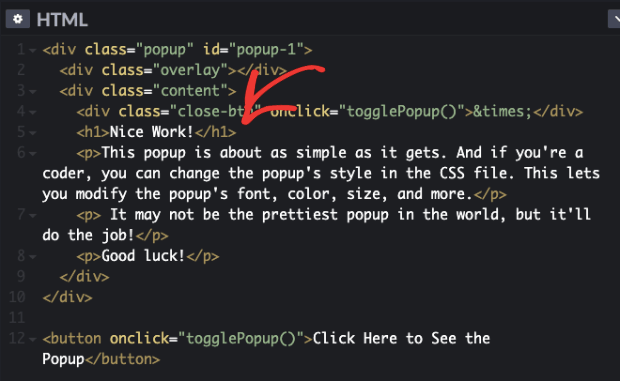
You can change both the title of the button and the content of your popup directly in the HTML:
All of the white text from the image above (in the <h1>, <p>, and <button> tags) can be changed without disrupting any of the HTML code.
Next, we’ll add a bit of CSS to style the button and the content of the popup.
Step 2: Add the CSS
Use the following CSS to style your popup button and content:
With this code, you can change the visual aspects of your popup button and content. That includes things like the font, font size, color, and more.
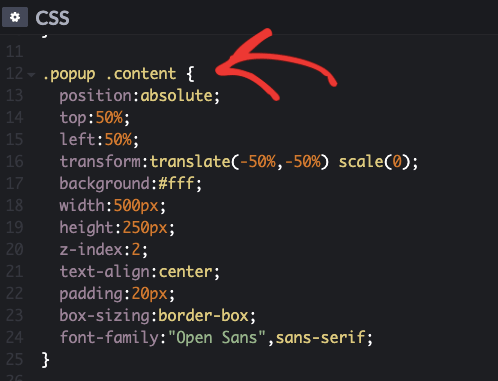
So, for example, you’d change the popup’s content in the following section of the CSS:
You could easily change the background color under background or the font under font-family. These visual aspects are totally optional, and you should only modify these aspects if you’re familiar with how CSS works.
And now comes the last step: adding a bit of JavaScript.
Step 3: Add JavaScript to Your Popup
As we mentioned, JavaScript is a programming language that’s mostly used to make web pages more interactive. Here, JavaScript is what will allow your popup to open when clicked.
You can use the following JavaScript snippet to complete your popup:
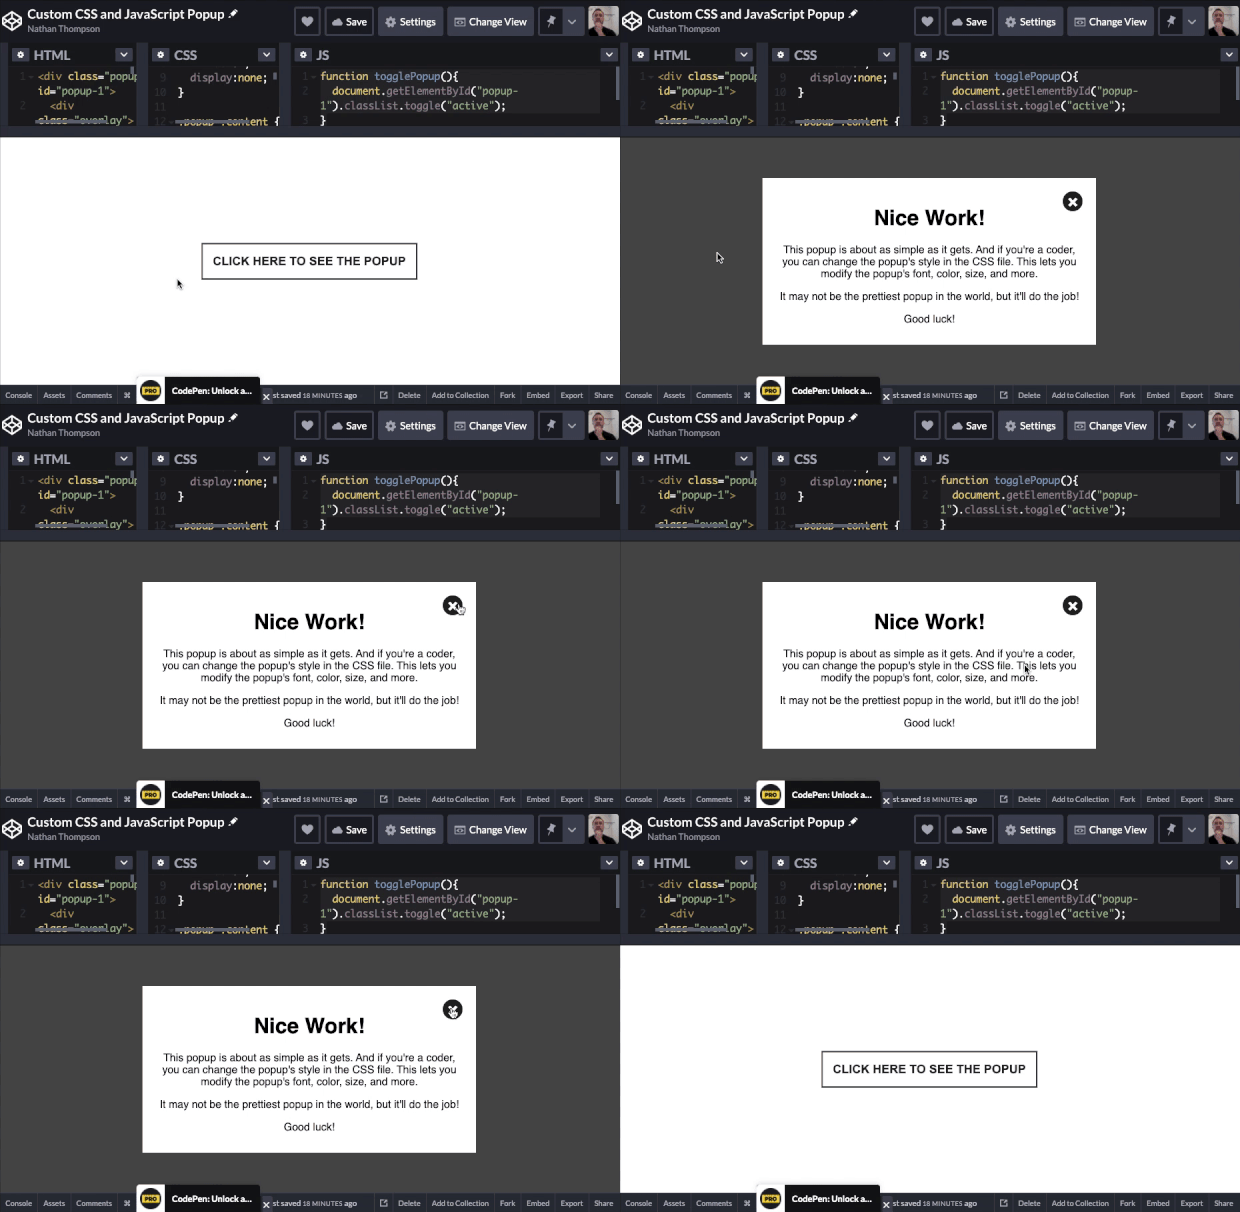
And that’s it! With HTML, CSS, and JavaScript, you can now put a simple popup on your site that opens with the click of a button:
Now you have all the pieces you need to create a custom CSS and JavaScript popup on your site. But where you embed those elements will depend on the website builder you’re using.
Create High-Converting Popups Now!
So… Which Method Is Best?
We understand that some developers love to get their hands dirty and build everything from scratch. But we also know that most business owners don’t have the time, energy, or resources to do so.
OptinMonster is the perfect solution if you’re:
- A business owner or marketer with no coding experience
- A new developer who wants custom CSS and JavaScript popup forms but doesn’t want to spend days building them from scratch
- An experienced developer who would rather spend more time building their website or products than coding all of their marketing tools
But why not try it out for yourself by signing up for your risk-free account today? Get started with OptinMonster!






Add a Comment