Are you looking for an easy way to add a Joomla popup to your site?
Popups are great for boosting email signups, increasing page views, and promoting special offers.
By the end of this article, you’ll learn exactly how to create a Joomla popup that works.
Why Your Joomla Site Needs a Popup
A Joomla popup is, typically, an optin form designed specifically to capture your visitor’s attention and convert those visitors into leads. Aside from lead generation, you can also use a popup to boost sales and conversions.
Out of the box, Joomla doesn’t allow you to create a popup. You’ll need a popup builder tool like OptinMonster to help you create one.
OptinMonster is the best way to create a Joomla popup that lets you grow your email list. With its drag and drop builder, it allows you to easily create popups that are specifically designed to add more subscribers.
You can easily customize OptinMonster’s stunning popup templates to build an eye-catching Joomla popup.
AutoAnything used OptinMonster to grow its daily optins by almost 2.5X. This helps boost their email revenue by 20%!
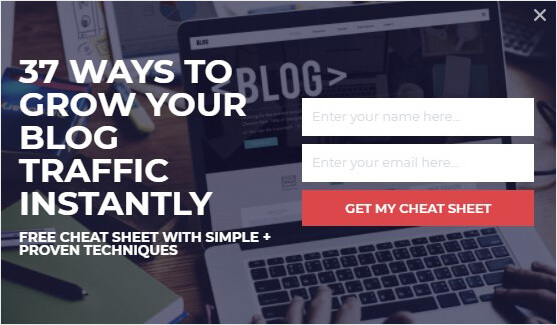
In this article, we’ll show you how to create a popup like the one shown below.
How to Create a Joomla Popup
In order to create a popup on your Joomla site, you’ll first need to sign up for an OptinMonster account.
Get started by clicking the link below.
Ready?
Let’s get started.
Step 1: Create an OptinMonster Campaign
Once you log into your OptinMonster account, select Create New Campaign.
Next, choose your campaign type.
You can select from multiple campaign types:
- Floating bar
- Fullscreen mat
- Slide-in scroll
- Inline
- Gamified
Today, we’ll go with Popup.
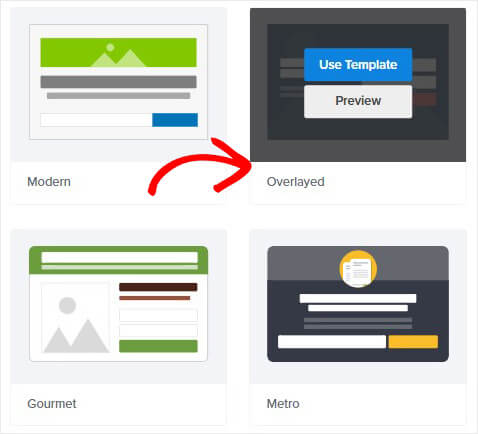
Now, you need to pick a template.
Choose from more than 50 templates.
If you’re confused about which template you should choose, then filter the templates by campaign goal:
- Grow email list
- Time sensitive offer
- Redirect traffic
- Target abandoning visitors
Now, if you want something completely different, you can go with our Canvas template. Build your own popup from scratch without any code.
All templates are responsive and look great on any device.
Today, we’ll pick Overlayed.
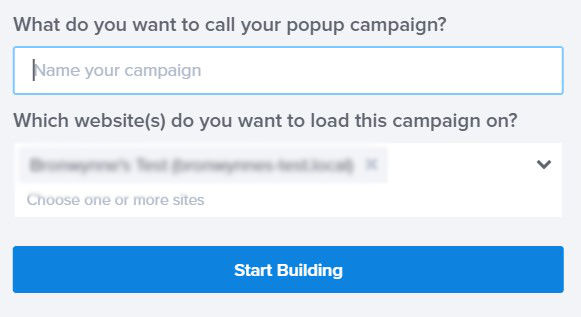
You’ll be prompted to name your campaign.
Click Start Building to enter the OptinMonster editor.
Now you’re ready to customize your template.
Step 2: Design Your Joomla Popup
Designing your template in OptinMonster is simple because the drag and drop builder is so easy to use.
You can customize everything about the template in minutes.
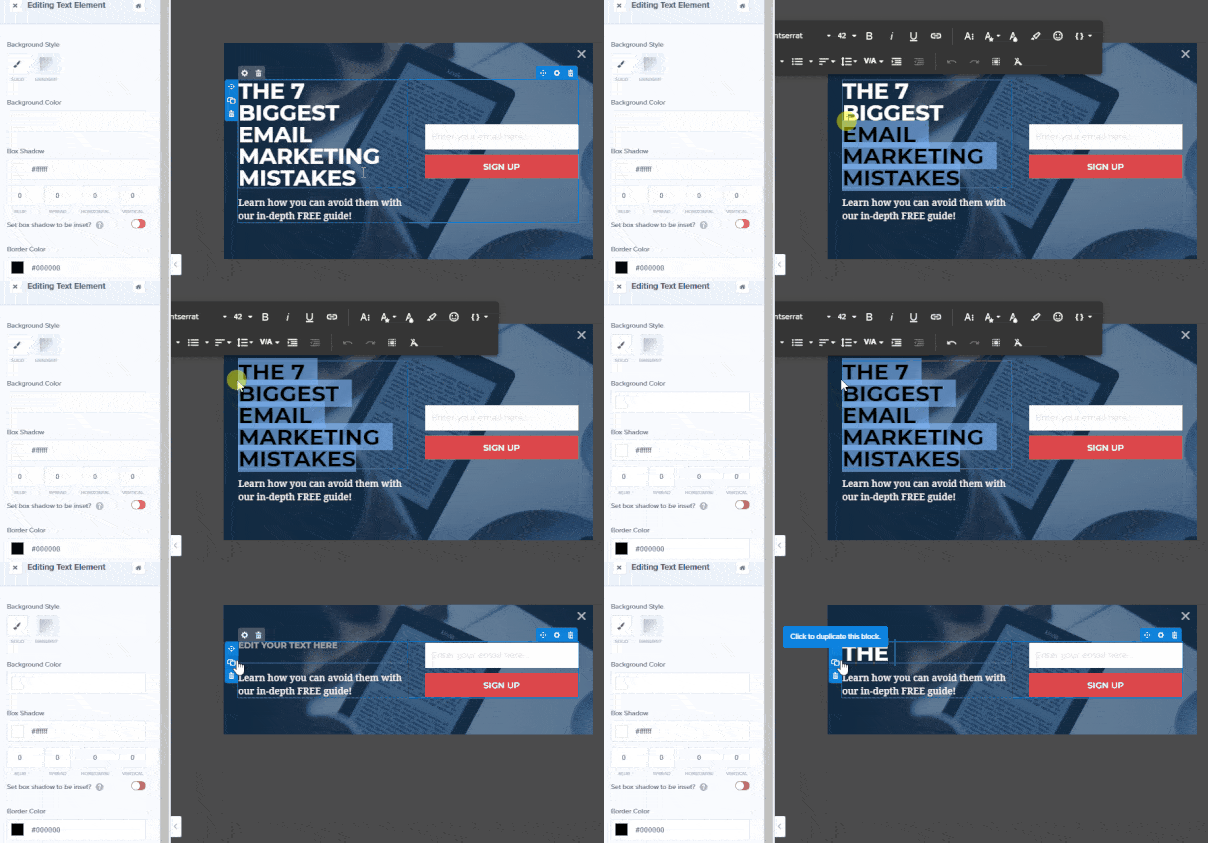
All you need to do is click on any part of the popup to change it.
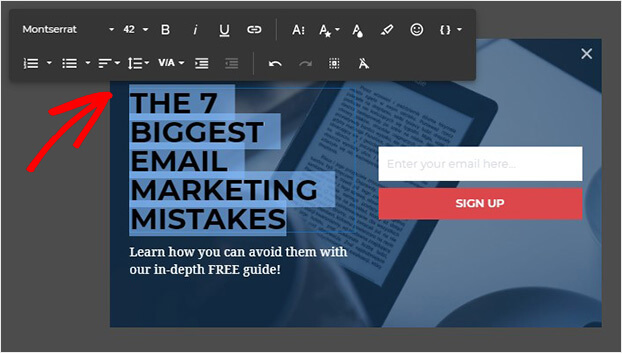
So, to edit the text, simply click on the text block.
Add your new copy directly to the popup.
Consider these questions when coming up with copy for your popup:
- Do you have compelling copy that speaks to your readers’ problems and desires?
- Does your headline grab attention?
If you need help to write a compelling copy, check out this article: 69+ High Quality Copywriting Templates Proven to Work
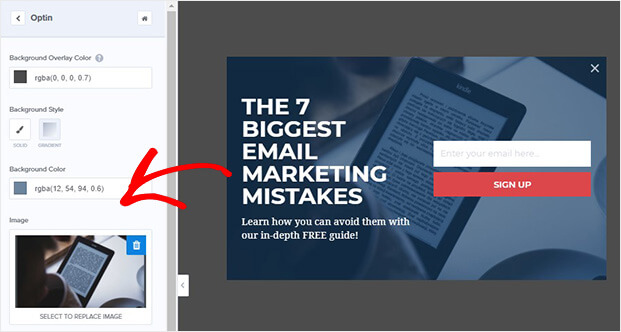
Similarly, to change the image, click on the image block.
Want to add anything to your popup?
Simple.
All you need to do is select Add Blocks at the top of your editor.
From here, you can add:
- Countdown timer
- HTML
- Image
- Text
And more.
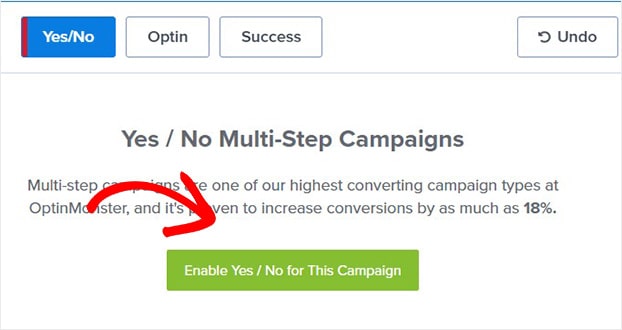
You can also easily turn your optin into a two-step campaign with OptinMonster’s Yes/No feature.
Are multi-step popups effective?
They’re proven to increase conversions by as much as 18%.
Two-step optins take advantage of a psychology principle called the Zeigarnik Effect. It’s based on the idea that when people start something, they’re more likely to finish it. That means when your visitor starts the action by clicking the Yes button, they’re more likely to complete your optin.
Simply click Yes/No at the top of your editor.
Looking for more resources for crafting high-converting popups?
- Popup Design Inspiration: 10 Beautiful and High-Converting Email Popups
- 15 Email Popup Best Practices To Skyrocket Your List
Because you can customize just about anything about your popup, you’ll be able to create a popup that matches your site and brand.
Next, you’ll decide when and where your popup will appear.
Step 2: Display Your Joomla Popup
If your popup is not targeted at your visitors’ need, you’re more likely to
That’s why OptinMonster lets you customize your campaign to your target audience.
Head over to Display Rules at the top of your editor.
By default, your settings will be:
- Time on page is 5 seconds
- Appear on every page
These settings will show your popup on any page once your user has been browsing for more than 5 seconds.
You can use triggers and targeting to refine your targeting.
Here’s some of the things you can target:
- Time on page
- Location
- Device
- URL path
And more.
What this means is you get to create a highly targeted popup campaign.
Today, we’ll look at two display rules, Time on Site and Page Targeting.
Time on Site
Are you worried about showing your popups at the wrong time?
OptinMonster’s Timed Display Control lets you set time delays for your campaigns.
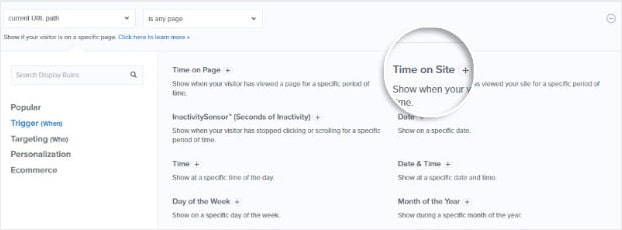
Head over to Display Rules.
Select Time on Site
Adding a longer time on site means you’re only showing your popup to readers who are more interested in what you have to offer.
Page Targeting
Do you want to show your visitors the offers they’re most interested in?
OptinMonster’s Page Targeting rule lets you do that.
With Page-Level Targeting, you can:
- Offer a lead magnet that closely resembles the content your visitor is consuming
- Present a discount for the product the visitor is looking at
Are page specific popups effective?
Flywheel increased engagement 660% using Page Level Targeting.
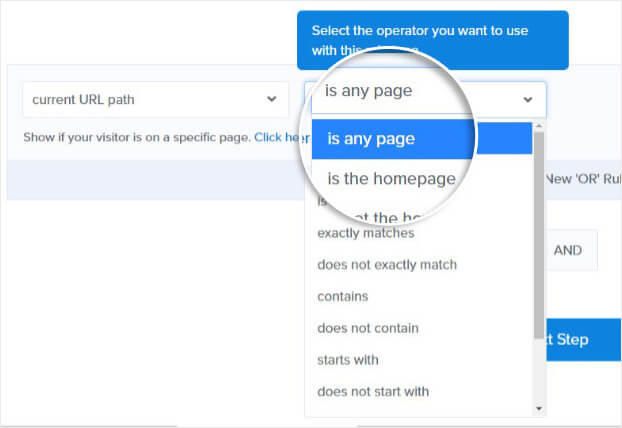
Under Display Rules, click Page Targeting.
Next, decide where you want to show your campaign.
For more ways you can use page specific popups, check out these posts:
Step 4: Integrations
You’ll need to decide where your emails will go once your subscriber signs up.
Connecting OptinMonster and your email service provider is simple.
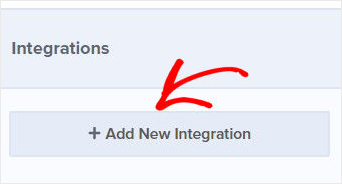
Head over to Integrations.
Click Add New Integration.
From the email provider dropdown, find your provider.
Follow the prompts to sync OptinMonster with your email provider.
Step 5: Publish the Popup on Your Joomla Site
Adding OptinMonster to your Joomla site is super easy.
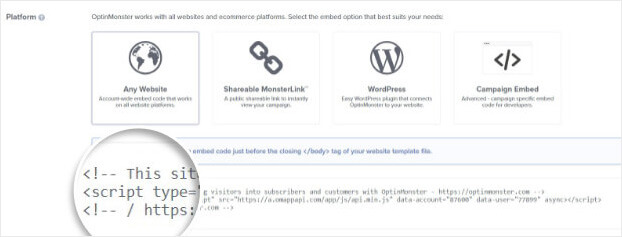
Head over to Publish screen in OptinMonster dashboard.
Scroll to the bottom of the page and copy the embed code.
Now, you’ll need to head over to your Joomla site.
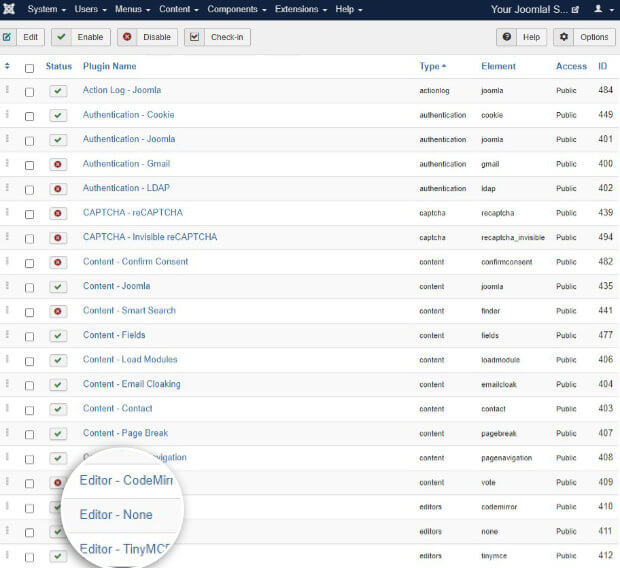
Before the embed code will work, we’ll first need to change the TinyMCE plugin’s settings.
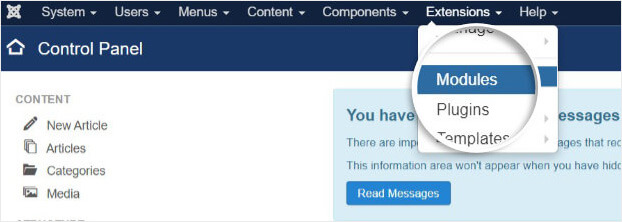
Click Extensions at the top of the Joomla toolbar.
Select Plugins.
Click on Editor – TinyMCE.
Scroll down to the Prohibited Elements filter.
Remove script.
Keep in mind that Joomla may remove third-party code.
If this happens, you might need to turn off the text filter in the TinyMCE plugin editor.
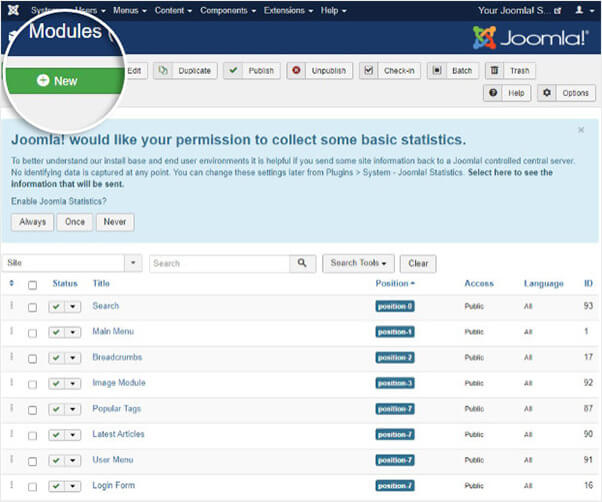
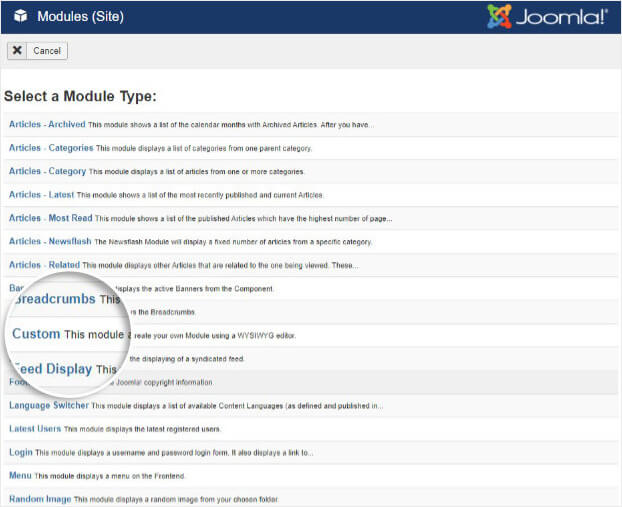
Next, from the admin area, select Modules.
Select New.
Now, select Custom.
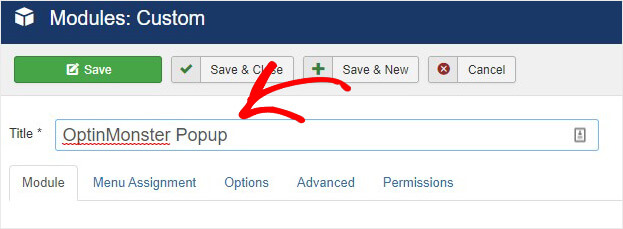
Give your popup campaign a title.
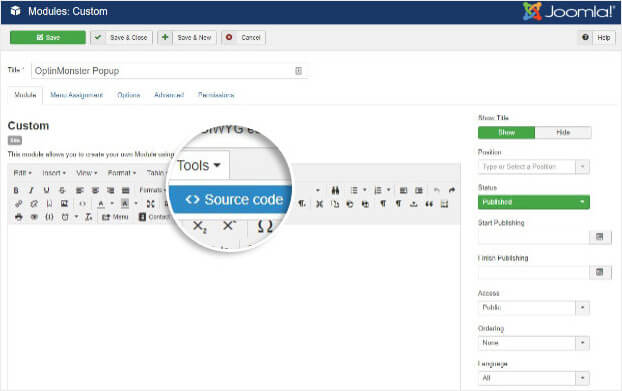
From the toolbar, select Tools » Source Code.
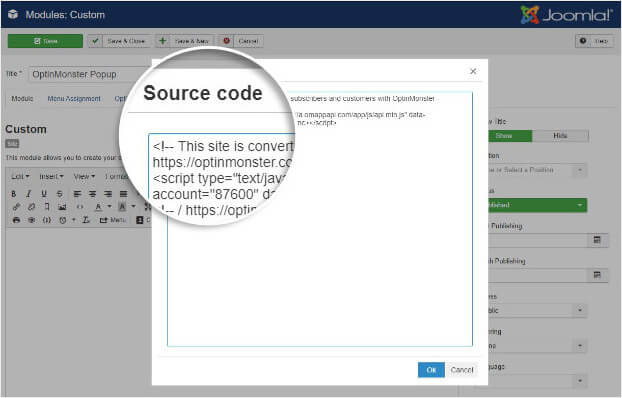
This will open a modal window where you can paste the OptinMonster embed code.
Go ahead and click Ok after pasting your code.
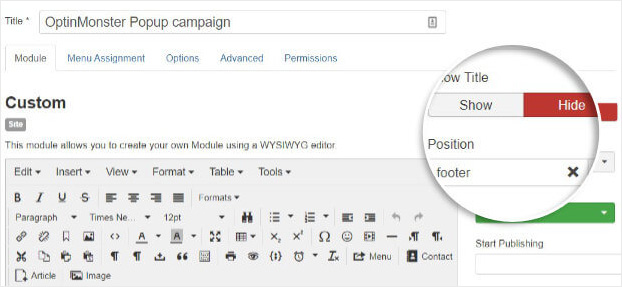
Next, you’ll want to switch the Show Title option to Hide if you’re displaying a popup campaign.
Select Show if you’re publishing an Inline campaign.
You’ll also need to choose the position of your campaign.
We’ll select Footer.
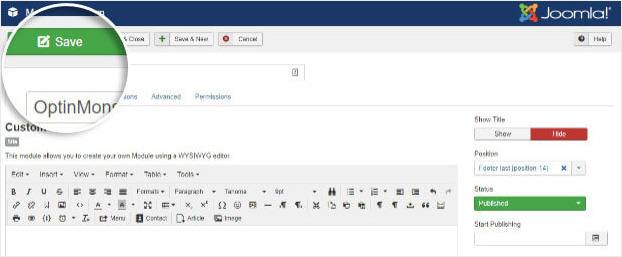
Once you’re finished, save your Module.
That’s it. Now your popup will appear on your Joomla site.
If you enjoyed this article, you’ll find these resources about email list building useful:
- How To Get More Email Subscribers in Less than 5 Minutes
- Email Marketing Made Simple: A Step by Step Guide [+ Examples]
Ready to turn your site visitors into subscribers? Sign up for OptinMonster today.












Add a Comment