Are you using Blogger to write your blog, and you’d like to add a popup to your site?
Popups are an excellent way of keeping your audience informed about sitewide news, redirecting users to popular posts, and more.
But one of the best ways to use a popup is to grow your blog’s newsletter subscribers. That’s why, in today’s post, we’re going to teach you how to add a popup to a free Blogger blog in a matter of minutes.
But before we get into the tutorial, let’s talk about why you’d want to use a popup in the first place.
Why Your Blogger Blog Needs a Popup
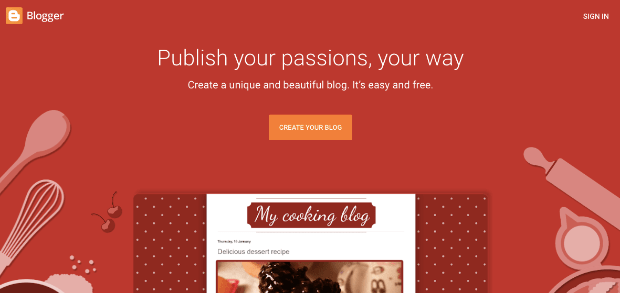
When most bloggers start out, they’re usually writing for a small audience like friends and family. And one of the most convenient blogging platforms is Blogger:
Blogger is a place where new or experienced bloggers can create a blog totally free.
But over time, as your blog grows, your audience will expand.
And at a certain point, you need better ways to communicate effectively with your new readers and visitors.
A popup can be the perfect solution to this.
Here are a few of the benefits of adding a popup to your free Blogger blog:
- Welcome New Visitors: Popups are a great way to welcome new visitors and tell them a little bit about yourself. You can even add buttons to different categories or sections of your blogs to increase user experience (UX).
- Increase Sitewide Traffic: Not all popups need to sell or grab an email address. You can also use popups to redirect users to popular posts on your site to increase sitewide traffic. This will also have a positive effect on your SEO efforts.
- Promote New Products: As your blog grows, you may decide to create and sell products directly from your content. Popups can help you promote loads of digital products like online courses, eBooks, and more.
- Increase Your Subscribers: Popups are the best way to get your audience to sign up for your monthly newsletters and grow your email list.
That last one is particularly important. One of the best parts of having a robust email list is that it allows you to drive communication with your audience rather than waiting for them to visit your site.
Whatever motivates you to use a popup on your website, there’s still one question: how do you add a popup to your Blogger blog, especially if you don’t consider yourself very “tech-savvy.”
That’s where OptinMonster can help out:
OptinMonster is the world’s #1 lead generation software. That means we’re the best at getting your site’s visitors to take the actions you want them to.
As they visit your Blogger blog, OptinMonster can help you increase your sitewide traffic, share your new products, and grow your email list.
We do that by helping you create highly targeted optin campaigns, such as popups. These popups can be totally customized to make sure you’re getting the right message to the right people at the right time.
For more information about how OptinMonster can help you grow your blog, check out this article: How Does OptinMonster Work? (8 Benefits + 12 Case Studies).
Or go sign up for your risk-free OptinMonster account today!
Now let’s dive into our tutorial on adding a popup to your free Blogger blog.
Adding a Popup to Your Blogger Blog
Step 1: Choose Your Popup Campaign & Template
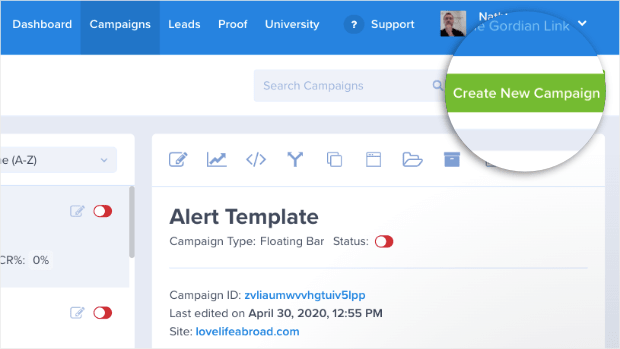
Once you’re in your OptinMonster dashboard, go to the top right-hand corner and click Create New Campaign:
Now you’ll need to choose your campaign type. For today’s tutorial, we’ll be using a Popup:
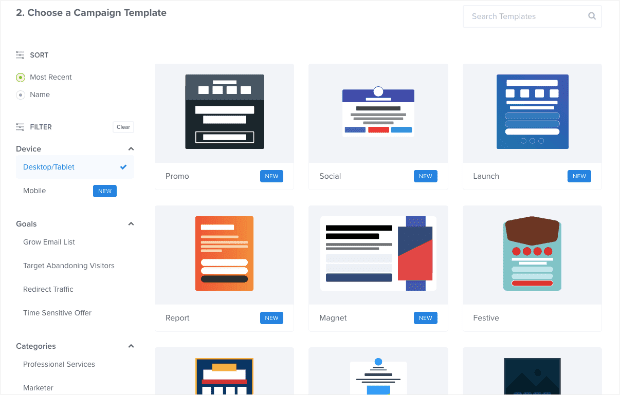
Then you can choose from our template selection for your campaign’s basic design:
OptinMonster has over 50 pre-built templates, all of which can be completely customized to your brand’s style, voice, and message.
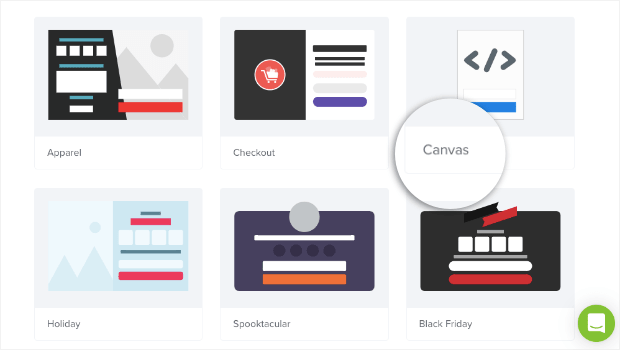
But some customers want to start totally from scratch, which is no problem. You can choose our Canvas template for that:
No matter which template you choose, including Canvas, everything can be modified with a drag and a drop. We wanted to make sure our campaign designs were accessible to everyone at all levels.
That means you don’t need any coding skills or web design experience to create beautiful campaigns in minutes.
For today’s tutorial, we’ll go with the Basic template:
This is a great starter template for collecting emails. It’s minimal in design, won’t distract your site’s visitors, and gives you plenty of room to write compelling copy.
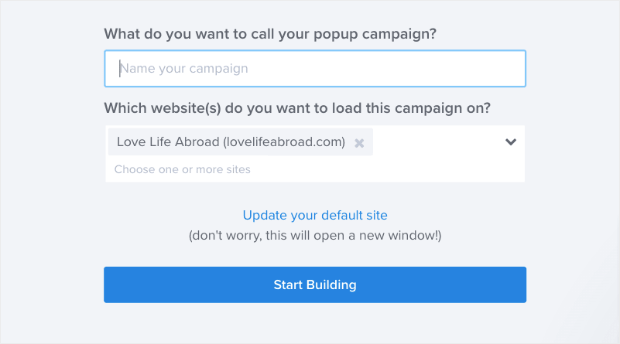
Now all you need to do is name your campaign (to stay organized), select which website you want to load your campaign on (which you configured during registration), and click Start Building:
Then you’ll be in your OptinMonster editor and ready to design your campaign.
Step 2: Design Your Blogger Blog Popup
As we said before, we wanted to make sure that it was easy for all of our users to design the perfect campaign for their site.
We made everything fully customizable with a drag and a drop. We won’t get into too much detail on how to design every aspect of your Blogger popup. Frankly, there are too many options to cover in one post.
But if you need some help or it’s your first time designing a campaign with OptinMonster, check out this resource: How to Create and Design Your First OptinMonster Campaign.
That resource will have everything you need to get started.
For today, you simply need to know that all of our campaigns are made with elements that we call “blocks.” You have text blocks, image blocks, video blocks, spacer blocks, and more.
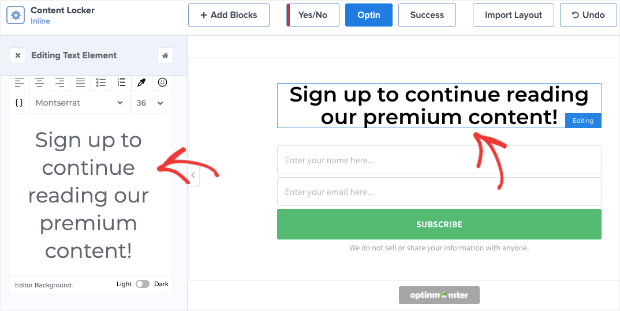
To edit your campaign, simply click on the block you want to change. Then the editing tools will appear on the left-hand side.
So if you wanted to change your text block, for instance, you would click on the text you want to modify:
This is how you would change any aspect of your Blogger popup. And if you want to add a new block, that’s not a problem.
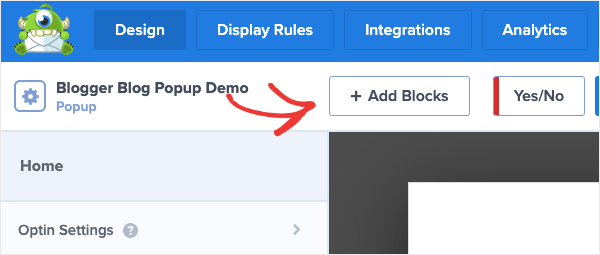
Just click + Add Blocks at the top of your editor:
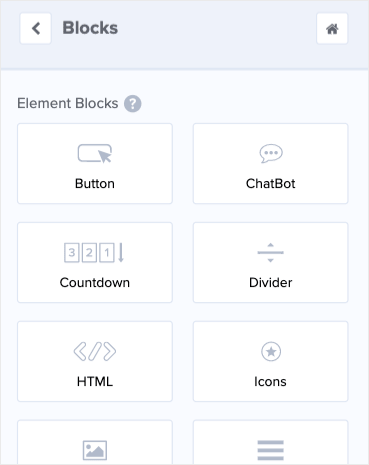
This will show you a list of blocks you can add to your campaign on the left-hand side. You can add:
- Buttons
- ChatBots
- Countdown Timers
- Dividers
- Videos
- And much more
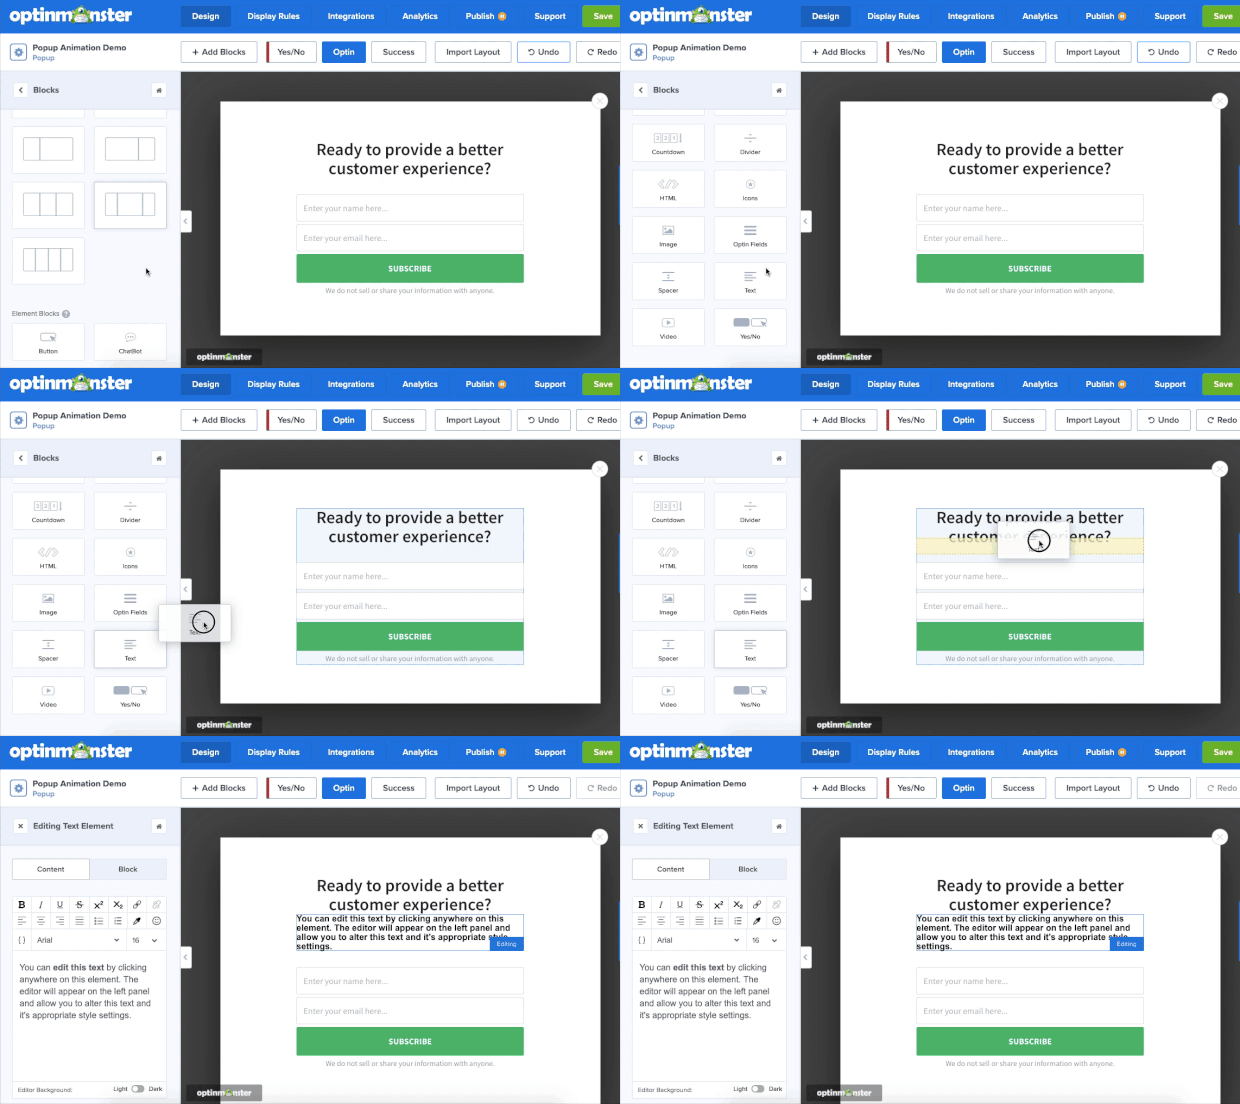
Then you’ll drag and drop the block element you want into place:
Again, we made sure that anyone could design the perfect campaign for their site regardless of their technical experience.
Once you’ve designed the perfect campaign for your Blogger site, you can either integrate OptinMonster with your email service provider or skip straight to adding your popup to Blogger.
Step 3: Configure Your Display Rules
Next, you’ll want to determine where, when, and to whom your Blogger popup appears. To do so, click Display Rules at the top of your OptinMonster menu:
By default, your Blogger popup will appear with 2 rules:
- Time on page is 5 seconds
- Appear on every page
That means that your popup will show up on every page of your blog as long as a user is on the page for longer than 5 seconds.
But, the popup won’t appear more than once in 30 days if the user closes it without opting in.
You can change all of these settings in your Display Rules menu. We won’t get into too much detail in this tutorial on how to change your display rules. Just like designing your popup, there are too many options to cover everything you can do.
The rules that you decide to use for your Blogger popup will depend on your goals, your niche, and your needs.
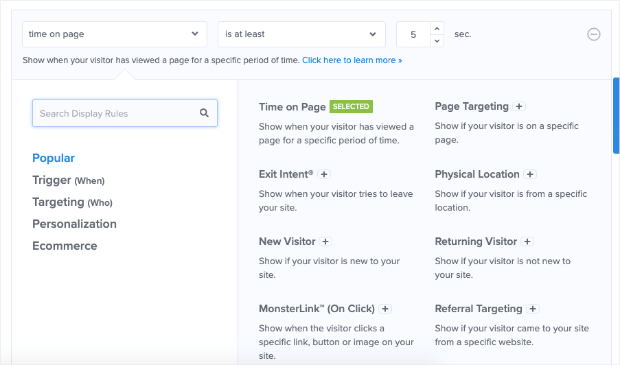
The important thing is to know that you can use your display rules dashboard to customize where and when your popup will appear:
For more information on how to change your display rules, check out this helpful resource: How to Use Display Rules to Customize When a Campaign Will Appear.
Once you configure the rules that will work best for your Blogger blog, you can integrate OptinMonster with your email service provider.
Step 4: Integrate With Your Email Service Provider
If you’re using a popup to capture emails, then you’re likely working with an email service provider (ESP).
An email service provider helps website owners and bloggers manage their email lists. You can store your contacts, create automated email campaigns, and make sure you’re getting the highest open and click-through rates possible.
If you don’t have an ESP already, here are the 3 that we recommend most highly:
- Constant Contact: an excellent solution for small businesses who value phone/email support
- Brevo (formerly Sendinblue): the perfect choice for businesses on a budget looking for a free option to get started
- Drip: the most advanced option for eCommerce
These are especially valuable options if you’re hoping to monetize your blog at some point down the road.
But you can integrate OptinMonster with any email service provider you’re working with. In fact, we have over 30 native integrations making it easy to connect with your ESP.
To do so, click Integrations at the top of your editor:
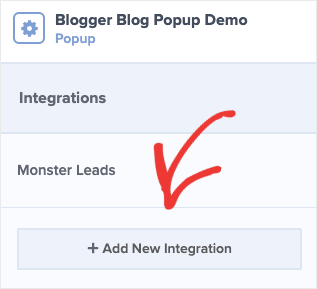
On the left-hand side menu, click Add New Integration:
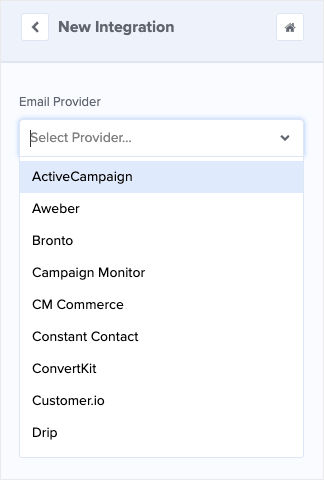
Then select your ESP from the drop-down list:
And follow the unique instructions for connecting to your ESP. This usually involves copying and pasting an API key from your ESP dashboard.
If you don’t see your ESP on the list, no worries. Check out this post on how to connect OptinMonster to an email service provider.
Now you’re ready to add your popup to your Blogger blog.
Step 5: Add OptinMonster to Your Blogger Blog
Once you’ve designed your popup and connected it to your email service provider, you’re ready to add it to your Blogger blog.
Click Publish at the top of your editor menu:
Make sure to switch your campaign to Live using the toggle button next to Status:
Then scroll down and find your campaign’s embed code:
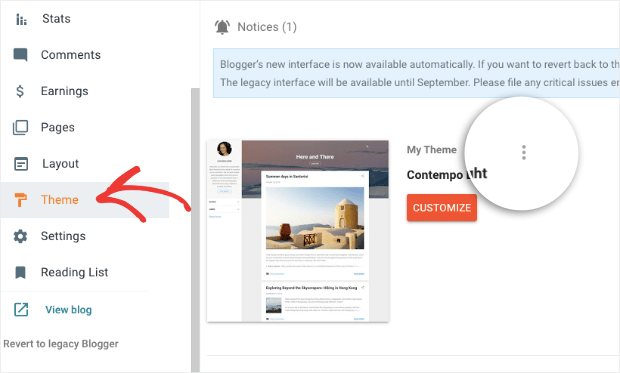
Copy and paste this code. Now go over to your Blogger account dashboard. Click Themes in the left-hand side menu and click the three dots next to your active theme:
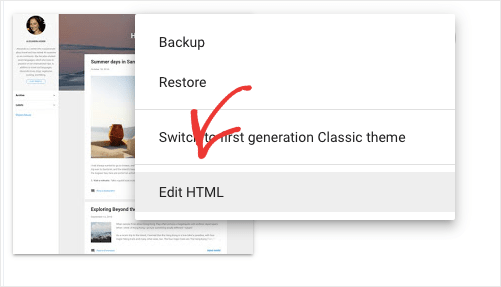
Select the option Edit HTML:
Scroll all the way down your themes HTML and paste your OptinMonster embed code directly before the closing </body> tag:
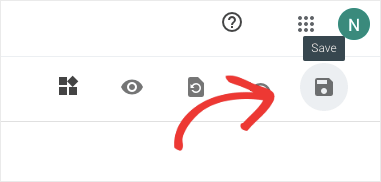
Now click Save in the upper right-hand corner of your screen:
And that’s it! Your popup will now appear on your Blogger website.
We hope you found this article helpful. If you’re using your popup to grow your email list, that means you’re likely interested in improving your email marketing strategy. Here are some articles you may find helpful:
- How to Run a Successful Email Marketing Campaign
- Email Marketing for Beginners: A Step by Step Guide
- How to Create an Effective Email Autoresponder Series
These articles will have everything you need to grow and monetize your contact list.
Ready to get started? Sign up for your risk-free OptinMonster account today!










Add a Comment