Are you using iPost and trying to find the best way to grow your subscribers?
If you’re using iPost, you’ve already invested in email marketing. Now, you need a way to grow your iPost mailing list. Here’s where a popup can help.
Using a popup is the easiest way to skyrocket your email list. By default, iPost doesn’t let you create a conversion-optimized popup. You’ll need to use a popup software like OptinMonster to build a popup for your iPost email list.
In this article, you’ll learn how to create an iPost popup that adds new subscribers.
What is an iPost Popup
iPost is an email marketing platform that allows you to easily design emails and run automated email campaigns.
With iPost, you can quickly build targeted, personalized email campaigns with real-time subscriber data.
And, you’ll have access to detailed conversion tracking, so you’ll be able to refine your best campaigns and ditch what’s not working.
So, where does an iPost popup fit into your email marketing strategy?
An iPost popup is an optin form that appears on your website. In order to ensure the popup captures your visitors’ attention, it appears on top of your content, typically covering the page behind it.
And it’s a powerful way to boost your email list.
You can use your iPost popup to collect emails, promote new content, and offer coupons.
And here’s where OptinMonster helps.
OptinMonster is the best tool to build an iPost popup that will boost your email list. With its drag and drop builder, you can easily create eye-catching popups that are designed to add more subscribers.
OptinMonster comes with 50+ popup templates that are easy to customize. You’ll also get multiple campaign types, like floating bar, welcome screen, lightbox popup, and more.
Once you start using OptinMonster, you can start collecting leads right away.
WebMachnix converted 1,281 abandoning visitors using OptinMonster.
OptinMonster works so well because you create beautiful popup campaigns that appear at the right time to the right people.
The result?
Your list gets filled with your most engaged subscribers. As you build relationships with those subscribers over time, they become paying customers.
The best thing is it’s easy to create attractive, effective popup campaigns without any coding or design skills.
Ready? Let’s begin.
How to Create an iPost Popup
For this tutorial, you’ll need an OptinMonster account.
Even if you’ve never created a popup campaign before, you’ll be able to figure out how to get OptinMonster to work for you.
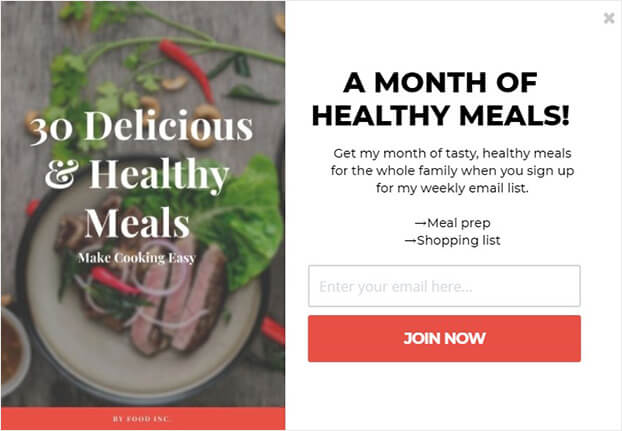
Today, we’ll build this popup:
Step 1: Create OptinMonster Campaign
First, log into your OptinMonster account.
Once you’re in your dashboard, click Create New Campaign in the top right corner.
Now, you’ll select your campaign type.
Today, we’ll go with Popup.
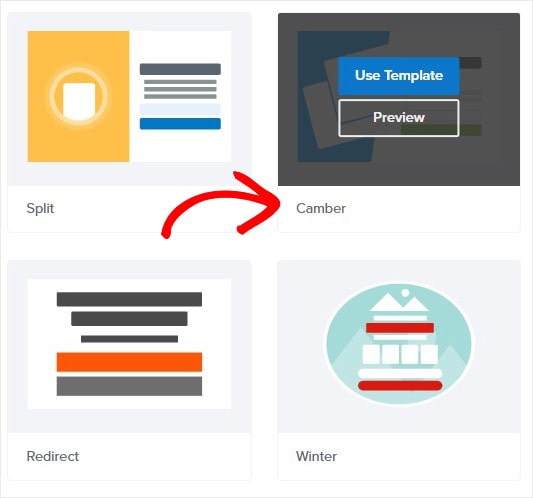
Next, you’ll need to choose a template. You can choose from over 50 different templates.
Today, we’ll go with the Camber template because it has enough space for a compelling image and copy.
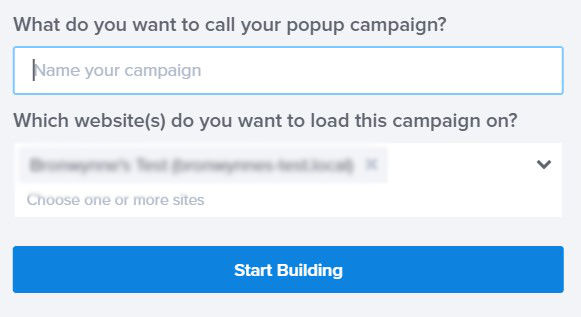
Once you choose your campaign, name your campaign, and click Start Building.
Now, you’re set to design your iPost popup in the OptinMonster editor.
Step 2: Design iPost Popup
Designing your popup in the builder is simple.
You can change the text, colors, and layout with just a few clicks.
The Optinmonster template is made up of elements called blocks.
To edit any block, simply click on it. That will pull up the editing tools on the left. As soon as you make any changes, you’ll see your edits on the popup.
You’ll only need to spend a few minutes customizing your popup.
But if you want, you can use the Canvas template to build your own popup from scratch.
Today, we’re going to create a popup to promote our lead magnet. A lead magnet is something you give to your site visitors in exchange for their email addresses. It’s a proven way to get more subscribers because you’re providing something valuable for free.
Check out this article for highly effective lead magnet ideas to grow your list.
Let’s start designing.
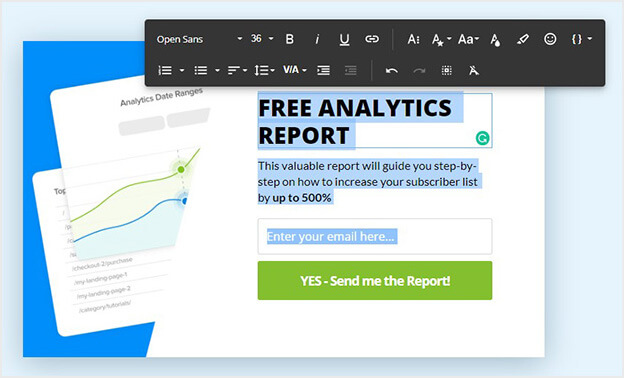
Simply click on the text block. Now, you can change the text directly on the popup. Here you can customize the copy, font color, font size, and alignment.
Next, we’ll change the image.
So, head over to the editing panel on the left.
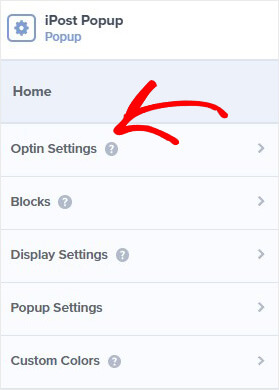
Click Optin Settings.
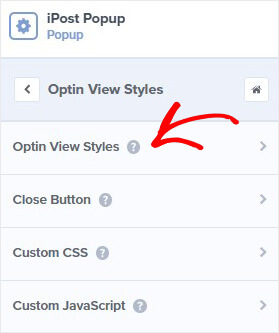
Then, click Optin View Styles.
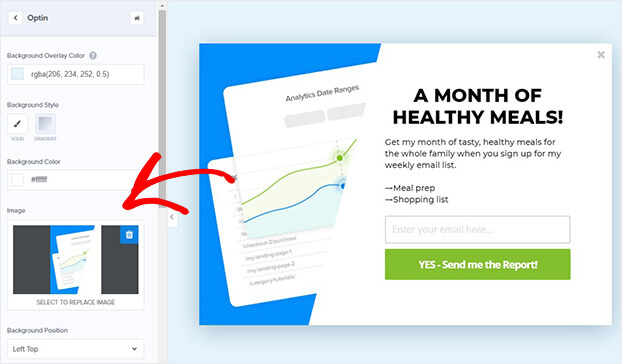
Now, you can change the image.
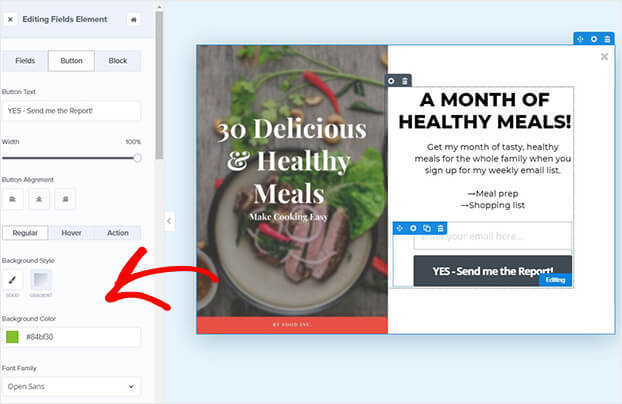
You can even change the color of the submit button.
Again, click on the button and use the editing tools.
Want to add anything to your popup?
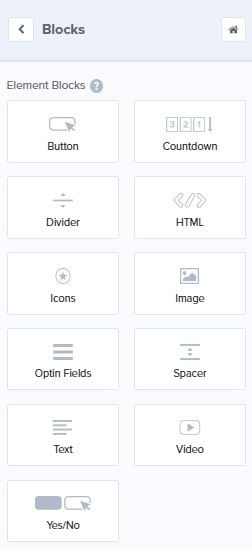
All you need to do is click Add Blocks at the top of your editor.
Now, you can drag and drop anything you want.
Looking for popup ideas?
Here are some great examples and popup design inspiration.
When you’re happy with your popup, make sure to hit Save at the top of your editor.
Now, you’ll need to decide where you’ll show your popup on your site.
Step 3: Display iPost Popup
You can control exactly where and when to display your popup.
The benefit of this is you won’t end up annoying or distracting your site visitors with poorly timed popups
OptinMonster makes this possible with triggers and targeting.
Triggers use your site visitor’s behavior to display campaigns at the right time.
Examples of OptinMonster triggers include:
- Scroll Trigger: only show campaigns after the visitor has scrolled a certain percentage of the page
- Timed Display Control: show your campaign after a specified time
- Campaign Scheduling: run limited campaigns during certain times and dates
With these triggers, you can make your campaigns appear when a visitor is most likely to convert. For example, use time triggered popups to wait until a visitor has started engaging with your content before displaying your optin.
Targeting controls who sees your popups.
Here are a few OptinMonster targeting rules:
- Referrer Detection: show to users from a specific traffic source
- Page-Level Targeting: customize your campaigns based on the page or section of your site
- Geo-location: show campaigns based on the visitor’s physical location
For this tutorial, we’ll take a closer look at two powerful display rules, Exit Intent® and Monsterlinks™.
Exit Intent
Exit Intent® technology triggers a popup when a user is about to leave your website.
You’ll get to show your visitor a targeted message one last time before they leave.
Do exit popups actually work?
Exit popups are shown to increase conversions between 2 to 4%.
Shockbyte more than doubled their sales conversion rate with exit-intent.
Head over to Display Rules.
Find and select Exit Intent®.
Now, you can decide which device you want to show your iPost popup on:
- Mobile
- Desktop
- Both
Next, you can set your Exit Intent® Sensitivity. This will control how soon your popup appears as the visitor starts to leave the page.
For mobile, sensitivity will change the trigger, too. Low and Medium will trigger a popup when the visitor scrolls up the page. High sensitivity will trigger the popup when the user hits the back button.
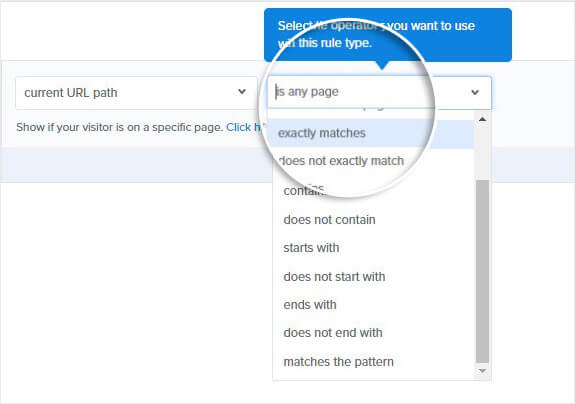
Finally, select the page where you’ll display your popup.
Monsterlinks™
Another highly effective display rule is Monsterlinks.
Monsterlinks turns any link or image into a two-step optin.
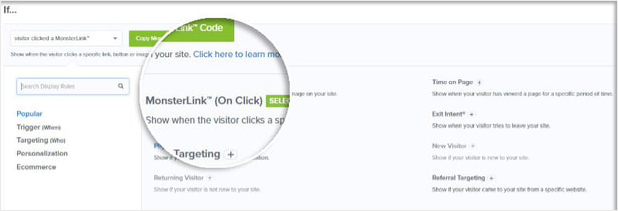
Under the Display Rules tab, find and select Monsterlinks™ (On Click).
Copy your code.
Once you have your link, you can add it to any image or link on your site to create an optin that appears on click.
Step 4: Integrate OptinMonster with Your iPost Account
Connecting OptinMonster to iPost is simple.
Head over to Integrations at the top of your editor.
Click Add New Integration.
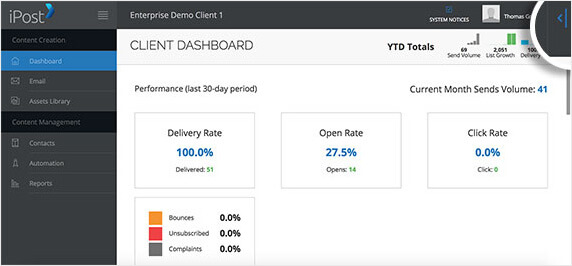
After you log into your iPost account, click the top-right arrow.
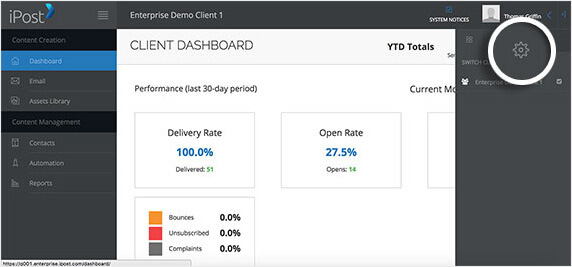
Next, you will need to click the Gear icon.
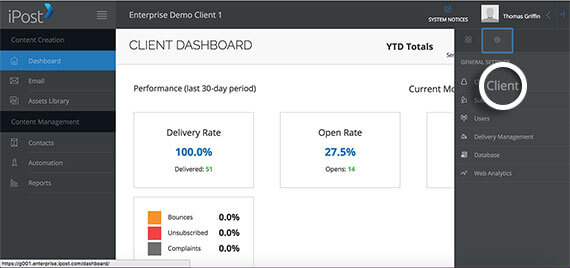
Select Client in this settings menu.
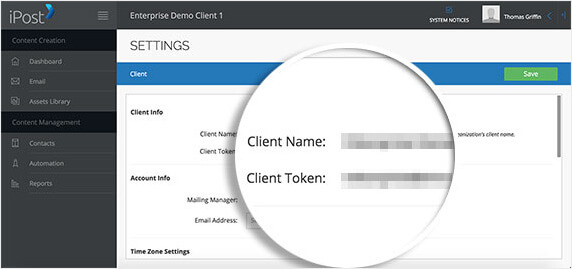
On the next screen, you’ll find the client information you need.
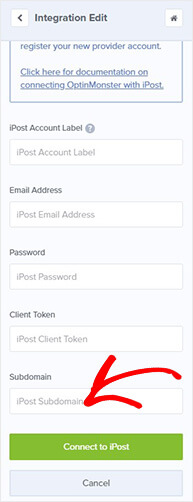
Copy and paste those values into the appropriate fields in OptinMonster.
For now, the subdomain only has two options, g001 and g002. This is assigned by iPost and it’s part of the your login URL.
Go ahead and paste your sub-domain values in the relevant field.
Once you’ve completed all the fields, click Connect to iPost.
OptinMonster will now connect to your iPost account and fetch your email lists. Choose an email list you want users to subscribe to.
Step 5: Add iPost Popup to Your Site
The last step is to publish your iPost popup on your site.
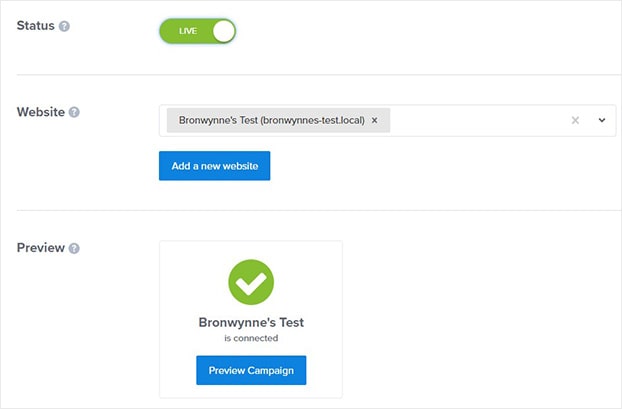
Head over to Publish at the top of your editor.
Switch the campaign status to Live.
If you’re creating your first OptinMonster campaign for your site, then make sure you’ve synced your OptinMonster account with your site.
Check out this article for simple instructions to integrate OptinMonster with WordPress.
Not using WordPress? No problem. Adding OptinMonster to your site only takes a few minutes. Here’s a detailed guide to add OptinMonster to any website.
That’s it! Now when someone completes your optin form, their details will go straight to your iPost list.
We hope you enjoyed this article.
If you’re interested in using popups, then obviously, you’re serious about email marketing.
You might want to check out these resources to create successful email marketing campaigns:
- Email Marketing Made Simple: A Step by Step Guide [+ Examples]
- 10 Brilliant Email Marketing Examples and Why We Love Them
Ready to convert your site visitors today? Get started with OptinMonster.












Add a Comment