Do you want to create a GetResponse popup to get more email subscribers?
An engaged email list is a valuable business asset. And with the right popup, you can build your email list fast. In this tutorial, we walk through how to create a custom GetResponse popup that will grow your subscribers.
What is a Custom GetResponse Popup?
A GetResponse popup is an optin form on your site that is usually displayed on top of your content by dimming the content behind it for grabbing your reader’s attention.
This popup is connected to your GetResponse account, so all the emails you collect are added automatically to your email list in GetResponse.
From there, you can segment your audience and run targeted email marketing campaigns for:
- Sending exclusive offers
- Announcing sales
- Sharing new content
- Promoting upcoming events
Without a doubt, building a popup form helps you skyrocket your email list.
But how do you create a popup in the first place?
OptinMonster is the best tool to create a GetResponse popup. With its drag and drop builder and stunning collection of premade templates, OptinMonster makes it easy for you to grow your email list from your website.
Aside from ease of use, what makes OptinMonster stand out from its competition?
Its targeting features!
Take a look at a few features of OptinMonster.
- Targeting: With its precision targeting feature, you can show campaigns based on the user’s physical location, the page the visitor is viewing, and more
- Triggers: You can detect your site visitor’s behavior to show the right campaign at the right time. For example, triggering a popup when they’re more likely to leave your site, and more.
- Testing: OptinMonster also lets you split test your campaigns to find the messages and designs that your site visitors love
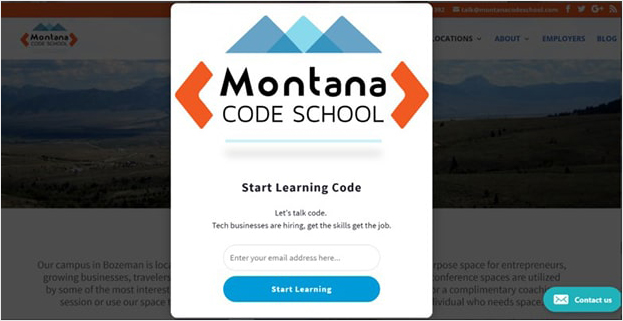
Here’s an example of an OptinMonster popup:
With OptinMonster, Social Media Examiner added 250,000 new email subscribers to their list. They also increased conversions by 15% using OptinMonster’s split-testing features.
Today, we’ll use OptinMonster to create a GetResponse popup that converts our site visitors to subscribers.
Now, though GetResponse does come with a popup builder, it has limited functionalities and targeting rules.
For instance, both OptinMonster and GetResponse let you choose and customize a popup template. But OptinMonster offers more customization options, like adding more elements to your popup.
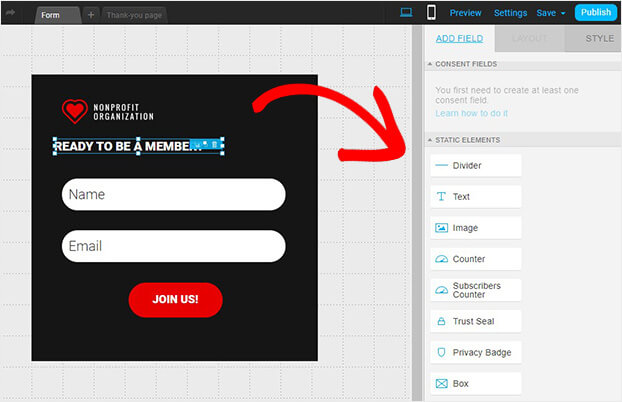
Here’s a look at GetResponse editor and the elements you can add.
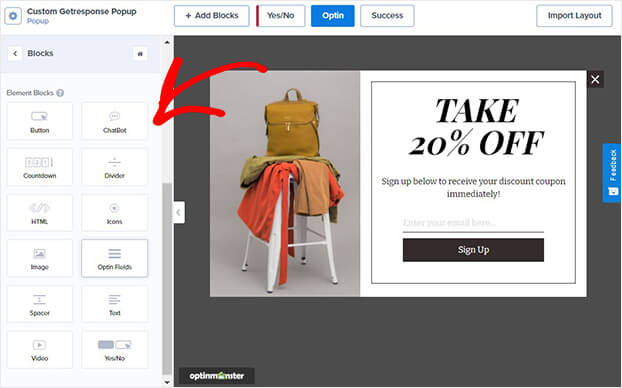
And here is OptinMonster’s editor. You can add any of the block elements to your popup.
In this tutorial, we’ll walk through the exact steps to build this custom GetResponse popup in under 15 minutes:
Let’s begin.
How to Create a Custom GetResponse Popup
Before we get started, you’ll need an OptinMonster account.
Sign up with ease by clicking on the button below.
Let’s begin.
Step 1: Create a Popup Campaign
First, log into your OptinMonster account.
From your dashboard, select Create New Campaign.
Now, you’ll need to choose your campaign type.
We’ll use Popup. As you’ve seen, the lightbox popup campaign type converts very well for OptinMonster customers.
Next, you’ll need to build a campaign template. If you need help choosing a template, you can filter the templates by the following goals:
- Grow email list
- Target abandoning website visitors
- Redirect traffic
- Time sensitive offer
For the sake of this tutorial, let’s create a custom GetResponse popup that will grow your email subscribers. And, in exchange for joining the email list, let’s offer site visitors an incentive — a discount coupon when they sign up.
Offering a coupon is just one way to add new subscribers. Here’s 73 proven ways to grow your email list.
In this tutorial, we will go with the Shopping template because it’s perfect for our discount offer.
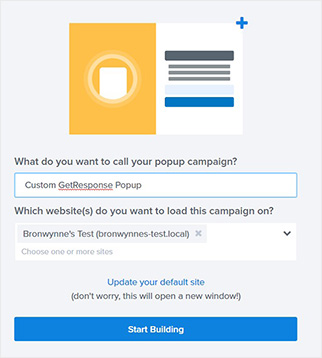
Next, name your campaign and click Start Building.
Now, we’ll design our custom GetResponse popup.
Step 2: Design Custom GetResponse Popup
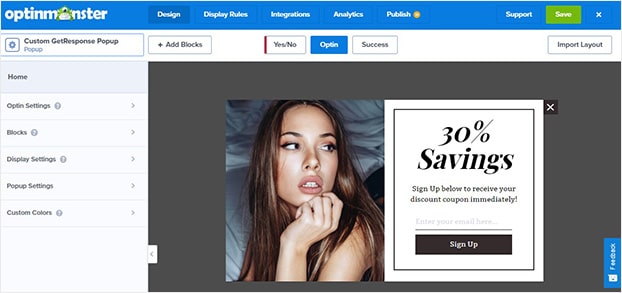
The next screen will be your campaign editor.
You can change anything about your template. All you need to do is drag and drop or click on the element you want to edit.
Let’s see how this looks in action.
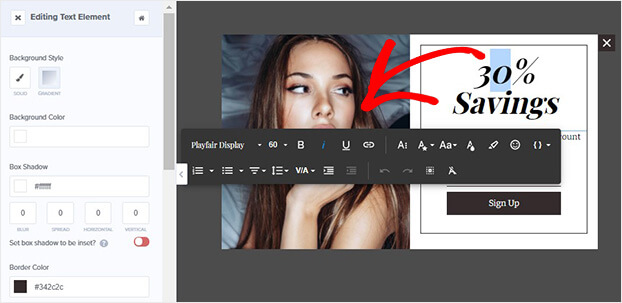
Want to change the text? Simply click on the popup to edit the text.
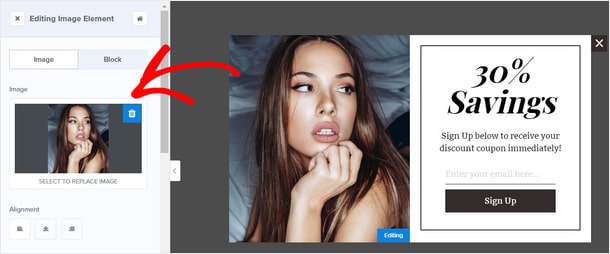
To change the image, simply click on the image. You’ll see the editing tools on the left.
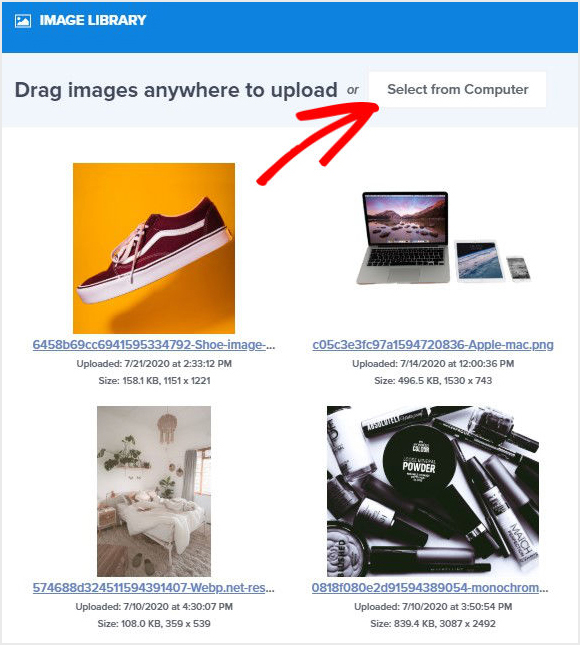
From your image library, you have two options:
- Upload from your computer
- Use existing image from your library
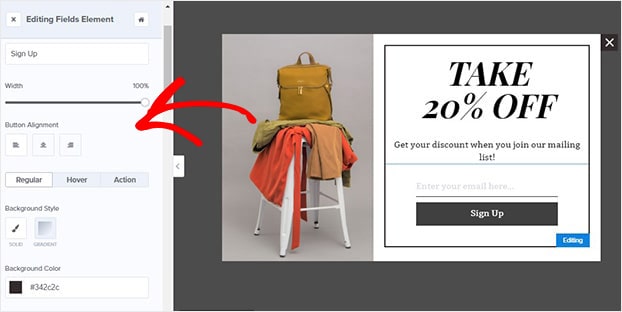
Changing any block on your popup form is so easy and the steps are also similar. For example, click on the button in the builder and the editing tools will appear on the left-hand side.
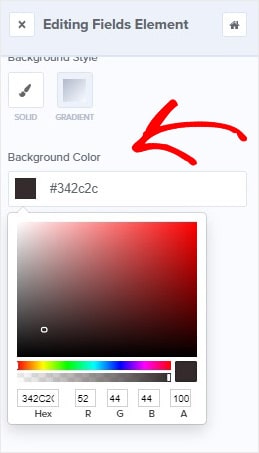
Here, you can choose the color that matches the exact color of your brand.
To add any new elements to your site, simply click Add Blocks.
Once you’re happy with the design of your popup, it’s time to decide where to display it on your site.
Step 3: Display Your Custom GetResponse Popup
You’ll need to click Display Rules at the top of your editor.
From here, you can choose triggers and targeting rules to configure where and when your popups are displayed.
Triggers determine when your campaign is displayed:
- Scroll trigger: only display the campaign after a visitor scrolls down a certain percentage of the page
- Time on Page: show the campaign when a visitor viewed a certain page for a specific period of time
- Date: display the campaign on a specific date
And there’s so much more to choose from.
Targeting lets you decide who gets to see your campaign:
- Page targeting: show to visitors on a specific page
- Referral targeting: show if visitor came to your site from a specific website
Now, instead of showing generic campaigns to all site visitors, you’ll be able to display more targeted messages. If people feel like a popup speaks to them and the offer is custom tailored to what they’re looking for, they’re more likely to give you their email addresses.
In this campaign that we’re creating, let’s add a powerful trigger, Exit-Intent®.
Exit popups appear as someone is about to leave your site. Instead of losing a potential customer forever, you can show them a targeted message as they move their mouse towards the browser. OptinMonster customers convert an additional 2 to 4% of site visitors into subscribers using exit-intent technology.
From Display Rules, find and select Exit-Intent®.
Don’t forget to save your campaign. You can save your popup at any time by hitting Save at the top of your editor.
Step 4: Integrations
One of the advantages of OptinMonster is that it seamlessly integrates with any email service provider.
Within a few minutes, you’ll be able to connect OptinMonster with your GetResponse account.
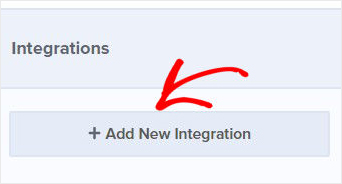
First, head over to Integrations.
Then select Add New Integration.
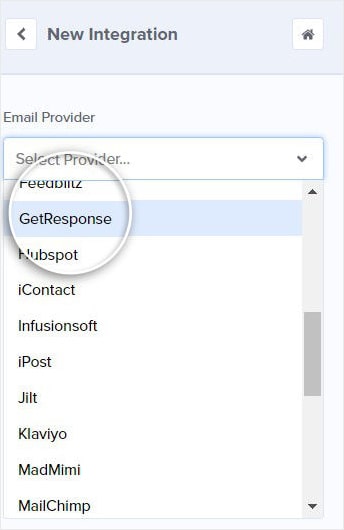
From the email dropdown, choose GetResponse.
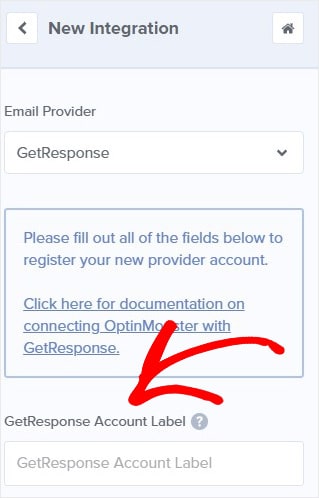
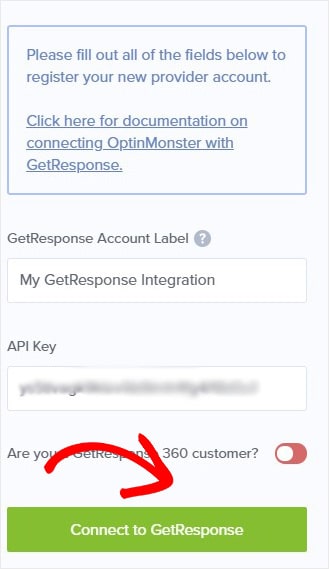
Now, you can enter an account label. This is a personal label to help you organize your integrations.
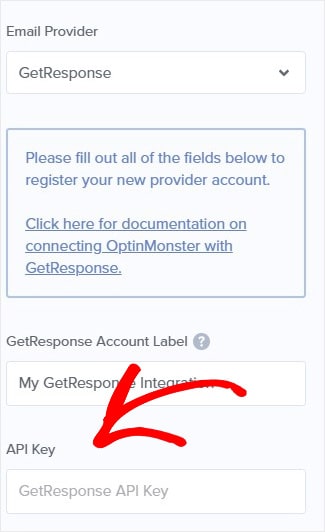
Next, you need to get your GetResponse API key. For that, you’ll need to log into your GetResponse account.
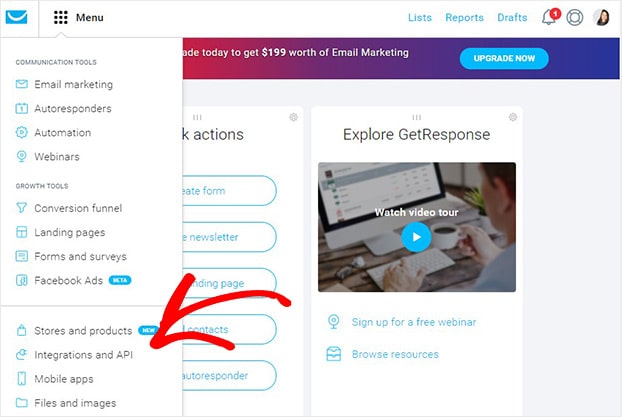
From the top-left of your GetResponse account, click Menu » Integrations and API.
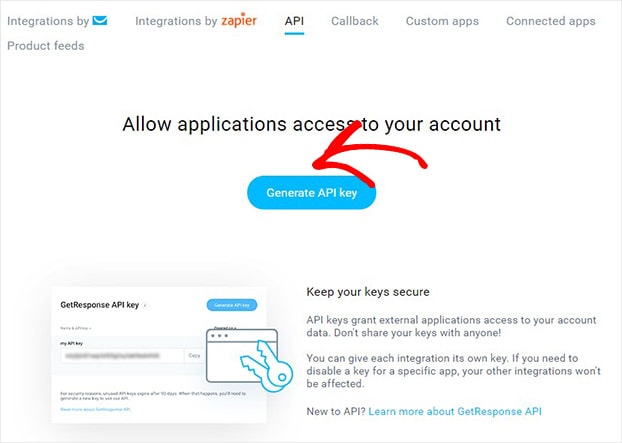
Next, select API.
On the next screen, click Generate API Key.
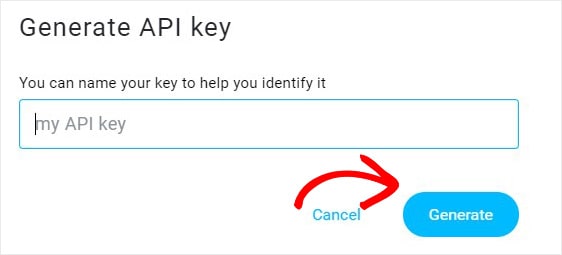
On the next screen, name your API key. And click Generate.
Paste the API key into OptinMonster and click Connect to GetResponse.
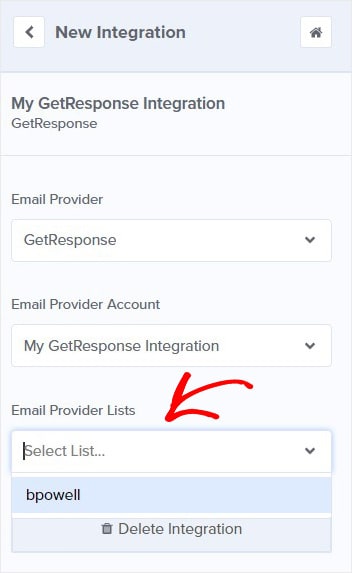
Finally, select the GetResponse email list you want to add.
Finally, head over to the top of your editor and click Publish.
Switch your campaign status to Live.
The last step is to make sure your site is connected.
Don’t worry if your site isn’t connected yet. Follow the steps in this article to connect OptinMonster with any website platform.
Now, you’re ready to grow your email list.
You might be interested in some more practical strategies and case studies about email marketing.
Check out these resources:
- How Does OptinMonster Work (8 Benefits + 12 Case Studies)
- How to Run a Successful Email Marketing Campaign (Step by Step)
- Email Marketing Made Simple: A Step by Step Guide [+ Examples]
Ready to convert more site visitors? Sign up for OptinMonster today.








Add a Comment