Do you want to create a popup registration form on your WordPress website?
A popup registration form is one of the best ways to entice your visitors to register on your site. That way you can prompt them to complete the registration from the same page they’re without having them to navigate to another page.
But how do you create a popup registration form without coding or designing skills?
Today, we’ll show you how to easily create a popup registration form with two powerful tools:
First, let’s have a look at what a popup registration form is and why you need one on your WordPress site.
What is a Popup Registration Form?
A registration form requires your site visitors to create a profile with their username, email, and password to access certain parts of your site.
Now, there are a few reasons you might need to add a registration form to your WordPress site.
To allow people to:
- Create profiles for an eCommerce store
- Signup for an online course
- Join a membership site
Unfortunately, on most websites, the registration process is not always easy.
Maybe it’s slow or confusing. And if people get stuck, they will leave your site. Not to mention, a poorly designed registration process will cost you revenue.
On the other hand, a positive user experience sets your business apart.
That’s where a popup registration form comes in.
A popup registration form allows your site visitors to quickly register on your site without interrupting their browsing pattern.
It’s the easiest way for your site visitors to register or log into your WordPress site.
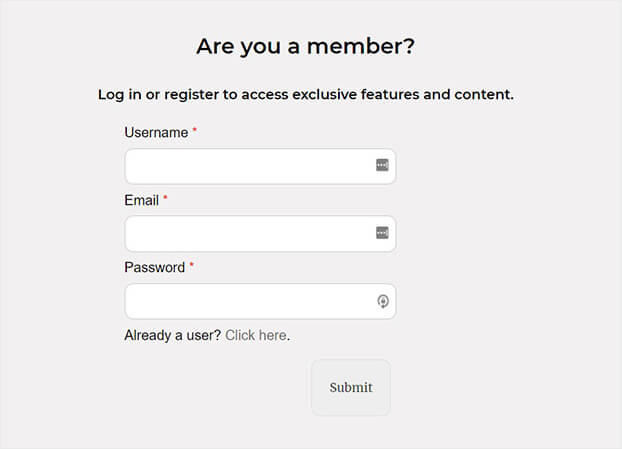
Today, we’ll create this popup registration form:
How to Create a Popup Registration Form in WordPress
In today’s tutorial, we’ll create a popup registration form in WordPress using WPForms and OptinMonster.
- WPForms is the best form plugin for WordPress. With WPForms, you can add fully functional forms to your site without writing any code. And you get to choose from around 100 templates.
- OptinMonster is the best popup builder for WordPress. OptinMonster’s drag and builder makes it’s easy for you to embed the registration form within the popup.
Below, we’ll walk through each of the steps you need to set up your popup registration form.
Create a Registration Form Using WPForms
Before we begin, you’ll need to install and activate the WPForms plugin.
Check out this article for step by step instructions on installing a WordPress plugin.
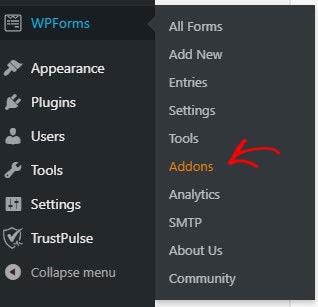
Once you have activated the plugin, click WPForms » Addons.
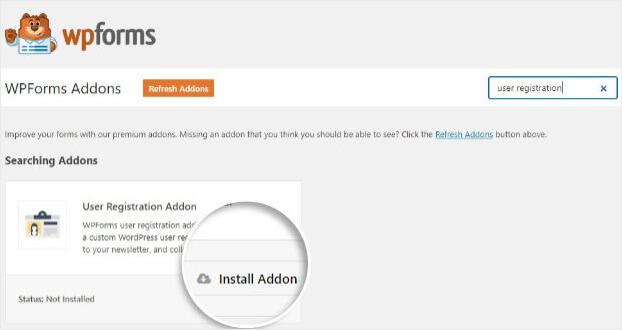
On the next screen, you’ll see the available addons.
Search for User Registration Form.
Click Install Addon.
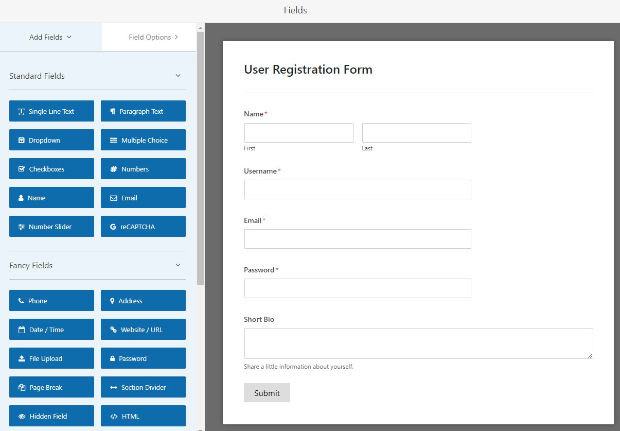
The User Registration template comes with all the fields you need for a popup registration form:
- Username
- Password
- Short bio
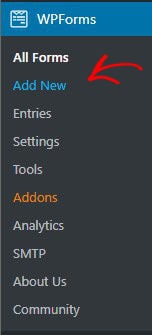
Next, click WPForms »Add New.
You’ll now be in the form builder.
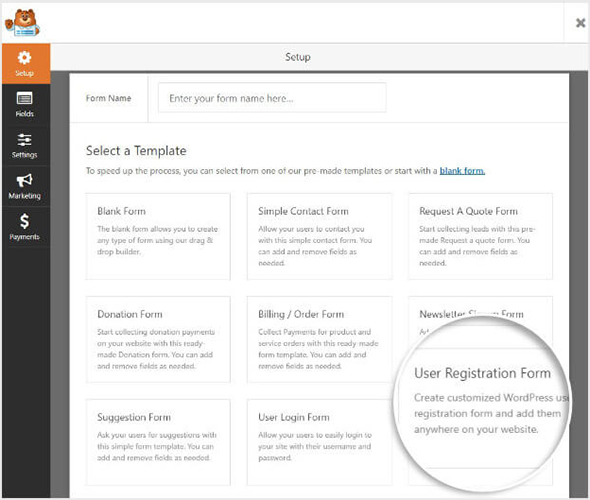
Find and select the User Registration Form template.
Now, you can customize your form by adding fields from the left side of the screen.
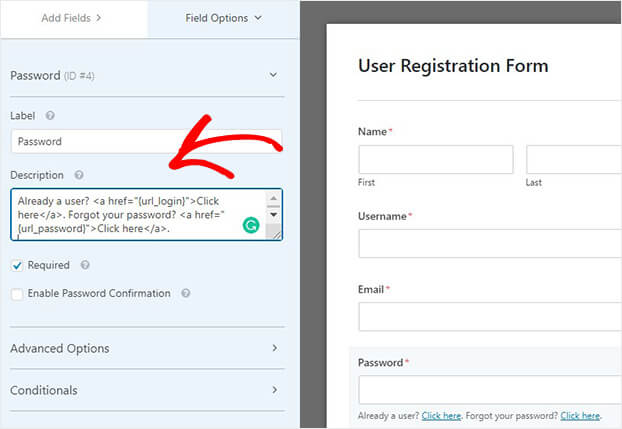
Next, click on the Password field on the form. Again, you’ll see the field options on the left side.
Add the code below in the description box of the Password field:
Now, you can display options like forget password or user login if the visitor already has an account.
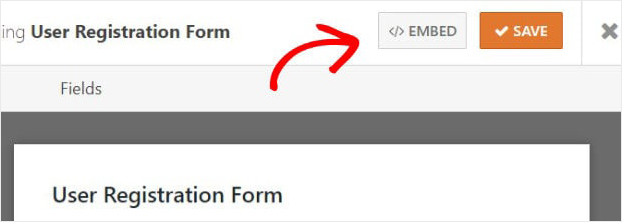
After that, click Save at the top of the editor.
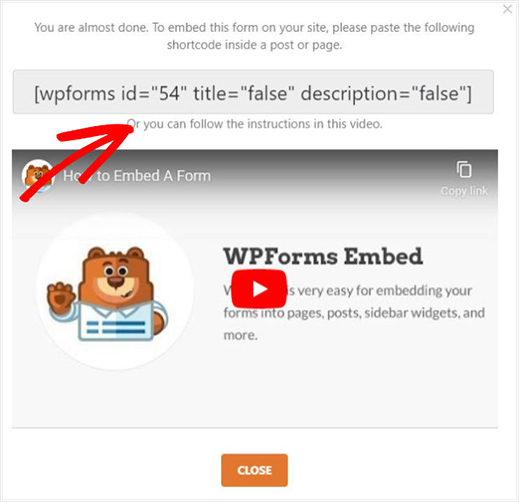
Then, select Embed.
Copy the code. We’ll need this code when we set up our popup in the next step.
Next, it’s time to head to OptinMonster to create and display your popup registration form.
Create Your Popup Registration Form
Now, we’ll create our popup registration form in OptinMonster.
Step 1: Create a Popup Campaign
First, head over to your OptinMonster dashboard.
Click Create New Campaign.
Choose Popup.
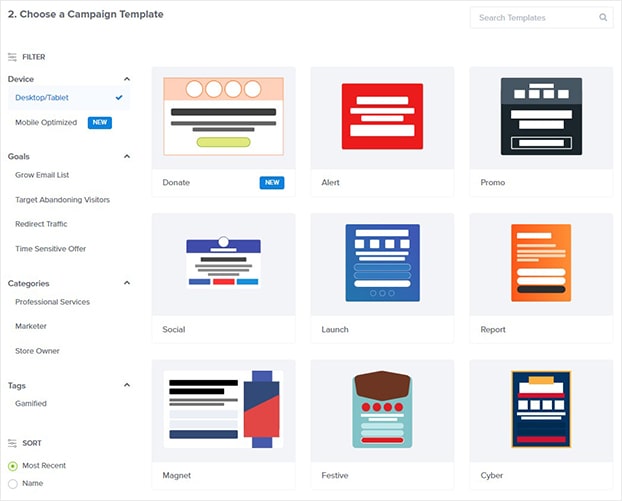
OptinMonster has over 50 templates to choose from.
The templates let you create plenty of different types of campaigns, like offering:
- Content upgrades to users based on the articles they’re reading
- Discounts to online shoppers for the products they’re looking at
All OptinMonster’s pre-built campaigns work beautifully across desktop, mobile, and tablet.
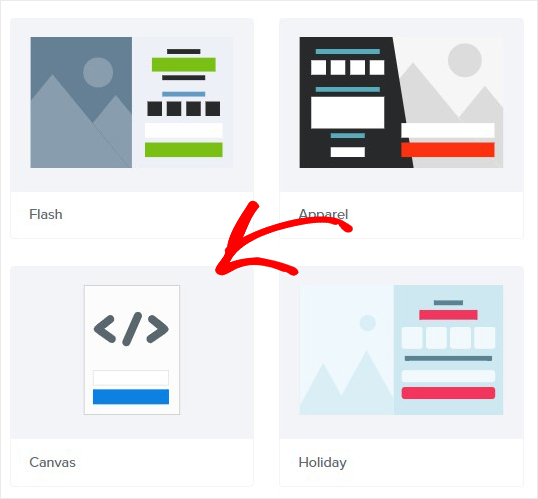
Today, we’ll go with Canvas.
Canvas lets you build your own campaign from scratch.
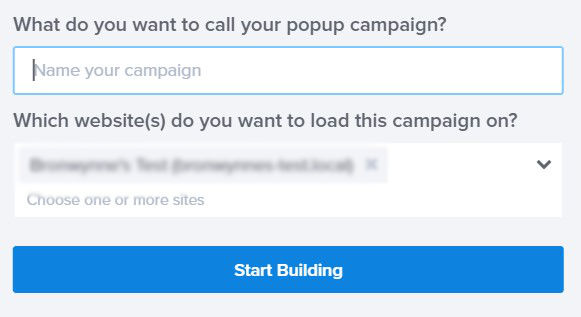
Name your campaign and assign it to your WordPress site.
Click Start Building to edit your popup.
Step 2: Design Your Popup Registration Form
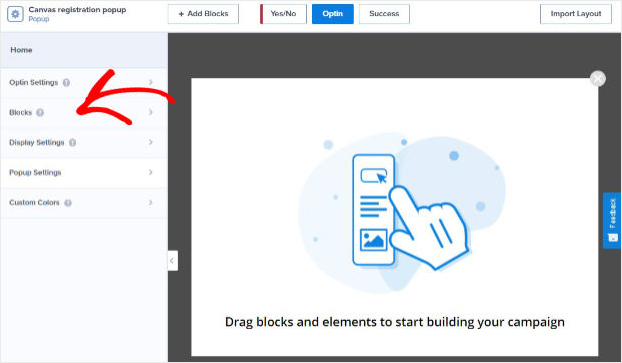
Now, you’ll be in the campaign editor.
Customizing your popup in OptinMonster is easy.
You’ll see all the editing tools and blocks on the left.
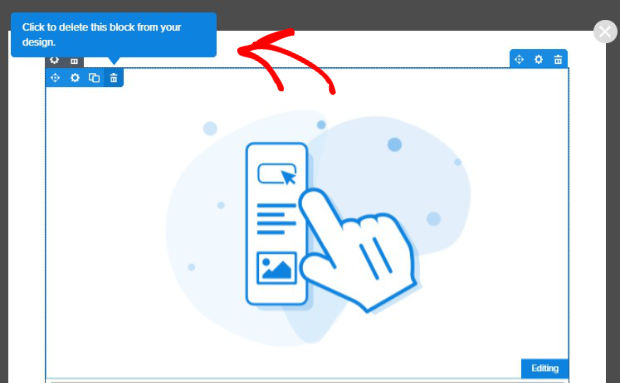
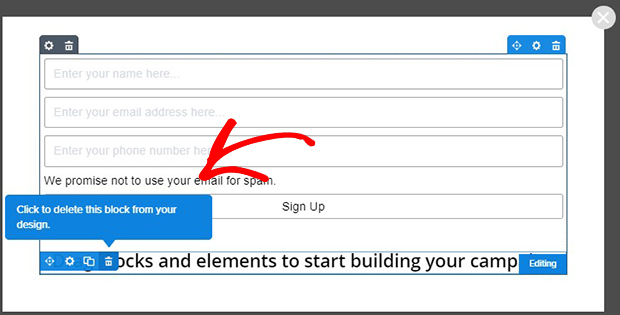
To delete an element, simply click on it, and select delete.
Let’s delete the rest of the text on our form, too.
At this stage, you’ll have a completely blank canvas.
Now, we’ll add our embed code from WPForms.
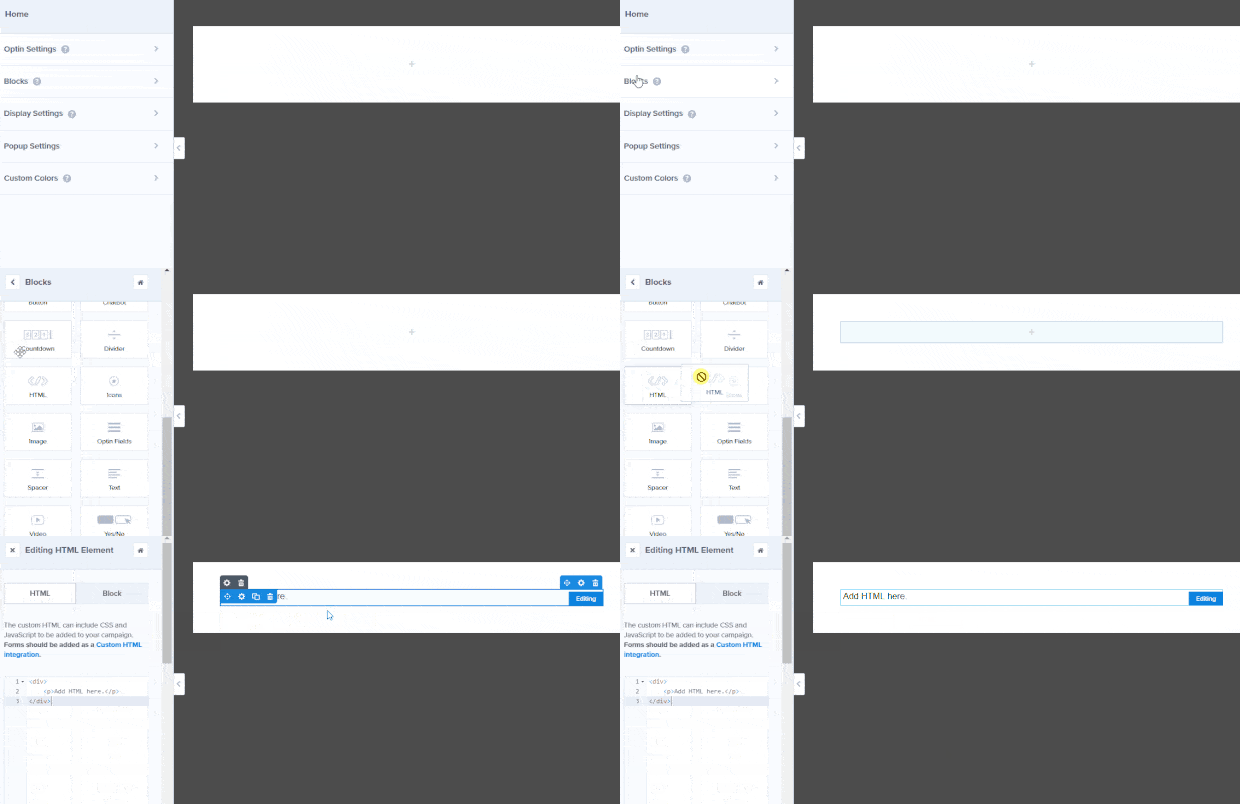
Choose Blocks.
Now, drag the HTML block over to your form.
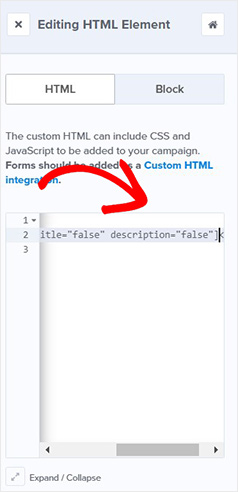
In the left-hand side menu, insert your shortcode.
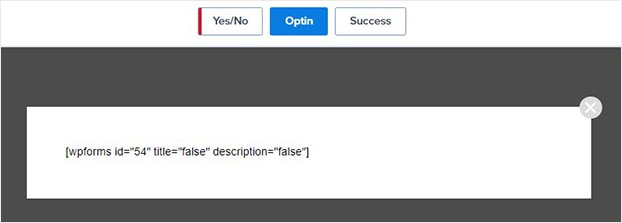
The OptinMonster editor will now show this shortcode, but once your campaign goes live the form will appear.
Next, we’ll add a heading to our form.
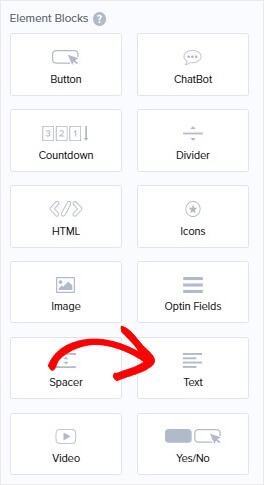
Click Add Blocks from the top of your editor.
Simply drag and drop the text block onto your form.
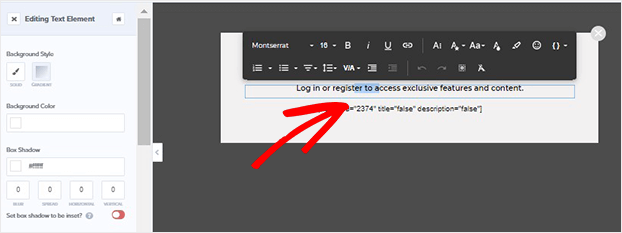
Now, you’ll be able to add copy to your form. Simply click on your text to edit the copy from within the builder.
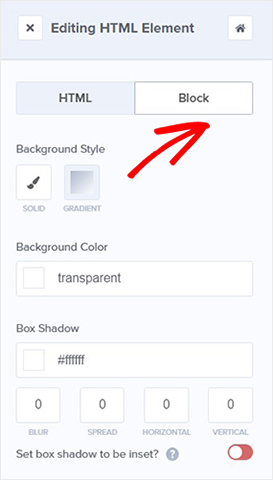
Next, click on the shortcode. This will pull the Editing HTML Element tools on the left.
Select Block.
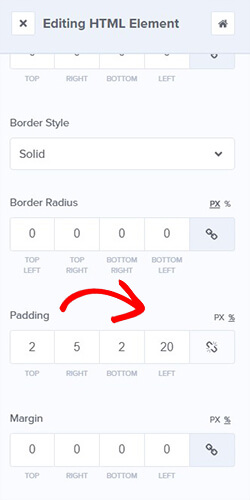
Set the padding to the values below. This will center your form fields.
Next, we’ll style our popup registration form.
Step 3: Adding CSS to Your Login Form
Now, we’re going to add custom CSS to your registration form.
If you’re new to CSS, don’t worry. All you’ll need to do is copy and paste a few lines of code in your campaign editor.
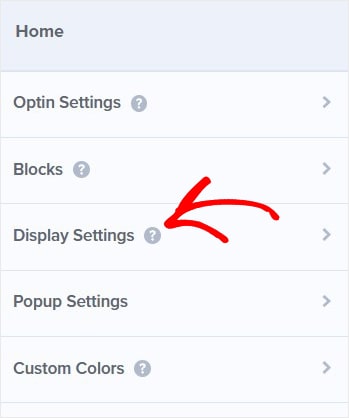
Head over to the Home panel and click Display Settings.
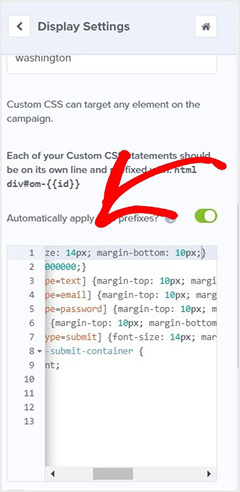
Copy the below CSS:
Paste it into the field box.
Step 4: Display Your Popup Registration Form
Today, we’ll be using one of OptinMonster’s most powerful campaign triggers, Monsterlinks ™.
Lead Guru converted 81% of their site visitors using MonsterLinks.
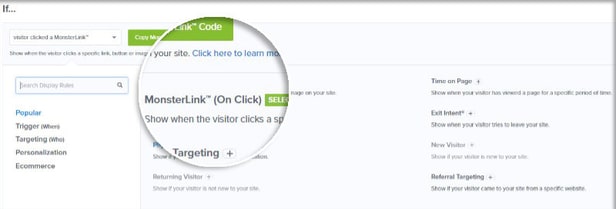
Head over to Display Rules.
Find and select Monsterlinks™ (On Click).
Next, click Copy Monsterlinks Code. You’ll be able to place this code anywhere on your WordPress site to add a clickable registration link.
Finally, it’s time to publish your campaign.
Select Publish from the top of your editor.
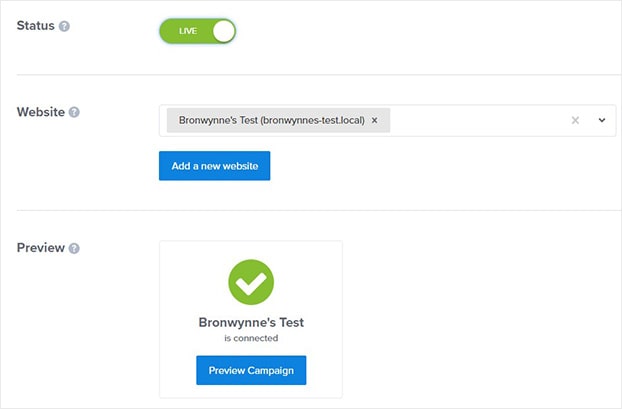
On the publish screen, make sure the campaign status is Live.
On the next screen, make sure the status of your campaign is Live.
Now, all that’s left is to add your popup form to your WordPress site.
Step 3: Add User Registration Form to WordPress
Head over to your WordPress dashboard.
Click OptinMonster from WordPress.
You might need to refresh your campaigns if you don’t see your campaign here.
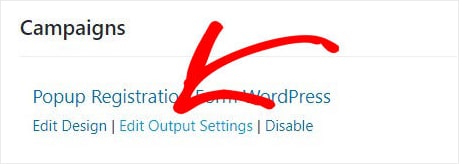
Once you see your campaign, click Edit Output Settings.
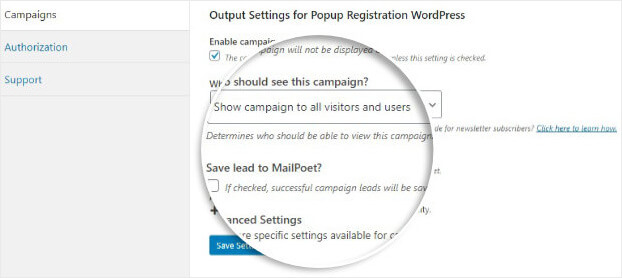
Under Who should see this campaign, click Show campaign to all visitors and users.
Finally, add your Monsterlinks link to your site.
You’ll now create a clickable registration link you can place anywhere on your site.
Now, your site visitors will see this popup when they click on the registration link:
That’s it.
Now, you’ve set up a super simple registration process on your WordPress site.
Now that you know how to use popups for easy user registration, you might also want to check out how they can boost your email subscribers.
Check out these articles for techniques that will add more subscribers to your mailing list:
- Exit popup hacks to Grow Your Subscribers and Revenue
- Proven and Simple Ways to Grow Your Email List
Ready to use popups to grow your business? Get OptinMonster today.













Add a Comment