Do you want to make a paywall in WordPress but aren’t sure the best way to do it?
Paywalls are a great way of boosting revenue for premium content on your site. And while you’ve likely seen paywalls on major publishing sites, you may not know exactly how to make one for your own website.
So, in today’s post, we’re going to show you 2 different methods for creating a paywall in WordPress, including:
- Content locking
- Integrating the membership site feature
But before we do that, let’s make sure we’re clear on what a paywall is.
What Is a Paywall?
A paywall is a feature that allows users to access some of your site’s content for free but requires payment for premium content. It’s a method used by publishing sites and most major news networks.
Here’s an example from the New York Times:
After consuming a certain amount of content, users are asked to log into their account for more. Or, users see the campaign from the image above asking for a small fee in exchange for unlimited content.
And while that’s great for a big name like the New York Times, is using a paywall right for you? Well, that depends.
If you publish a ton of high-quality content that gives your readers lots of value, then you should consider using a paywall. This actually gives your site 2 benefits:
- Makes your content look more exclusive and, therefore, more valuable
- Creates passive income to help you promote even more great content
With a paywall, you get the best of both worlds. Not only do you get to serve everyone with your free content, but you also get to be compensated for the premium content that took you so many hours to create.
And for a small fee, your most loyal readers will be able to consume this high-quality content. But that still leaves the question: How do you make a paywall in WordPress?
Let’s dive into 2 different methods that you can start using today.
Our conversion experts will design 1 free campaign for you to get maximum results – absolutely FREE! Click here to get started →
How to Create a Paywall in WordPress
In this tutorial, we’ll be using 2 different tools:
- OptinMonster
- MemberPress
OptinMonster is the world’s #1 lead generation software. And by that, we mean that OptinMonster is the best tool on the market to get you more sitewide traffic, grow your contact list, and increase sales on your website:
We do that by offering various lead generating campaigns across your site. These campaigns can be things like:
- Lightbox popups
- Fullscreen welcome mats
- Slide-in scroll boxes
And much more, including one that will help us make a paywall in today’s tutorial.
Plus, OptinMonster offers more targeting and trigger options than any competing software on the market. That means you get complete control over when, where, and to whom your campaign appears on your site.
This leads to more conversions for you because you’re able to personalize your messaging.
If you want more information, check out this article on how OptinMonster works (with 8 benefits and 12 case studies).
Otherwise, go sign up for your risk-free OptinMonster account to begin!
Method 1: Content Locking
Content locking is a way of preventing users from seeing your content until they’ve signed up for your contact list. Now, this isn’t a traditional paywall since users won’t need to pay a fee to access your content. They’ll simply need to provide an email address for your contact list.
So why are we using this method?
Because the more emails you get, the more revenue you can generate through email marketing. But more on that in just a bit.
Now, let’s learn how to use OptinMonster’s content locking campaign.
Step 1: Create Your Content Lock Campaign
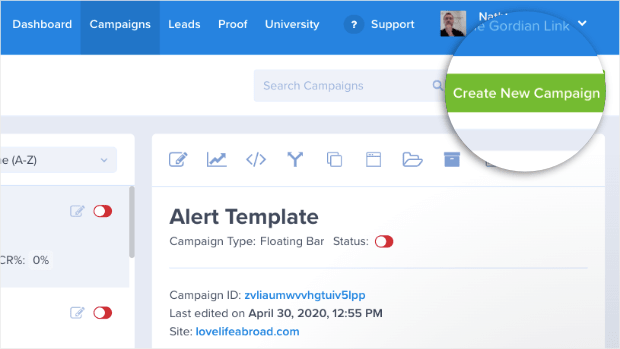
Once you’ve signed up for an account, you can go to your dashboard and click Create New Campaign in the upper right-hand corner:
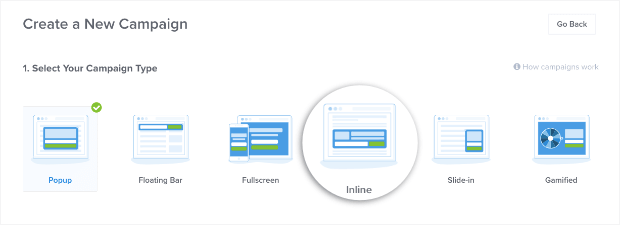
Now it’s time to choose your campaign type. To create our paywall, we need to select an Inline campaign:
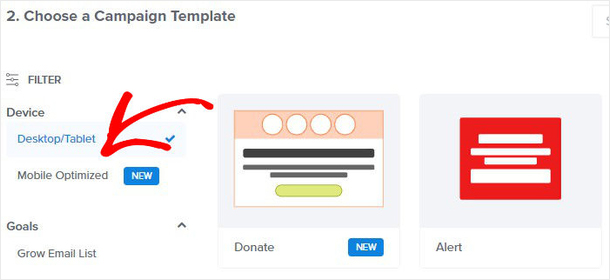
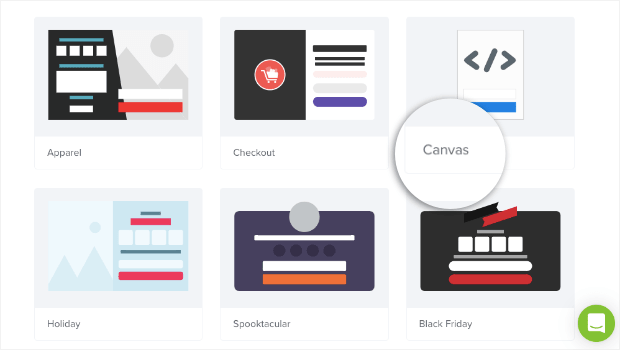
Then, you need to choose one of our pre-built templates to display over your content lock. We have over 50 pre-built templates that look great over a wide variety of devices. You can even choose to use templates specifically optimized for mobile:
Or you can use the Canvas template to build an optin campaign totally from scratch:
No matter what you decide, just know that customizing your campaign is totally easy. It requires zero coding skills, and everything can be done with a drag and a drop. For today’s tutorial, we’ll go with the Basic template:
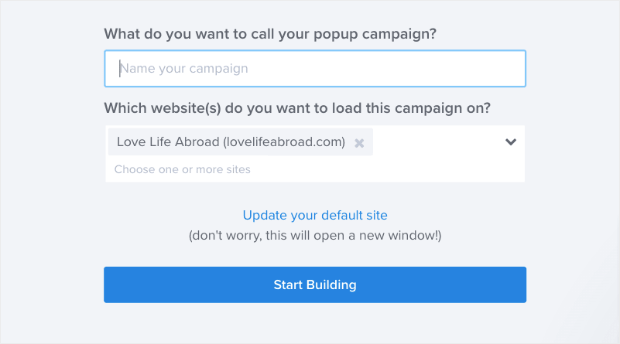
Then you simply need to name your campaign and click Start Building:
Step 2: Activate the Content Lock
The first thing you need to do is activate the content lock feature. This means that when users reach your campaign, the rest of the page will either be removed or blurry until they enter their email address.
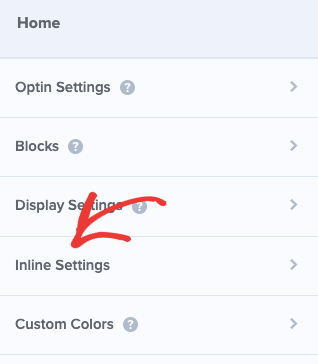
To activate this feature, click Inline Settings in you OptinMonster editor dashboard on the left-hand side:
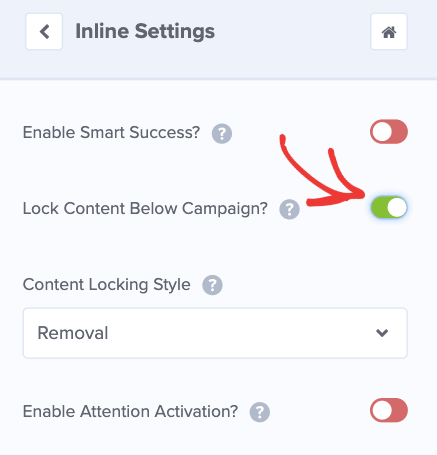
Then click on the toggle switch Lock Below Campaign?:
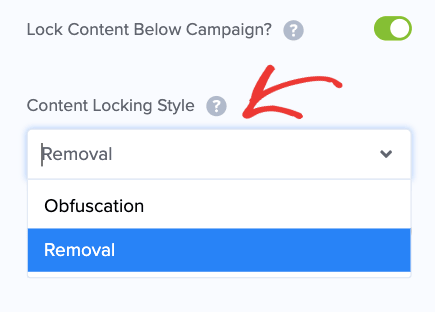
And choose which type of content lock you want:
- Removal
- Obfuscation
The Removal option will completely remove your content from the page until the user signs up. Obfuscation, on the other hand, makes everything blurry for the users until they sign up.
You can choose whichever one you believe would be most effective with your audience.
Once you’ve done that, it’s time to design your optin campaign.
Step 3: Design Your Campaign
We’re not going to go deep into how to design a campaign in OptinMonster today. There are too many customization options to cover for this tutorial.
But rest assured that any changes you want to make are super simple. If you need help, check out this article on how to create your first campaign with OptinMonster.
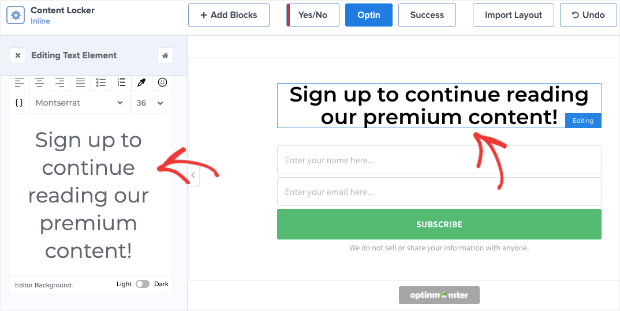
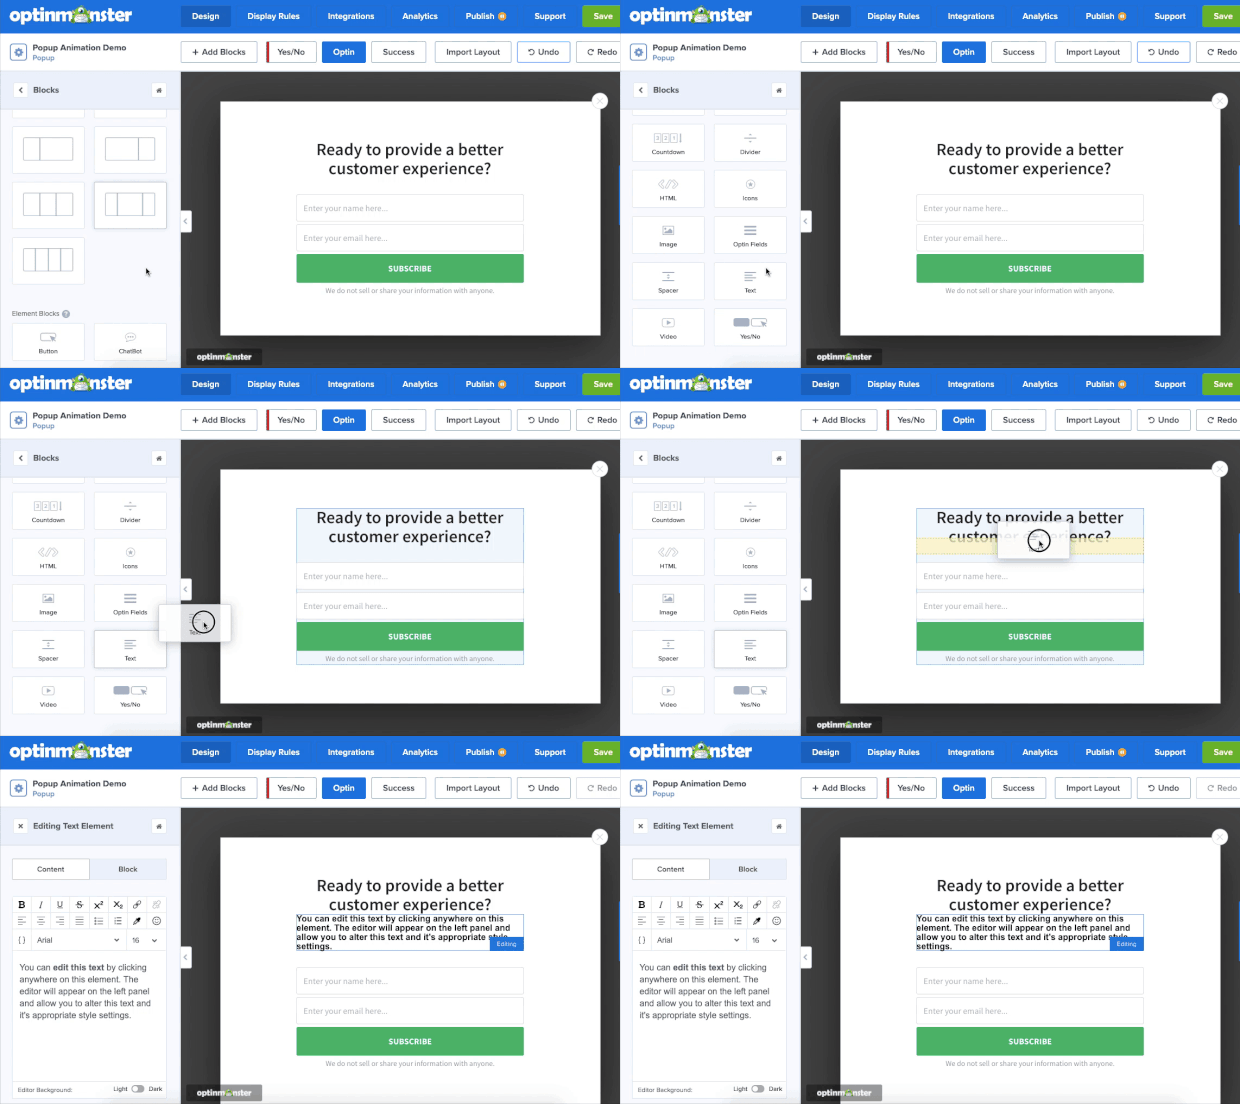
All you need to know today, however, is that you can modify anything in your campaign with a few clicks. Our campaigns are made up of various “blocks” that you can change in the left-hand side menu.
So if you wanted to change the text, for example, you’d simply click on the text block to make the changes you want:
The same goes for every type of block, including images, buttons, and more.
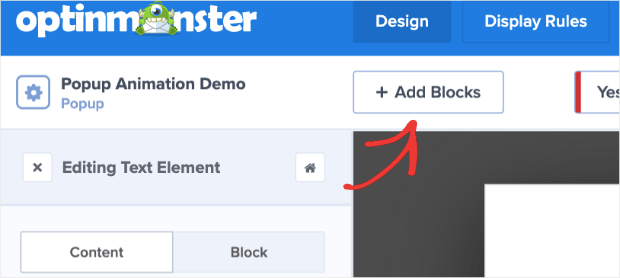
If you want to add a new block, that’s easy. Click on the + Add Blocks button at the tip of your OptinMonster editor:
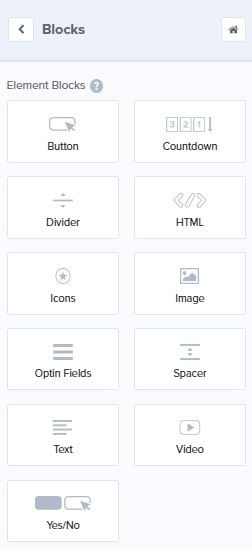
Then you’ll see a list of block types you can add, such as:
- Button
- Countdown timer
- Divider
- HTML
- Images
- Videos
And more. Then you drag and drop the element blocks where you want them to be in your campaign:
That’s it! With those tools, you can create your campaign to look, say, and link to whatever you’d like.
Here’s a simple campaign we built for today’s demo:
Once you have the campaign created, save and publish it. Then, you’ll be ready to embed your content lock over your content.
Step 4: Embed Your Campaign
Embedding your content locking campaign with OptinMonster is easy. There are 2 methods for doing so:
- Using an HTML placeholder (for any website)
- Adding a shortcode (if you use WordPress)
Today, we’ll just be covering how to add your campaign with a shortcode for WordPress if you use the OptinMonster plugin.
But you should know that both methods can be found in the following resource: How to Manually Add an Afterpost or Inline Campaign.
This section of the tutorial assumes that you’ve installed the OptinMonster plugin. If you haven’t, you can read this to learn how to install the OptinMonster WordPress plugin.
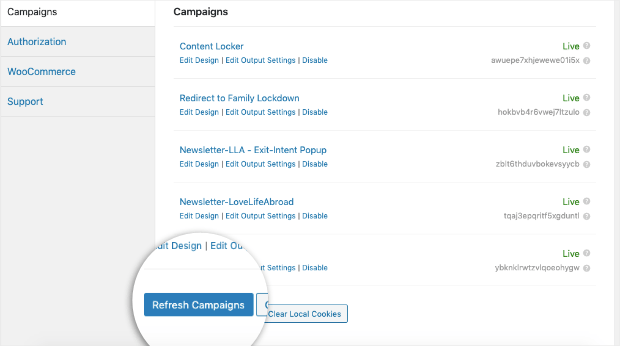
Then head to the plugin dashboard in your WordPress account. Click on Refresh Campaigns:
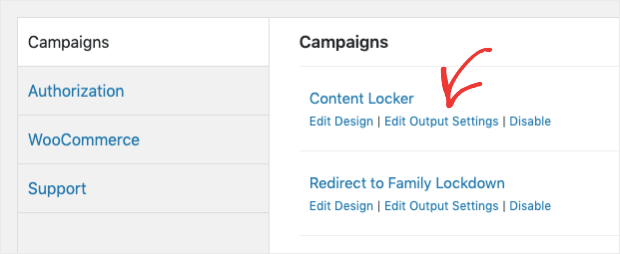
Then locate your content locking campaign and click Edit Output Settings:
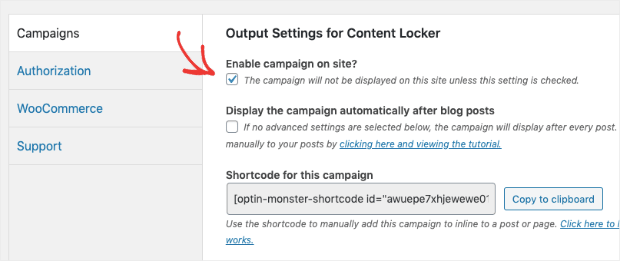
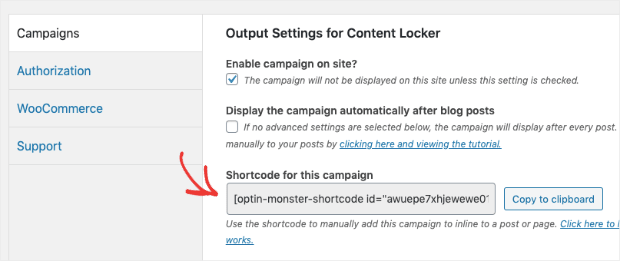
Make sure that the Enable campaign on site box is checked:
This will allow you to use the shortcode for your content locker. Now just copy the shortcode:
And now, you can put the shortcode on any of your pages to block all the content underneath it.
Never used shortcodes before? No problem. Just read this helpful guide on how to add a shortcode in WordPress.
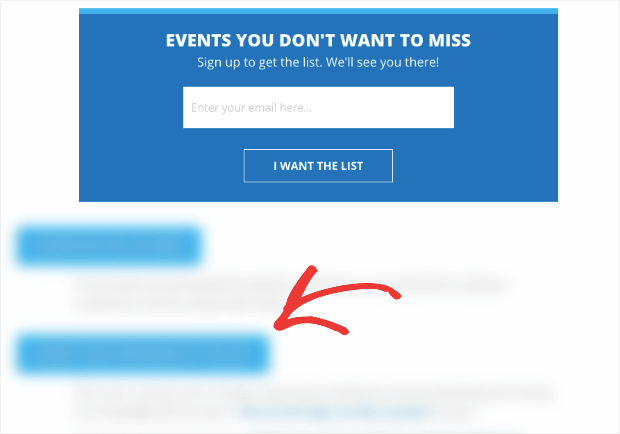
This method is so effective at growing your email list, in fact, that Whole Whale used an obfuscation content locker:
And it increased their email subscribers by 100%. That’s 2x as many email subscribers from one simple content locking campaign.
But that’s not a traditional paywall. So how do you make money?
You can do that by running an effective email marketing campaign. To learn how to do so, read through these following guides:
- Email Marketing Made Simple: A Step by Step Guide
- How to Run a Successful Email Marketing Campaign
- How to Create an Effective Email Autoresponder Series
These resources have everything you need to learn how to monetize your email list.
It’s how ClickFunnels owner Russel Brunson can give his marketing books away for free but still turn a profit. He knows that each contact in his email list is worth future revenue, and sees that money come back.
You can do the same with content lockers to grow your email list using premium content and monetize that list with future campaigns.
But if you’re looking for a more traditional paywall, we have you covered there too with our second method.
Method 2: Using MemberPress
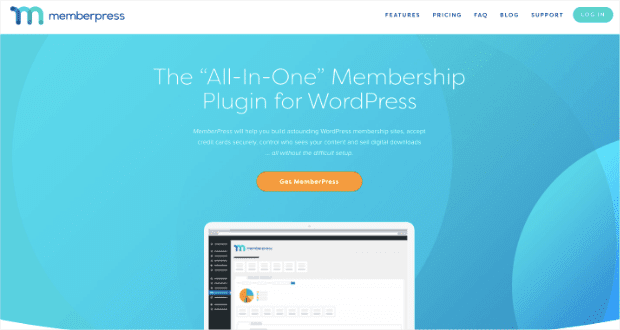
With this method, we’ll be using MemberPress:
MemberPress is the all-in-one membership plugin for WordPress that makes it easy to create membership sites.
When you’re using MemberPress, creating a paywall is super simple.
Step 1: Install, Activate, and Configure MemberPress
First, you’ll need to sign up for MemberPress and install the plugin. Need help installing a plugin? Read this guide on how to install and activate a WordPress plugin.
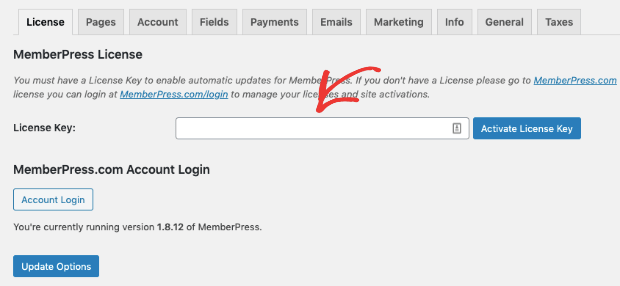
When your plugin is activated, head over to MemberPress » Settings » License page to enter your license key. Then click Activate License Key:
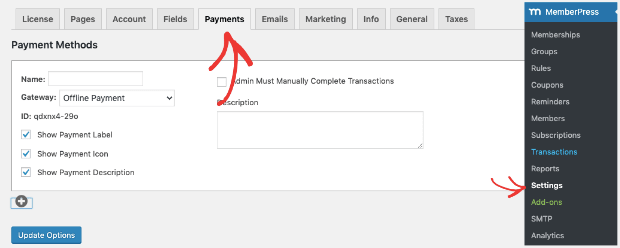
Now you need to set up a payment gateway. That way, your users will be able to pay you for unlocking the content. Head over to MemberPress » Settings » Payments, which is one of the tabs in the top menu:
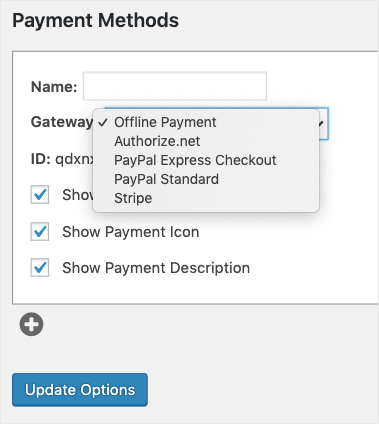
From there, you can configure your payment settings with the following payment gateways:
- Offline payments
- Authorize.net
- PayPal Express Checkout
- PayPal Standard
- Stripe
Once you’ve configured your payment gateway, it’s time to create a subscription plan for your users.
Step 2: Make a Subscription Plan
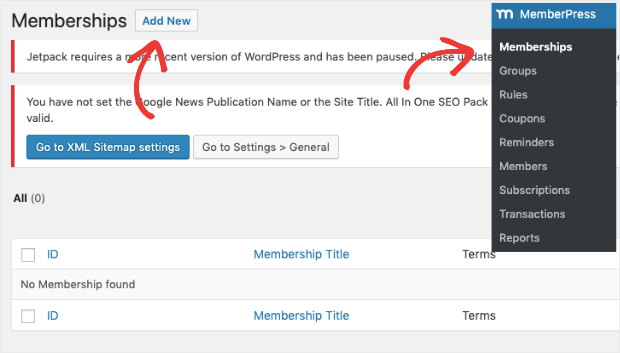
Now you’ll want to make a subscription plan to unlock the premium content on your website. For that, go to MemberPress » Memberships and click Add New:
You’ll need to give your membership plan a name and create the terms for your paywall. This includes setting up details like:
- Name of your new plan
- Description
- Price
- Type of plan (1 time or recurring)
- Interval
And more. You can even set up different levels of membership to have tiered paid plans. That would give paid members premium content but VIP members, for instance, other exclusive resources.
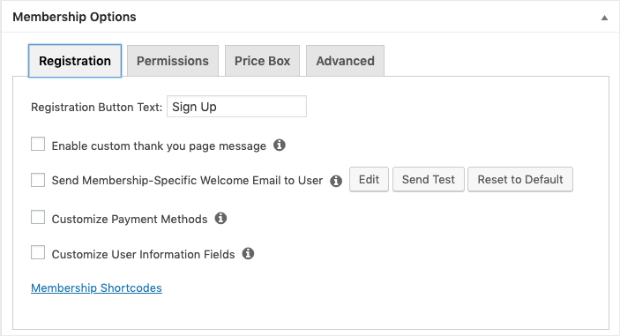
You can configure this and other details about your subscription plan in the Membership Settings on the same page:
When you’re finished setting up your new subscription plan, click Publish.
Step 3: Determine Which Content to Add to Your Paywall
Now that you’ve successfully created your paywall with MemberPress, it’s time to determine which content you want to be private and public.
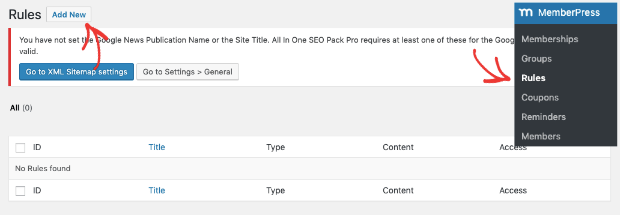
Go to MemberPress » Rules and click Add New:
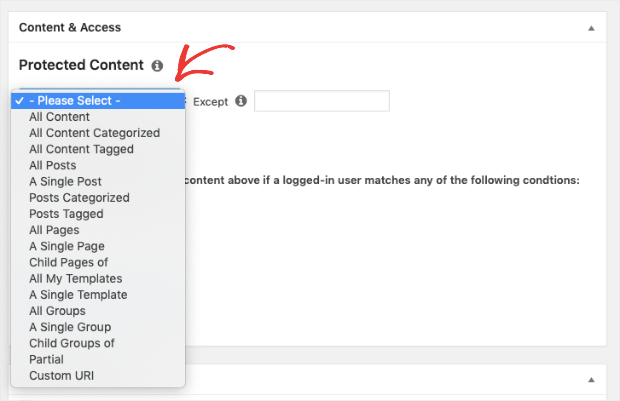
Then you need to determine which content you want to save for paying users.
Select the content you want to make premium from the drop-down menu:
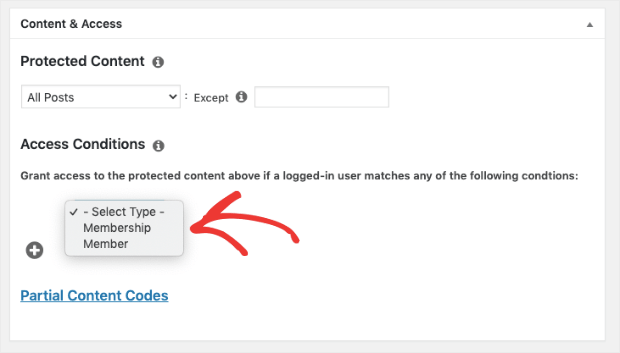
Then, under Access Conditions, choose the membership plan you created in step #2 of this section of the tutorial:
When you’ve configured what content you want for your paywall, click Save Rule.
Our conversion experts will design 1 free campaign for you to get maximum results – absolutely FREE! Click here to get started →
And that’s it!
We hope that this article helped you create a paywall for your website. If you run a publishing site, you may want to generate passive income through affiliate marketing.
For that, you should read the following articles:
- How to Make Money While You Sleep With Affiliate Marketing
- 11 of the Best WordPress Plugins for Affiliate Marketers
Those resources will get you set up to increase your affiliate marketing income through a publishing website.
Ready to get started boosting conversions and increasing sales? Join OptinMonster risk-free today!








Add a Comment