Do you want to add a free shipping bar to your website that motivates customers to make a purchase?
Providing your customers with free shipping can be a great incentive to turn window shoppers into paying customers.
But how do you let customers know you’re offering free shipping in the first place?
One of the best solutions is with a floating bar at the top of your website. That’s why, today, we’ll teach you how to create a free shipping bar to your online store.
More specifically, we’ll cover how to:
- Create a free shipping bar with OptinMonster
- Add it to your:
After this ultimate guide, you’ll be ready to add a free shipping bar to any eCommerce platform you use. First, though, let’s get clear on what a free shipping bar is.
What Is a Free Shipping Bar?
A free shipping bar is a floating banner that sits at the top of your website, letting users know you offer free shipping. It’s a great way to motivate your customers to go through with checkout.
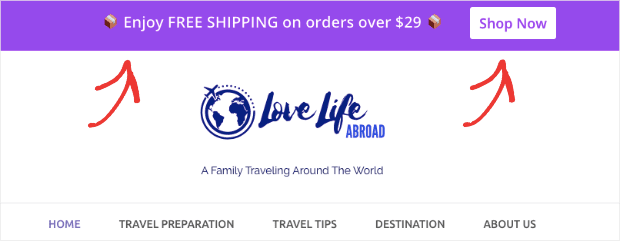
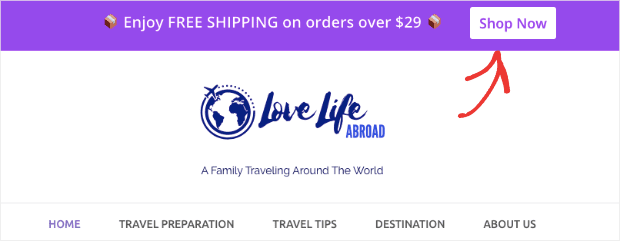
You’ve likely seen floating banners before. They look something like this:
In fact, the image above is the free shipping bar that we’ll be building in our tutorial today. But why do these little announcements make such a big impact?
Because they combat shopping cart abandonment.
It’s no secret that shopping cart abandonment rates are incredibly high, ranging from 75%–85% depending on the device a consumer is using. And one of the main reasons for shopping cart abandonment is unexpected costs at checkout.
That can include shipping costs.
When you display a free shipping bar, it lets your customers know that they won’t have huge added fees once an item is in their cart. The price they see is the price they’ll pay.
This can be a huge motivator for transforming your site traffic from casual browsers to loyal customers.
Now that we know why free shipping bars are so effective, let’s learn how to build one with OptinMonster.
How to Add a Free Shipping Bar to Your Site
Today we’ll be building our free shipping with OptinMonster, the world’s #1 conversion optimization toolkit.
Don’t have an OptinMonster account yet? No worries. You can get started with OptinMonster today risk-free with our 14-day money-back guarantee.
Once you’ve gotten started, you can log into your OptinMonster account and start creating your free shipping bar.
We understand that not everyone learns the same way. That’s why we also made this helpful video tutorial for our visual learners:
But for a totally in-depth guide, we recommend going through these written instructions. Let’s get started.
Step 1: Create Your Floating Bar
First, you need to select your campaign type. For today’s tutorial, we’ll choose a Floating Bar:
Then it’s time to select a template. OptinMonster has over 50 pre-built templates to choose from that work great on desktop, tablet, and mobile devices.
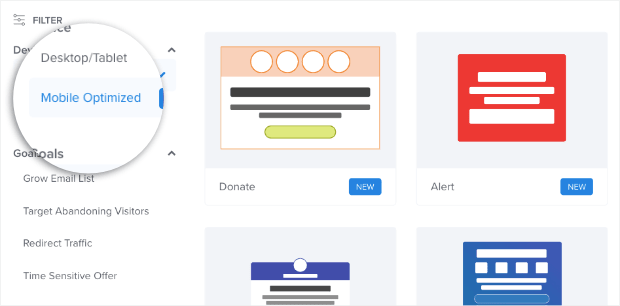
You can even filter your template options specifically for mobile devices if most of your traffic comes from smartphones. You can do that with your filter options on the left-hand side:
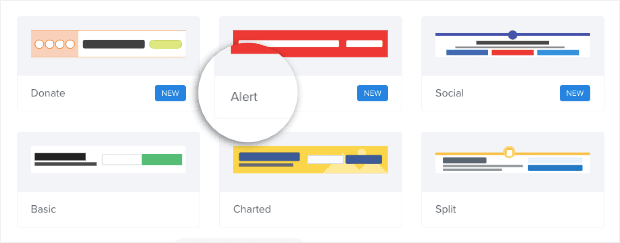
In this tutorial, though, we’ll select the Alert template for Desktop/Tablet, which still looks excellent on most mobile devices:
The Alert template is perfect for getting your customers’ attention and letting them know you provide free shipping.
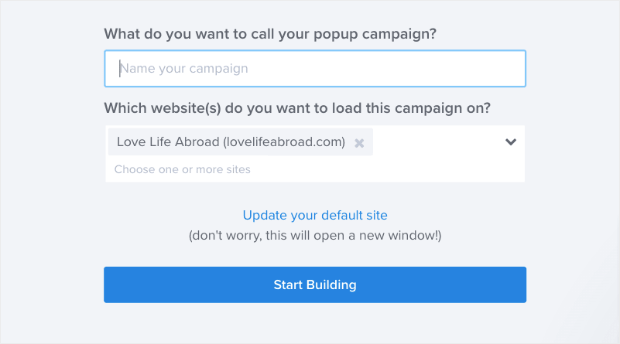
Now you need to give your campaign a name, assign it to your website, and click Start Building:
Step 2: Design Your Free Shipping Bar
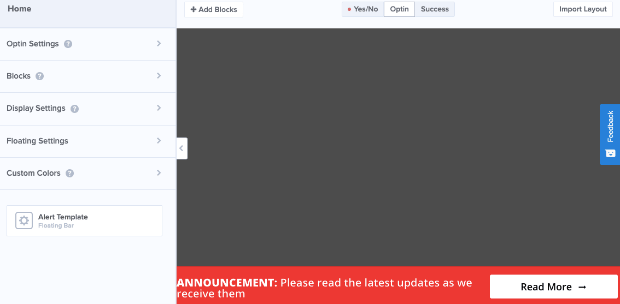
When your Alert template appears in your OptinMonster editor, it will show up at the bottom of your browser:
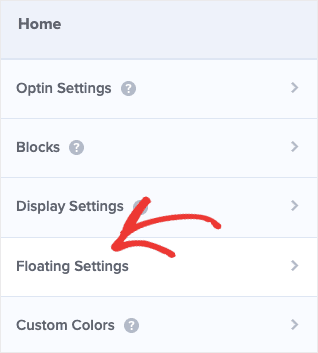
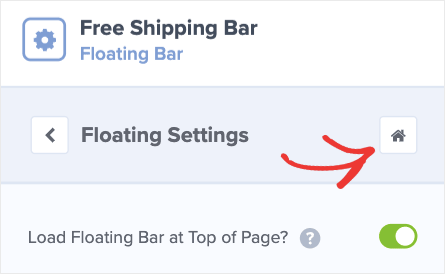
This shows you where your free shipping bar will rest on your website. But you can easily move your floating banner to the top of your site. Head over to the left-hand side menu and click Floating Settings:
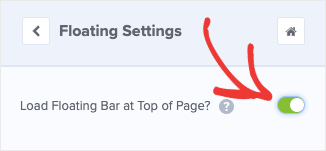
Then click the toggle switch to On where it says Load Floating Bar at Top of Page:
Now your free shipping bar will appear at the top of your customers’ browser.
At this point, you need to design your floating banner campaign. We won’t get into too much detail on how to do this because there are too many customization options to cover.
All you need to know is that you can change literally any aspect of your free shipping with just a few clicks. To change the background color, for example, go back to the home menu of your editor:
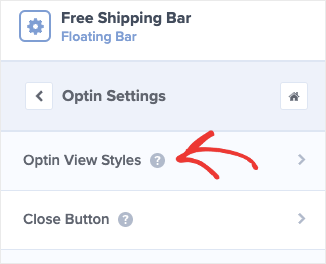
Click Optin Settings » Optin View Styles:
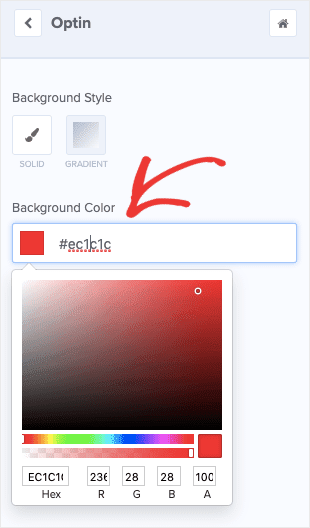
This will bring up the option to change the background color of your floating banner:
Choose a color that fits with your brand but will also grab your customers’ attention.
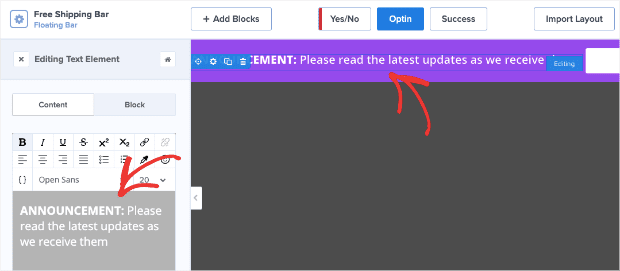
If you want to change other aspects of your free shipping bar, just click on them in the editor to pull up the editing tools on the left-hand side. For example, we’ll want to change the text from this template to show our free shipping offer:
By clicking on the text in the editor, we can modify the writing on the left-hand side menu.
Plus, to remove any element from your free shipping bar, just hover your cursor over it and locate the trash can icon. You may want to get rid of the button in your free shipping bar, for instance:
This would make our floating banner purely informational, like so:
If you want, though, you could keep the button and simply add a call to action like Shop Now.
That way if you choose to display your banner on every page of your website, readers can easily access your online store:
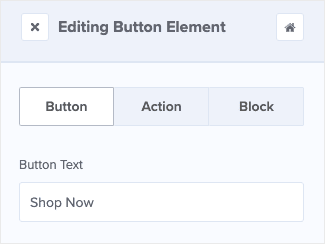
You would change the button text in the same way you changed your banner text. Simply click on the button to pull up the editing tools in the left-hand side menu:
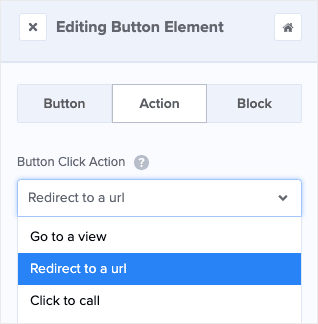
Then you can click Action and change the URL where your button will redirect customers:
Then all you need to do is add the URL where you want your visitors to go when they click on your button!
The way you style your free shipping bar is totally up to you. And if you ever want to add a new feature to your floating banner, that’s easy.
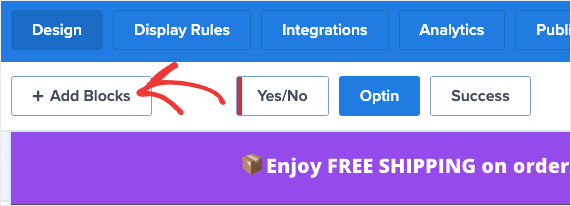
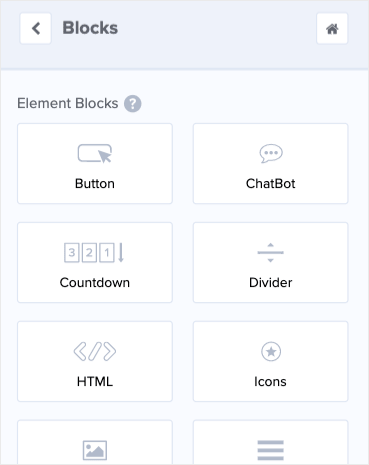
Click + Add Blocks button at the top of your editor:
This will show you different things you can add to your campaign, such as:
- Button
- Chatbot
- Countdown Timer
- Divider
- Text
- Image
- Video
And more.
Then you can drag and drop your new block into place.
For today’s tutorial, we’ll keep things simple by sticking with our text and Shop Now button. But you should know that you have the option to completely customize your campaign to be the most effective for your online store.
And if you ever feel stuck, check out this helpful resource on how to create your first campaign with OptinMonster.
From here, we need to decide where and when to display the free shipping bar.
Step 3: Set Display Rules
Go to the top of your editor and click Display Rules:
By default, your campaign will appear when a visitor has been on your page for 5 seconds or longer. It will also appear on any page.
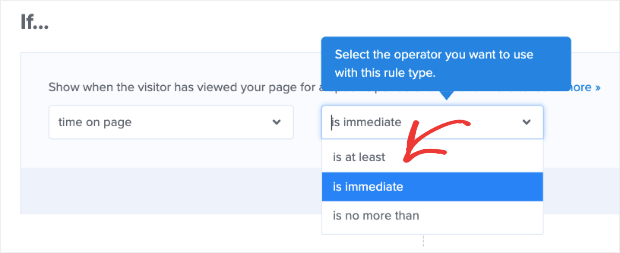
Today, we’ll change Time on Page from is at least to is immediate:
That way, your free shipping notification will display on your site as soon as your traffic arrives.
Remember, you can tailor your free shipping bar to appear whenever, wherever, and to whomever you’d like. We help you create the exact floating banner you need for your eCommerce site to be most effective.
For example, you may only want to show your free shipping bar on certain product pages of your site. This is particularly helpful if you have certain restrictions on which products receive free shipping.
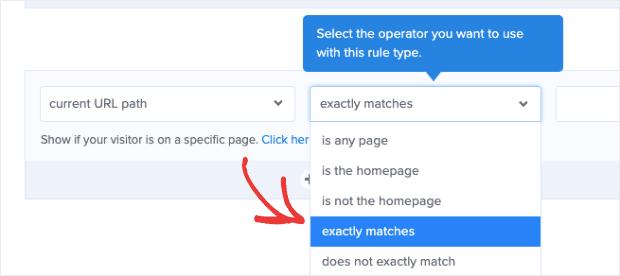
If that’s the case, you can head to your second condition and change the rule for Current URL path. Instead of is any page, you can select exactly matches:
Then enter the unique URL slug attached to the page you want your free shipping bar to appear on:
Again, today we’ll stick with the following 2 rules:
- Time on page is immediate
- Current URL path is any page
But you can change these however you need to make your free shipping bar the most effective.
Once you’ve determined where and when you’ll display the floating banner on your site, all that’s left is to Save and Publish.
And that’s it! Creating your free shipping bar really is that simple. Again, here’s the demo version we built for today’s tutorial in under 5 minutes:
Now, we just need to make sure you can connect OptinMonster to your eCommerce platform. Today, we’ll show you how to use OptinMonster specifically with:
Let’s get started.
Add a Free Shipping Bar to Your WooCommerce Store
WooCommerce is a WordPress plugin, which makes it ridiculously easy to sync with OptinMonster.
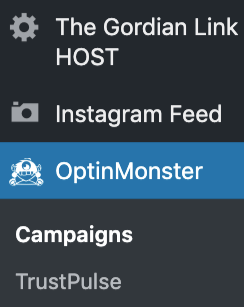
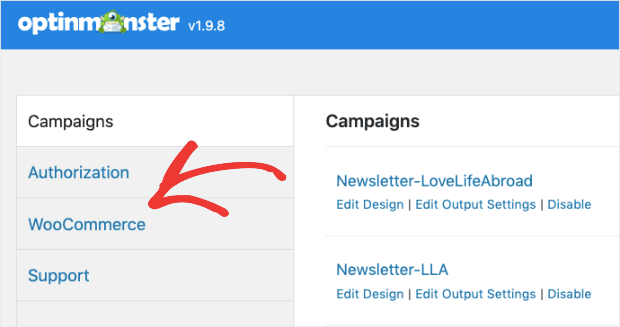
In your WordPress dashboard, find the OptinMonster plugin on the left-hand side menu:
Don’t have the OptinMonster plugin installed for your WordPress site yet? No problem. Check out this guide on how to install OptinMonster to your WordPress site.
In your OptinMonster dashboard (in WordPress), find and click on the WooCommerce tab:
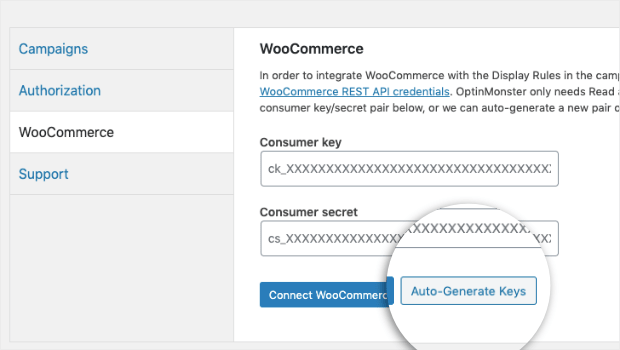
Now you’ll see 2 blank fields that need information:
- Consumer key
- Consumer secret
While you can go get those manually from your WooCommerce account, you can also simply click Autogenerate keys:
This will fill in both fields for you. And that’s it! Now your OptinMonster plugin is hooked up to your WooCommerce store.
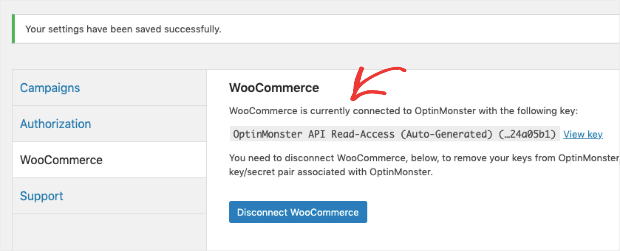
You’ll know it worked when you see the following confirmation message:
Now you can manage all of your campaigns from your WordPress dashboard through the OptinMonster plugin.
Or you can manage your campaigns from your OptinMonster account.
Add a Free Shipping Bar to Your BigCommerce Store
Integrating OptinMonster to your BigCommerce store is really simple. Plus, it only takes about a minute to accomplish.
Log into your BigCommerce store. Also, make sure you’re logged into your OptinMonster account, as well.
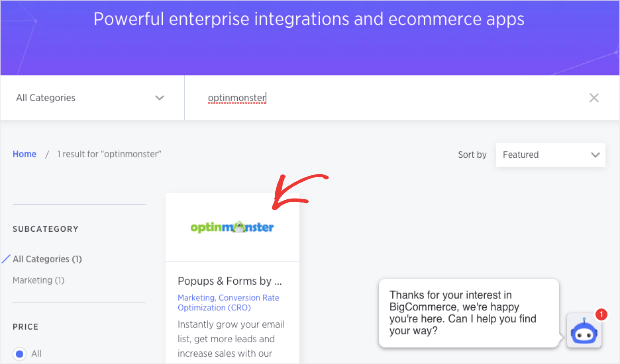
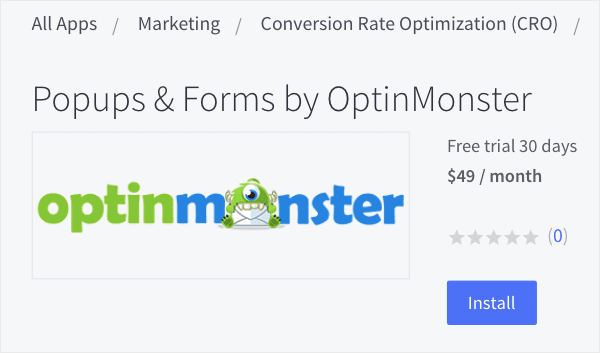
Then head over to BigCommerce’s apps page. In the search bar, type OptinMonster, and click on the OptinMonster app:
On the next page, click Get This App:
You’ll be redirected to your BigCommerce store’s dashboard. Click Install next to the OptinMonster app:
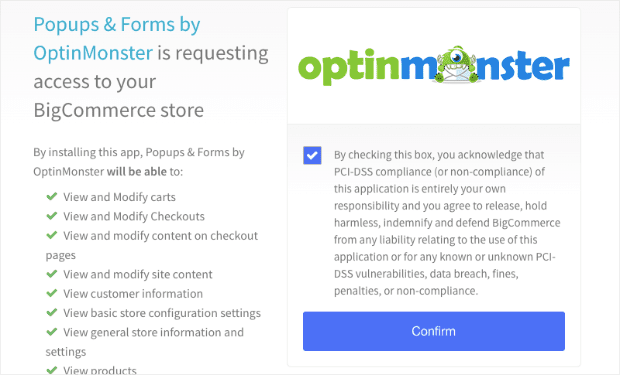
Click their terms of agreement and then click Confirm:
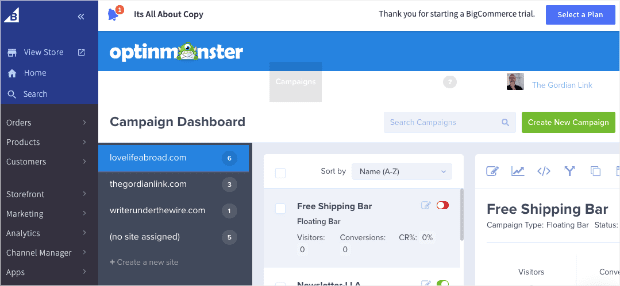
Your OptinMonster account will now show up in your BigCommerce dashboard:
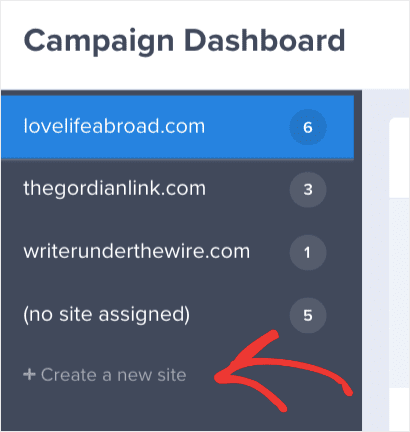
You can manage your OptinMonster free shipping bar from here. You can also connect your BigCommerce account by clicking Create a new site:
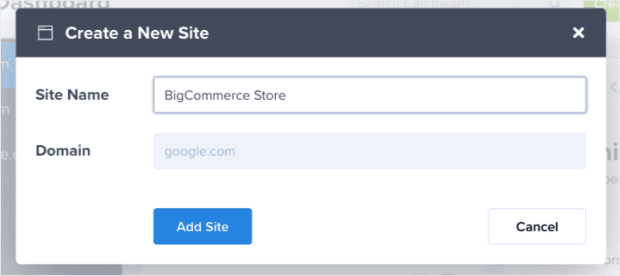
And enter your BigCommerce site’s information:
Now your BigCommerce site is connected with OptinMonster. Plus, you can manage your free shipping bar directly from your BigCommerce site dashboard.
Add a Free Shipping Bar to Your Shopify Store
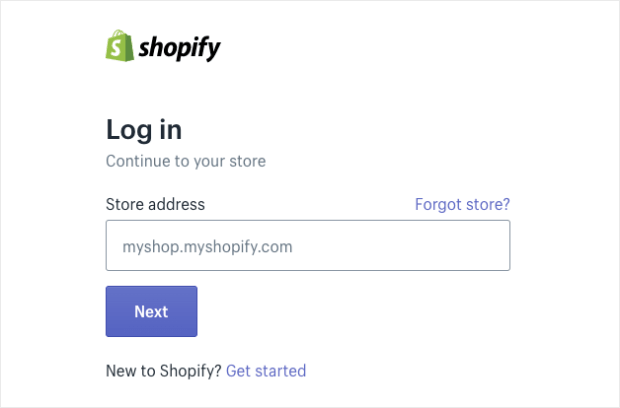
Adding OptinMonster to your Shopify store couldn’t be easier. First, log into your Shopify account:
And, remember, you also need to be logged into your OptinMonster account, too.
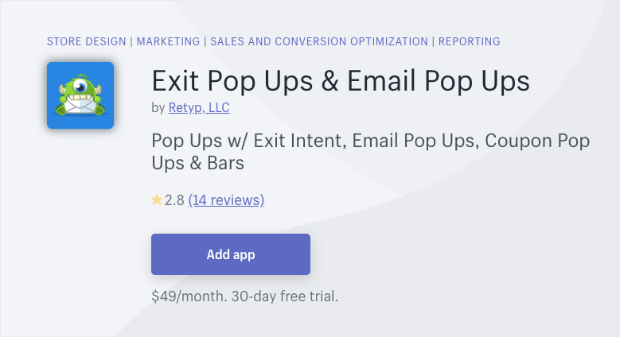
Next, visit the OptinMonster app in the Shopify store. Find and click Add app:
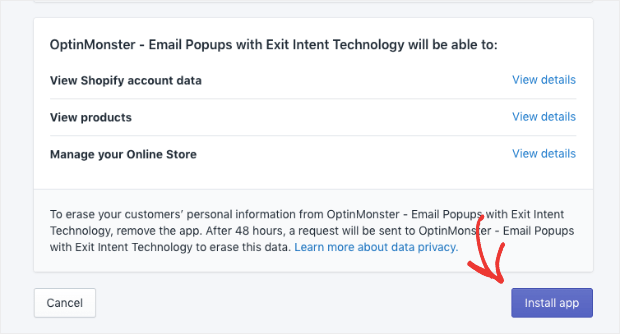
You’ll be redirected to another page where you need to click Install app:
Once the app is installed, your Shopify store will automatically connect with OptinMonster.
Yup. That’s it!
Like we said before, using OptinMonster for your Shopify store literally couldn’t be easier.
Add a Free Shipping Bar to Your Magento Store
The first step is to get your embed code from the free shipping bar campaign you created earlier in this tutorial. To find that, head to the Publish tab at the top of your editor and scroll all the way down:
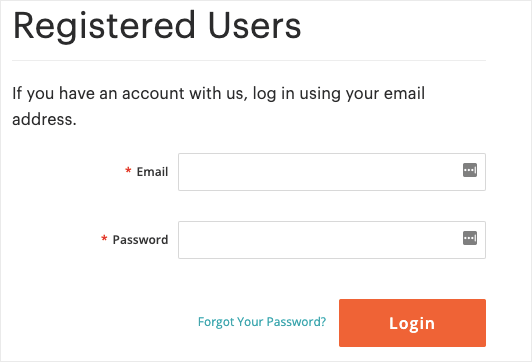
Once you have that code, log into your Magento account:
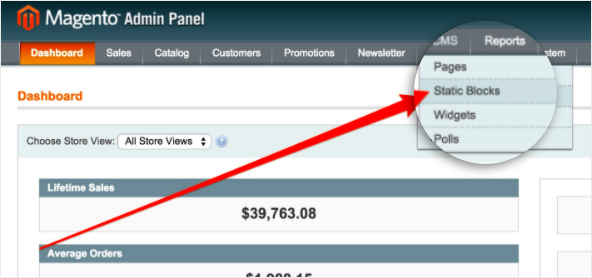
Then navigate to CMS » Static Blocks:
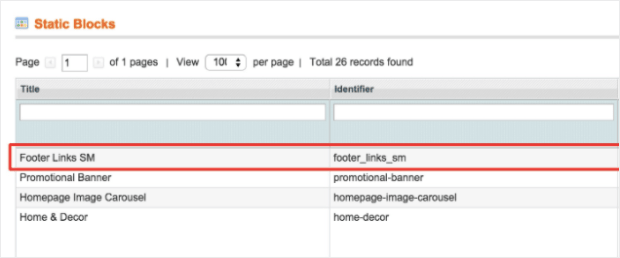
Now we need to select an existing block close to the footer of the page. This is where we’ll add our embed code from OptinMonster.
We’ll embed it under the Footer Links SM:
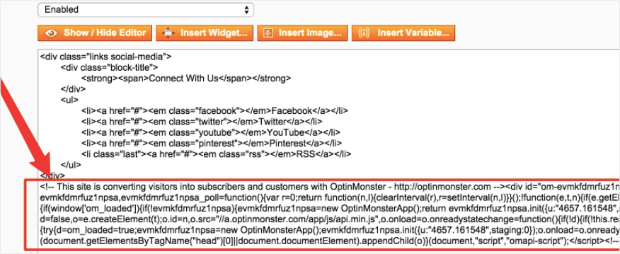
Now you just need to paste the embed code below the existing HTML in our Footer Block SM:
Once you’ve done that, you’ll be all set.
Need some more help? Check out this article on how to integrate OptinMonster with Magento.
You may also be interested in checking out this post on Magento extensions and how they can boost conversions and sales.
Add to Any Site
If you’re not working with any of the eCommerce platforms mentioned in this article, don’t worry. You can use OptinMonster with any site.
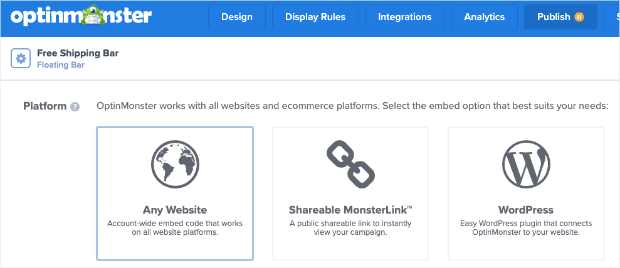
First, you need to go to your free shipping bar campaign in your OptinMonster dashboard. Click on Publish at the top of the editor and scroll all the way down to the option Any Website:
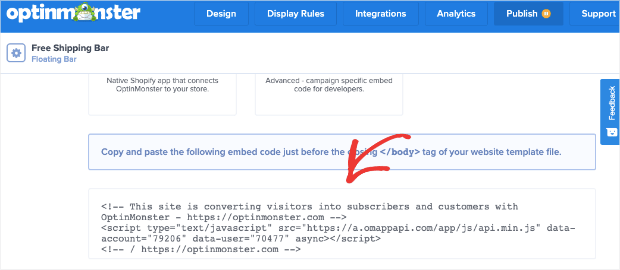
This will provide you with the embed code you need to sync OptinMonster with your site:
Now you need to locate the closing <body> tag of your site’s HTML file. Paste your OptinMonster embed code just above this closing <body> tag.
And that’s it! Then you simply need to save the file and upload it to your site. If you need more help, you can check out this guide on how to add OptinMonster to any website.
We hope that you enjoyed this article. Our goal is to empower you to create a better shopping experience for your customers. That way, you can get even more customers and increase sales.
If you’re interested in using OptinMonster to boost profits, you definitely need to check out the following articles:
- 18 Proven Ways to Increase Your Conversion Rate Throughout Your Sales Funnel
- How to Create a Notification Bar for Your WordPress Site
- 15 Upselling Tips & Examples Proven to Boost Average Order Value
- How Does OptinMonster Work: 8 Benefits (+ 12 Case Studies)
These resources will be more than enough to help you drive more sales. And with your new free shipping bar, you’ll create offers that your customers simply can’t refuse!
Ready to get started? Sign up for OptinMonster today, risk-free!









Add a Comment