Ever taken a road trip with no plan or goals in mind? Just you, your friends, and the open road. It’s so much fun… but not super-efficient.
There’s a huge difference between “moving around” and “moving forward.” The latter requires a concrete plan. This is especially true when it comes to your marketing strategy.
That’s why we’re going to show you exactly how to make an editorial calendar so you can create a plan of action for your team and reach your marketing goals.
More specifically, we’ll look at:
- What is an editorial calendar (and how it’s different from your marketing strategy)
- Things good editorial calendars have in common
- Editorial calendar examples
- How to create an editorial calendar of your very own
- What to do with all the new traffic your content brings in
After reading this post, you’ll be able to save that aimless wandering for your next road trip and keep your business moving forward!
What Is an Editorial Calendar?
Simply put, your editorial calendar is the way your team plans ahead and organizes content releases. It provides a clear vision for your entire team and allows each member to physically see what (and when) marketing-related tasks need to be completed.
But let’s be clear:
Your editorial calendar isn’t your marketing strategy. At least, not exactly. Here’s what we mean:
Your marketing strategy is something you need to develop before putting an editorial plan into action. If you don’t have a marketing strategy nailed down yet, you’ll want to get right on that.
That’s because your marketing strategy is the cornerstone of your entire marketing effort and you can’t make any plans without it. In other words, you can have a marketing strategy without an editorial calendar but you should really never have an editorial calendar without a marketing strategy.
But you should totally have both.
Want help with your marketing strategy? Check out our post on eCommerce marketing strategies. That article has everything you need to get started.
When you know what types of content you’ll be producing and for what specific goals, you’re ready to build your editorial calendar.
NoteThis article won’t get into the small differences between an editorial calendar and a content calendar. The key difference is that editorial calendars are usually “big picture,” while content calendars detail individual content pieces. That said, the two are often used interchangeably and frequently overlap.
What All Good Editorial Calendars Have in Common
Your editorial calendar is, again, a way to keep your team organized. It’s your roadmap for reaching all the goals outlined in your marketing strategy.
And while no two editorial calendars will ever be the same (because every company has different marketing needs), here are a few key features that all great editorial calendars share:
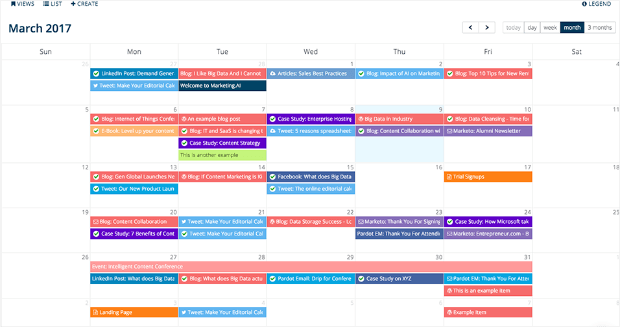
- They have a clear, coded system. Because editorial calendars deal with all types of content, it’s going to get cluttered very quickly. That means it’s important to have a system in place that makes the calendar easy to follow. Usually, editorial calendars use color codes to differentiate between types of content, specific campaigns, and the status of each task.
- They’re accessible to the entire team. Every marketer knows that creating content is a team effort. Whether your sales department is waiting on a landing page to be completed or your editor is waiting to review one of your many blog posts, everyone should have access to what is getting done, where it is in the pipeline, and who is in charge of completing the task.
- They’re living documents. Editorial calendars are planned quarterly, bi-annually, or annually. Your editorial calendar shouldn’t encourage endless “tweaking” to the workflow but should be flexible enough to allow for changes when they’re needed. It’s a fine balance that every good editorial calendar eventually finds.
- They make everyone’s lives easier. The whole point of an editorial calendar is to streamline content production and keep things organized. If you find that your team is constantly asking questions about what needs to get done by when and by whom, it’s a sign that your system needs improvement.
- They’re realistic. Create a posting schedule that your team agrees on that is both ambitious but also achievable. You don’t want to give your audience content for three months and suddenly stop because half your team is overwhelmed.
When you do have a good system in place, you’ll quickly see the benefits for your team: staying organized leads to higher content output which leads to attracting more customers and, ultimately, that means getting more conversions. We’ll be talking more about conversions later.
For now, it’s important to remember that even the best marketing strategy can go off the rails from time to time. And there’s nothing that will kill your traffic, sales, and leads faster than long lapses in content posting whether it’s blogs, social media, videos, or any type of content you’ve trained your audience to expect.
Having an editorial calendar keeps you organized, accountable and, most importantly, consistently productive.
Editorial Calendar Examples
You can make your editorial calendar with a wide variety of tools. Here are a few great examples of editorial calendars:
GetMintent provided an example of their editorial calendar while promoting a centralized calendar system. As you can see, their calendar is totally booked up! That said, the color-coding system makes it easy to see the difference between tasks.
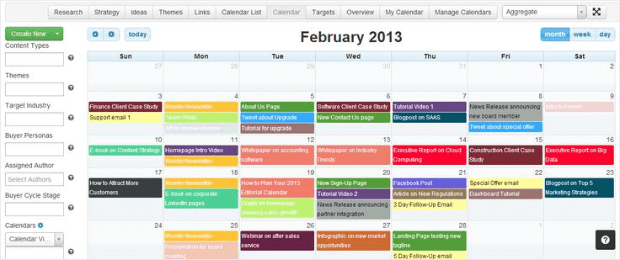
CoolerInsights provides another editorial calendar example that is color-coded but with an added bonus: users can filter content using the fields on the left-hand side.
Quick NoteEven though this editorial calendar example comes from 2013, its core principles are still just as relevant today.
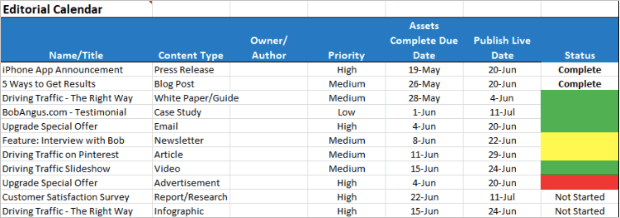
BobAngus: This editorial calendar is simple to read, clearly categorized, and would be easy to replicate in Excel or Google Sheets.
How to Create an Editorial Calendar
Though there are many ways to create an editorial calendar, today we’ll be using HubSpot, a killer Customer Relationship Management (CRM) software that helps with marketing, sales, and team collaboration.
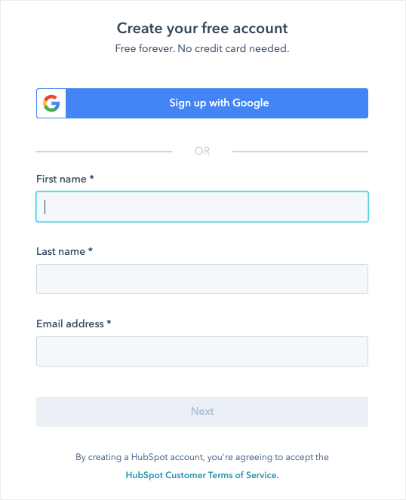
While there are many things that you can do with HubSpot, today we’ll just be focusing on the editorial calendar. To begin, you’ll first need to create an account with HubSpot.
They offer a free 14-day trial which means you can test out the product totally free (plus, no credit card required).
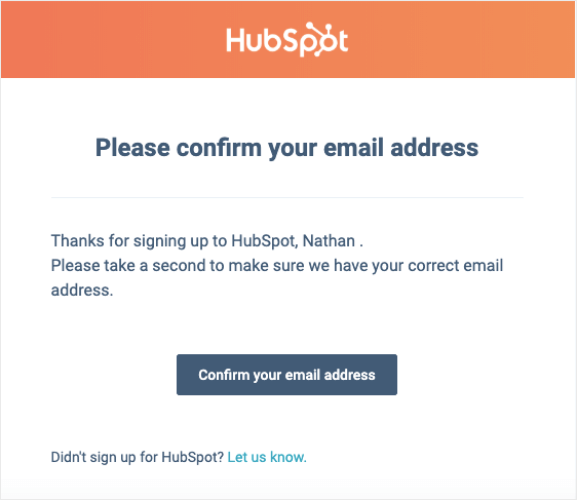
After filling out the initial form, you’ll receive a confirmation email.
Once you’ve confirmed your email address is correct, login to your new HubSpot dashboard.
The first thing you’ll want to do is create a few campaigns based on your marketing strategy and goals. This will help make your editorial calendar more clear as, again, it can get cluttered pretty quickly.
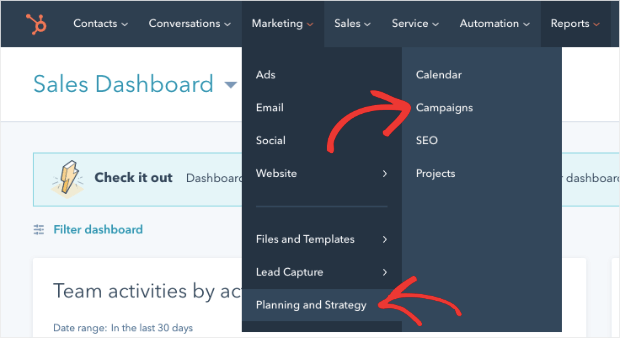
In the header menu, click Marketing » Planning and Strategy » Campaigns.
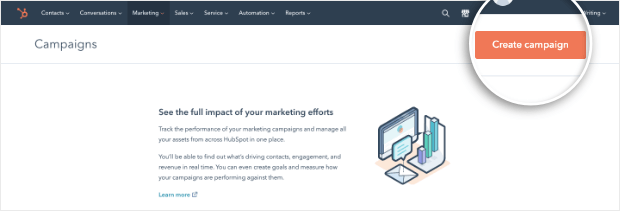
Next, click Create Campaign to give your campaign a name.
This name will change depending on the type of content you’re releasing and your specific goals. For the sake of clarity, we’ll name our campaigns after the different types of content we’ll be putting on our editorial calendar today: blog posts, YouTube videos, and newsletters.
Once our campaigns are defined, we are ready to create tasks for our editorial calendar!
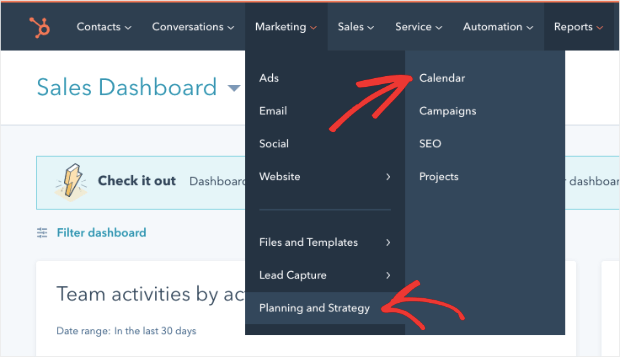
In the header bar, click on Marketing » Planning and Strategy » Calendar.
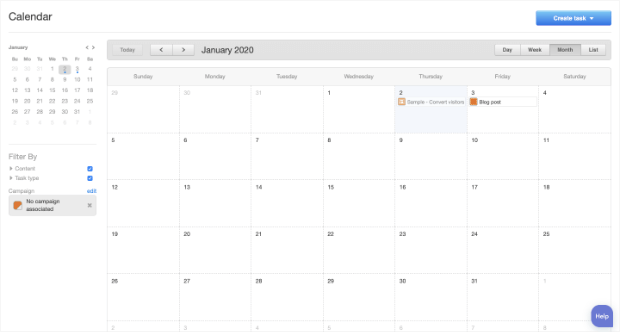
Now you should arrive at the following page:
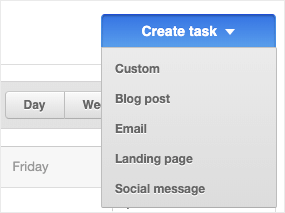
From here, creating your editorial calendar is easy! In the top right corner, click Create Task and choose which type of content you’re going to create.
Again, for today’s demo, we’ll schedule three types of content for the month of January: blog posts, some newsletters, and two YouTube videos.
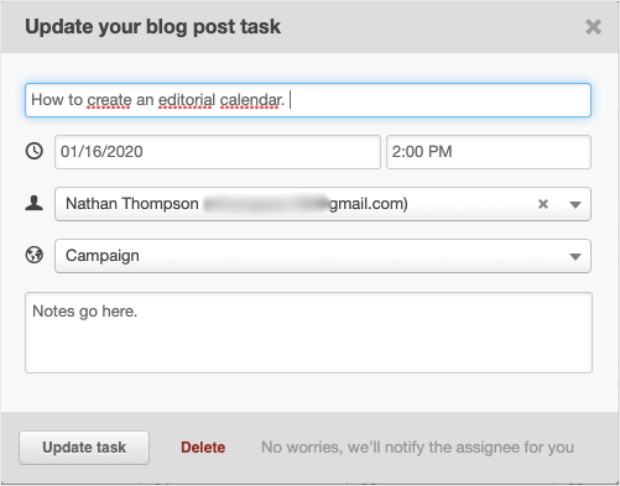
We’ll start with the blog posts. When you create a blog post task, you can give the task a title, assign it to a specific person, add a due date, attach it to a predefined campaign (or theme), and add notes about the task:
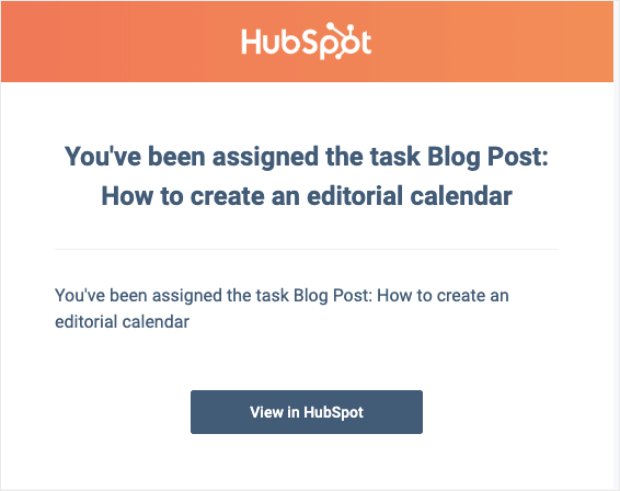
One of the things we love about HubSpot is that it sends email notifications about assigned tasks so nothing gets overlooked:
Once you’ve scheduled your task, it will be on the calendar under the date assigned. To create more, just repeat the process! In this demo, we’ll do one blog post each Thursday.
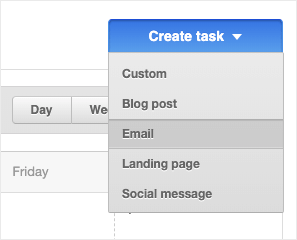
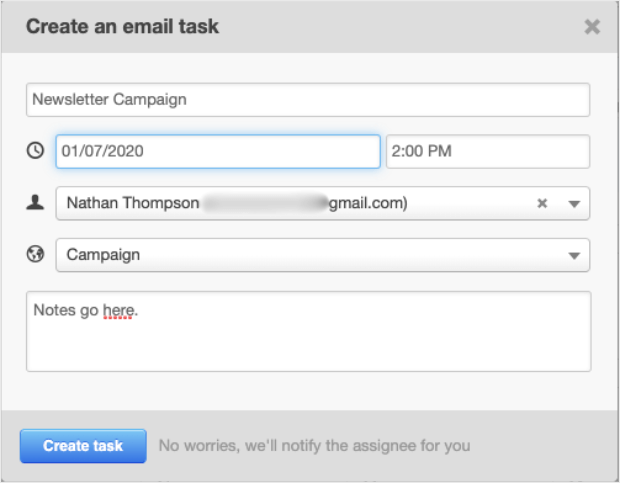
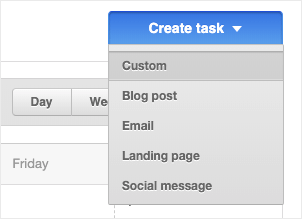
Next, let’s plan a few email newsletters for each Tuesday of the month. We can go to Create Task » Email.
At this point, you can fill out all the same fields as you did with a blog post.
Create the task and your assignee will be notified via email. To create similar tasks, simply repeat the process. In this demo, we’ll assign one Newsletter every Tuesday of the month.
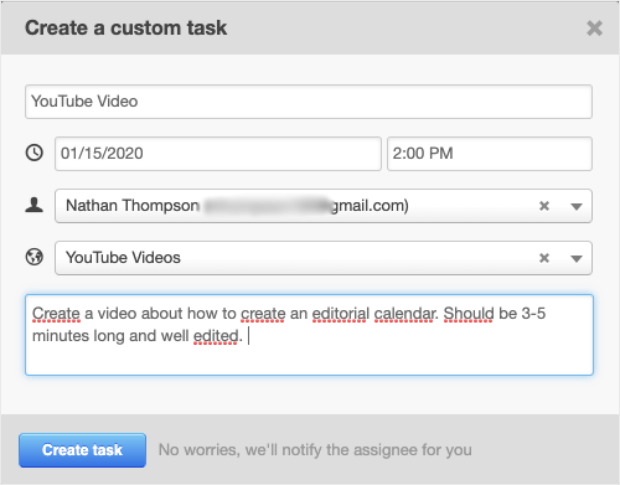
Finally, we’ll create a YouTube video. However, you’ll notice that when you click Create Task there is no Video category to choose from. We’ll need to click on Custom.
We’ll title this task YouTube Video, give it a due date, an assignee, match it to the correct campaign, and fill out the notes for the project.
Once we’ve created that task, we can continue to repeat until our calendar is full!
You’ll notice that our content tasks are color-coded depending on the campaign we attached to it. In the example above, blog posts are red, newsletters are blue, and YouTube videos are green (a simple, coded system).
When you are ready to fill out the editorial calendar for next month, simply click the arrow next to the name of the month you are currently on:
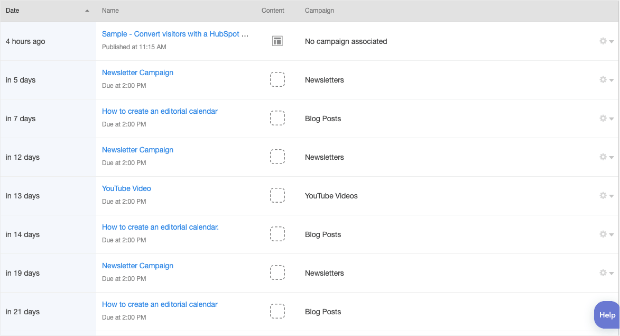
Like most online calendars, you are able to view your tasks by day, week, or month, depending on which is most convenient for you. However, one cool feature in HubSpot is the ability to view by List which will show the tasks coming up in chronological order.
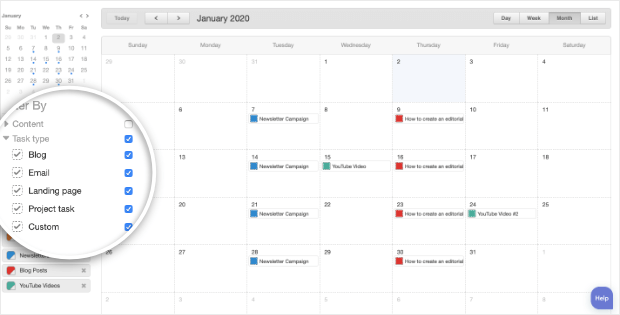
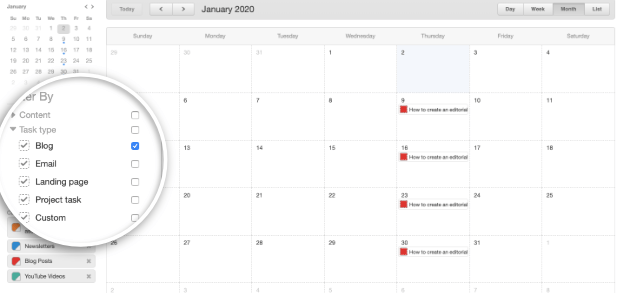
Also, on the left-hand side, you are able to remove some of the clutter by filtering the content on your calendar by Content and Task Type.
For instance, if we wanted to see all the tasks for the month, we would leave all the boxes under Task Type clicked:
But if we wanted to see just the blog posts for the month, we could go to the Task Type and unclick everything except for Blog. Then all the tasks unrelated to blog posts will be removed from view.
When working with larger teams and a variety of tasks, this can help keep individual users becoming overwhelmed as they look at their editorial calendar. They can concentrate on certain tasks rather than the calendar as a whole.
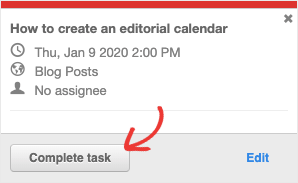
Finally, when a task is complete, it’s easy to update the calendar! Simply click on the task directly on your calendar and then click Complete task.
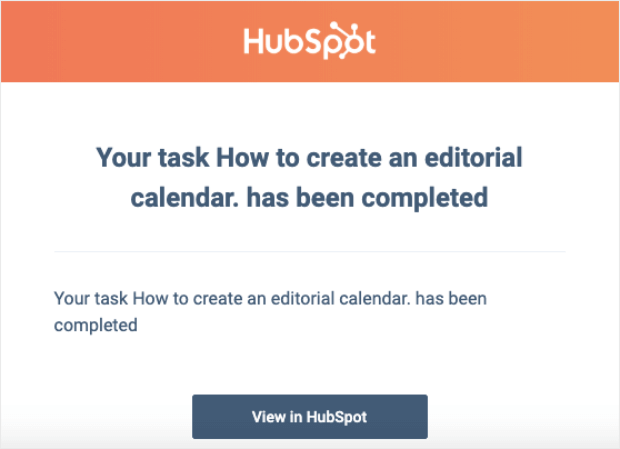
You’ll get a confirmation message and your whoever is in charge of that task will be notified that the status has been marked “complete.”
This just scratches the surface when it comes to what you can do with HubSpot’s editorial calendar, but you can follow this guide to create your own editorial calendar in no time!
But wait…
With all the new leads you’ll get from efficiently posting awesome content, does that automatically mean more sales and conversions?
Sadly, no. You’ll need a system in place for that.
How to Turn Your Traffic Into Leads and Conversions
Remember how earlier we said your marketing strategy is different from your editorial calendar? Here’s another important difference between the two:
Posting content will get you more traffic but you need a way to convert this traffic from viewers to customers as a part of your overall marketing strategy.
When it comes to increasing your conversion rates, there’s simply no better tool than OptinMonster. With OptinMonster, you can grow your email list, get more leads, and watch your sales explode in no time. How?
A great first step is to create a lead magnet or content upgrade for your highest-performing content. Lead magnets usually offer a piece of digital, downloadable content, like a free checklist, report, ebook, whitepaper, video, or even a coupon.
Once you have a great lead magnet, you need a way to get it into the eager hands of your visitors. One of the easiest ways to do that is through a success message with OptinMonster.
Start by creating an OptinMonster campaign.
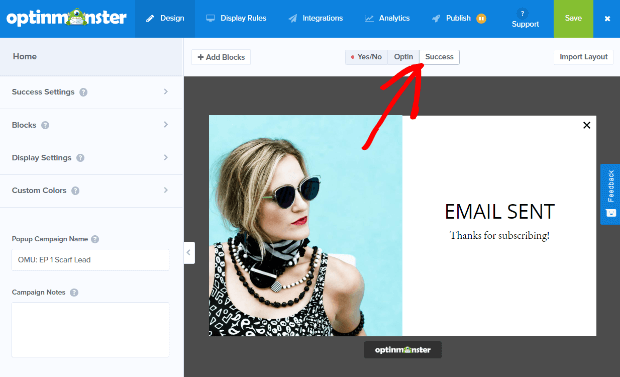
Once you have your campaign created, go to the Success View tab.
We’re going to add a Download Now button to this view so subscribers can instantly download the lead magnet they just signed up for.
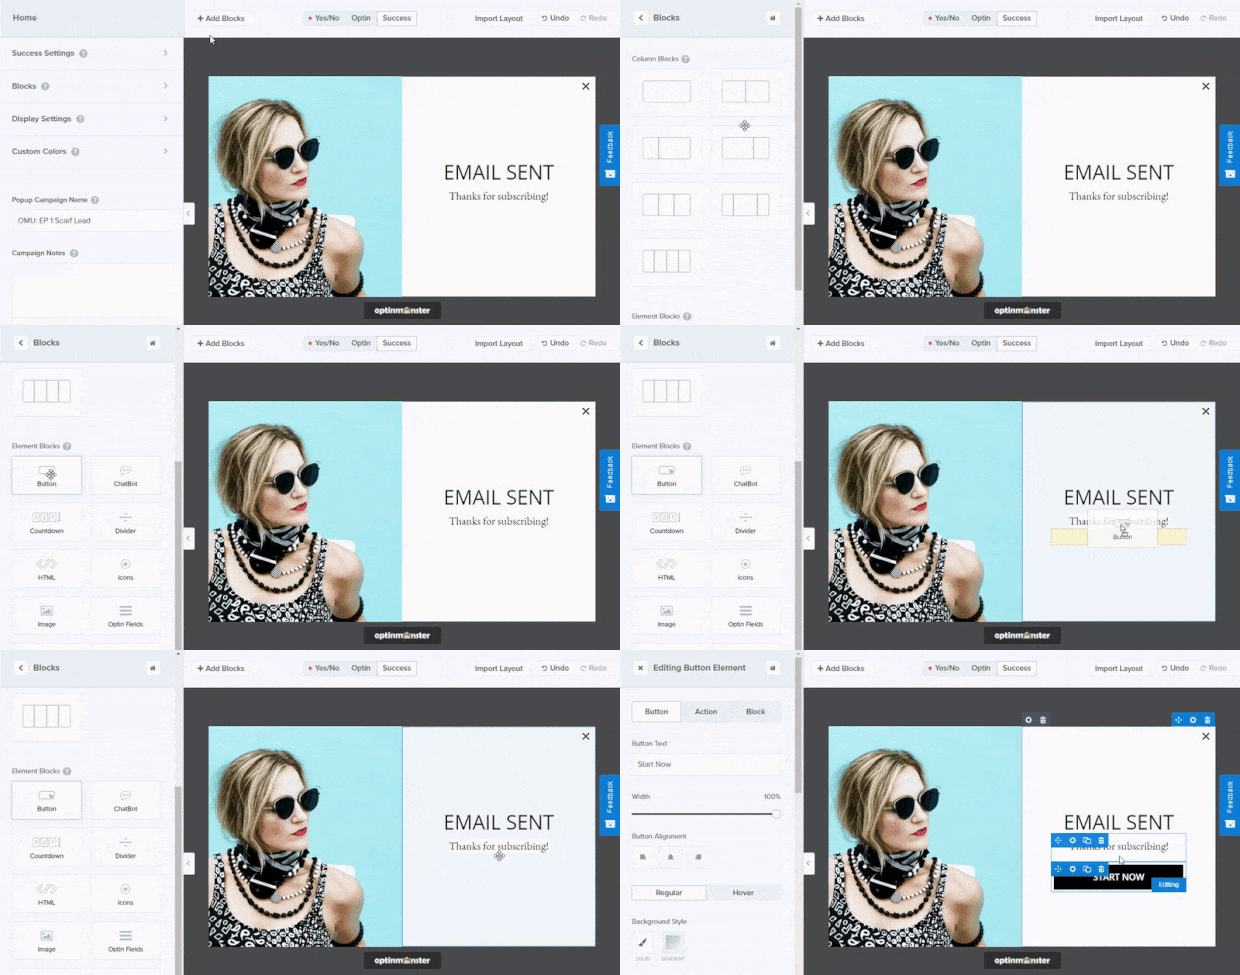
To begin, let’s add a new Button to our design by clicking on + Add Blocks, scrolling to the Button element, and dragging it to the position we want.
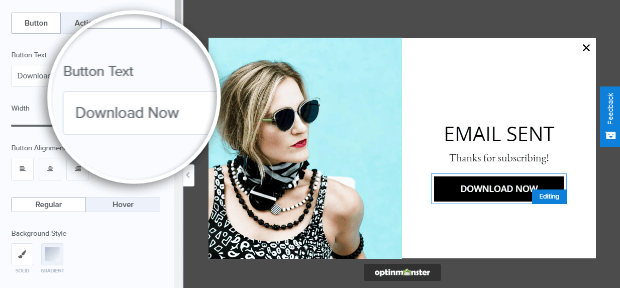
Next, we’re going to edit our button to say “Download Now.”
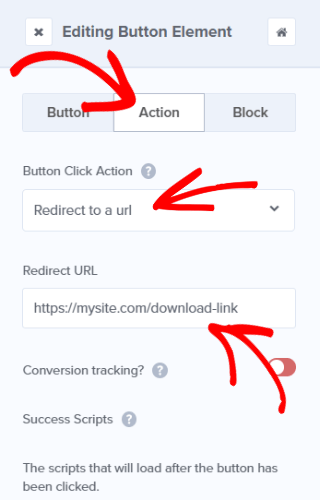
Now, we’ll set our button’s action to Redirect to a url and enter the URL to our download:
Save your campaign and you’re all set! Now, when subscribers click on that Download Now button, they’ll get your lead magnet immediately.
Regardless of which tool you end up using to build your editorial calendar, OptinMonster is definitely a resource you’ll want to check out if you want to level up your conversions!
What are you waiting for? Why not carpe that diem (and all that traffic from your content) and join OptinMonster now!








Add a Comment