Are you looking for a spin-to-win app to add a gamified popup to your eCommerce store?
Spin to win wheels can be an excellent way to engage your customers. Whether you’re trying to reduce shopping cart abandonment, capture new leads, or improve user experience (UX), spin to win wheels add excitement to your popups.
But how can you quickly and easily build such a dynamic popup, especially if you don’t know how to code?
Today, we’re going to show you step-by-step how to create a gamified spin to win wheel popup for your eCommerce site.
First, though, let’s get clear on what a spin to win wheel is and why it’s such a valuable tool for you as an online merchant.
What Is a Spin to Win Wheel Popup?
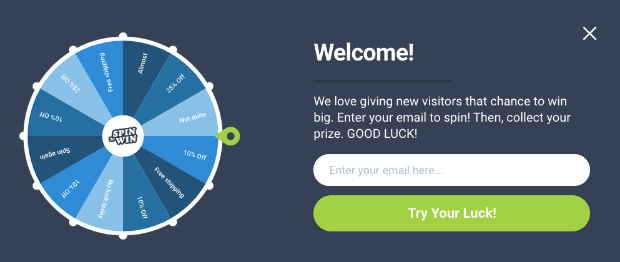
A spin to win wheel popup is a specific type of optin campaign that shows users a spin wheel game. When users enter their contact information (like phone number or email address), they can spin a wheel to win a prize.
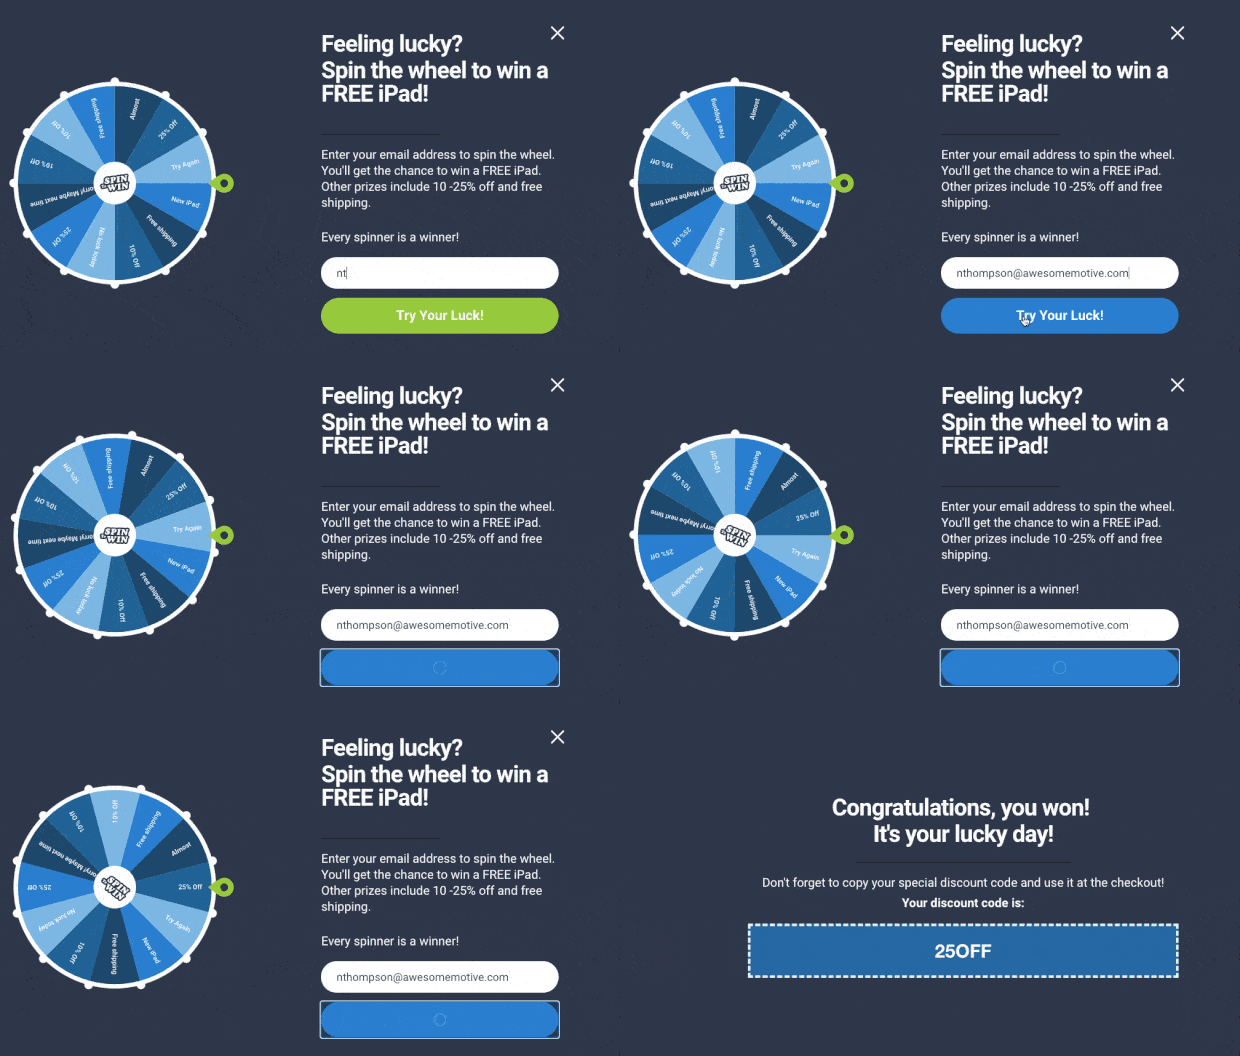
You’ve likely seen these before. They look something like this:
Each section of the wheel has a different prize that users can win. Adding this type of dynamic feature to your website or optin campaigns is known as “gamification,” and it’s an excellent way to engage with customers and grow your list.
And now you might be wondering, “Great, but does gamification actually work?”
Check out some of the success stories other companies have seen by adding gamification to their marketing strategy:
- After using points and badges to gamify their website, Verizon Wireless boosted browsing time by 30% among half their users.
- Gamification helped Volkswagen China’s crowdsourcing project go viral. As a result, they garnered over 33 million hits and nearly 120,000 ideas submitted.
- Ford Motors increased sales by more than $8 million and boosted Facebook likes by 600% with gamified content.
You can have similar success by adding a spin to win wheel that captures your audience’s attention, rewards them with a fun prize, and captures their email address–all at the same time!
But how do you create a spin to win wheel popup for your website if you don’t have skills, knowledge, or time to build one from scratch?
That’s where OptinMonster comes into play:
OptinMonster is the world’s #1 lead generation software on the market. It’s also the most efficient spin to win app you can use for eCommerce stores.
That’s because we have a gamified spin to win wheel popup campaign that can be set up in a matter of minutes. Here’s the spin to win popup we created for this tutorial:
This took us less than 5 minutes to configure. Plus, it can be embedded with any website.
As you’ll see, with just a few modifications, you can personalize a spin to wheel popup campaign for your online store with custom prizes without writing a single line of code.
Ready to see how? Let’s dive into the tutorial.
Step 1: Select Your Campaign Type and Template
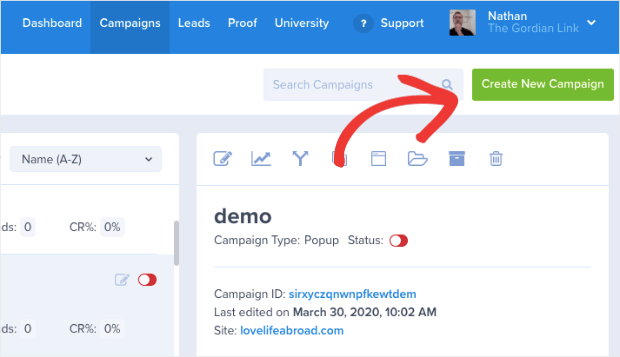
Once you’ve created your account, you’ll be in your OptinMonster dashboard. In the upper right-hand corner, click Create New Campaign:
Now you’ll need to select your campaign type. For this tutorial, we’ll go with Gamified:
This will automatically give you a popup with a spin to win wheel. All you’ll need to do is modify the text, add custom prizes, and set you spin wheel rules.
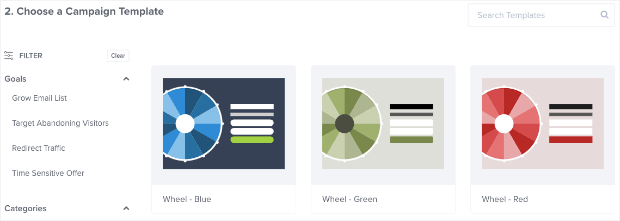
But first, you’ll need to select your campaign’s color. We have 3 templates you can choose from for your spin the wheel popup including blue, green, and red:
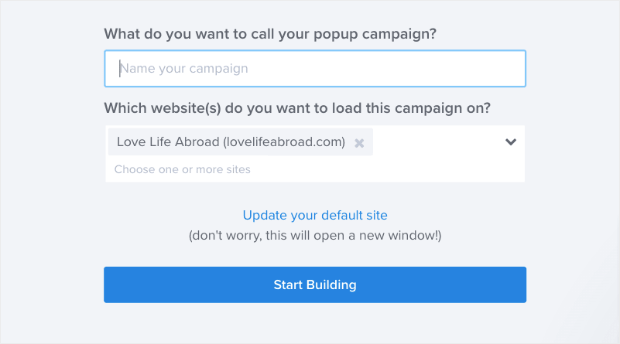
You can choose whichever template would fit best with your website. Then you’ll just need to name your campaign, assign it to your website, and click Start Building:
Now you’re ready to customize your gamified popup.
Step 2: Modify Your Spin to Win Wheel Campaign
Making changes to your spin the wheel popup is just as easy as modifying any other OptinMonster campaign.
We don’t have time to get into all the customization options in this post. Frankly, there are too many options to cover here.
But there are a few things you’ll need to know for today’s purposes. Let’s begin with changing the text.
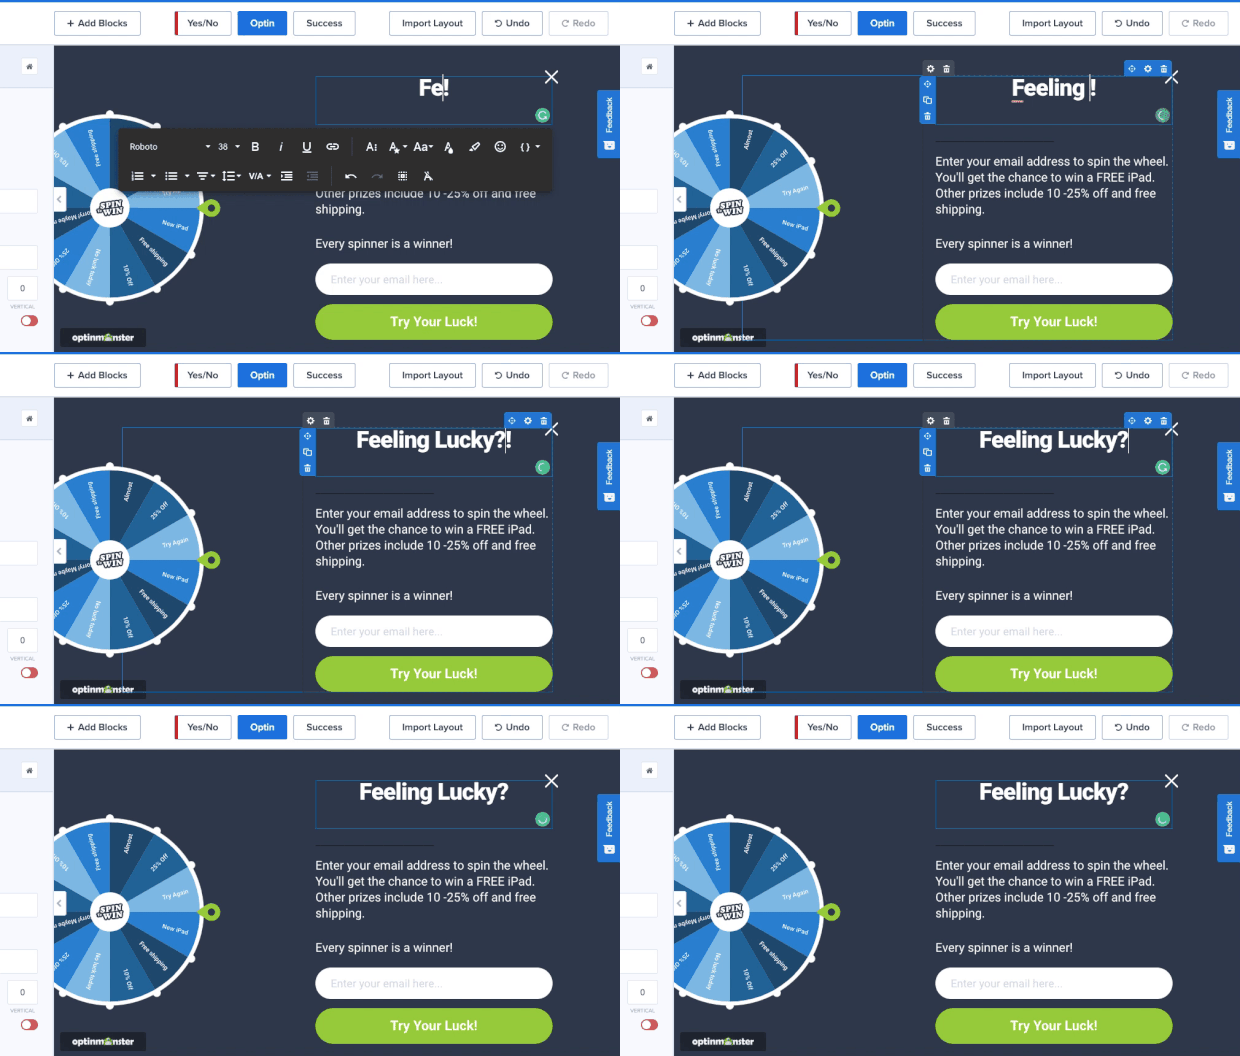
Using our inline editor, you can click on the text you want to change and modify it directly in the OptinMonster editor:
This makes it easy to personalize your campaign and communicate more effectively with your target audience.
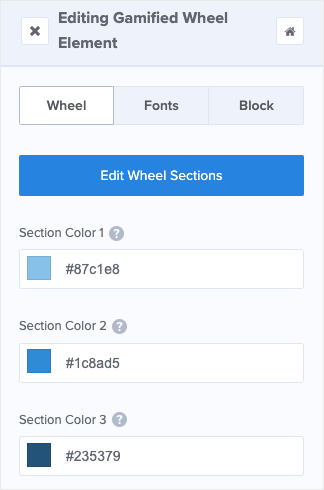
Then you’ll want to customize the spin wheel options. For that, click on the spin wheel in your editor. You can edit your spin wheel colors in the left-hand side menu:
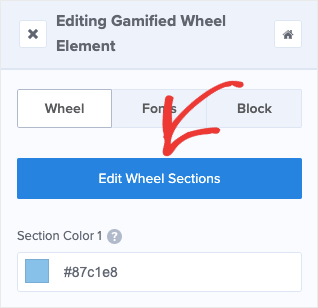
But how do you change the prizes? That part’s just as easy. Click on Edit Wheel Sections:
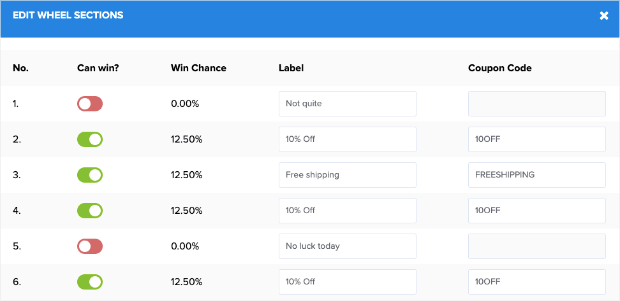
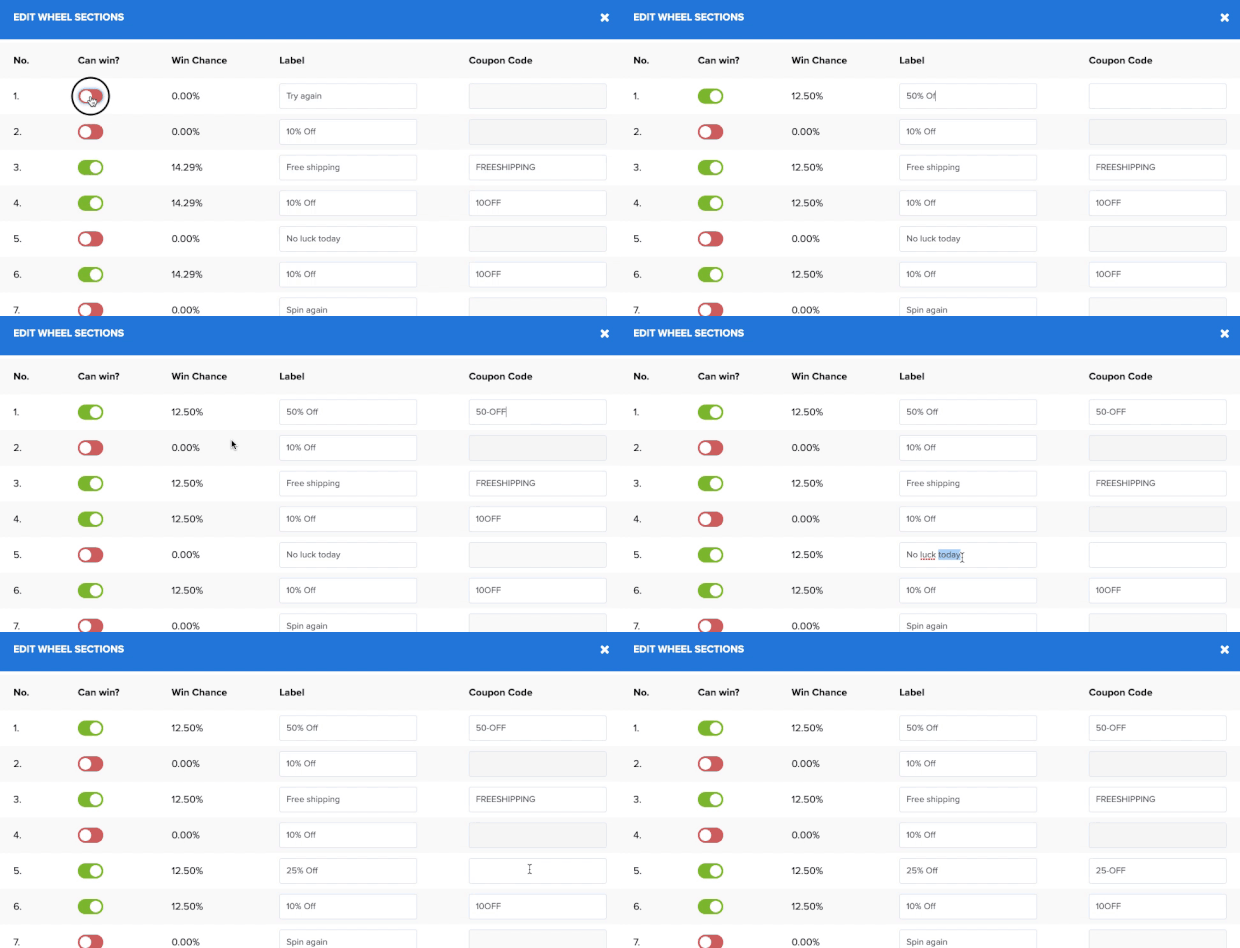
A new window will popup allowing you to change the prize options and the coupon code:
You’ll notice that you have several options you can modify:
- Can Win: This lets you make options that can’t be won which is useful if you have a product that recently went out of stock and you need to replace it. You can also turn off options like “spin again” or “no luck this time” to make sure all your participants win a prize.
- Win Chance: This shows the odds of your customer winning that specific prize based on how many options are available to win.
- Label: This is the name of the prize that will be on your spin wheel.
- Coupon Code: This is the coupon code that the user will receive when they win a specific prize.
With these options, you can create custom prizes for your visitors to win:
This allows you to create the perfect gamified popup for your website or special event. Here’s the spin wheel popup we built for today’s tutorial:
Again, this only took us a few minutes to configure and launch.
Once you’ve created the perfect gamified popup for your site, you’ll need to set up a few display rules. That will ensure that you show this campaign to the right portion of your audience.
Step 3: Set Your Display Rules
At the top of your editor menu, click Display Rules:
OptinMonster has tons of display rules that you can use to show your campaign to the right people at the right time in their customer journey.
We split up the display rules into two categories:
- Targets
- Triggers
Targets rely on the user’s characteristics or profile to determine whether or not your campaign should appear. This could be things like where the user is searching from, what device they’re using, or what content they’re looking at.
Triggers, on the other hand, rely on the user’s behavior to determine whether or not your campaign should appear. That would be things like whether they’re trying to actively leave the page (Exit-Intent® Technology), what links they click (MonsterLinks™), or how they’ve interacted with your site in the past.
For today, we’re going to create an exit-intent trigger. This means that our spin to win wheel popup will only appear as users are trying to leave your site.
This is an incredibly effective trigger for engaging abandoning visitors. In fact, an exit-intent popup is how Crossrope grew its email list by 900%.
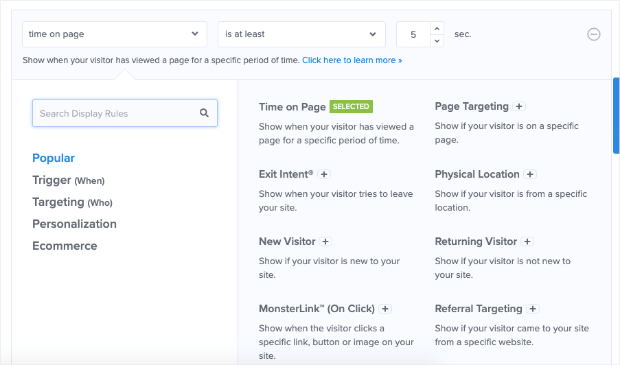
In your display rules menu, click on the first default rule (time on page). This will pull up your display rule options:
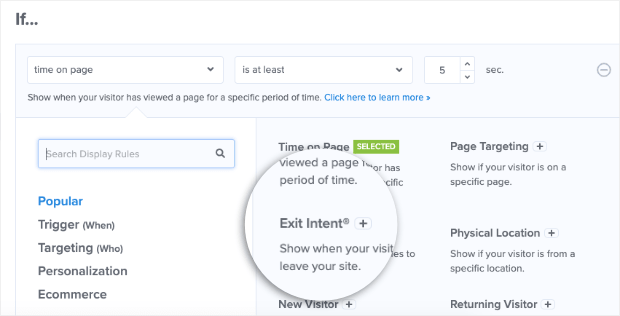
Find and click Exit Intent®+ in the menu options:
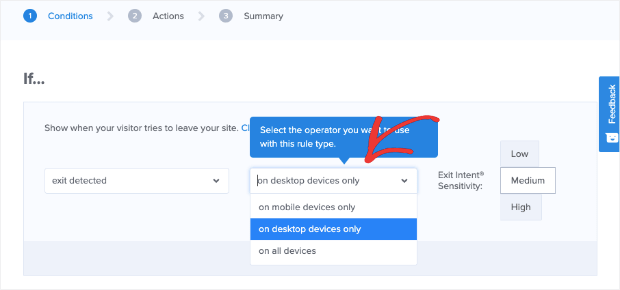
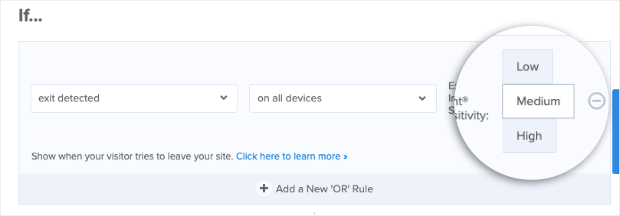
Next, you’ll need to determine which device you want your exit-intent popup to appear on. You can choose between:
- Desktop only
- Mobile only
- Both
And after that, you’ll want to select your Exit-Intent® Sensitivity level:
You should know that the sensitivity level you choose, however, will have a direct impact on how your campaign appears on mobile devices.
Low and Medium sensitivity create a scroll up trigger, whereas High sensitivity creates a back button trigger.
To learn more about how exit-intent popups work with mobile, check out this helpful resource: How to Create Mobile Exit-Intent Popups That Convert.
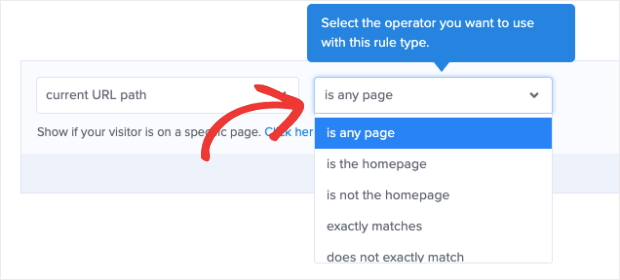
You can add, change, or remove any display rules you want. For today, we’ll leave the second default rule (campaign will appear on any page) alone. But you can customize this to make your spin wheel popup campaign appear on:
- Any page
- The homepage
- Pages that are NOT the homepage
- Specific URLs
This level of customization ensures that you’re showing your gamified popup to the right segment of your audience and at the right time of their customer journey.
Once you’ve set the best display rules for your site’s campaign and goals, it’s time to integrate the popup with your email service provider.
Step 4: Integrate With Your Email Service Provider
At the top of your editor menu, click Integrations:
One of the most common reasons for creating a spin wheel popup is to grow your email list. That way, you can monetize your site or products through email marketing best practices.
OptinMonster integrates natively with over 30 of the most popular email service providers (ESPs) on the market. This allows you to automate your lead generation flow, so you can seamlessly add new leads from your popup to your ESP.
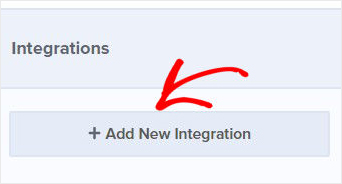
In the left-hand side menu, click + Add New Integration:
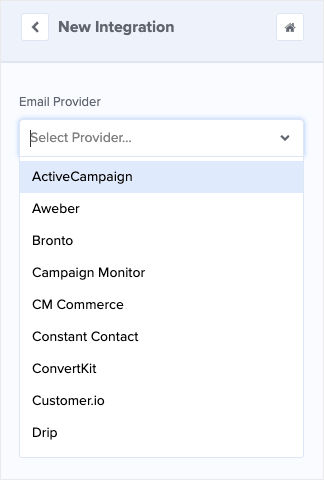
Then you can select your ESP from the drop-down list:
Don’t see your ESP on the list? No worries. OptinMonster can integrate with any ESP on the market. Just check out this helpful resource on how to connect OptinMonster with any email service provider.
Here’s the really cool part, though: now you can send information like the “coupon wheel” code directly to your ESP using OptinMonster’s updated webooks integration.
In the past, our webhooks allowed you to send your new lead’s name, email address, and phone number to your ESP or other marketing apps.
But now, you can send other information to correspond with your new lead. This comes in handy as you automate your lead generation strategy with your email marketing platforms because it allows the coupon code to be automatically available for use in your emails to customers.
For more information, check out this resource on OptinMonster’s webhooks.
Once you’ve integrated your spin wheel campaign with your ESP, you’re ready to embed your campaign and launch!
Step 5: Embed and Launch Your Campaign
At the top of your editor menu, click Publish:
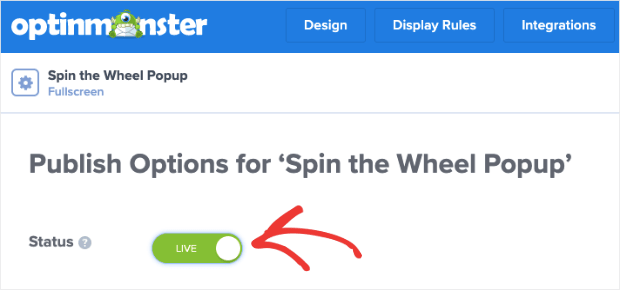
Then save your campaign and flip the toggle switch to Live to activate the campaign:
If you haven’t connected OptinMonster to your website yet, you’ll need to do so. The good news is that you can easily embed OptinMonster campaigns onto any website.
However, the exact steps to do so will depend on which platform you used to create your site. Here are a few helpful tutorials that explain how to connect OptinMonster with some of the most popular platforms:
- How to Install the OptinMonster Plugin for WordPress
- How to Connect OptinMonster to Shopify
- How to Connect OptinMonster to Any Website
And that’s it! We hope you found this article helpful. If so, you may want to check out the following posts:
- How to Win Big With Gamification in Marketing
- How to Run a Successful Email Marketing Campaign
- How to Create a Discount Wheel Popup (the Easy Way)
Those two posts will have all the information you need to take your gamification marketing to the next level and generate more sales from your email list.
Ready to boost your conversions? Get started with OptinMonster today!







Add a Comment